Carving on Bonsai: Sculpture

A previous blog post addressed sculpture as an art form and how it relates to Bonsai (https://bonsaiplace.net/2021/03/28/bonsai-as-sculpture-an-art-form/). This blog post will take an more practical approach by making use of photos to describe the process.

The start.

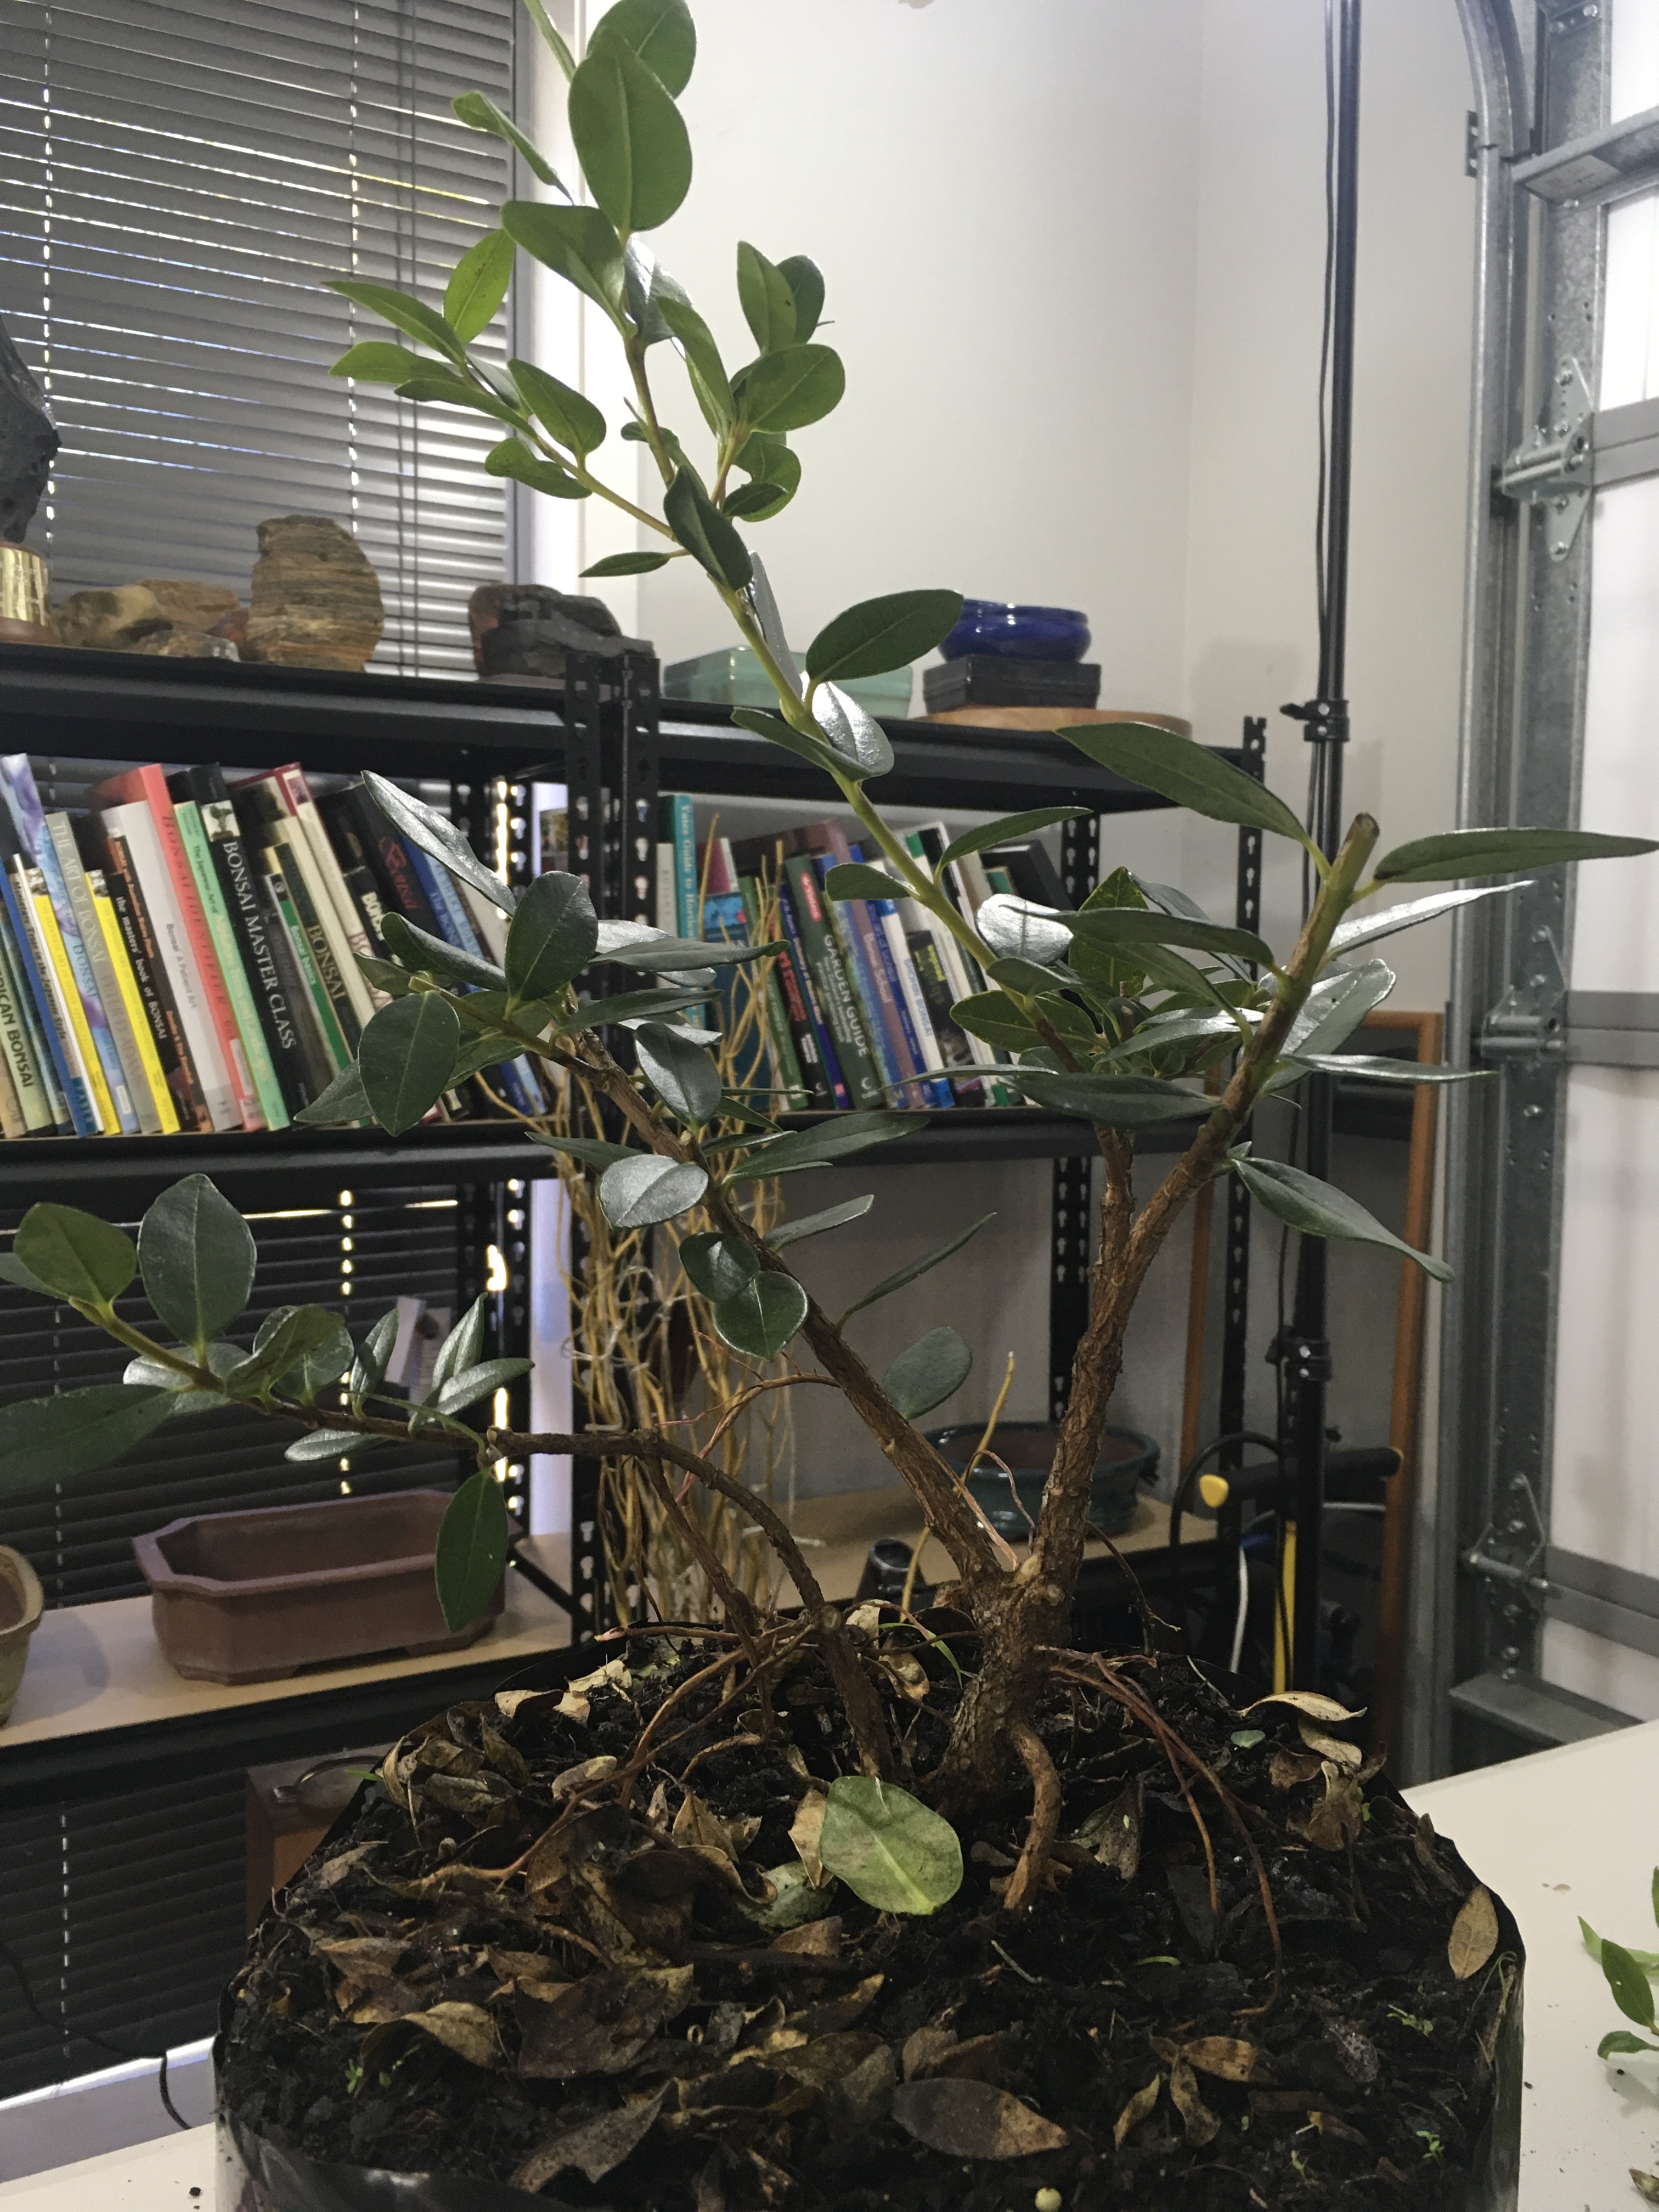
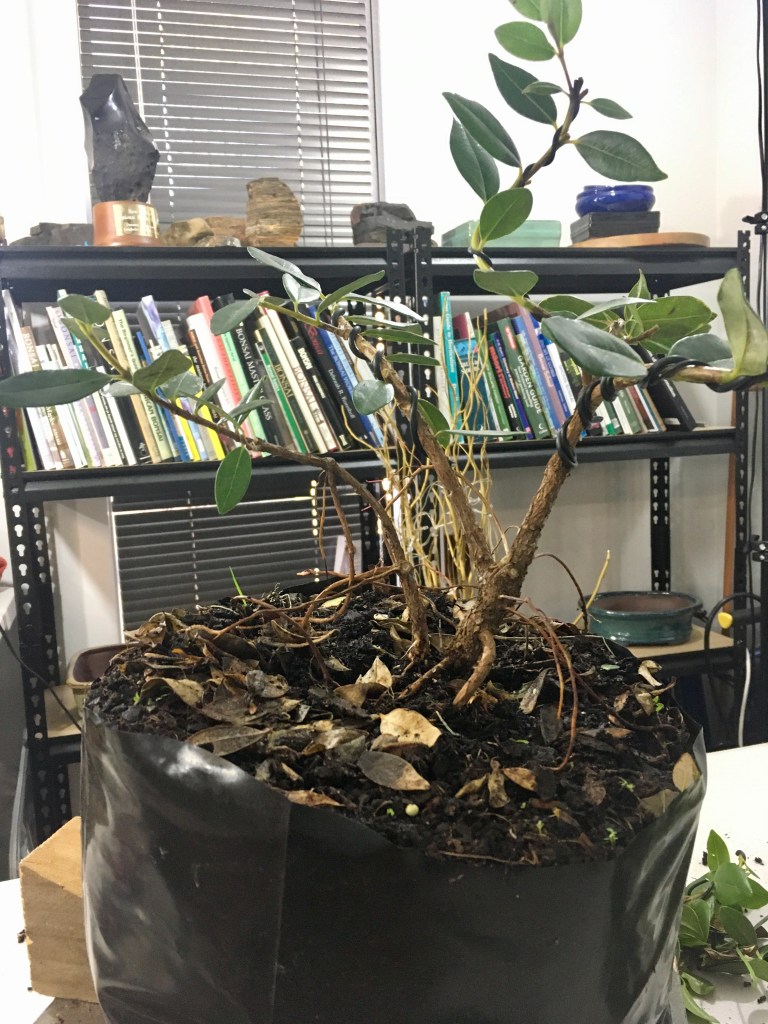
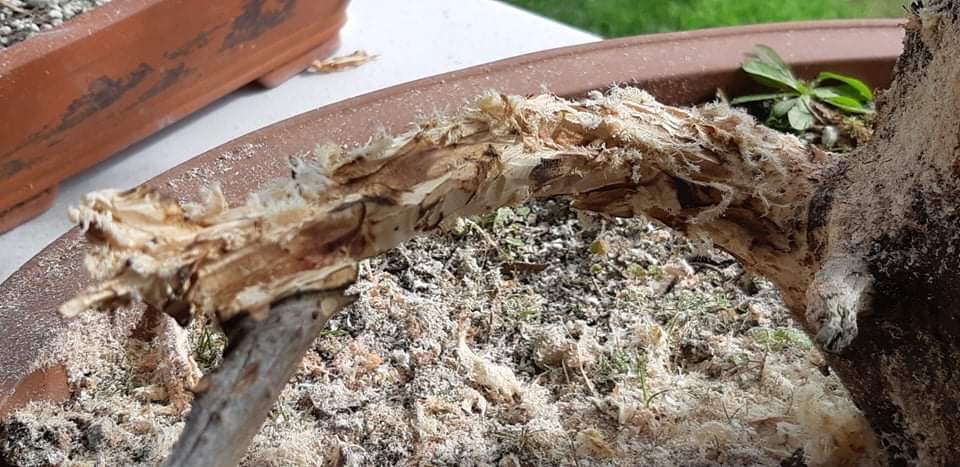
Carving is usually done to create or enhance jin, uro (holes), shari (stripped bark) or getting rid of areas where large branches were removed. In this case a large branch, about one inch thickness, had to be removed and it was decided to leave a 15cm piece of it and sculpt a jin (deadwood) out of it.

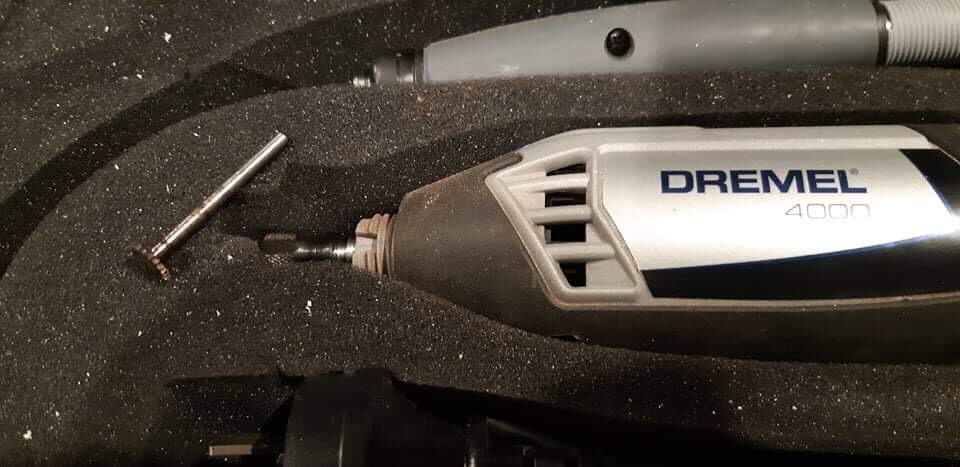
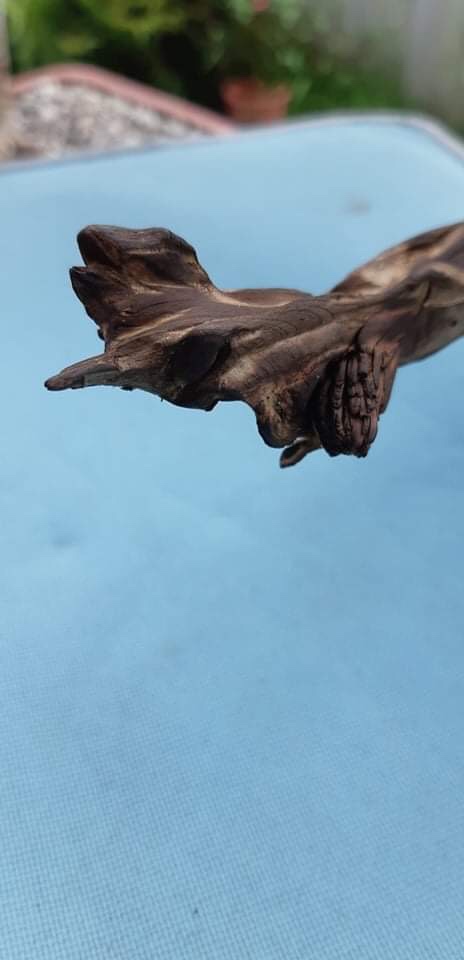
I use a die grinder with a carving bit to remove material fast and to roughly shape the dead straight branch by making grooves in curves and alternating the depth of the grooves. Once this is done I burn the jin to get rid of wood fibres and then repeat the process with the trusted Dremel and a smaller carving bit.

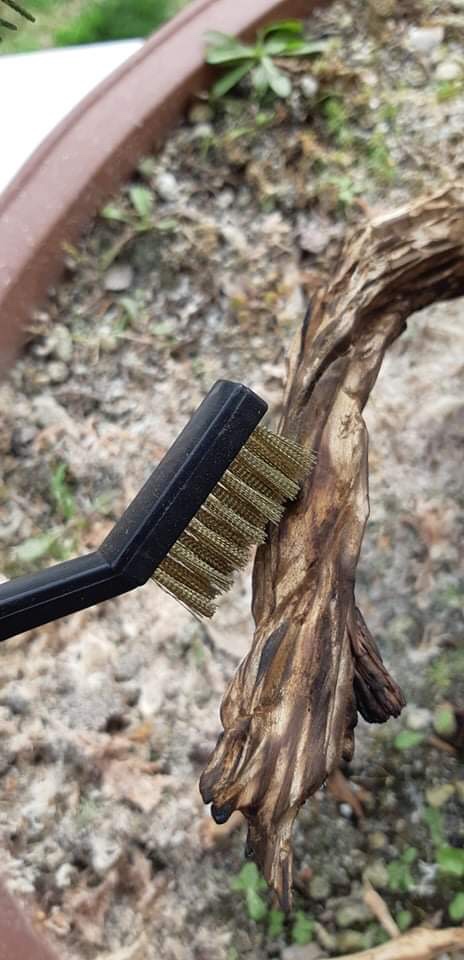
As mentioned, burning the jin with a butane torch gets rid of the loose fibres, but it also helps to get rid of sharp edges and tool marks. After a heavy torching, the jin is brushed with a copper brush and then with a nylon brush. Sand paper can be used to smooth areas that needs it, but I find that the brushing works well on its own.

To preserve the newly carved jin, I wash the whole tree off and then let it dry and rest for a few days. Lime sulphur or a wood hardener can then be applied. For a darker finish, mix some ash (burnt paper) in water and paint on. Some of the grooves can also be painted by making use of black ink. All fluids should be diluted. Lime sulphur is usually diluted with water 50/50%.

Safety aspects:

  • Wear safety glasses during the carving phase.
  • Use gloves when using the power tools.
  • When using the torch, protect the rest of the tree from the flame by using aluminium foil or a wet cloth around foliage and nearby parts.

Please like and subscribe to this blog to be notified when new posts are done. Thank you for the support and feel free to shore this post as well as the blog site.

Pohutukawa as Bonsai

In November 2015, the very early days of this blog site, I wrote about Metrosideros excelsa or Pohutukawa as Bonsai and included a few photos of these magnificent trees in nature. This tree is also known as the New Zealand Christmas tree. The link to that blog post is here.

https://bonsaiplace.net/2015/11/29/pohutukawa-as-bonsai/

For this blog post I will style a Pohutukawa as a Bonsai. As can be seen from the photos in the linked post, these trees very naturally present as multi trunks with great root structures and the very prominent aerial roots. it is this root structure and especially the aerial roots that make these trees ideal for root over rock designs. This tree will not be a full root over rock, but a rock will be placed next to it with roots growing over the rock.

This plant was grown from a cutting for a few years and these photos clearly show that these trees are basal dominant. It basically means that it will keep on growing new shoots from the base compared to tree which are apical dominant where the new growth is at the top of the tree.

Close up of the multiple shoots growing from the base as well as visible aerial roots.

As can be seen from the photos above, the first step is to search for roots and in this case roots in the soil and not the aerial roots. I find it better to remove the top edge of the plastic bag and sometimes remove the bag or pot completely. The presence and position of roots, especially radial roots will help to determine the orientation of the tree. In other words, the front of the tree and the first ideas of what the design could look like. In this case quite prominent roots were found and spread around the tree which means we can now look at the above ground structure as the placement of the roots allow us to look at multiple design options.

The next step is to remove all unwanted growth. To stay more or less true to the natural growth pattern Pohutukawa, the decision was made to design a multi trunk tree with three trunks. Really only two, but the thickest trunk has a fork which visually looks like two trunks. All three trunks have different diameters which makes it visibly more pleasing. All inward growing branches are removed and decisions are made about the three trunks. This includes things like direction, placement and length. As the three main trunks did not grow naturally in the directions needed and the centre trunk needed to be compacted, wire was applied.

A lot of branches and foliage were removed. some of these will be propagated as cuttings.

Wire was applied to bend the branches and also change the direction of the branches.
The pot is prepared.

The final product with a rock added to add visual weight on the right hand side and also allow a backdrop or prop for some of the aerial roots to grow over.

It is important that Bonsai trees are three dimensional. The best way to check that is to view the tree from above. Visual depth adds to the aesthetics and overall view of the tree.

As for all trees, the aftercare is now of the utmost importance. As the pot is not that shallow, not many roots were removed, but the tree will still be kept in a protected spot, out of the wind and cold temperatures. Watering is now also important as well as sun exposure. Just damp, not wet and limited afternoon sun is what is now needed for the further development of this tree.