

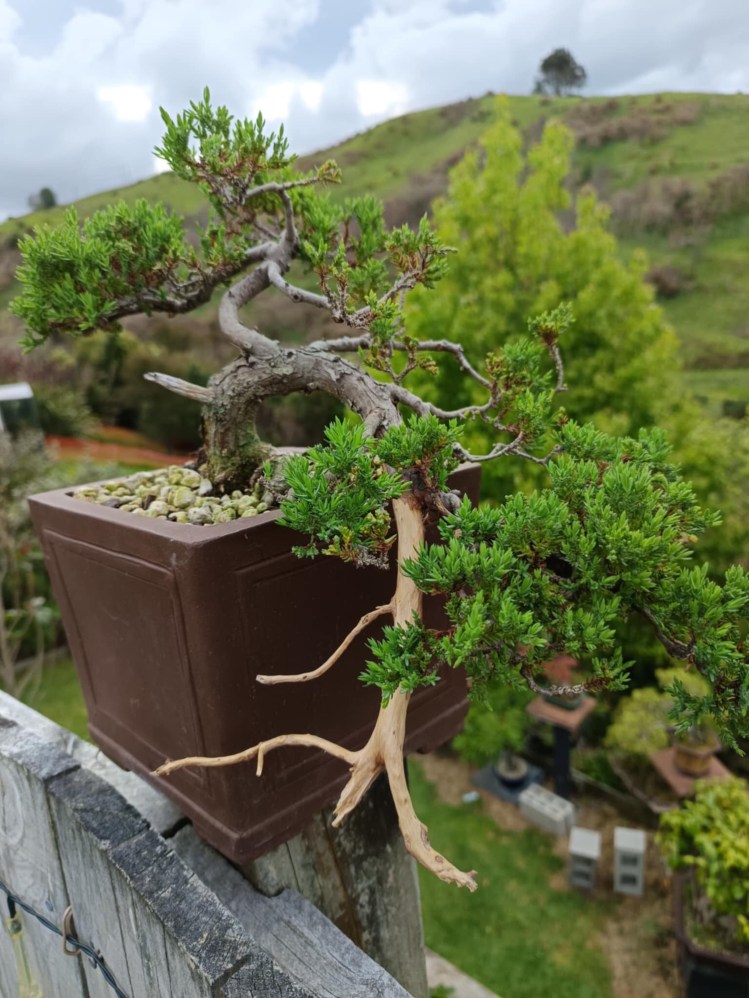
Semi-cascade Juniper Bonsai

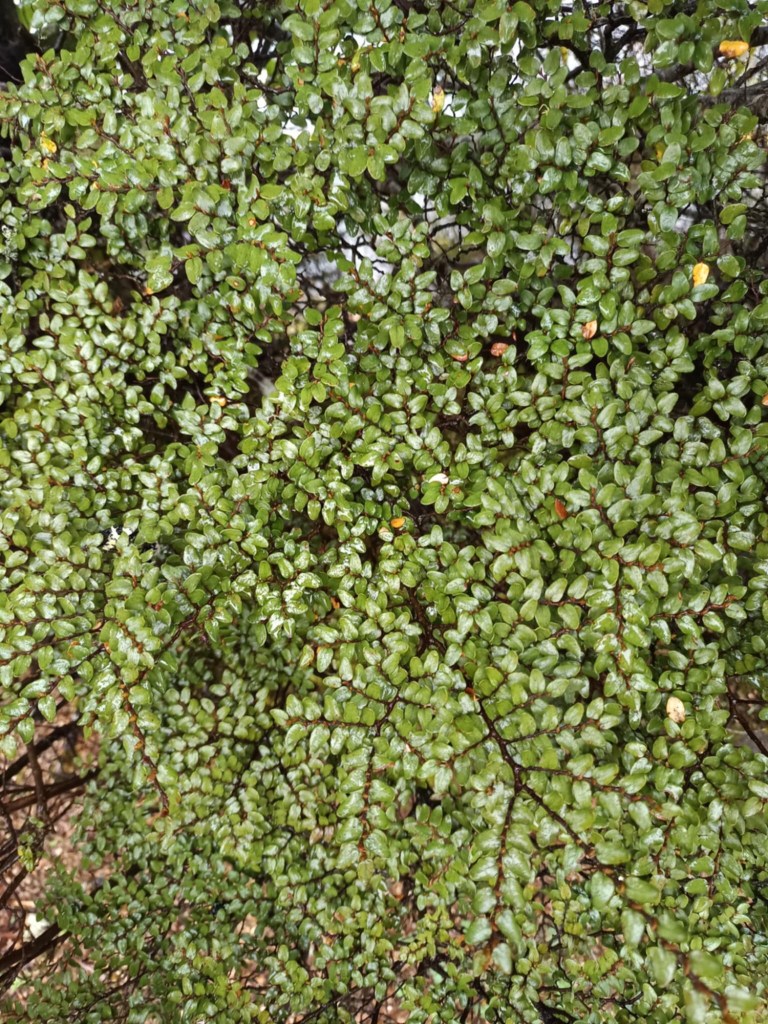
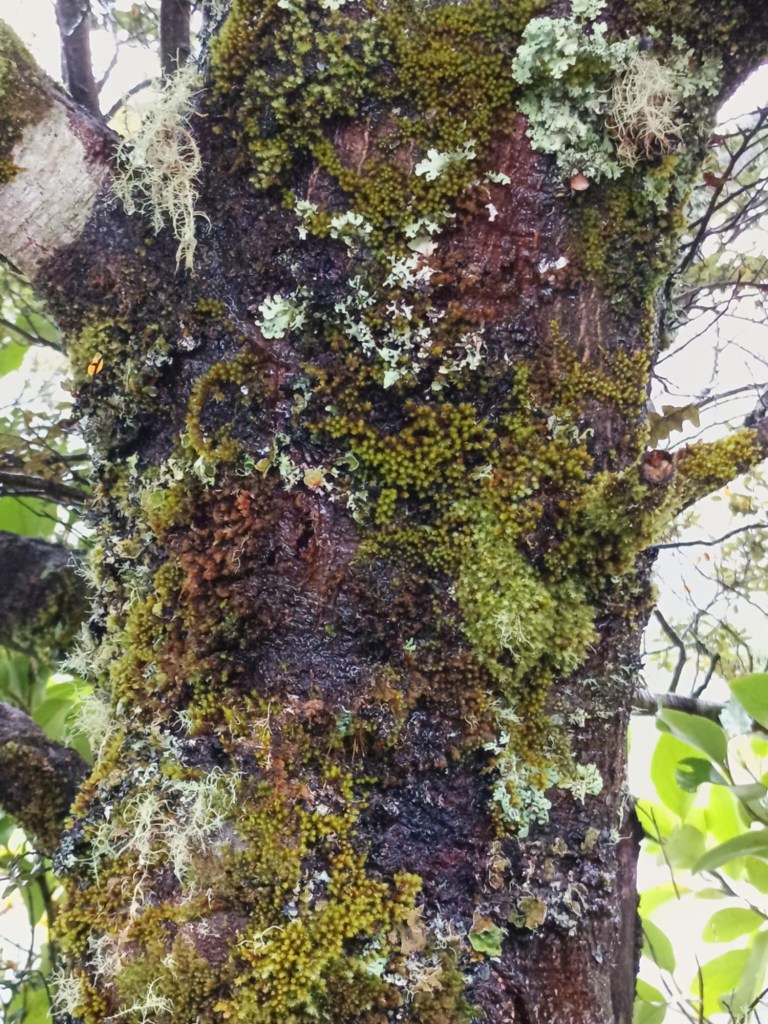
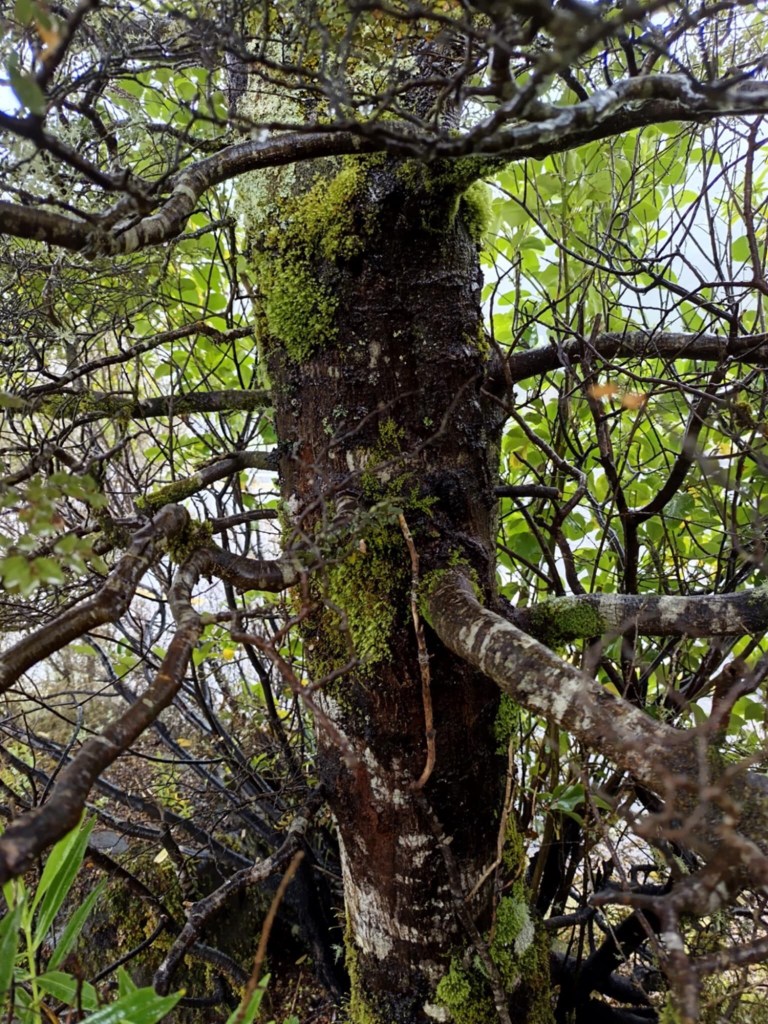
Nothofagus cliffortioides, known as Mountain Beech, is a large, evergreen tree native to New Zealand. The taxon is also known as Fucospora cliffortioides in New Zealand. It is found on the South Island and around higher altitude areas of the North Island. The photos in this article were taken in the Tongariro National Park area (Whakapapa).


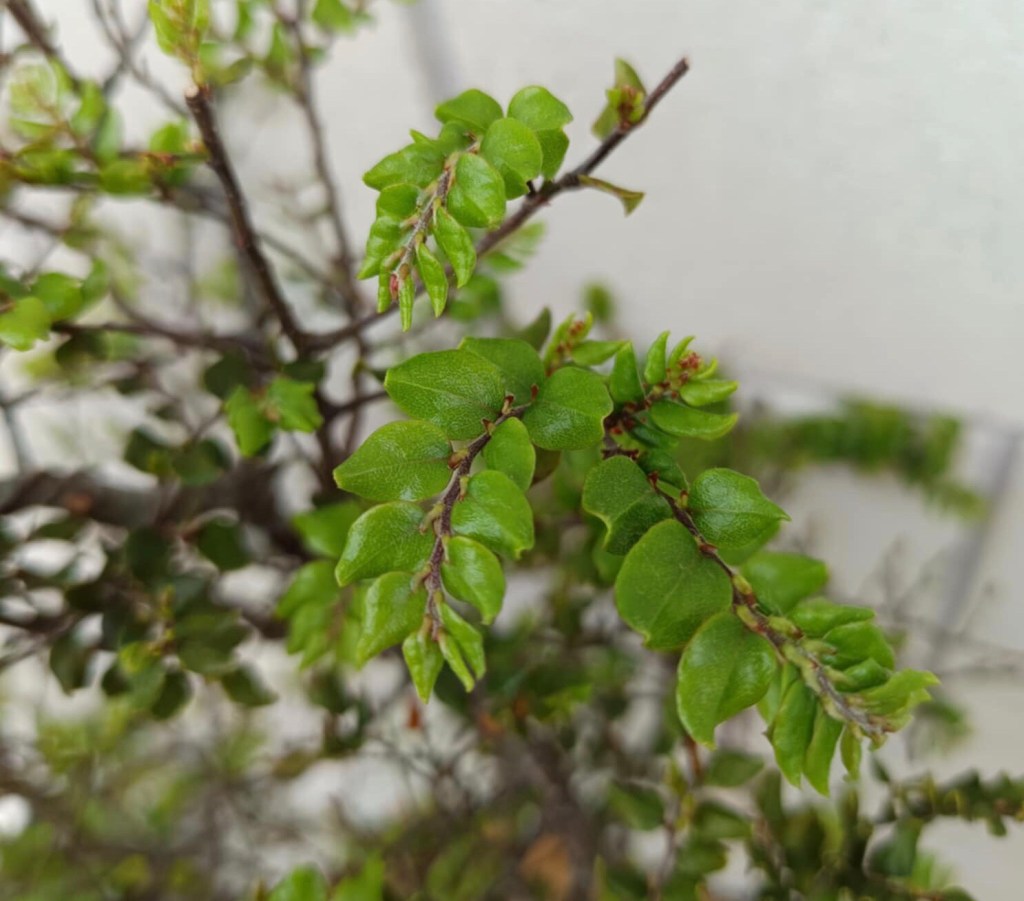
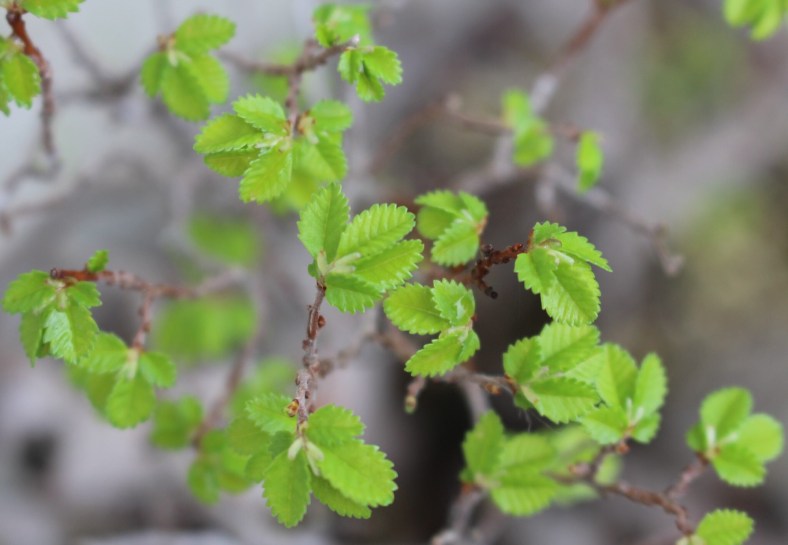
The foliage consists of small, dark green leaves which are carried closely on short stems in fan-like sprays. In its natural habitat the branches and leaves form natural foliage pads as commonly seen in Bonsai. It is this growth pattern that caught my attention while out and about studying trees and looking for Bonsai related inspiration. Masses of tiny, red flowers are borne across the tree in spring. It grows with a broad and somewhat rounded habit to about 30 m tall and 12 m wide. Will these trees make it as Bonsai?


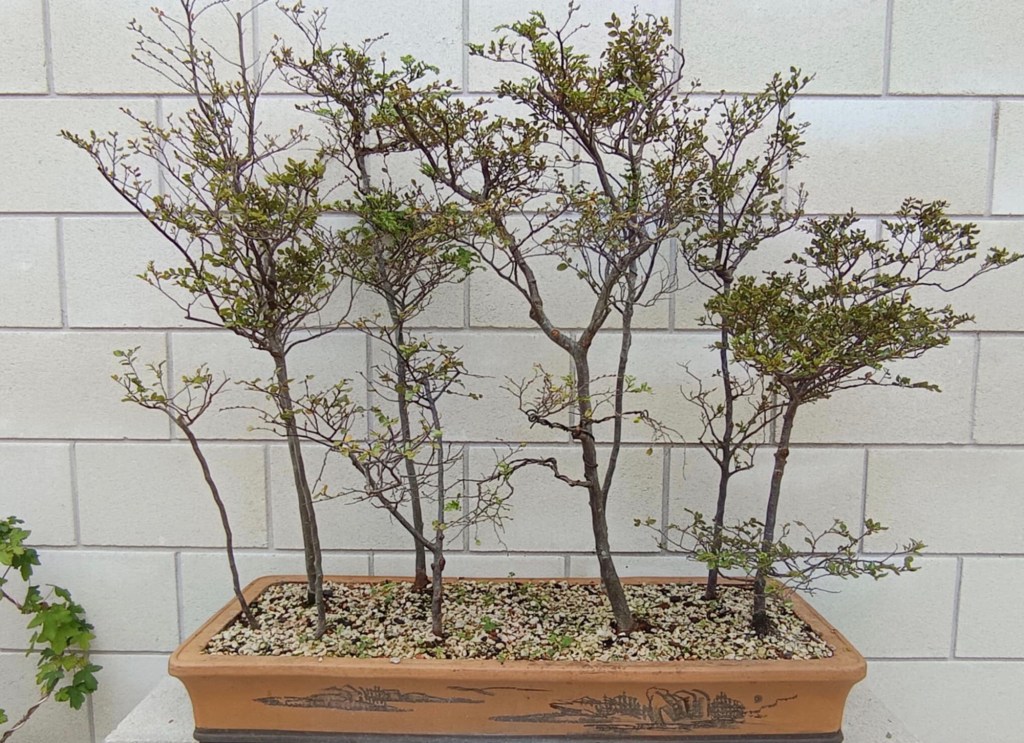
I ordered a few nursery trees a few years ago and these were planted in a long and narrow pot. The soil mix is made up of about 50% compost, 40% pumice and 10% scoria. In its natural habitat the soil is mostly organic with a high percentage of scoria and other volcanic rock mixed in. The photos in this article were taken of trees in a sub-alpine area with a few other native species in the immediate environment.
The trees that I have are arranged in a forest formation and since planting, the trunks have only marginally thickened with most of the growth originating from the canopy area, a clearly apically dominant species. The trees are ok with pruning, at times dropping leaves, but generally budding and forming new leaves within six weeks after partial leaf drop. I am not sure if this is a natural occurrence or a reaction to pruning.

I have wired some branches into a flattened foliage pad direction to imitate the natural growth. In young trees the growth tends to be vertically upright and as the branches get older, start to grow more horizontally with the nice evergreen foliage pads forming.
My next plan is to source more nursery material and to grow these in the ground for a few years for the trunks to fatten up before they go into a pot. At this early stage of my current trees, I am leaning towards the fact that they do not add a lot of width to trunks as soon as they go into a pot.
Thus far no disease or pests have been encountered and except for the hysterical leave drop after pruning, no other quirks have been observed.
Below are trees in forest style plantings done by New Zealand forest planting specialist, Mark Fredric. Mark has managed to capture the naturalistic style of these Beech trees.

One of the debates we also still need to properly have here in New Zealand and probably in other areas where there is prolific moss and lichen growth, is the one about especially the growth of lichen on our Bonsai specimens. Lichen grows naturally on trees and shrubs in New Zealand forests and is a feature of natural habitats where moisture and shade enhances the growth of these symbiotic organisms. Do we leave them on or do we take them off? Let’s talk about it and feel free to leave your ideas and thoughts below.

Next update in about ten years 😉.


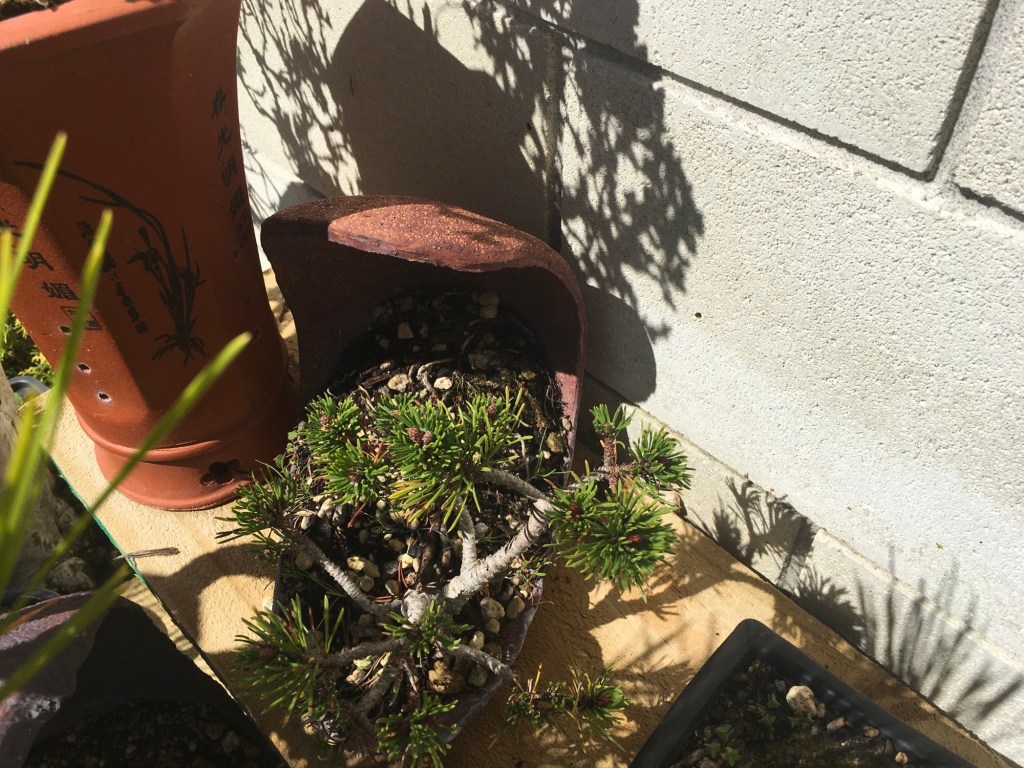
I was confronted with this Mugo Pine and had no idea what to do with it. The two bar branches at the bottom is ugly and the two arms going up from there does not lean itself to any of the Bonsai styles that I know of.
After many days, weeks and months of staring at it from different angles, I one day was working on a small Japanese White Pine that is planted in a crescent shaped pot and a new idea came to me. To do this, many Bonsai “rules” must be broken and the tree put at risk due to a lot of material being removed. This is a calculated risk. More about that later. Here is the culprit in all its former glory.

The decision was made to remove the one thick branch on the one side and create a two inch long Jin out of it.

Then the other branch was stripped and Jinned as well.

This longer Jin is now wired up and bent in the shape of a crescent, the same as what a crescent shaped pot would look like.
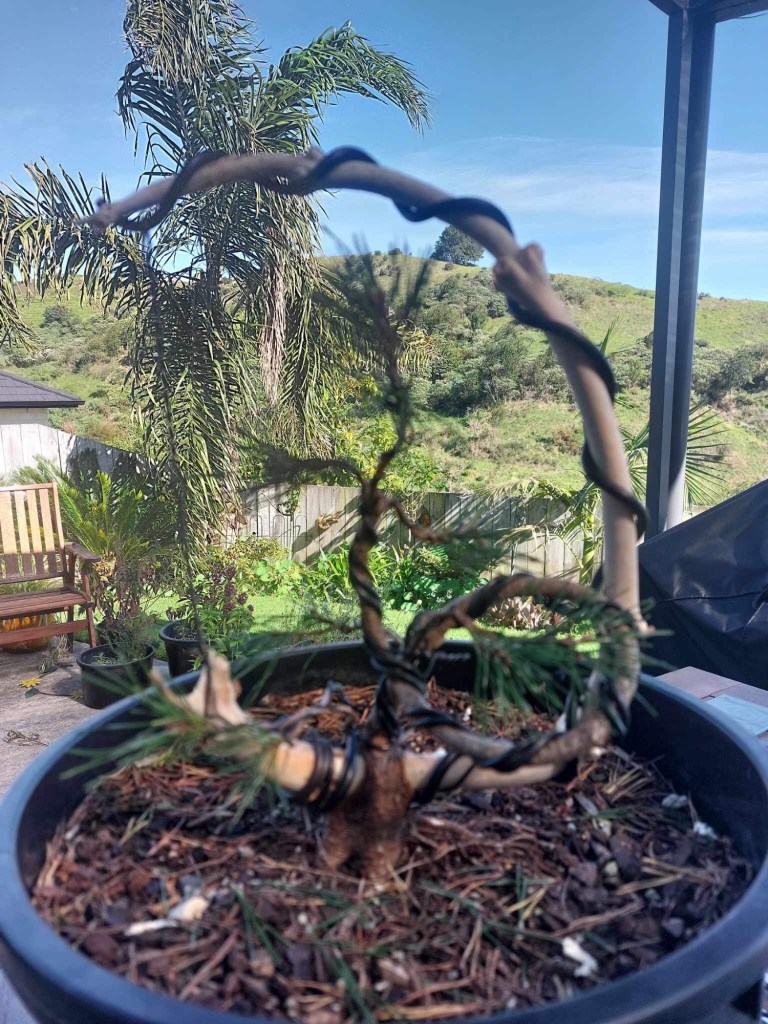
Now the only branch that is left is shaped to represent an informal upright style Bonsai tree with a loop in what is now the trunk to get the height correct.

Aftercare and the future: the tree will now be placed in a sheltered spot and remain there for at least a year. Fertilisation, watering, checking on the wire and weeding is the most excitement this tree will see for a long time. When the time is right, the wire will be removed and the Jin will be further developed. That will just be some detail work, inclusive of using fine carving tools, torching it and lime sulphur treatment. The tree will also go into a Bonsai pot once the growth is strong.
I mentioned taking calculated risks earlier. It really comes down to mitigating the risks by thinking through each risk and finding a way to minimise the risk. These include not potting anytime soon which means no root work at this time, sealing all the wounds and keeping the tree out of wind and harsh sunlight. Extensive wiring took place and this is mitigated by placing guy wires in places to support the harder wiring as to take some of the load off. Guy wires are attached to the wire on the branches / Jin and not on the branches itself. Now, let’s pray.

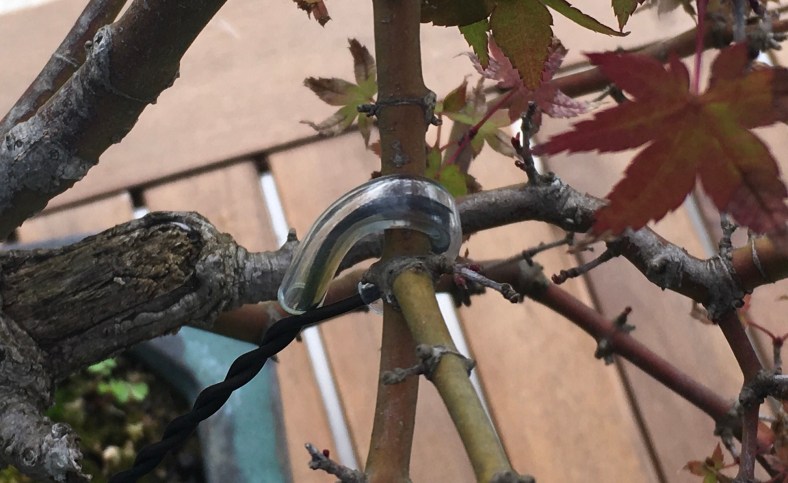
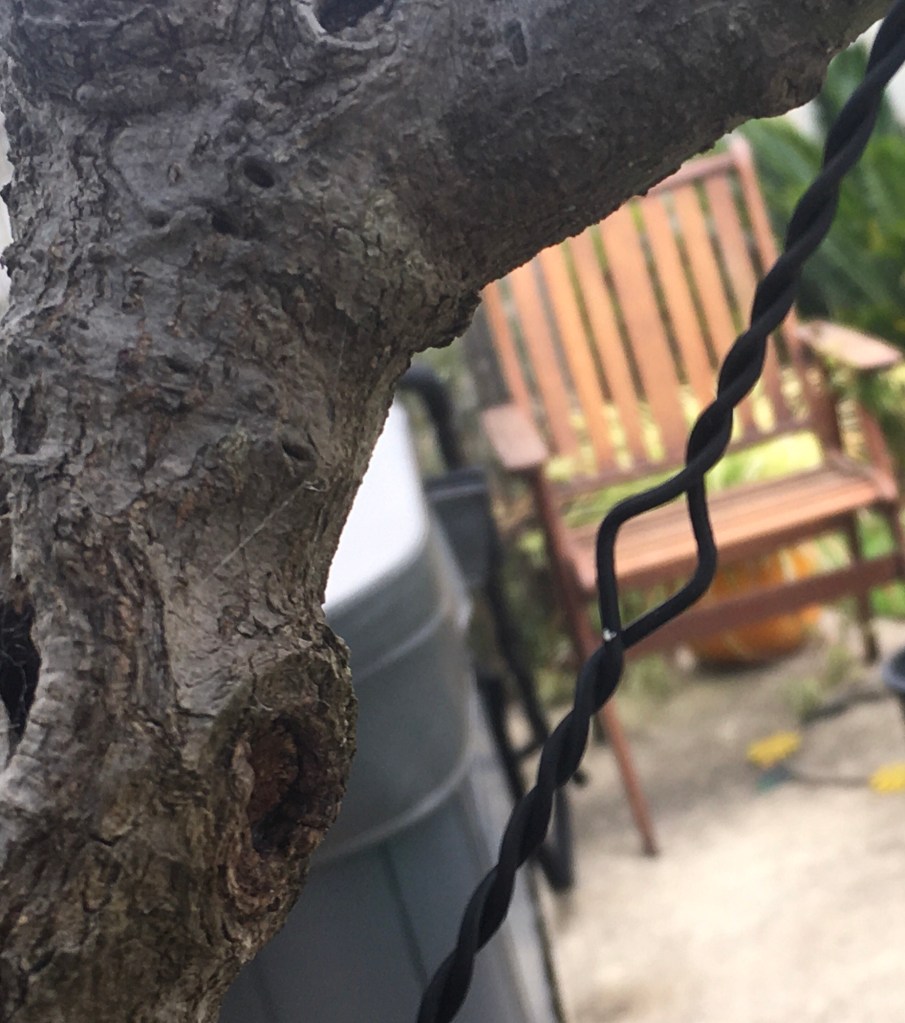
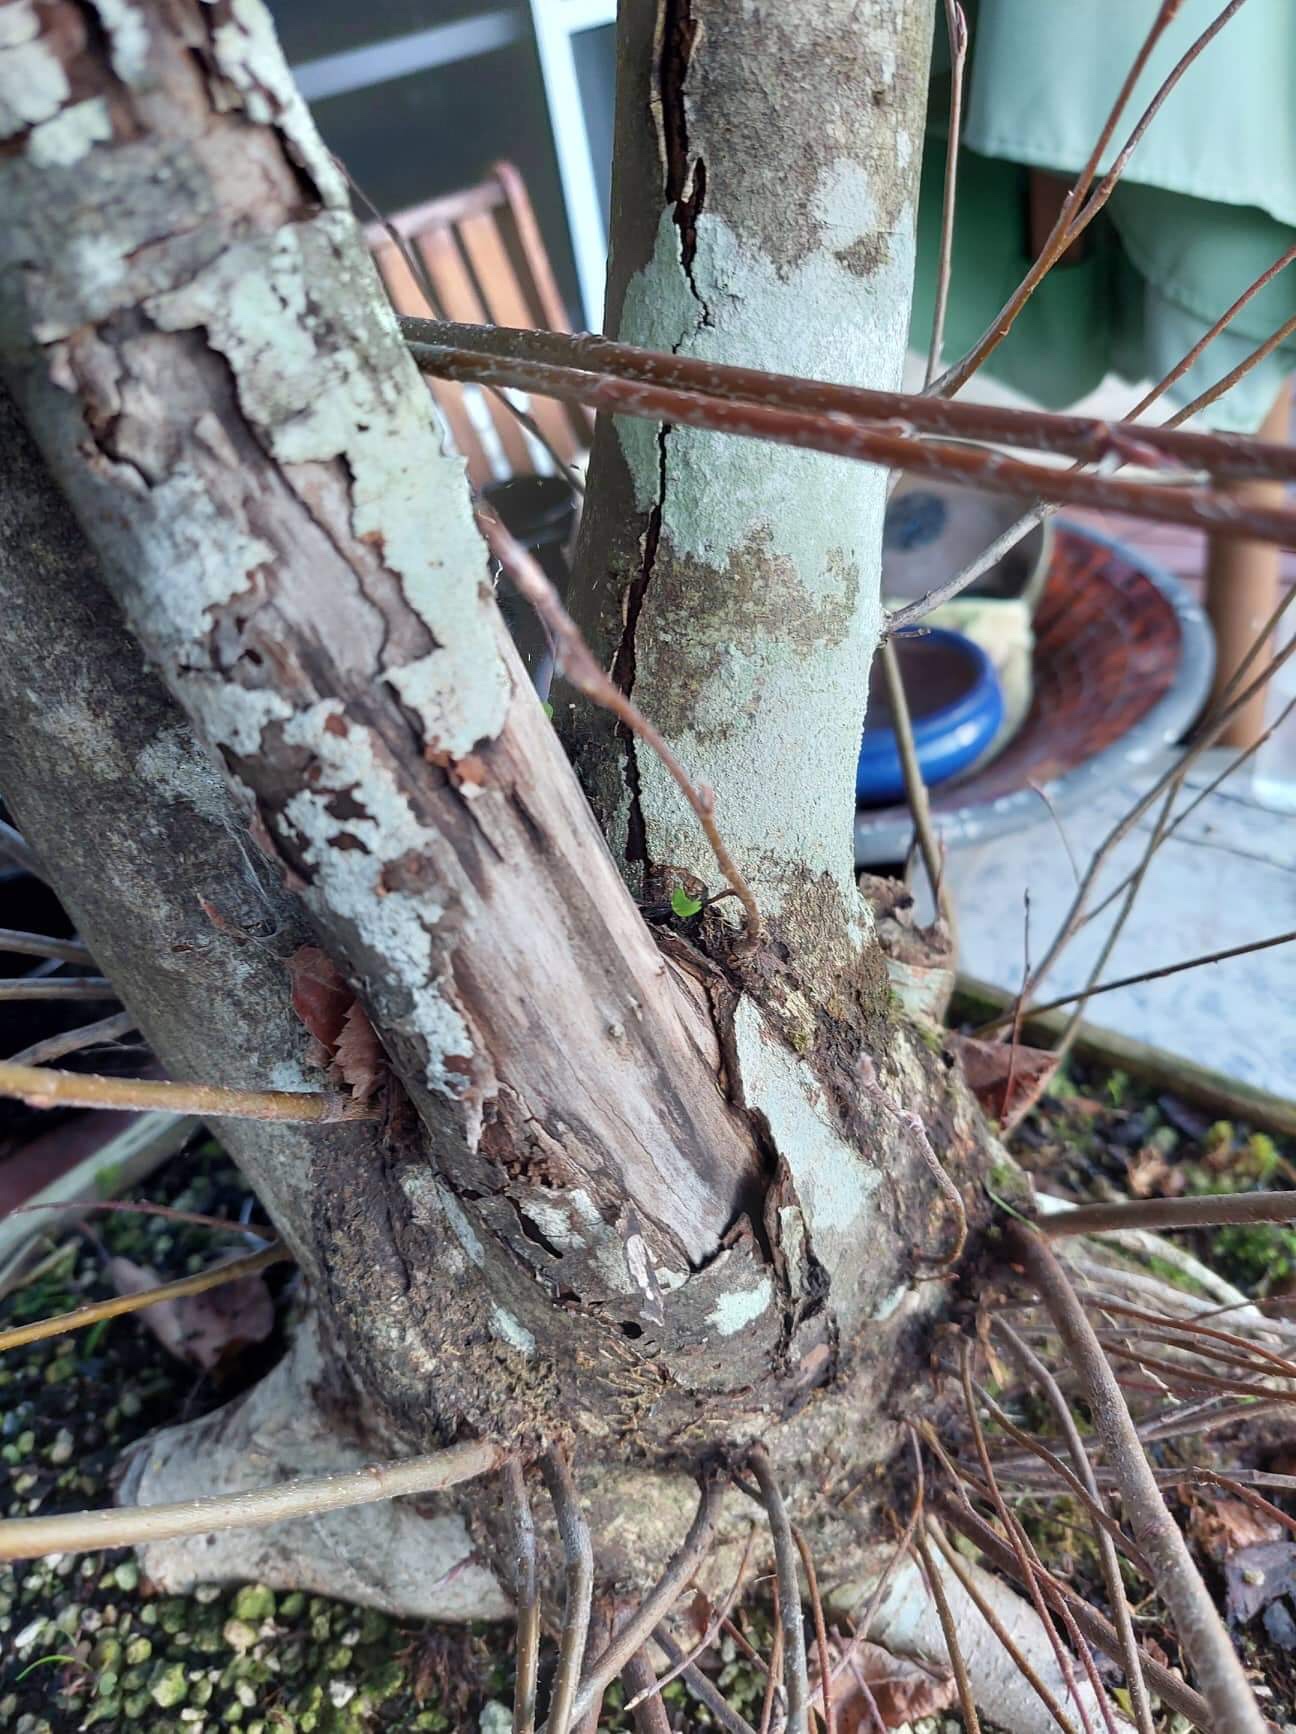
Someone recently asked about the use of guy wires in Bonsai. I find that guy wires are particularly useful when used on older Maple trees.
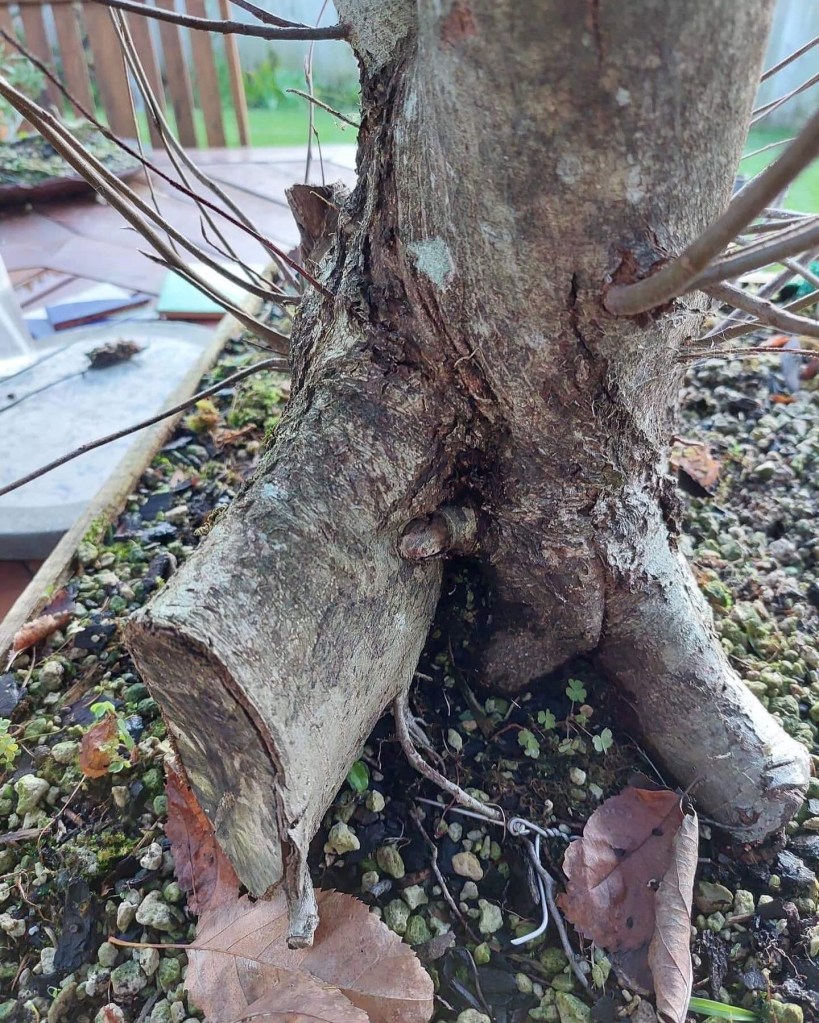
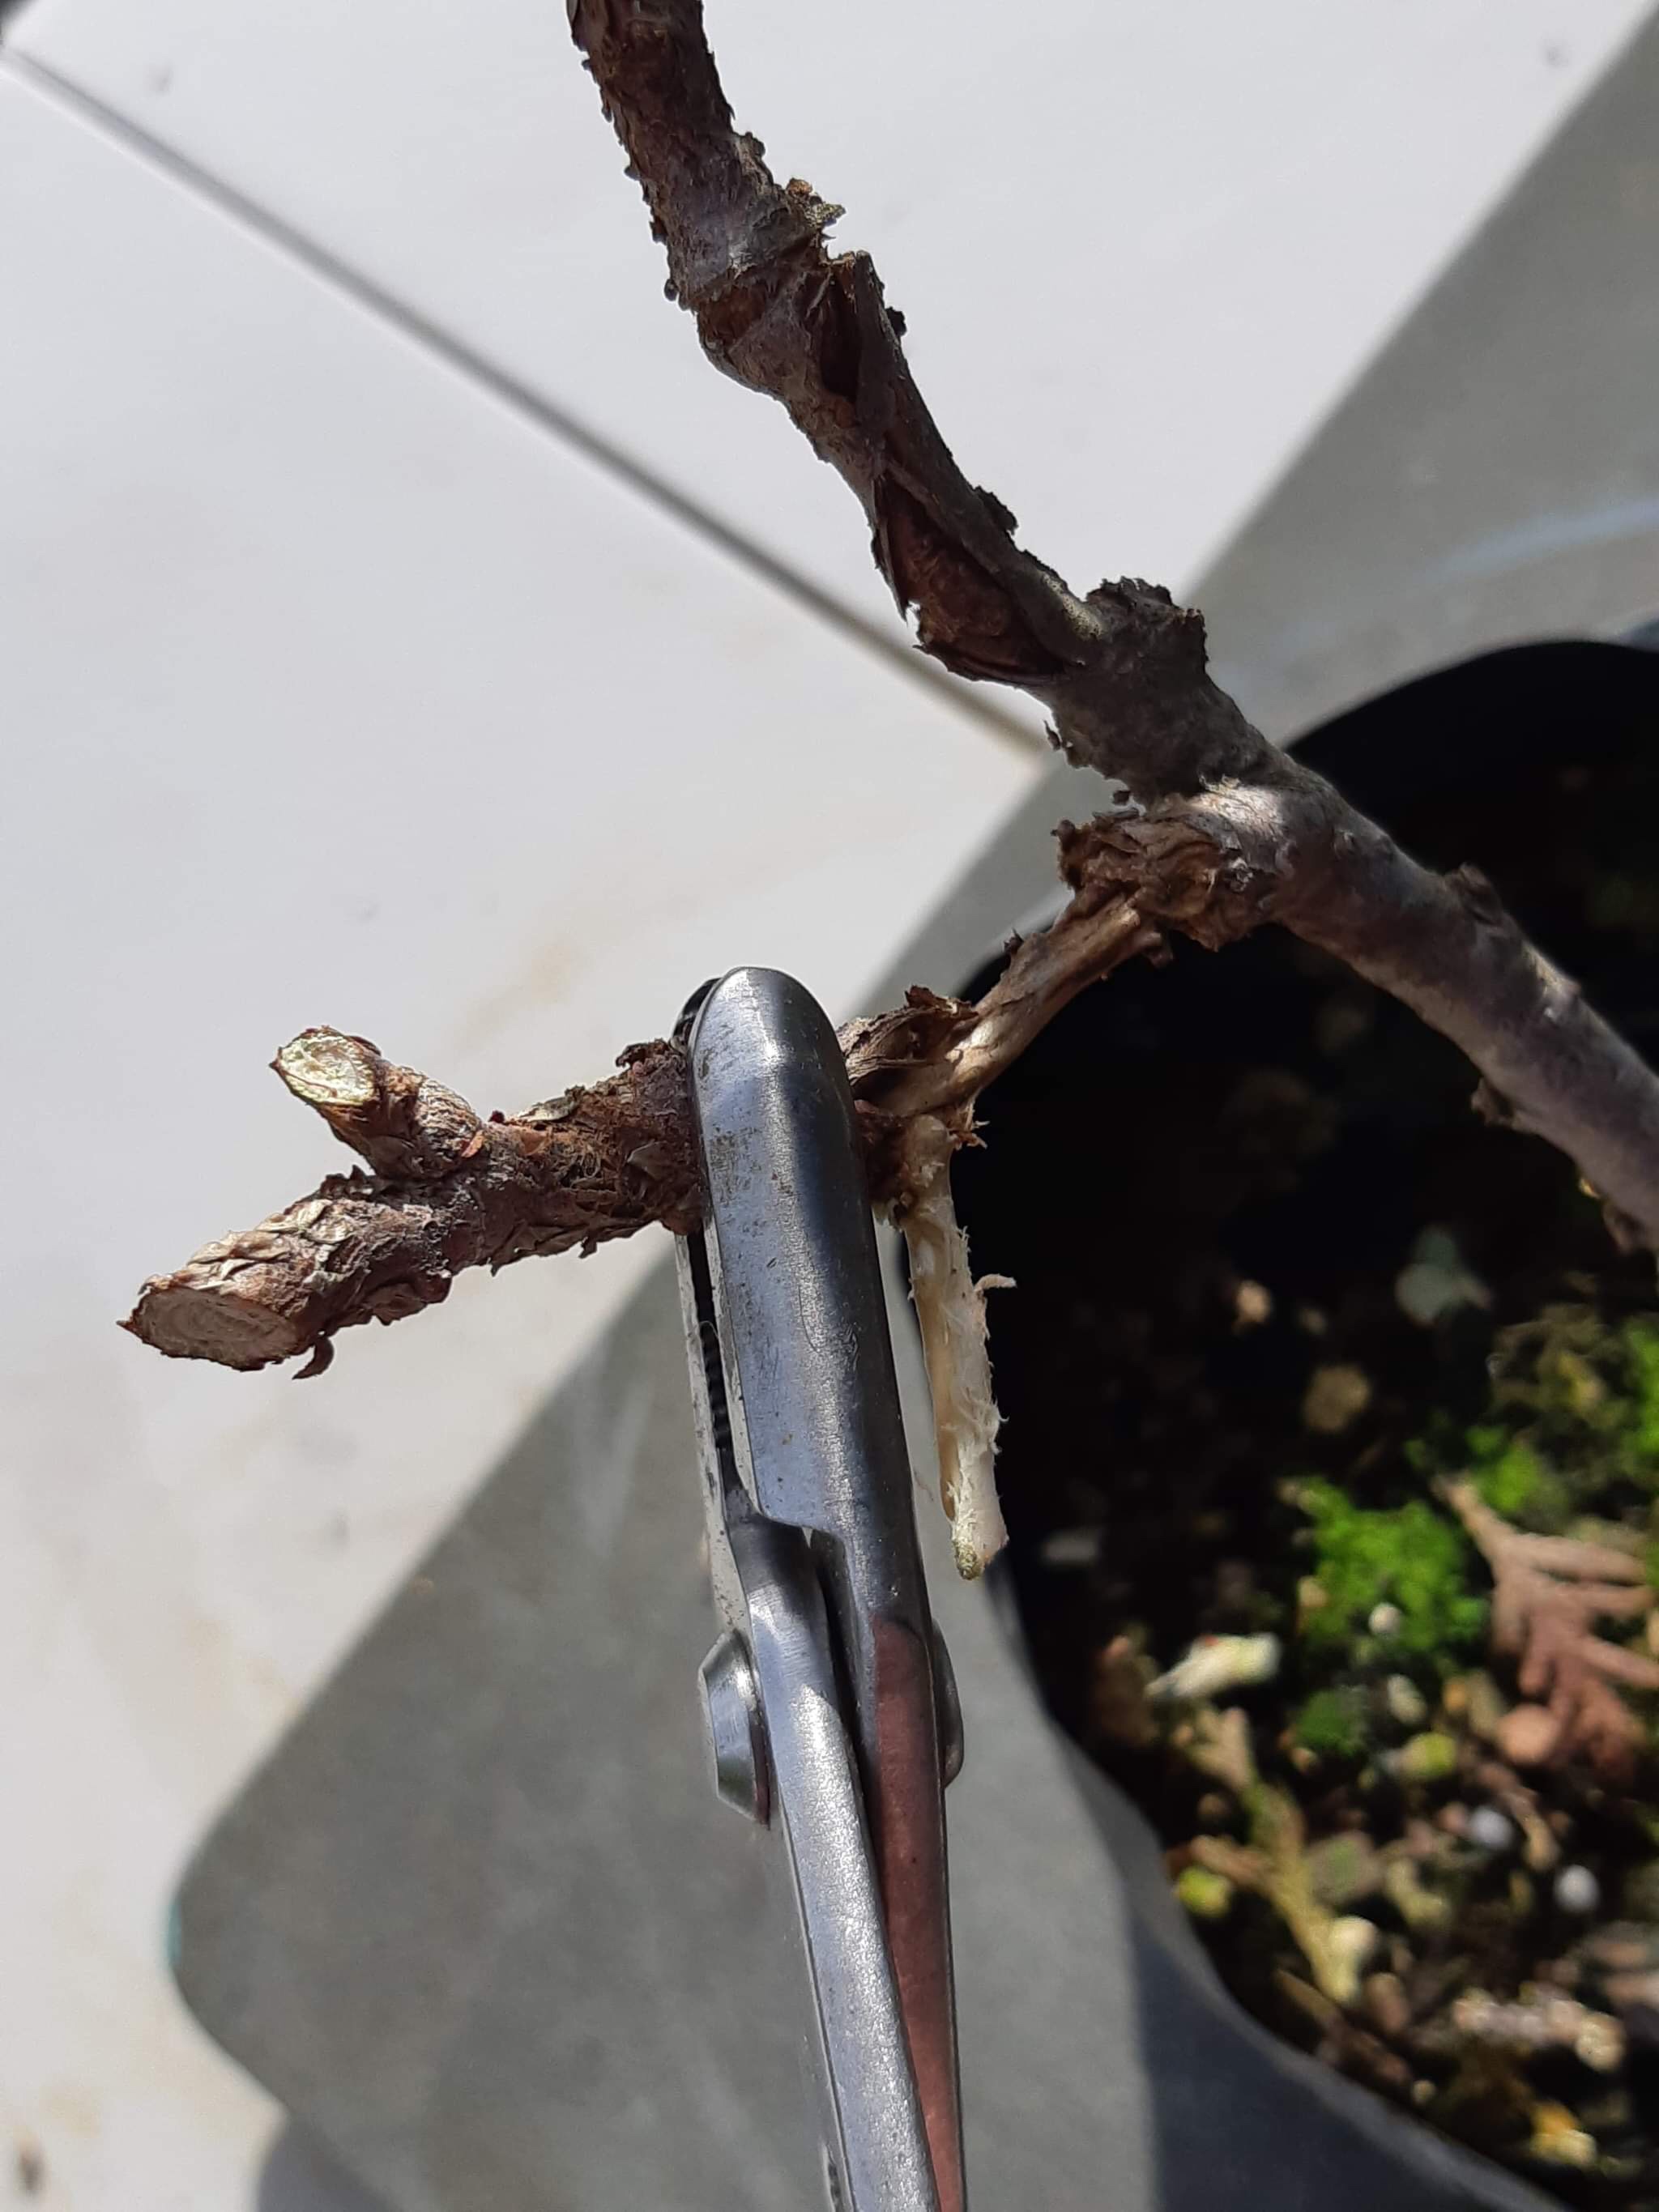
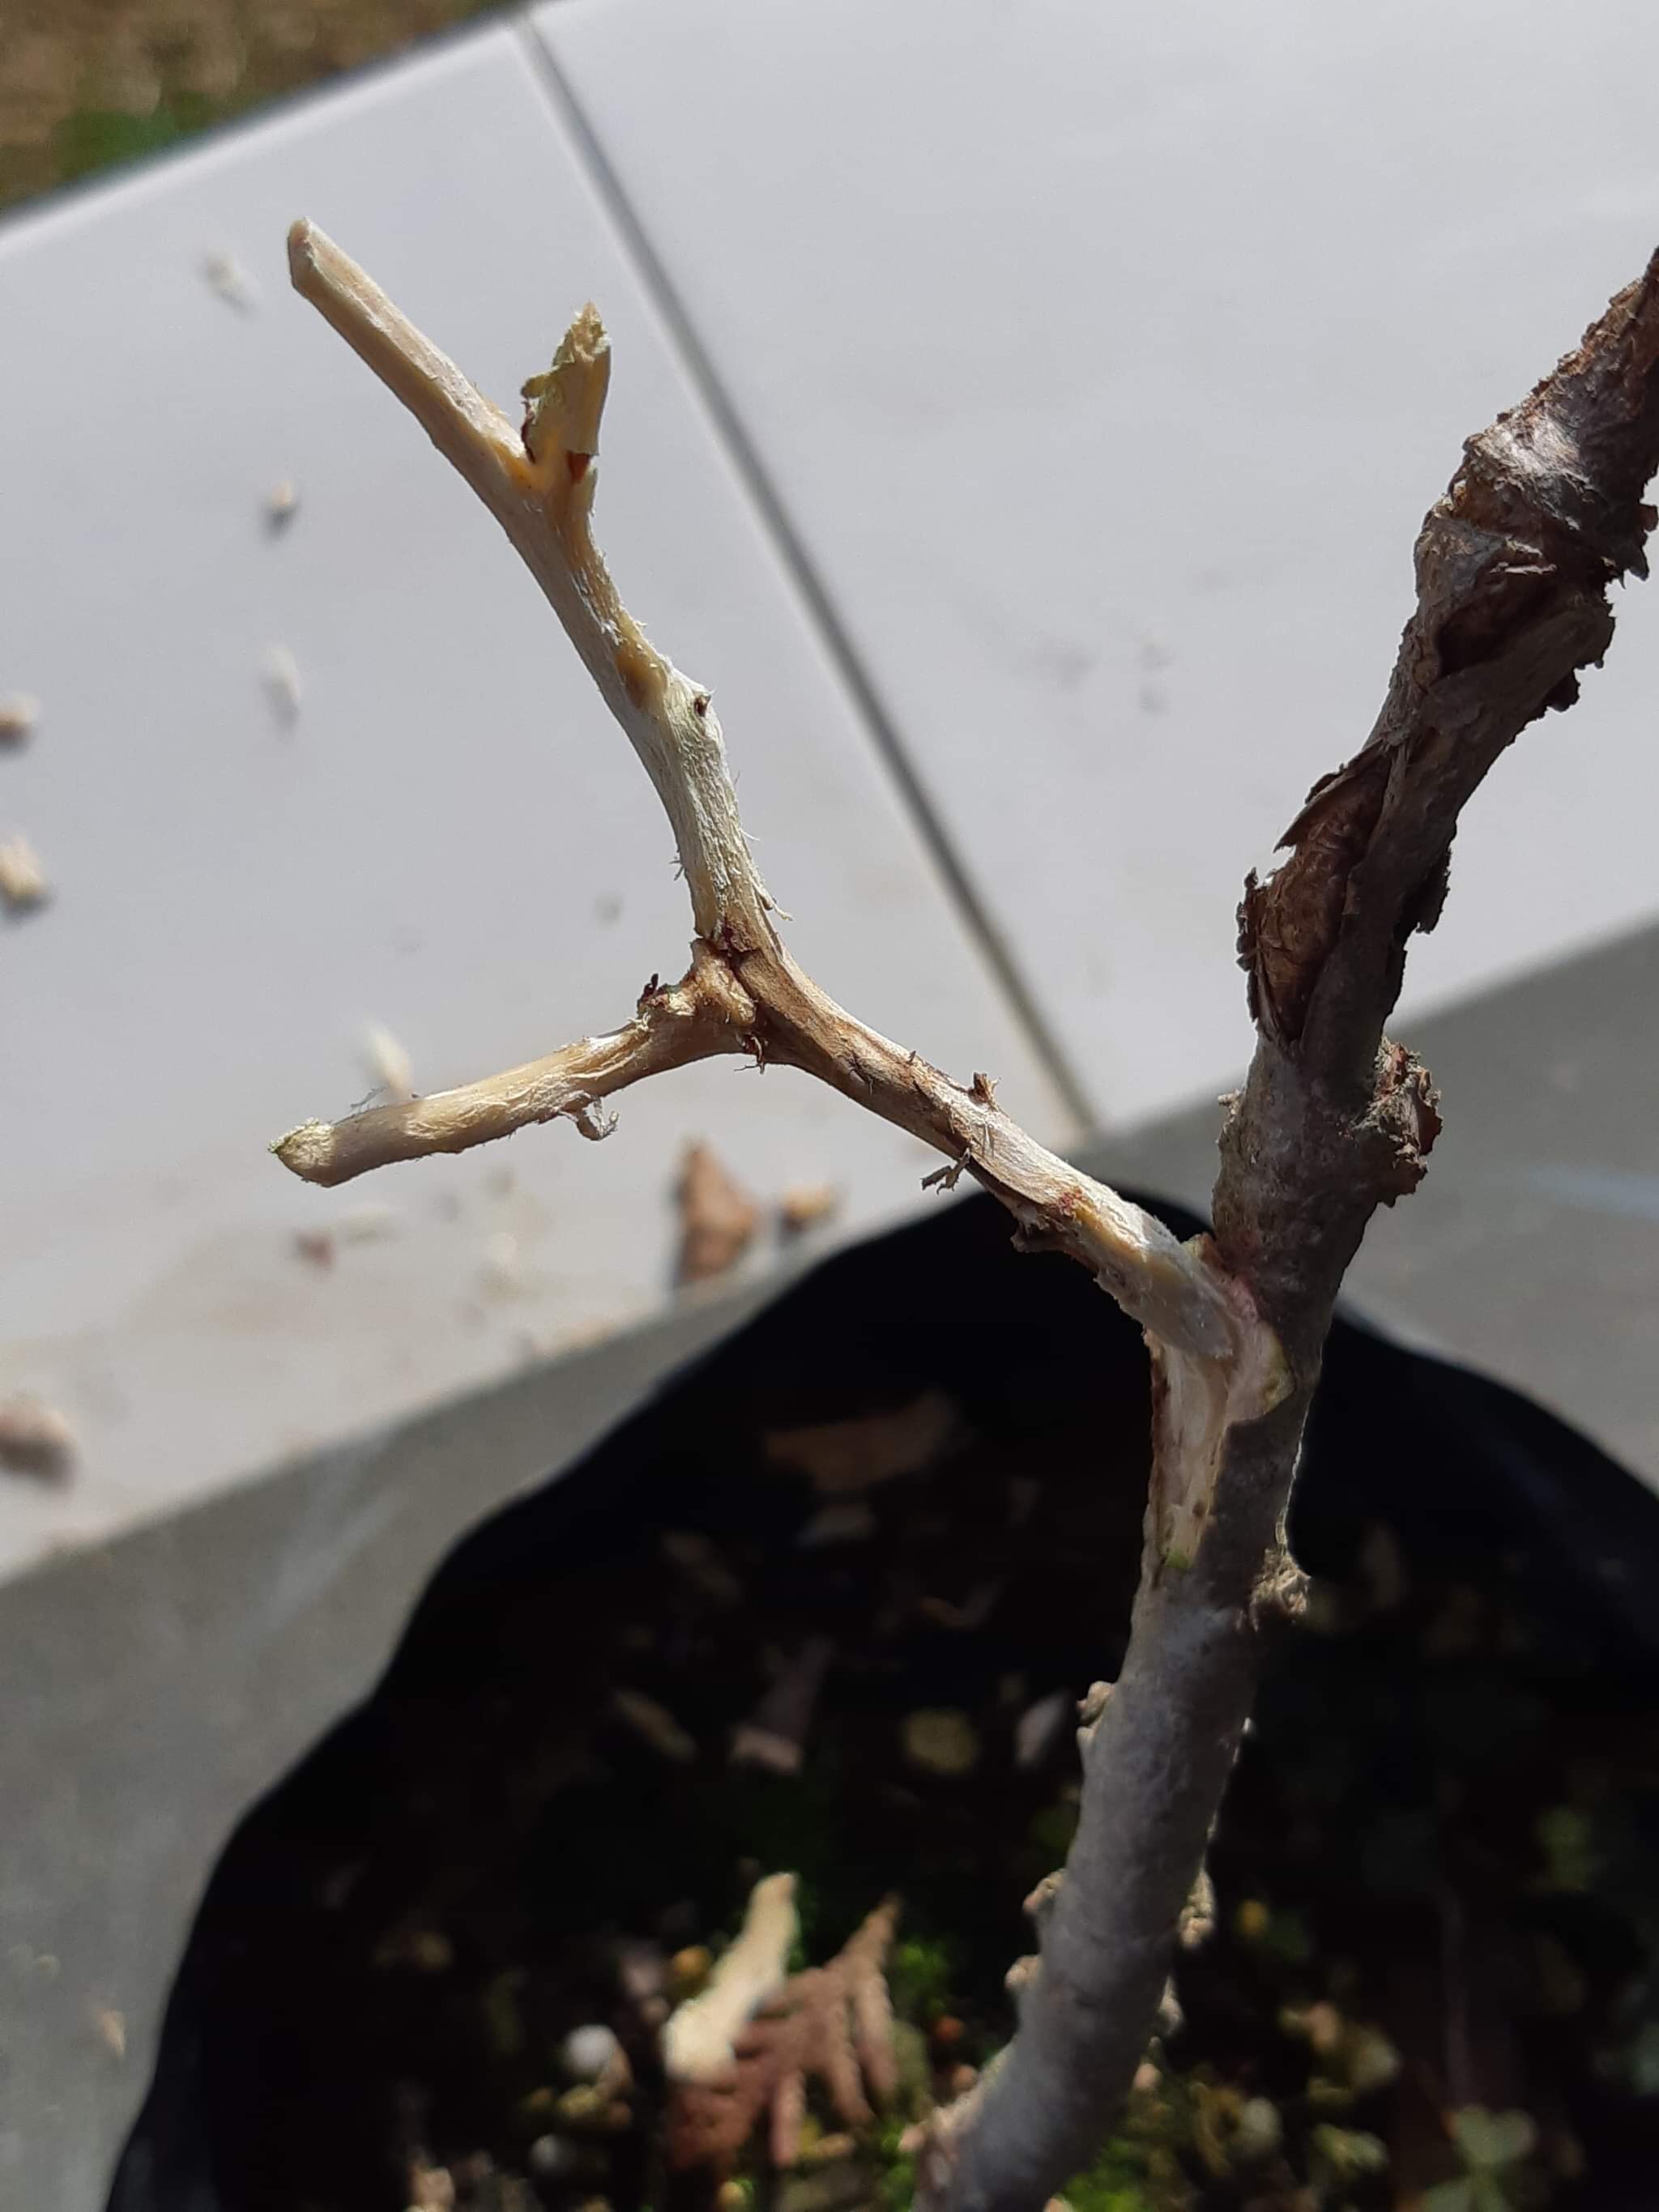
The branches are very brittle and not flexible at all (the older ones). The tree in the photos is a prime examples of this. Two branches were lost over the last few years trying to set the branches with wire directly applied to the branches. The first photo below has a little stump just under the wire (middle) where one of these branches, which just happened to be critical in filling the back of the tree, broke while bending.
I apply a guy wire if I need to pull a branch down or sideways on these brittle branches. A screw is placed at the bottom of the trunk, preferably under soil level or as close as possible to it. The hole left once removed will close quickly.
The important thing is to set or twist the wire over time. The tree in the photos had two turns per day over five days to get the branch where it is suppose to be.
It is important to use some sort of protection on Maple branches as a naked wire will cut in. There is an article at http://www.bonsaiplace.net that has more details on the use of guy wires.


It is always exciting for me to apply wire to a tree and I feel the same excitement unwiring a tree. Applying wire is part of the creative process. You wire and you place the branches in place and when done, you can stand back and admire the design. Removing the wire for me brings the same excitement in that once the wire is off, two emotions are detected. One is happiness that you managed to remove the wire in time with no nasty wire bite marks on the branches. The second emotion is about the same as seeing an infant take the first steps on his or her own or seeing your puppy successfully toilet trained. Your tree is now on its own, with no help from wires to keep its shape. It is resembling something more advanced from the time that you applied the wire. It is another step towards maturity as a Bonsai tree.

How do you do this job? Some people cut the wire in short bits and others uncoil it from the branches. I do both. Usually thicker wire gets cut and thinner wire gets uncoiled from the branches. It also depends on the size of the tree for me in that I prefer to use my fingers on smaller trees as my wire cutter is quite bulky, but perfect to use on the thicker wire where the chances of damaging bark is greater. Using the cutter is just easier, especially on Copper wire. Aluminium is softer and much more pliable which makes for safer removal of the wire. And that brings us to a very important point. Safety and the health of the tree always comes first. If you cannot remove the wire safely by hand and the uncoiling method, the appropriate tool should be used. Never compromise on the health of a tree.
I also usually start with all the thinner wire first. In other words, the reverse order of which the wire was applied in. My technique is to set the thicker branches first, therefor using thicker wire and from there use thinner wire as the branches taper out to the thinnest ones. Starting with the thinner ones also means working from the outside in and avoiding the odd wire that naughtily crossed a thicker wire in its pursuit to support the tree. Yes, it does include some planning on order of work and technique to be used. I also usually start at the bottom of the tree and work my way up, one branch at a time. That will minimise the chance of missing a wire somewhere and then discovering it a few weeks later, by then causing damage to the branch where it was missed.
Do you re-use uncoiled wire? I do, especially for students to practice their wiring technique. To do this, it is best to get all the bends out of the wire first. I use a smooth steel pipe that is fixed on both ends and then all you have to do is take the ends of the wire around the pipe in each hand and pull it across the pipe a couple of times and it is as straight as new wire again.
Unwiring is part of the process. Do it mindfully and your tree will reward you not just with its aesthetic appeal, but also with good health and a feel good emotion of accomplishing something worthwhile.
Feel free to comment on how you approach this task and any tips that will make the job easier.
Winter provides good opportunities to do structural work on deciduous Bonsai trees. Sap flow is low, no leaves means you can see what you are doing and wiring can set branches before Spring growth starts.

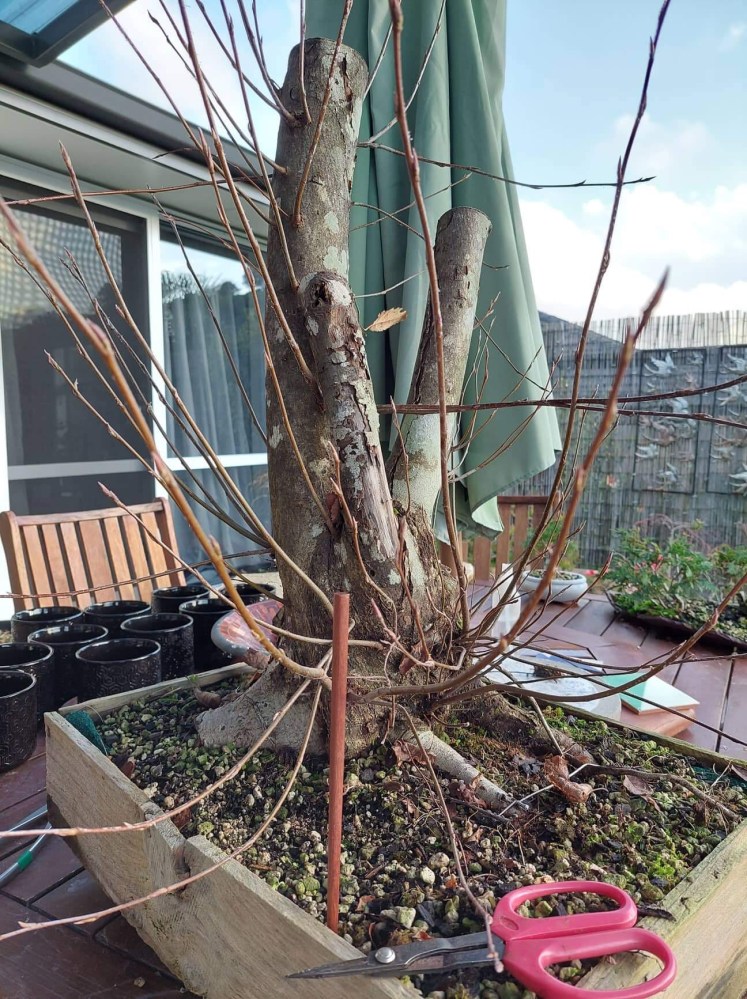
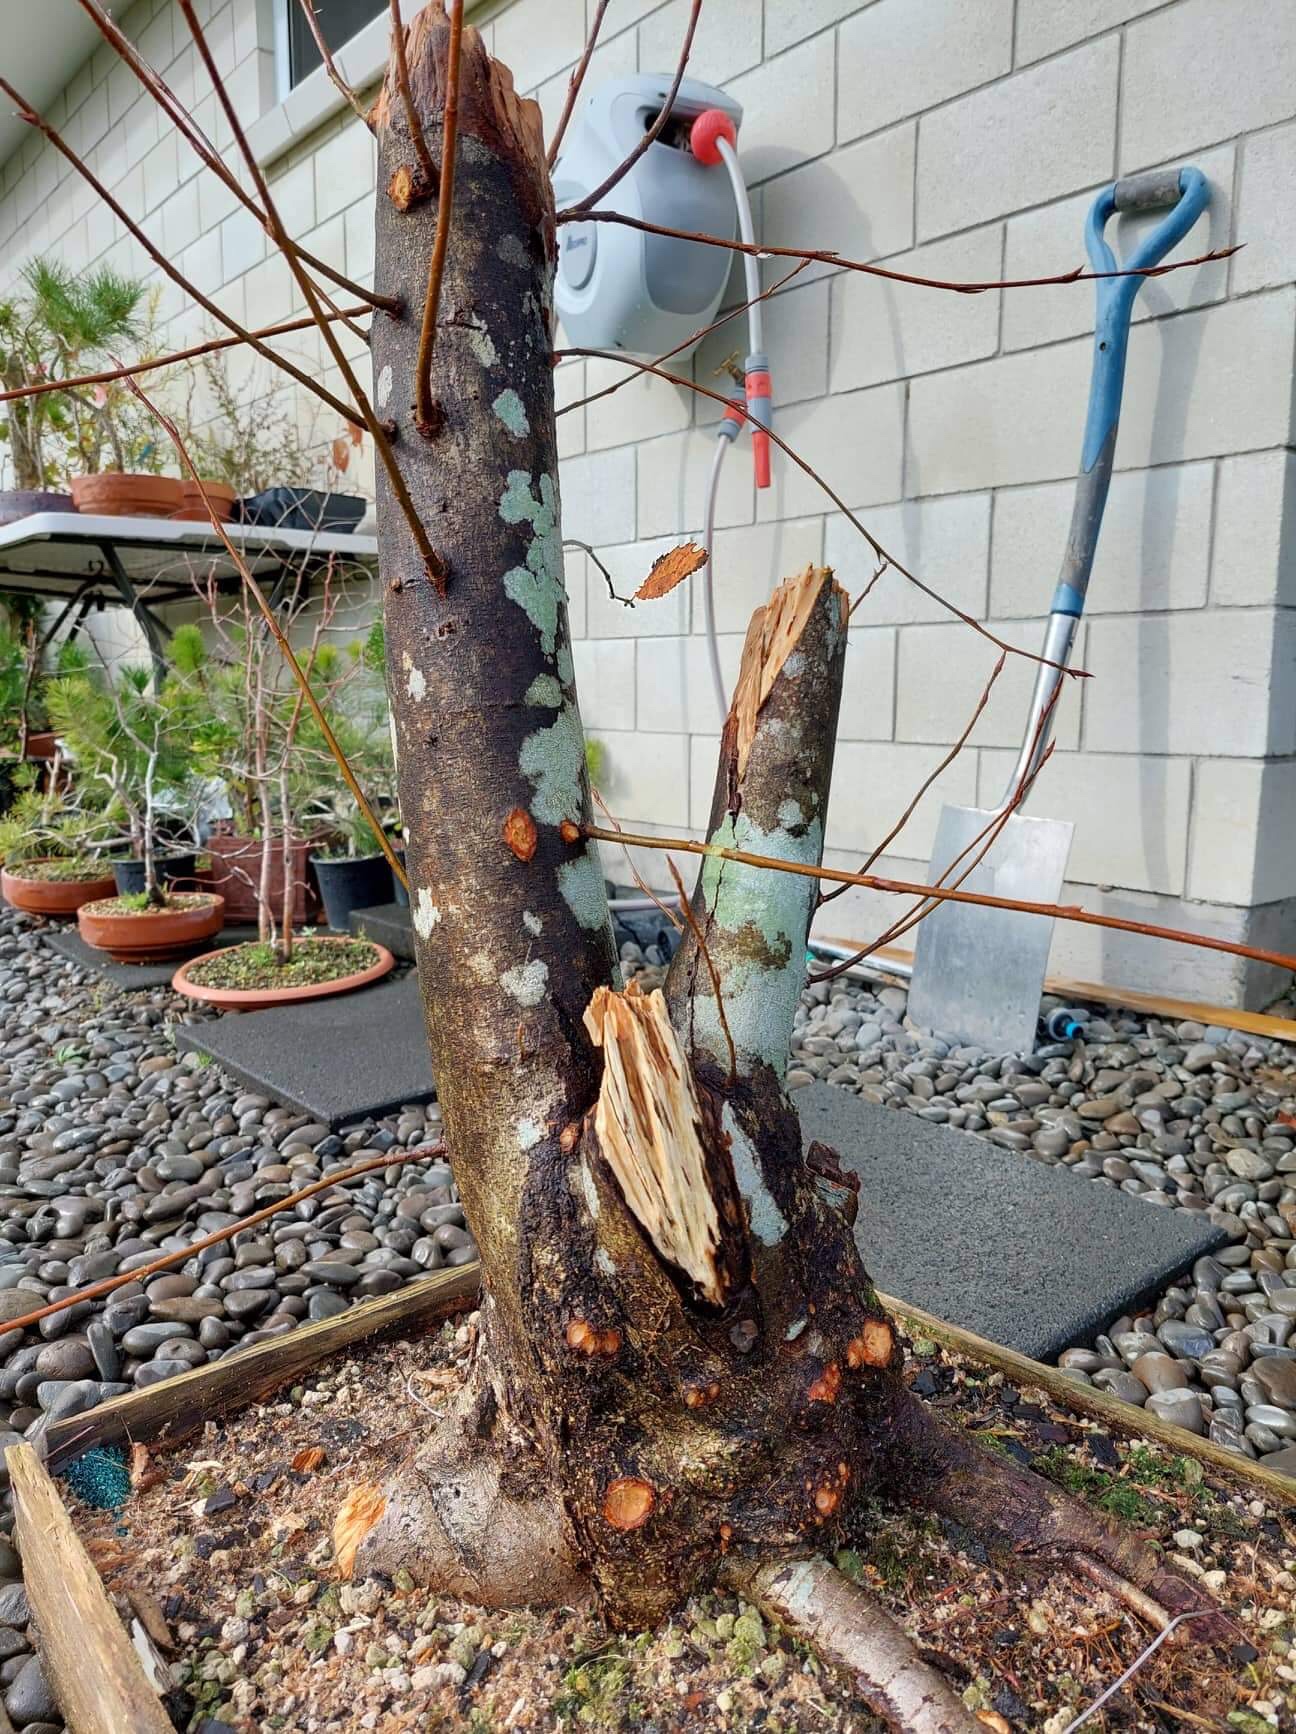
This Cherry tree was collected about a year ago and was just a trunk, in this case a triple trunk at collection. The original tree was about four metres high and in a forrest which means it was quite lanky with no branches towards the bottom. One year later and it has put on a lot of new growth and the fine root development is spectacular.
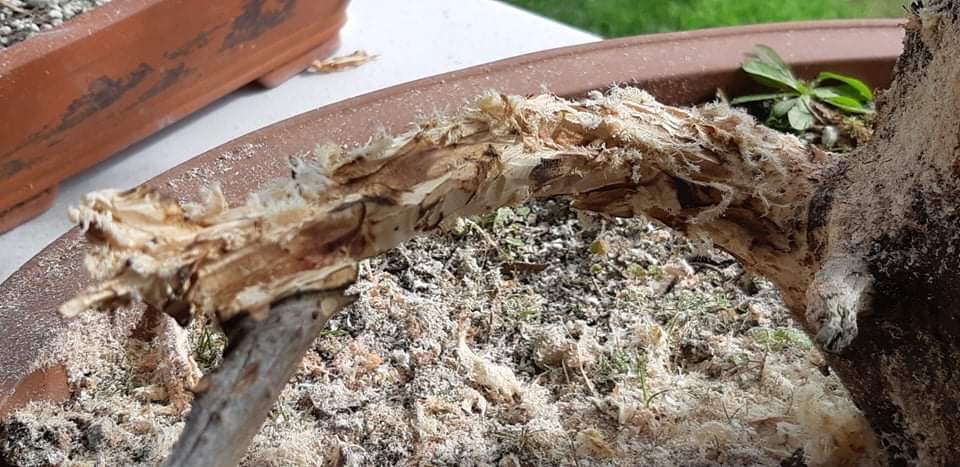
It has three quite large scars on the end of each trunk and then also a very big one on a chopped root. The middle trunk is dead and has been at collection already. This trunk was rotten and easy to just break to shorten it. As the root scar was going to be large, it was decided to have that at the back.


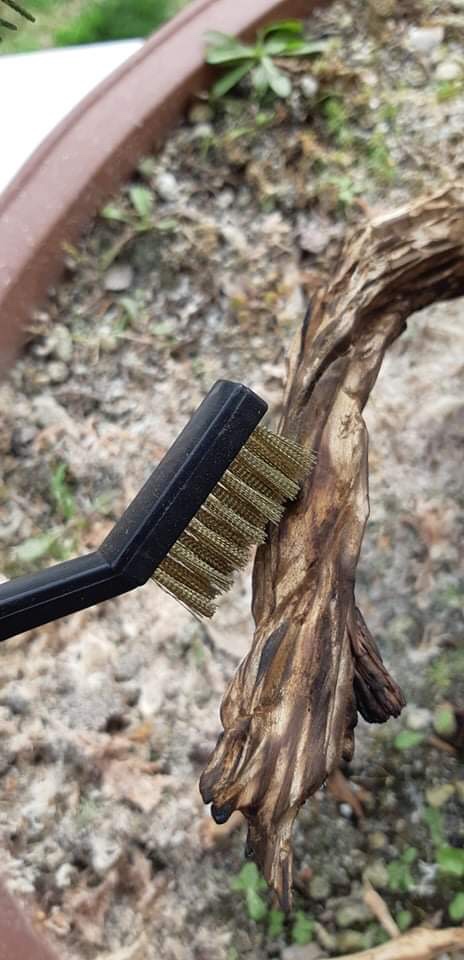
Once the front was established, extra branches were removed and a few at the top were shortened. All branches crossing the main trunks or too low down on the trunks were removed. The same happened where two new branches grew from the same place or they were just too close to each other. A few branches were in a 50/50 situation and these were left for now to be decided on later. Always start by removing large parts first. In this case it was mainly the root which was removed with a reciprocal saw and then the larger bit on the die grinder was used to set the first grooves by also creating some taper. This was then followed up by ever decreasing sizes of bits and once everything was carved, a wire brush and then a nylon brush was used to clean and polish the carvings. By polish I mean brushing vigorously to remove fine threads and fibres left over from the carving. I usually use a blow torch to help with this action, but in this case it was decided to not use the torch.

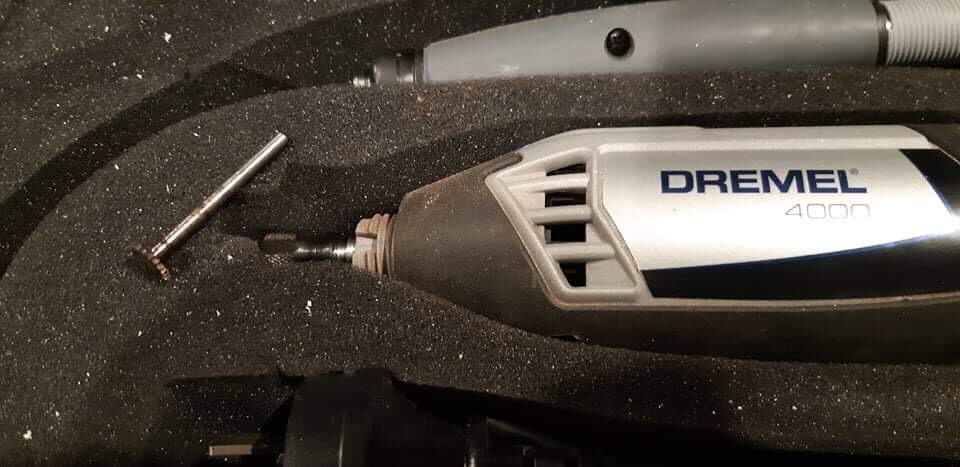
Once this phase was completed, the carving started. This was a three hour operation using different sized carving bits with both a Dremel 4000 as well as a trusty old die grinder.


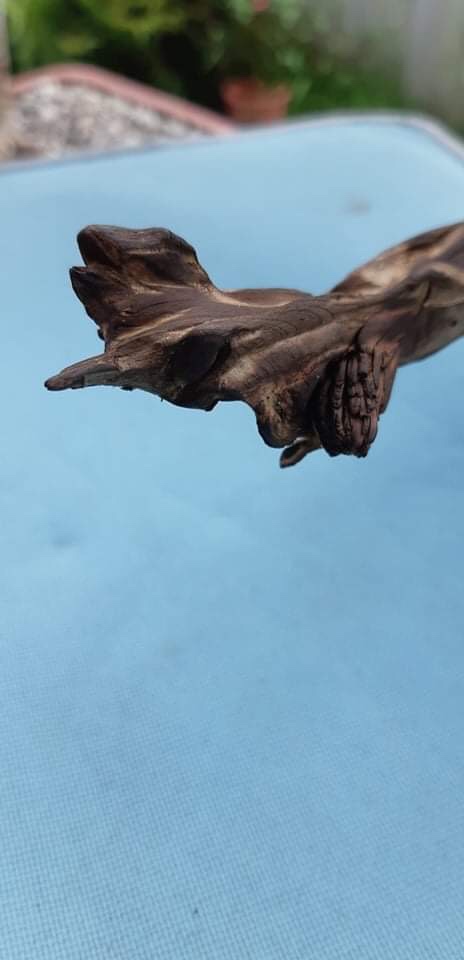
The last step was now to apply wire and set the branches. A few more branches were removed and it was also decided to plant the tree on an angle leaning forward a bit more once Spring sets in. This will be a naturalistic looking tree with a large and rounded top with the shorter trunk carrying the lower branches on the left hand side. There are still a couple of branches that will probably be removed, but that will come later depending on further development. An example of this are the two branches that looks as if they are coming of the front of the main trunk about a third from the top.
Now it will rest and as soon as the buds swell a fertilisation program will start and a sharp eye be kept on the wire as it will cut in quickly as the tree grows. Watch this space for updates.

Subscribing to this blog will ensure you see the progress of this tree over the years to come.


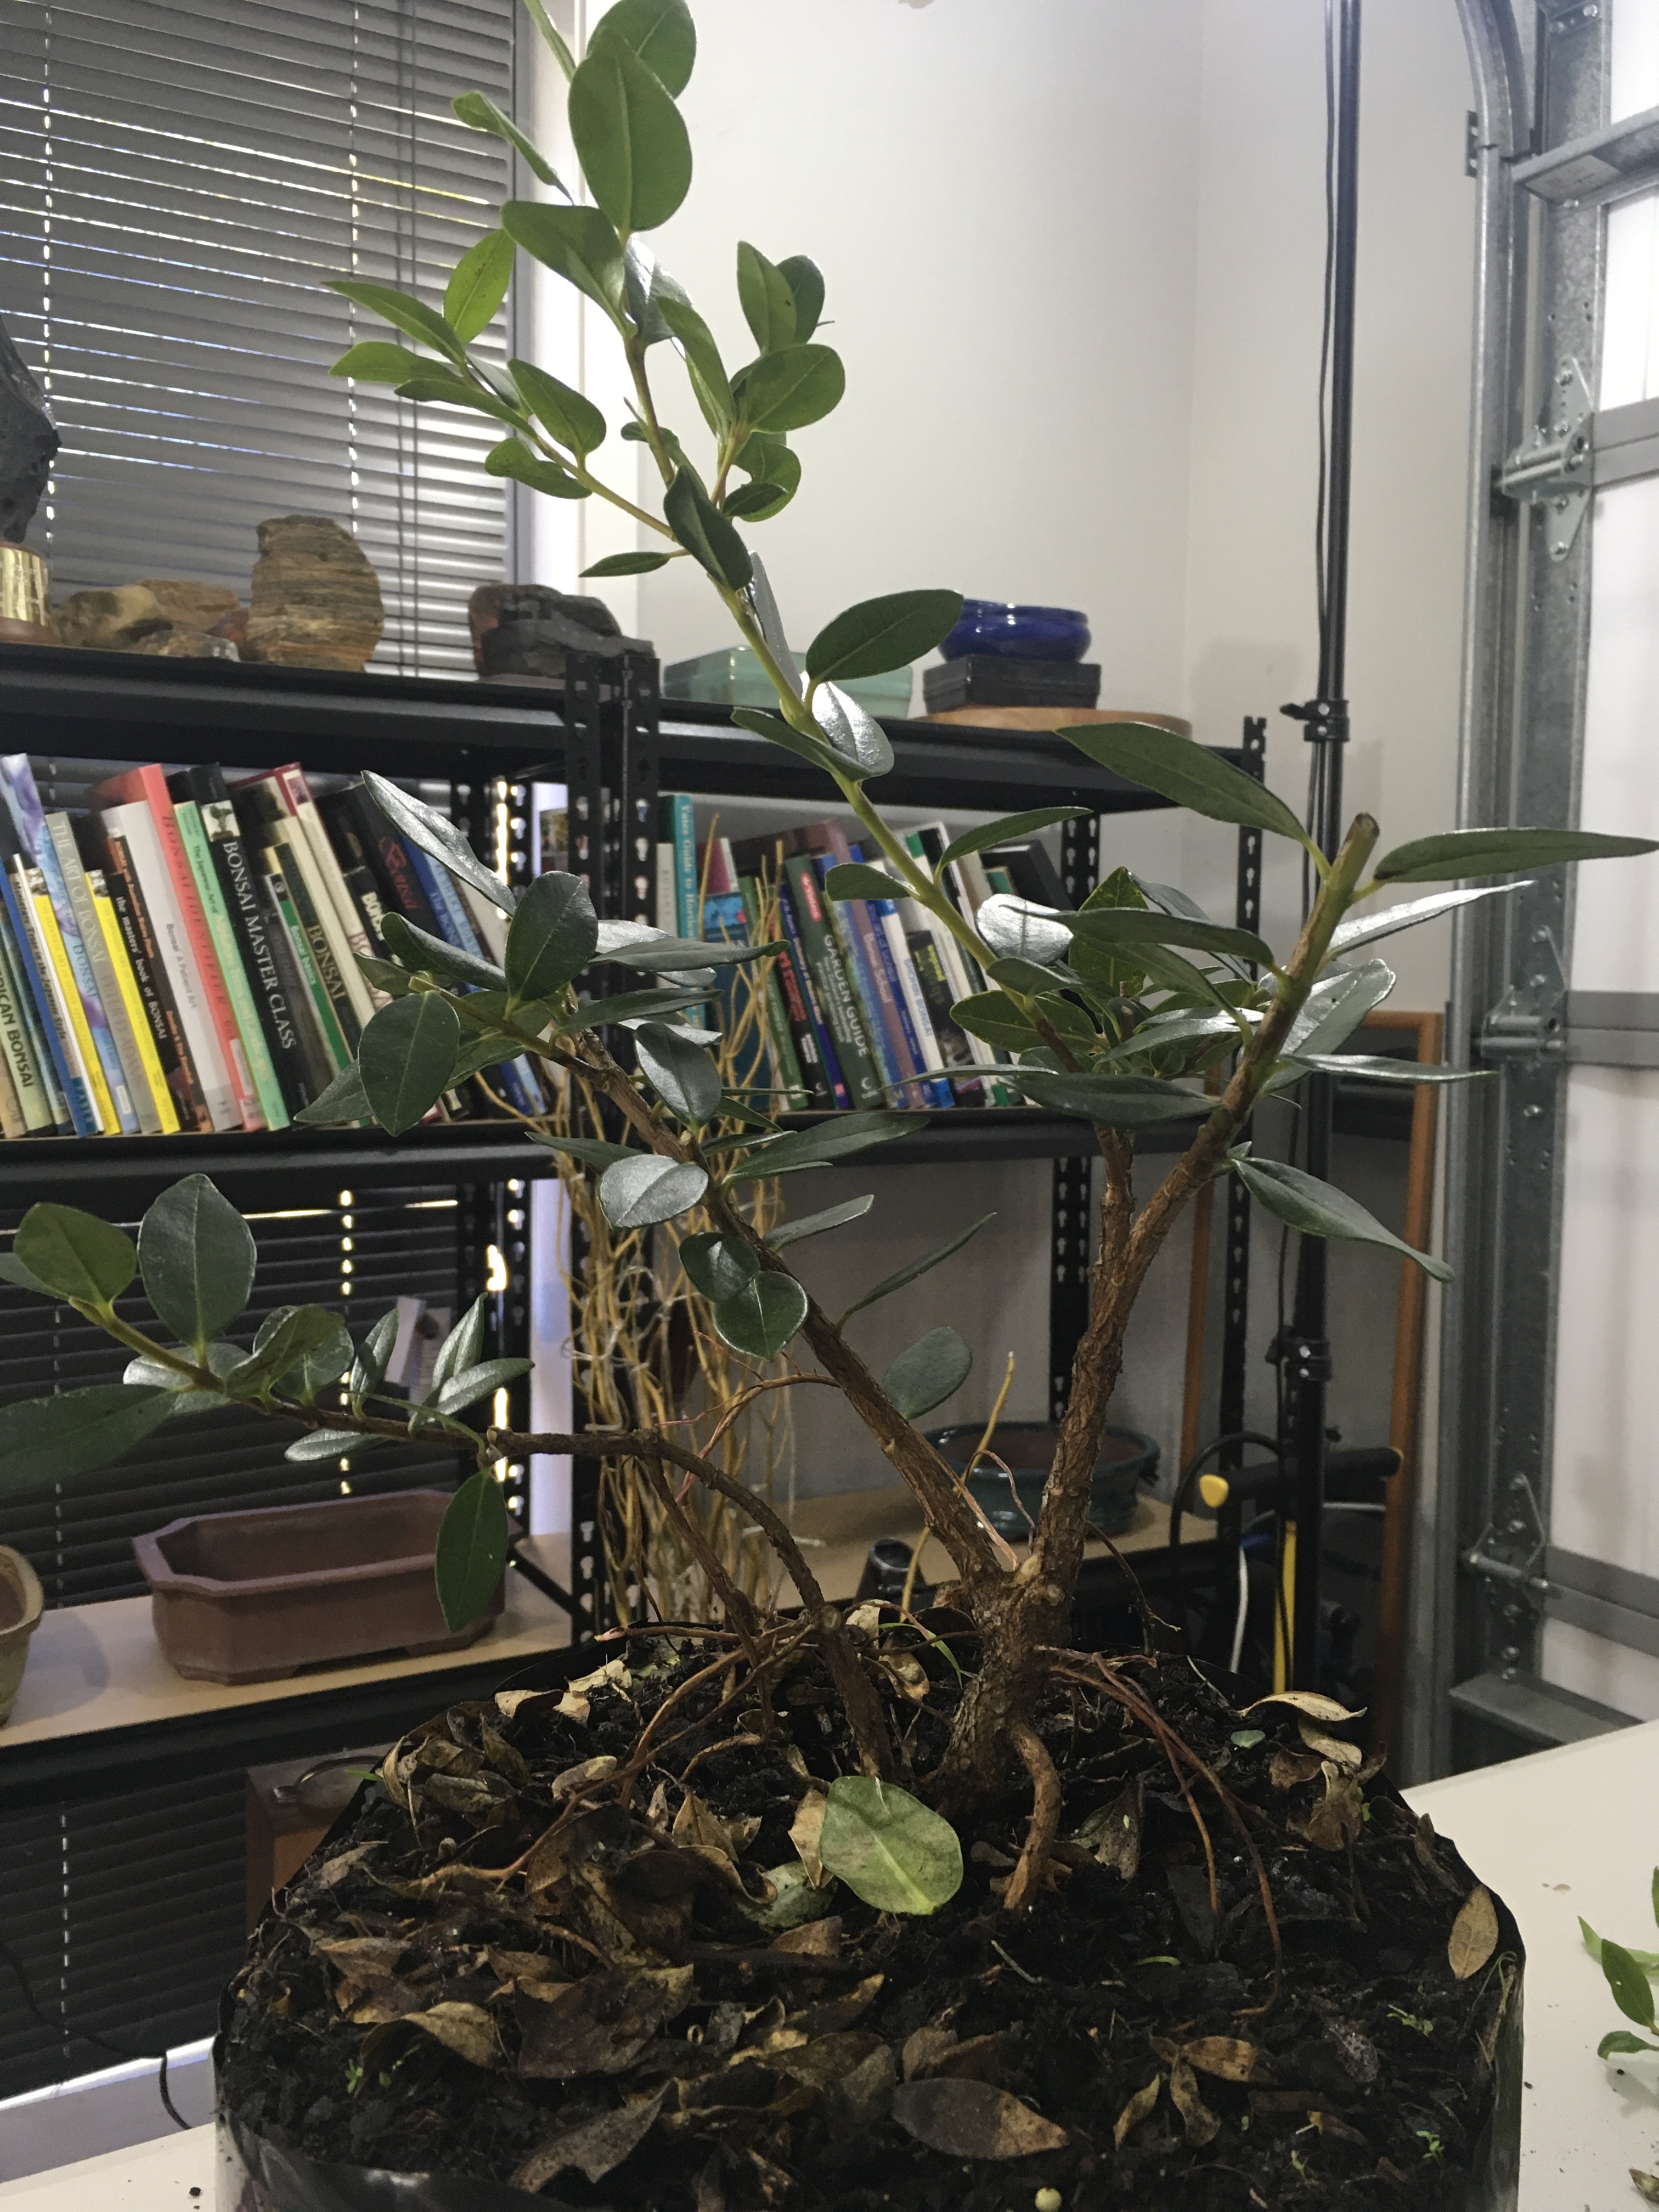
On 28 February 2021, I posted a blog article named “Off the back of a truck”. https://bonsaiplace.net/2021/02/28/off-the-back-of-a-truck/
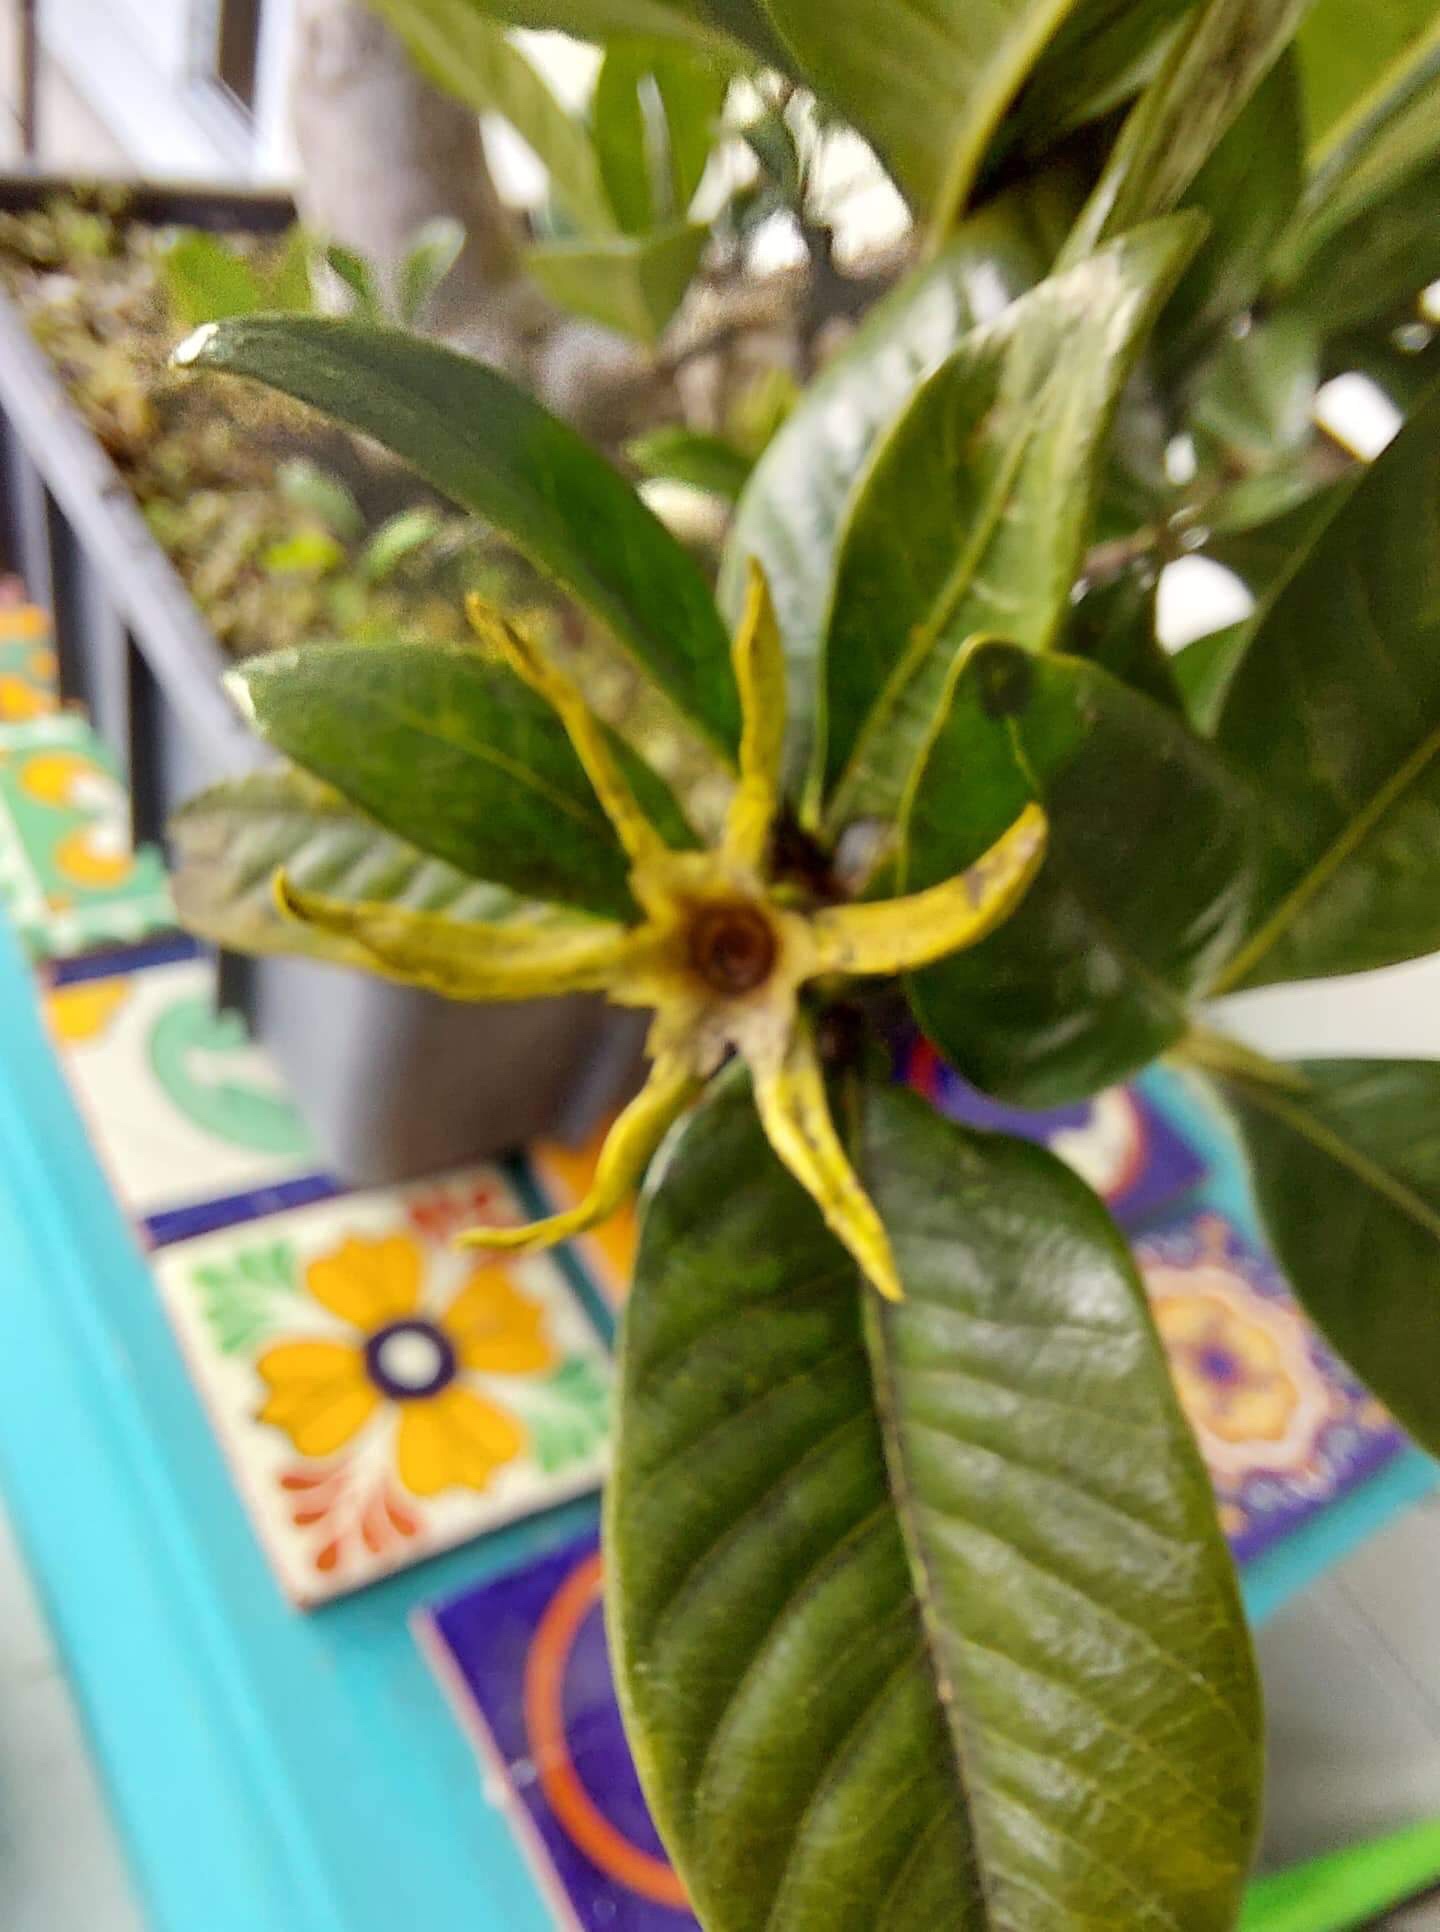
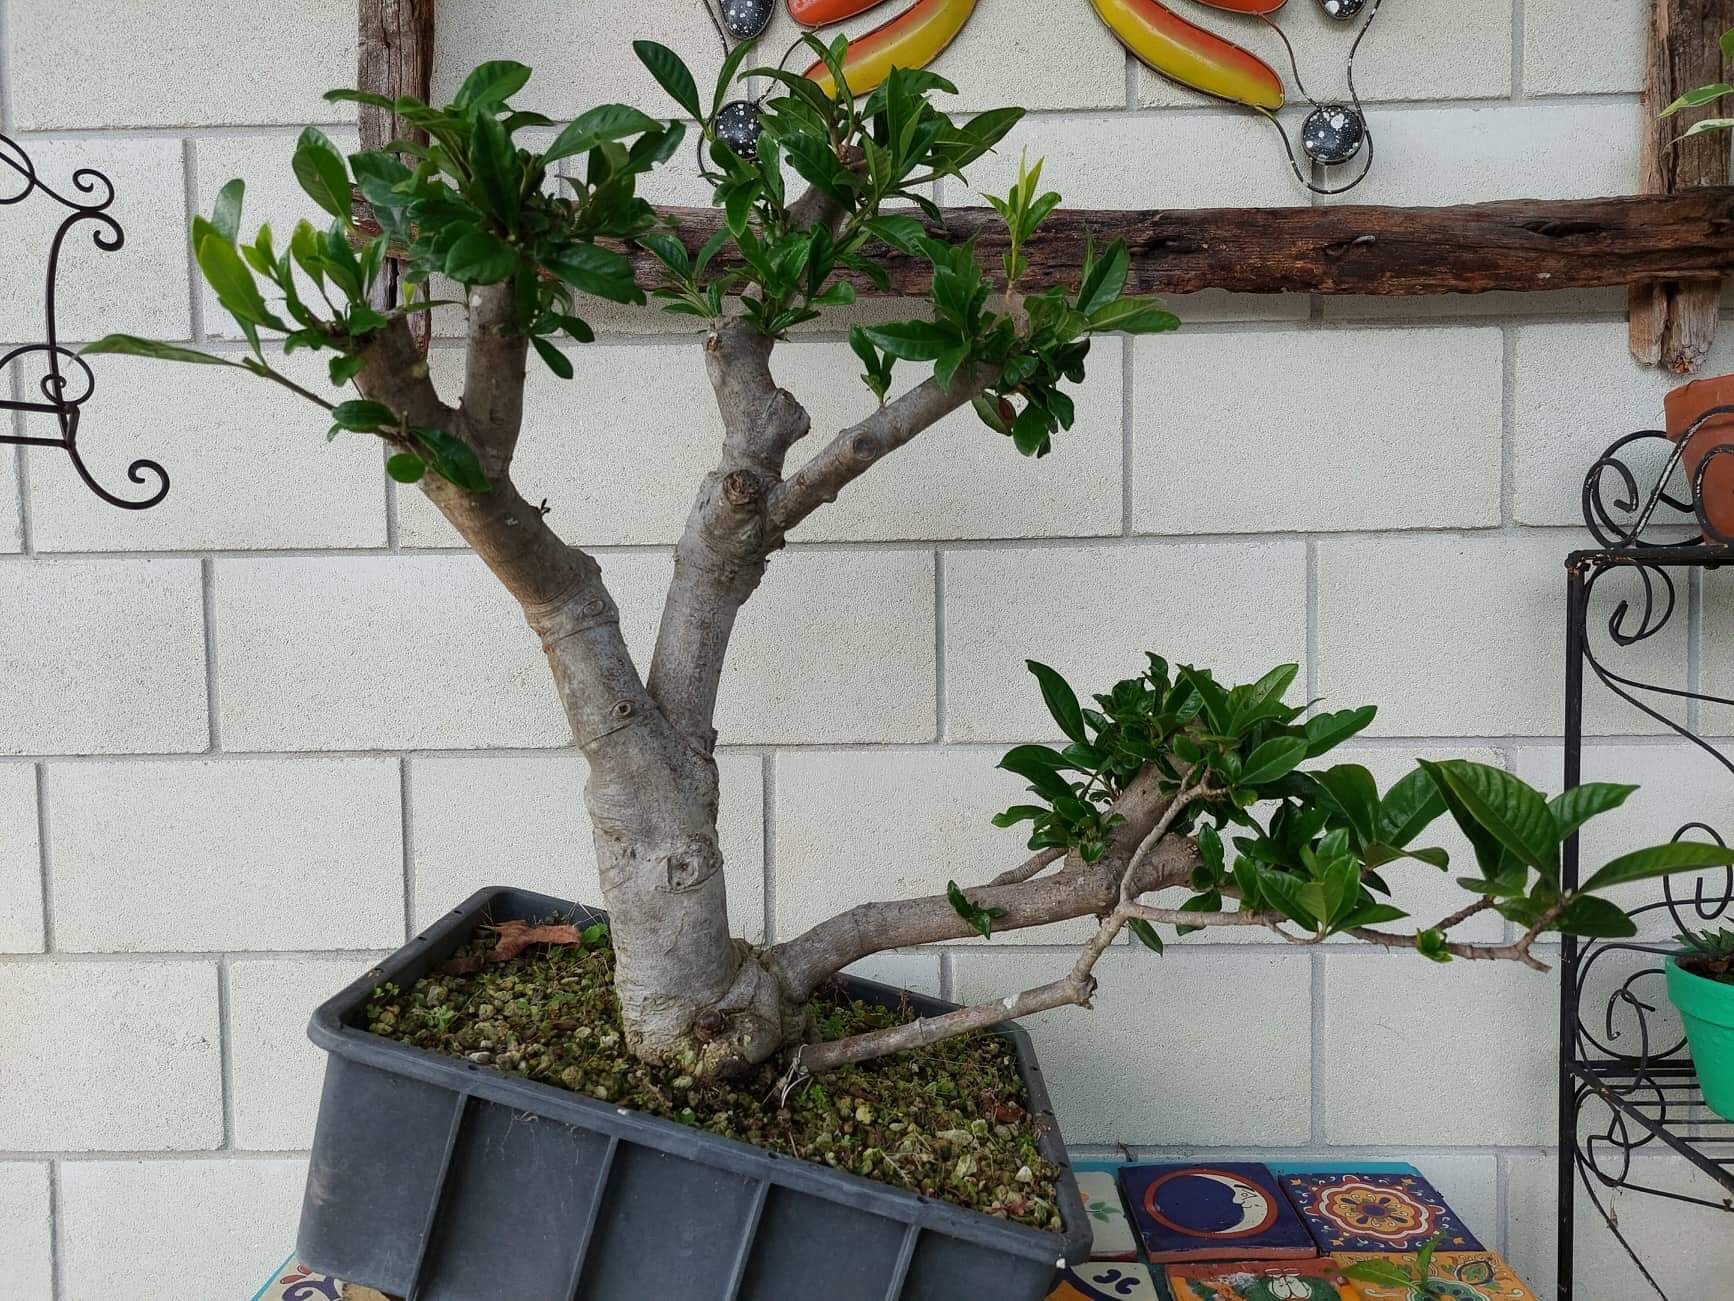
In that article I speculated about the specie of plant and my guess was correct as it is indeed a Gardenia. It flowered not too long ago, only one flower, but between that and the glassy leaves, the identification is now locked in.
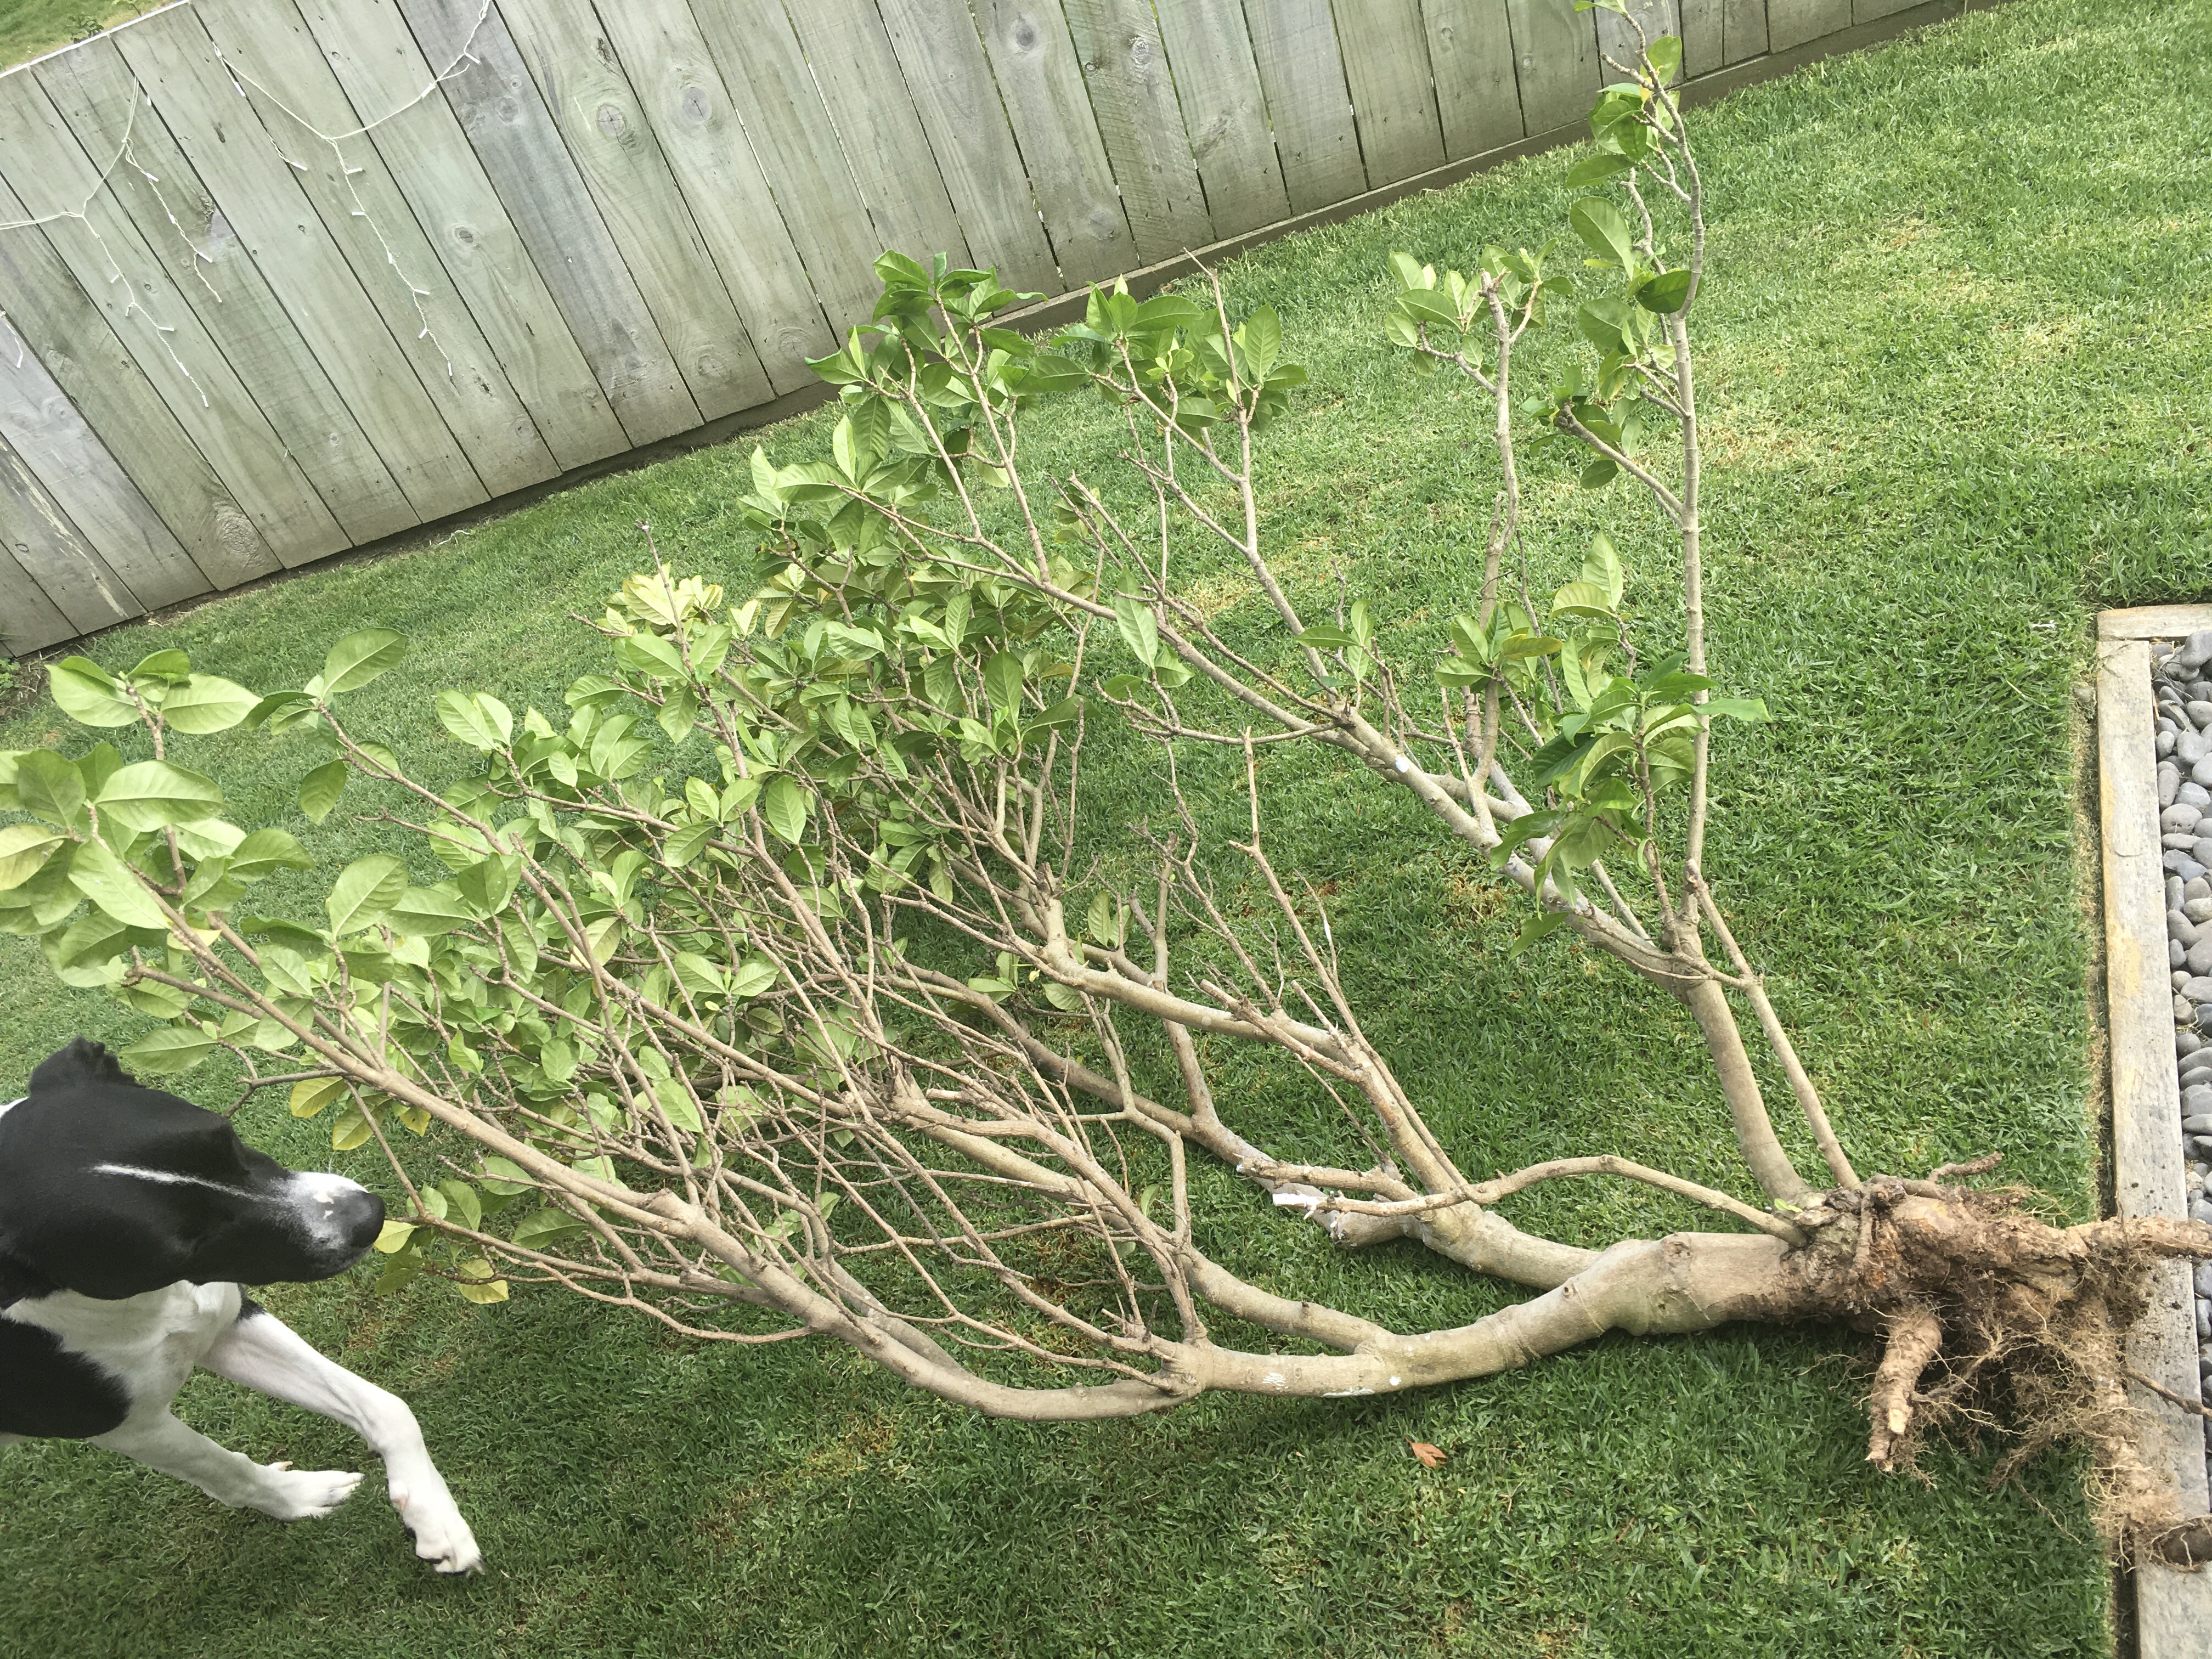
The photos below are of the plant when I found it on the back of a truck on its way to be dumped as well as a photo when it was potted up on that day.
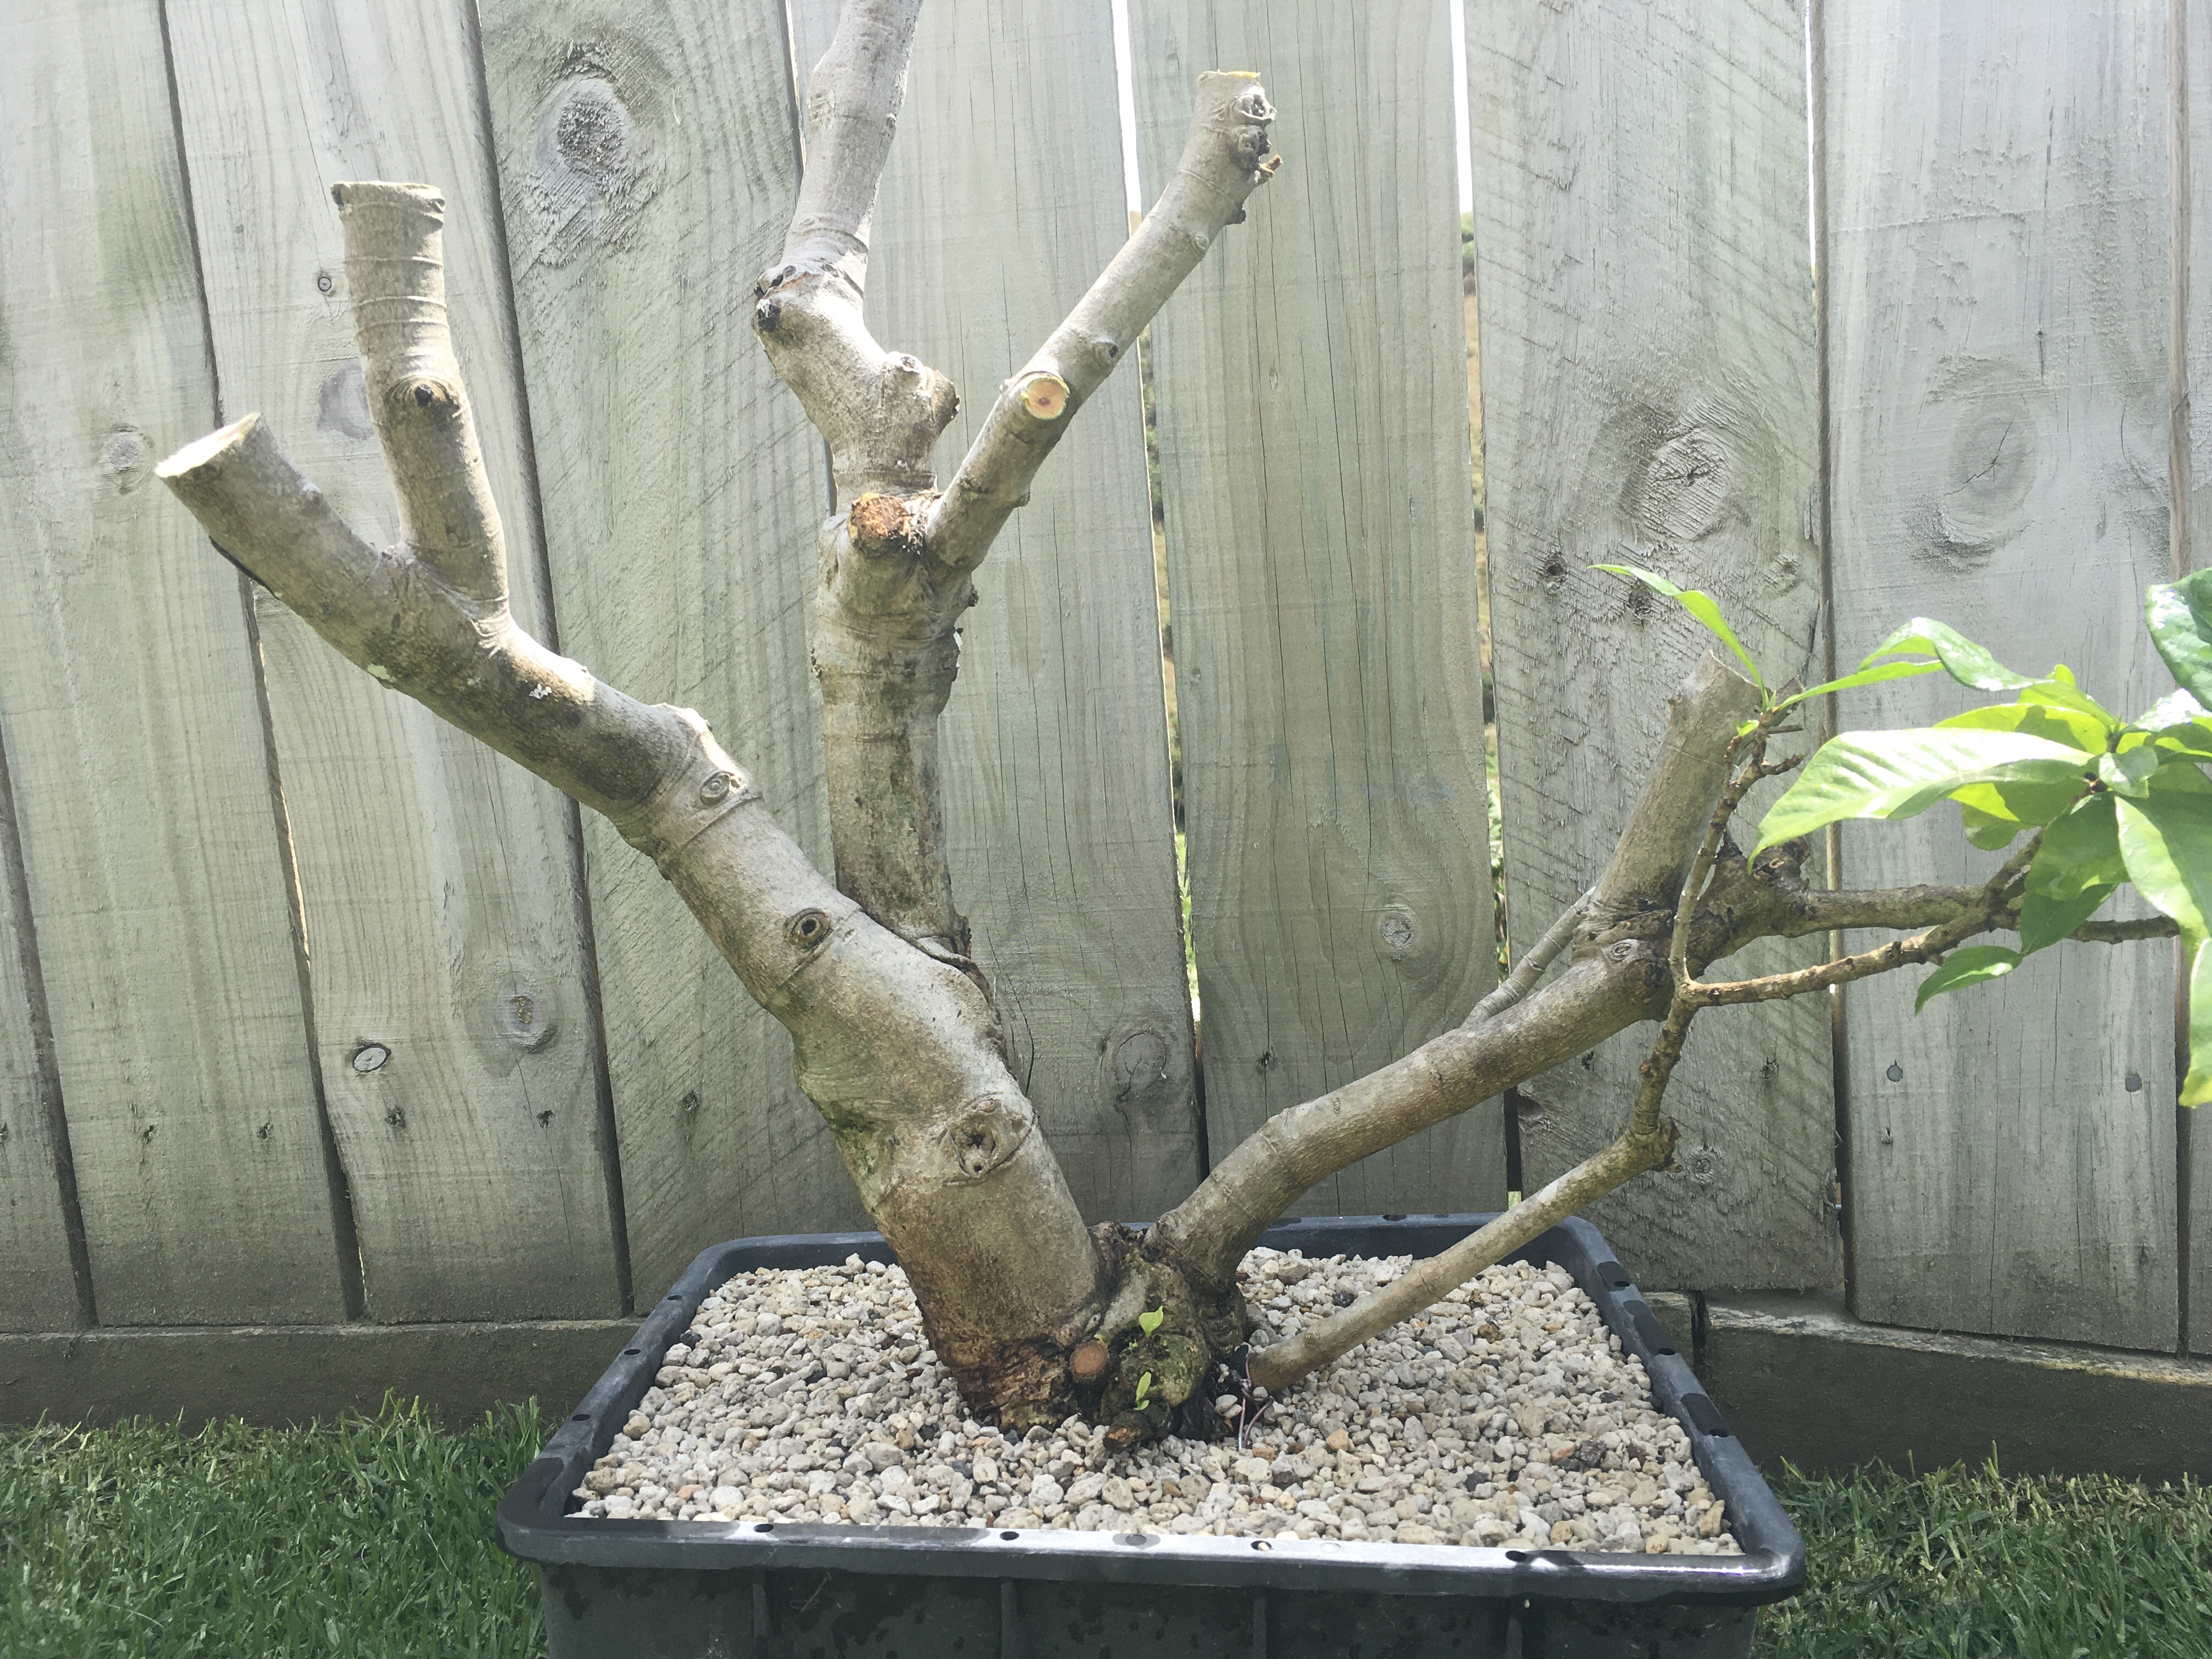
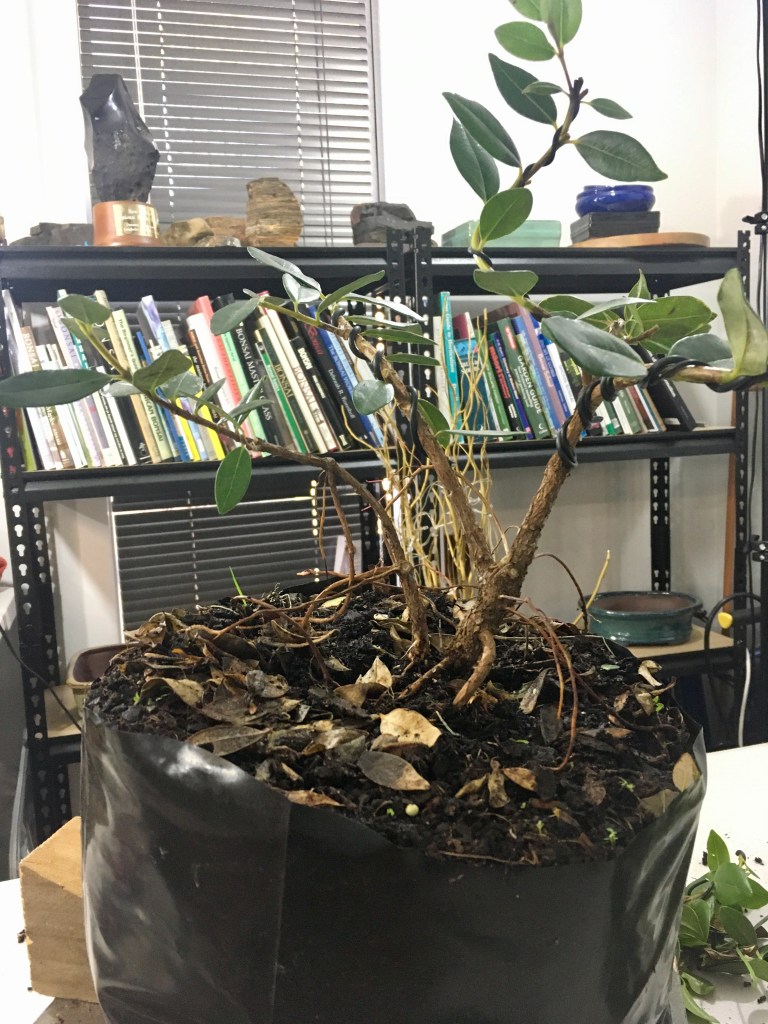
This is now just more than fifteen months later and the photo below shows the growth since the first planting and as mentioned, there was also a flower during the last summer.

The tree has been fertilised regularly, mainly with a liquid seaweed type of fertiliser, but other than that, mainly left alone with a regular watering regime. It is now time to do a bit of thinning of the branches, light wiring where necessary and inspection and a bit of work on the pruning cuts.

There are two things to consider now. The one is to change the angle as shown in the picture below and to even tilt it even more in the direction shown.

The second one is to remove the thinner, lower branch on the right. That might even be done sooner rather than later.


In summary. This is the start and where we are today.
Now it goes back to the bench and another year of watering, fertiliser and providing optimum growing conditions for this tree to thrive.
Please comment on this article to show your support and like it if that is what you think it deserves. Thank you for reading.

I am always on the lookout for new material and prefer to work with material that has accumulated some age and character through being garden plants or from nature during the first phase of their lives. Sometimes they come for free and sometimes you have to pay. These two Azalea plants were advertised for free and just needed to be dug out. That took two minutes as these are shallow rooted plants.


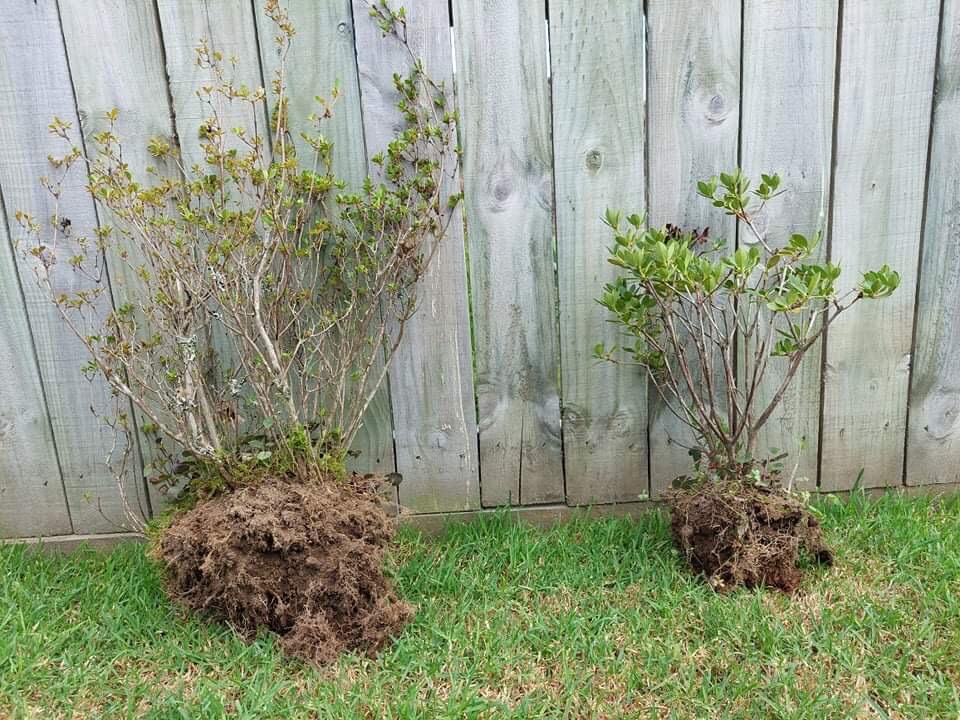
Freshly dug Azaleas and the first step is to remove all dead branches and then also to remove most of the garden soil. It is better to remove all old soil, but in some cases it is ok to leave some of the garden soil depending on the season. You do not always have a choice when the plants become available and then you have to make informed decisions about how far you can go, especially when it comes to root work.
These two were potted up and we also managed to get seven smaller plants off the larger clump. Needless to say, these two are clump style and will be grown and refined over the next few years as such.

Aftercare is the most important aspect when it comes to doing work on plants out of the optimum season. Watering is a big part of this and after I have watered the plants in, I always water with a nutrient rich tonic and fertiliser and prefer liquid ones. My go to preference is Swift Grow due to the fact that it is organic, contains all needed nutrients and very important for me, the right probiotics to get the roots off to a great start.
Please subscribe and leave comments.
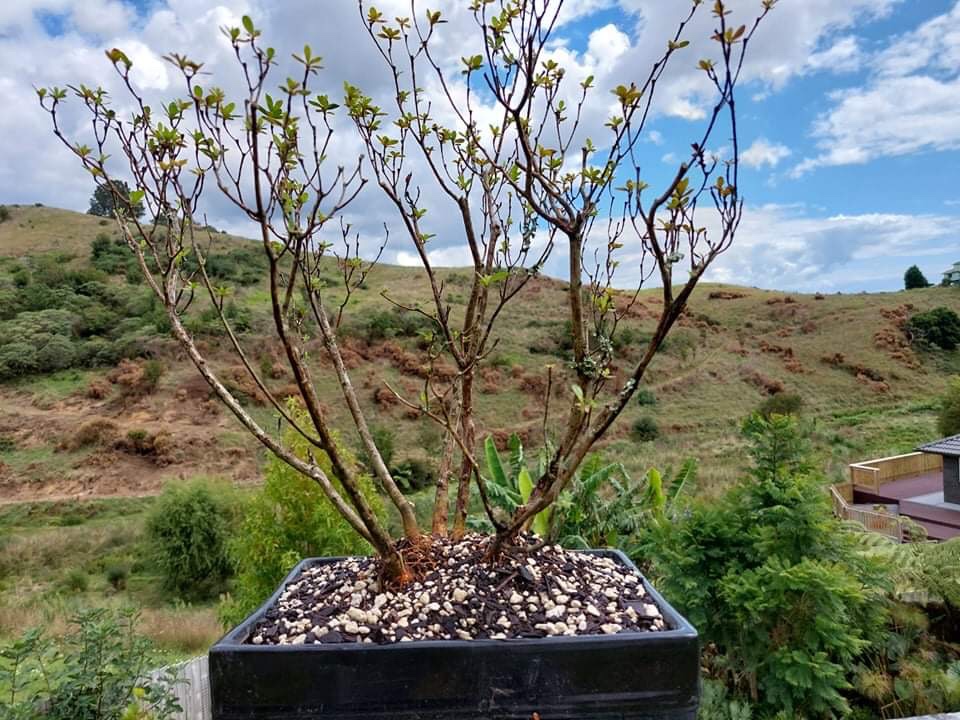
With no national shows in Spring and very little club activity due to Covid-related restrictions this year, it gave the opportunity to allow trees to just grow, recover and gain some vigour. Or is it just laziness or procrastination that allowed for some of my trees to get out of hand, especially in the weed growing department. With a bit more time on my hands due to the summer break, it is time to get some control back.
My normal way of working is to start at the bottom and this case was no different. I ignored the weeds for now and first took all the dead little twigs out. In the process of doing this, I discovered a solo paper wasp nest and had to remove the culprit and the start of the nest first.

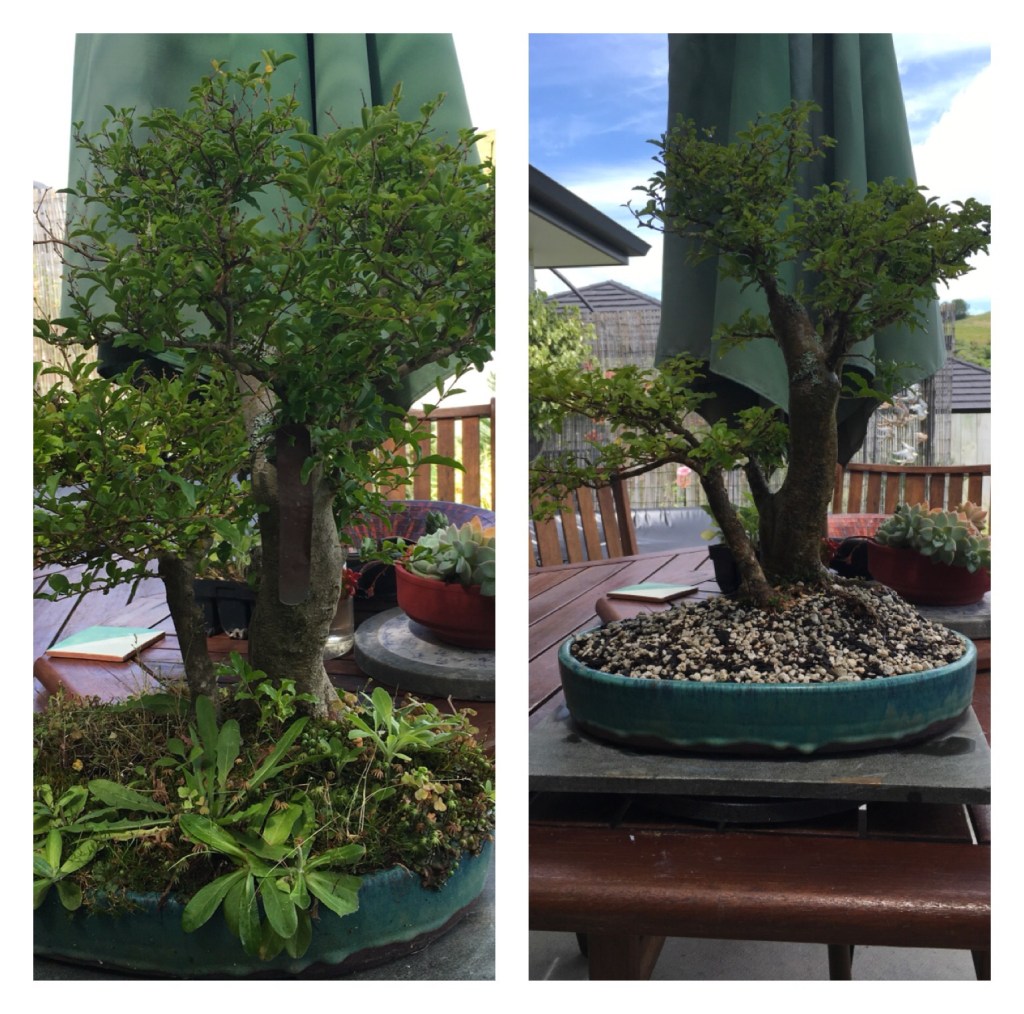
Next job was to take all unwanted growth out. This included spent flowers, crossing branches, branches going against the flow, branches and twigs growing up or down. This created a more natural pad shape and with the trunk now more open, it was decided to turn the tree very slightly to the right. That means repotting and in the middle of summer, not such a great idea. This tree species is treated as a weed in New Zealand due to its indestructible nature, spread all over the place and pushing native species out. In other words, it is quite hardy.
The tree was taken out of the pot, some old soil was raked out, but no roots were cut. This took care of the weed problem as well. Back in the pot with some fresh soil and also the slight twist. It is now well-watered and in the shade for a few days before it goes back on the bench.
Weeds: As Bonsai grow in relatively small pots and the soil medium is quite porous, you do not want weeds in your soil competing for the same food source. It is better to keep an eye on this and remove weeds as soon as they appear. Not only will you have more nutrients available for the tree, but by removing weeds while small, you also do not disturb the tree roots when you have to remove larger weeds.
In summary for summer maintenance:

Let’s drop the cat in the middle of the pigeons by saying that most art forms have specific styles or movements that are easily recognisable through look, technique or application. This article is just one of many having a good go at describing different painting styles (https://indonesiadesign.com/story/major-art-painting-styles). These include styles like Realism, Impressionism, Expressionism and many others. The artist themselves can in a lot of cases be identified by just looking at their work. Bonsai does not have that and there the cat goes.


How does this relate to Bonsai? Most Bonsai artists will be able to explain the difference between Bonsai and Penjing (see Zhao Qingquan’s work) and then there is also the nuggets of wisdom wanting to explain Niwaki as an art form, and we will rather stay away from saying too much about Topiary (just joking). Then there is also Kenji Kobayashi describing Keshiki Bonsai and many other attempts at identifying styles.


A book of great value is that of Charles Ceronio, Bonsai styles of the world (2015) in which he describes the structural styles of Bonsai design. What I am getting to here is to see if we can identify styles like it is done with paintings as mentioned in the first paragraph. There are attempts made by some artists to add to this knowledge and an example of this could be Walter Pall talking about the Naturalistic style. Is that even a thing? Taking a hedge trimmer to a Bonsai and giving it a name is probably not the best of attempts to give a style a name.

It is quite clear that there are many easily recognisable trees or even collections of trees that can be attributed to specific Bonsai artists. Goshin would be a good example of this. I can also think of some of Masahiko Kimura’s trees as easily identifiable. Is that true for many of the current big or trendy names that we currently have in Bonsai? Can you pick a Bjorholm, a Noelanders, a Neil, a Pall out of a line up of trees?


Then there is also a debate going around on specific regional styles. Is their a European style or an American style? What we do see is that artists use native trees from specific areas and do a wonderful job with those trees, but at the end of the day, these trees still relate back to the basic design styles of Bonsai and not necessarily an artist or a region or a philosophical style. The one exception will be that of Literati. Is that the only design style that can be linked to a time period or a movement?


Where to with this argument? Probably nowhere and does it really matter. We have the basic design styles in Bonsai and many derivatives from that, we have individual expression in each tree and if that is recognisable as the work from a specific artist, great. Do we need to link it to the “isms” that we find in other art forms? So far it has been restricted for Bonsai or maybe it is just case of it not being necessary for the Bonsai world. Or is it? Is this the missing bit for Bonsai to be recognised as a true art form? Maybe we can just enjoy Bonsai for what it is and not overcomplicate matters by trying to find its place in mainstream art forms. It could be that it is so far removed from other art forms that the vocabulary needed to describe it is very different. Maybe the vocabulary must still be worked out?
Whatever it is, it is art, a living art. It is an art form that humans use to express themselves within what nature provides to do so. It could be that it is too free to put in a box and put “ism” at the end of the name of the box.
A previous blog post addressed sculpture as an art form and how it relates to Bonsai (https://bonsaiplace.net/2021/03/28/bonsai-as-sculpture-an-art-form/). This blog post will take an more practical approach by making use of photos to describe the process.

Carving is usually done to create or enhance jin, uro (holes), shari (stripped bark) or getting rid of areas where large branches were removed. In this case a large branch, about one inch thickness, had to be removed and it was decided to leave a 15cm piece of it and sculpt a jin (deadwood) out of it.

I use a die grinder with a carving bit to remove material fast and to roughly shape the dead straight branch by making grooves in curves and alternating the depth of the grooves. Once this is done I burn the jin to get rid of wood fibres and then repeat the process with the trusted Dremel and a smaller carving bit.


As mentioned, burning the jin with a butane torch gets rid of the loose fibres, but it also helps to get rid of sharp edges and tool marks. After a heavy torching, the jin is brushed with a copper brush and then with a nylon brush. Sand paper can be used to smooth areas that needs it, but I find that the brushing works well on its own.


To preserve the newly carved jin, I wash the whole tree off and then let it dry and rest for a few days. Lime sulphur or a wood hardener can then be applied. For a darker finish, mix some ash (burnt paper) in water and paint on. Some of the grooves can also be painted by making use of black ink. All fluids should be diluted. Lime sulphur is usually diluted with water 50/50%.
Safety aspects:
Please like and subscribe to this blog to be notified when new posts are done. Thank you for the support and feel free to shore this post as well as the blog site.

In November 2015, the very early days of this blog site, I wrote about Metrosideros excelsa or Pohutukawa as Bonsai and included a few photos of these magnificent trees in nature. This tree is also known as the New Zealand Christmas tree. The link to that blog post is here.
https://bonsaiplace.net/2015/11/29/pohutukawa-as-bonsai/
For this blog post I will style a Pohutukawa as a Bonsai. As can be seen from the photos in the linked post, these trees very naturally present as multi trunks with great root structures and the very prominent aerial roots. it is this root structure and especially the aerial roots that make these trees ideal for root over rock designs. This tree will not be a full root over rock, but a rock will be placed next to it with roots growing over the rock.


This plant was grown from a cutting for a few years and these photos clearly show that these trees are basal dominant. It basically means that it will keep on growing new shoots from the base compared to tree which are apical dominant where the new growth is at the top of the tree.


As can be seen from the photos above, the first step is to search for roots and in this case roots in the soil and not the aerial roots. I find it better to remove the top edge of the plastic bag and sometimes remove the bag or pot completely. The presence and position of roots, especially radial roots will help to determine the orientation of the tree. In other words, the front of the tree and the first ideas of what the design could look like. In this case quite prominent roots were found and spread around the tree which means we can now look at the above ground structure as the placement of the roots allow us to look at multiple design options.


The next step is to remove all unwanted growth. To stay more or less true to the natural growth pattern Pohutukawa, the decision was made to design a multi trunk tree with three trunks. Really only two, but the thickest trunk has a fork which visually looks like two trunks. All three trunks have different diameters which makes it visibly more pleasing. All inward growing branches are removed and decisions are made about the three trunks. This includes things like direction, placement and length. As the three main trunks did not grow naturally in the directions needed and the centre trunk needed to be compacted, wire was applied.


The final product with a rock added to add visual weight on the right hand side and also allow a backdrop or prop for some of the aerial roots to grow over.


It is important that Bonsai trees are three dimensional. The best way to check that is to view the tree from above. Visual depth adds to the aesthetics and overall view of the tree.
As for all trees, the aftercare is now of the utmost importance. As the pot is not that shallow, not many roots were removed, but the tree will still be kept in a protected spot, out of the wind and cold temperatures. Watering is now also important as well as sun exposure. Just damp, not wet and limited afternoon sun is what is now needed for the further development of this tree.
Have you ever wondered how water travels from the soil into the roots and then up the stem to the leaves? Well, here we go. The process is called transpiration and starts in the roots through a process called osmosis. This is the movement of water across a membrane from an area of higher pressure to an area of lower pressure.

Now I am going to confuse you completely. I already said that it starts in the roots, but the condition for the process to happen actually starts in the leaves. As the water accumulates in the leaves, the internal volume of the leaves now have a higher pressure internally compared to the atmospheric air. That means that the water leaves the leaves through a structure called a stoma. There are hundreds of these on the leaves and they can open and close depending on the plant’s water needs and the climate on the outside. Almost like little valves.

Now we have the picture on both ends of the tree. The water flows in through the roots due to water pressure in the soil, it moves up a bit in the tubes (xylem) as these are very thin and act like thin straws. Have you ever noticed how when you place a straw in water how the water level in the thinner straw is higher than the level in the water. That is called capillary pressure.
What now happens is all of these work together. The water is pushed into the roots, the narrowness of the tubes give it a bit of a head start and then the pull from the leaves draws it further up the stem or trunk and the flow happens. This can happen as fast or as slow as the conditions dictate. If everything is perfect, a continuous flow will happen, but as soon as something changes, the tree will adapt. Let’s say there is not enough water in the soil for the osmosis to take place. In other words the pressure is not high enough for the water to enter the roots through the different membranes, well, water will not be taken up and the tree will dry out.

At the other end things can go horribly wrong as well. Let’s say it is a very hot day and a dry warm wind is blowing. That means the pressure on the outside of the leaf is very low and if there is any water inside the leaf, this steep difference will cause water to evaporate or transpire through the stomata and if this happens rapidly and the cells lose their turgidity (pressure), it will wilt and lose structure. If this happens for too long, it is possible that the plant will dry out and leave this earth for Bonsai tree heaven.


Before we get to the practical things to do and look out for, it is important to remember that water travelling through a plant will contain minerals and other chemicals that it absorbs from the soil. It therefore plays a very important role in the distribution of these minerals throughout the tree.
The practical things:
To receive notification of the other articles in this series on the horticultural processes for Bonsai, like, comment and very importantly, subscribe to this blog.
You can also follow us on Facebook as Bonsaiplace and on Instagram as BonsaiplaceNZ.

One thing that is for certain when it comes to Bonsai as an art form is that it is never static due to horticultural and climatic influences. Then we have to throw pests, disease and the odd mishap into the equation as well. This little Thuja did meet up with a bug or two one night and the Thuja came of second best. Yes, whatever it was, ringbarked one of the branches and the first sign was that one branch changed colour. Obviously unhappy and on its way to Bonsai afterlife. What to do?

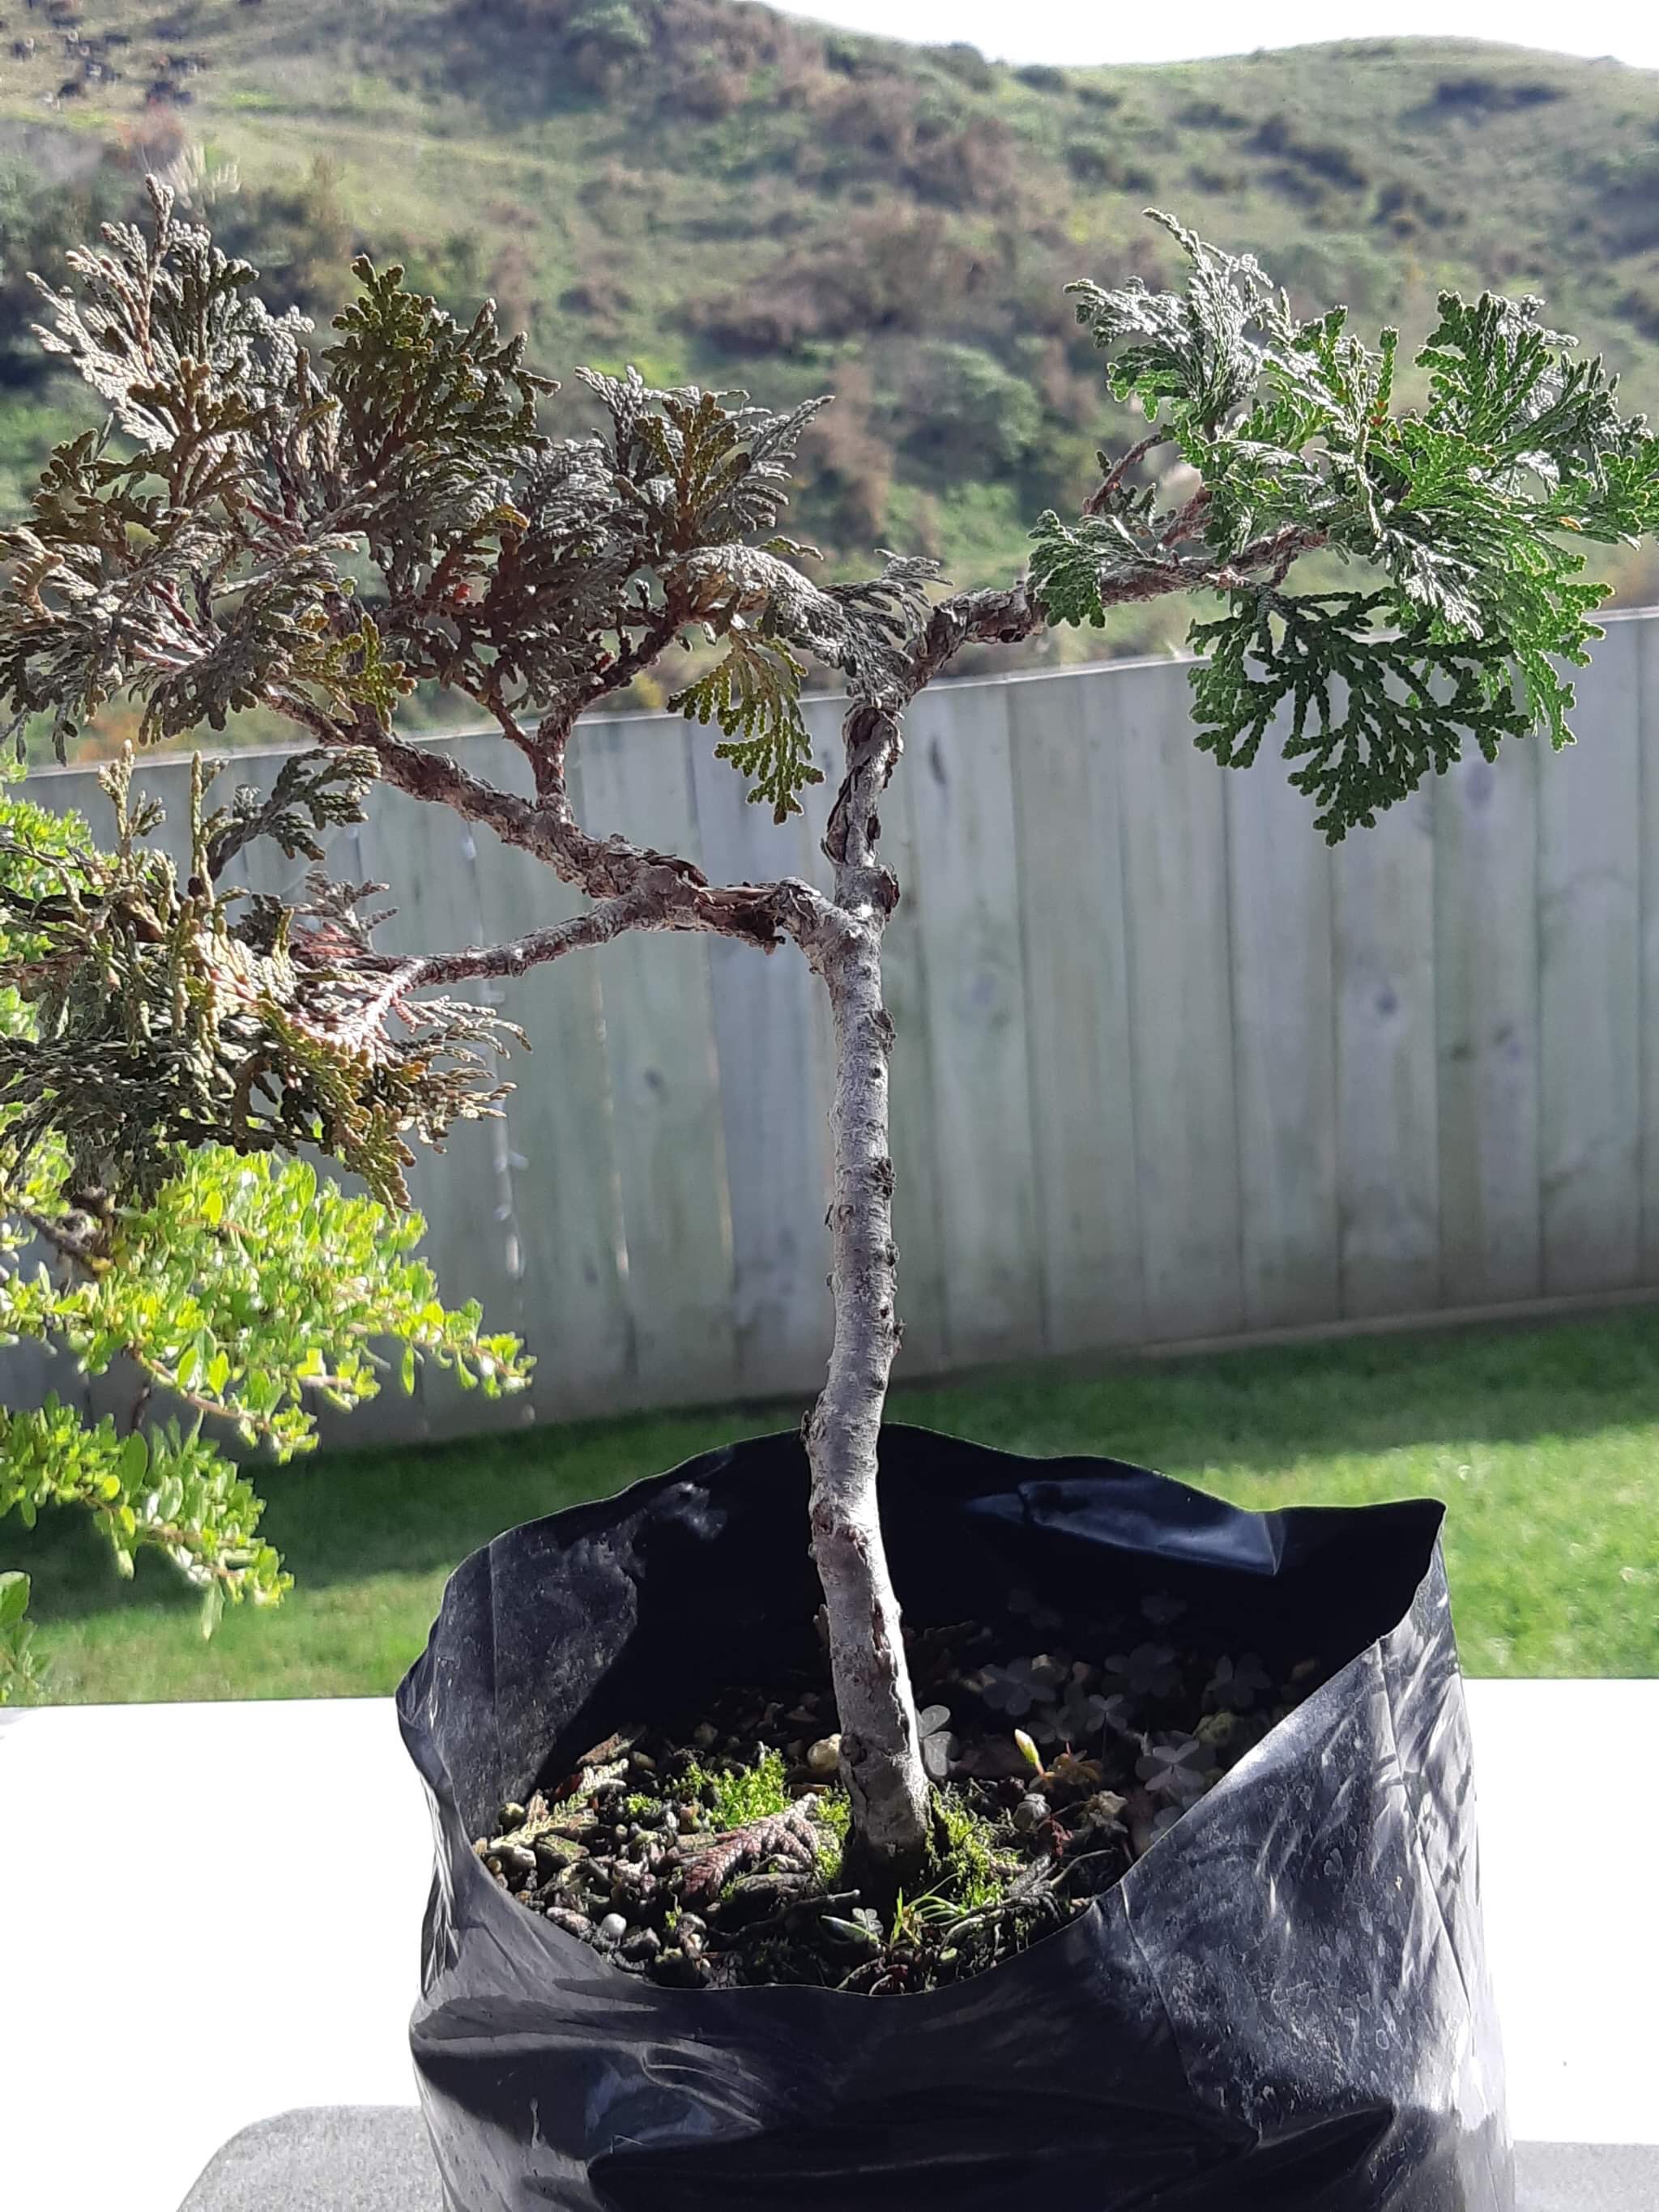

Change direction and from an informal upright change character to start the next phase of its life as a wannabe literati tree. The on its way to death branch comes off and becomes a jin.
Next step is to wire the trunk to the top, give it a bit of a change of direction and reduce the foliage as with the potting comes a reduction in root mass.


The tree is healthy otherwise and with good aftercare will grow into its new life and again stand tall as a proud Bonsai somewhere in the future.


Please subscribe and feel free to leave a comment.
