Committing a Crime in the name of Bonsai Art.

I was confronted with this Mugo Pine and had no idea what to do with it. The two bar branches at the bottom is ugly and the two arms going up from there does not lean itself to any of the Bonsai styles that I know of.

After many days, weeks and months of staring at it from different angles, I one day was working on a small Japanese White Pine that is planted in a crescent shaped pot and a new idea came to me. To do this, many Bonsai “rules” must be broken and the tree put at risk due to a lot of material being removed. This is a calculated risk. More about that later. Here is the culprit in all its former glory.

What to do with it?

The decision was made to remove the one thick branch on the one side and create a two inch long Jin out of it.

The Jin on the right.

Then the other branch was stripped and Jinned as well.

One short Jin and one long Jin.

This longer Jin is now wired up and bent in the shape of a crescent, the same as what a crescent shaped pot would look like.

Now the only branch that is left is shaped to represent an informal upright style Bonsai tree with a loop in what is now the trunk to get the height correct.

The end product for now.

Aftercare and the future: the tree will now be placed in a sheltered spot and remain there for at least a year. Fertilisation, watering, checking on the wire and weeding is the most excitement this tree will see for a long time. When the time is right, the wire will be removed and the Jin will be further developed. That will just be some detail work, inclusive of using fine carving tools, torching it and lime sulphur treatment. The tree will also go into a Bonsai pot once the growth is strong.

I mentioned taking calculated risks earlier. It really comes down to mitigating the risks by thinking through each risk and finding a way to minimise the risk. These include not potting anytime soon which means no root work at this time, sealing all the wounds and keeping the tree out of wind and harsh sunlight. Extensive wiring took place and this is mitigated by placing guy wires in places to support the harder wiring as to take some of the load off. Guy wires are attached to the wire on the branches / Jin and not on the branches itself. Now, let’s pray.

The shorter Jin that will undergo further development.

Guy Wires for Old Bonsai Maples

Someone recently asked about the use of guy wires in Bonsai. I find that guy wires are particularly useful when used on older Maple trees.

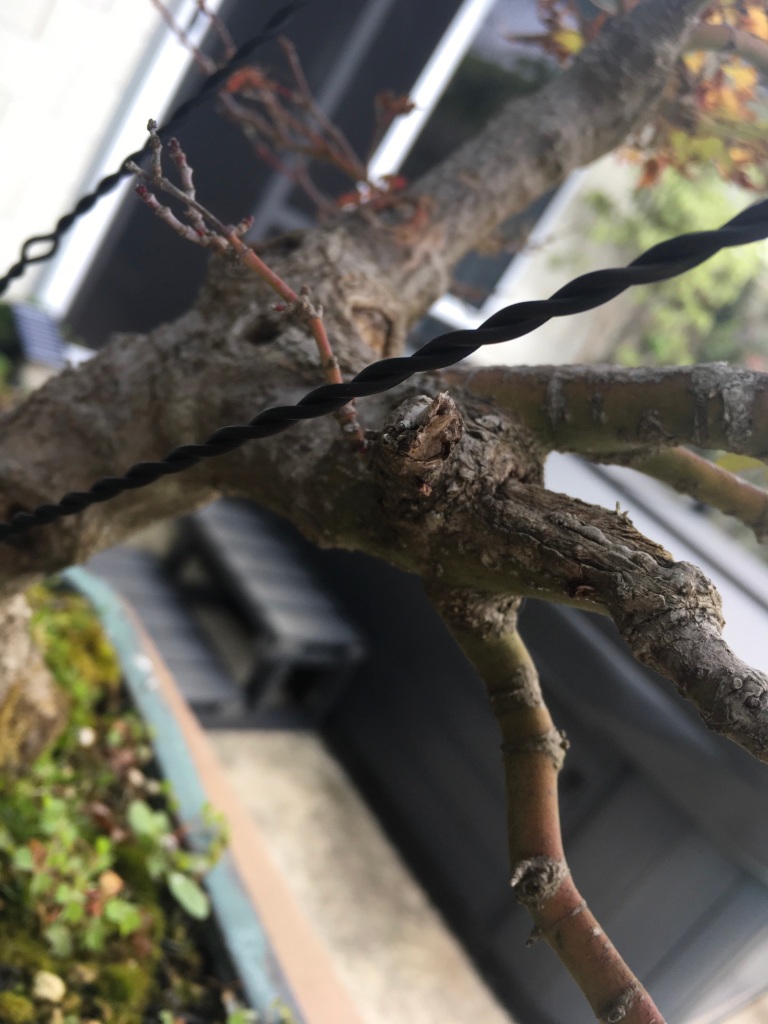
The branches are very brittle and not flexible at all (the older ones). The tree in the photos is a prime examples of this. Two branches were lost over the last few years trying to set the branches with wire directly applied to the branches. The first photo below has a little stump just under the wire (middle) where one of these branches, which just happened to be critical in filling the back of the tree, broke while bending.

I apply a guy wire if I need to pull a branch down or sideways on these brittle branches. A screw is placed at the bottom of the trunk, preferably under soil level or as close as possible to it. The hole left once removed will close quickly.

The important thing is to set or twist the wire over time. The tree in the photos had two turns per day over five days to get the branch where it is suppose to be.

It is important to use some sort of protection on Maple branches as a naked wire will cut in. There is an article at http://www.bonsaiplace.net that has more details on the use of guy wires.

Beginner’s Series: Make a start

You are now bitten by the bug and you are well on your way to addiction and now you want to design, bend, shape, cut, wire and do all the other things to expand your growing collection. Yes, there is a lot of art to it, but you can get far by following a few basic steps. I call it my Bonsai Beginner’s Curriculum and have done many workshops based on these basic seven steps. It works well on nursery material as well as field lifted trees which have been planted and allowed to rest for at least a year. Here we go with the seven steps.

Nursery stock

Step 1: Find the front of the tree. This includes looking at the trunk flare / root zone (nebari). You want the widest and most interesting part to face the front. The second part to this step is to find the best front showing the flow or movement of the main trunk line. Hopefully the best nebari view and trunk line is the same side, if not, make a decision based on the best of the two elements.

Step 2: Clean the main trunk. This includes getting rid of all unwanted growth. It could be removing one or more branches reducing the bar branch effect. Also remove branches pointing to the front in especially the bottom third of the trunk and branches crossing the trunk. At this stage remove all growth in the crotches of the main trunk and primary branches.

Step 3: Set the main trunk. If you are lucky, the movement of the trunk will be great and you have nothing to do. This is rarely the case. Use wire to set the shape. There are other more advanced strategies and methods that can be used. If you are using guy wires, it is best to wire the branches first as the wires sometimes get in the way of further work.

Thick wire can be used to bend this trunk.

Step 4: Select the main branches. You have already looked at this during step 2. What you now need to do is to look at the positioning of branches. The historical pattern is to have one to the one side, then to the other side and then one growing backwards. Repeat as you move up the trunk line. Nature and practicality does not always give this to you on a platter and this is where the artistic side of Bonsai kicks in. Also make sure that you do not have branches growing from the inside curve of a bend.

Step 5: Clean the rest of the tree by removing all growth from the axils / crotches of all branches. Remove the rest of the unwanted growth and especially spindly growth. At this point it is important to note that once you remove all leaves / needles from coniferous plants, it is highly likely that the bare branch will die. Perfect for Jin (more advanced technique).

Step 6: Set the main branches. Use wire on the branch or guy wires. Wiring technique is also slightly more advanced and will follow in a future blog or video. Ensure that there is movement in the branches (left, right, up and down). This is an easy way to bring leaves / growth closer to the main trunk on spindly growth.

Step 7: Create the apex. The apex is the top of the tree and plays a major role in determining the flow of a tree. Older trees show a more rounded apex form and this is what you want to recreate by either pruning or wiring the branches into that position.

Crotches are clean and branches set by using guy wires.

By now you should have a design roughly resembling a pre-Bonsai tree. After-care is the next important step. My advice is to not pot the tree into a Bonsai pot at this stage. If you have removed a lot of growth, the tree will be stressed and the last thing it needs now is to have its roots interfered with. Rather just place it in a sheltered position with no harsh afternoon sun. Water regularly and fertilise the tree to encourage health and good growth. Potting can be done in Spring or for certain species, Autumn could be suitable as well.

Keep an eye out for further articles in the Beginner’s series. If you subscribe to this blog, you will not miss any of those.

If you need one on one tuition, have a look at the subscriptions page on this website.

Guiding branches with Guy Wires

I am not sure where the word Guy wire comes from, but a wild guess is that it is from the word Guide. It is defined as a wire or cable used to stabilise something, like a mast and seeing that dictionaries and Wikipedia will not relate this to Bonsai, here is my version of it: A Guy wire is used to pull branches down and is used instead of normal Bonsai wiring due to various reasons.

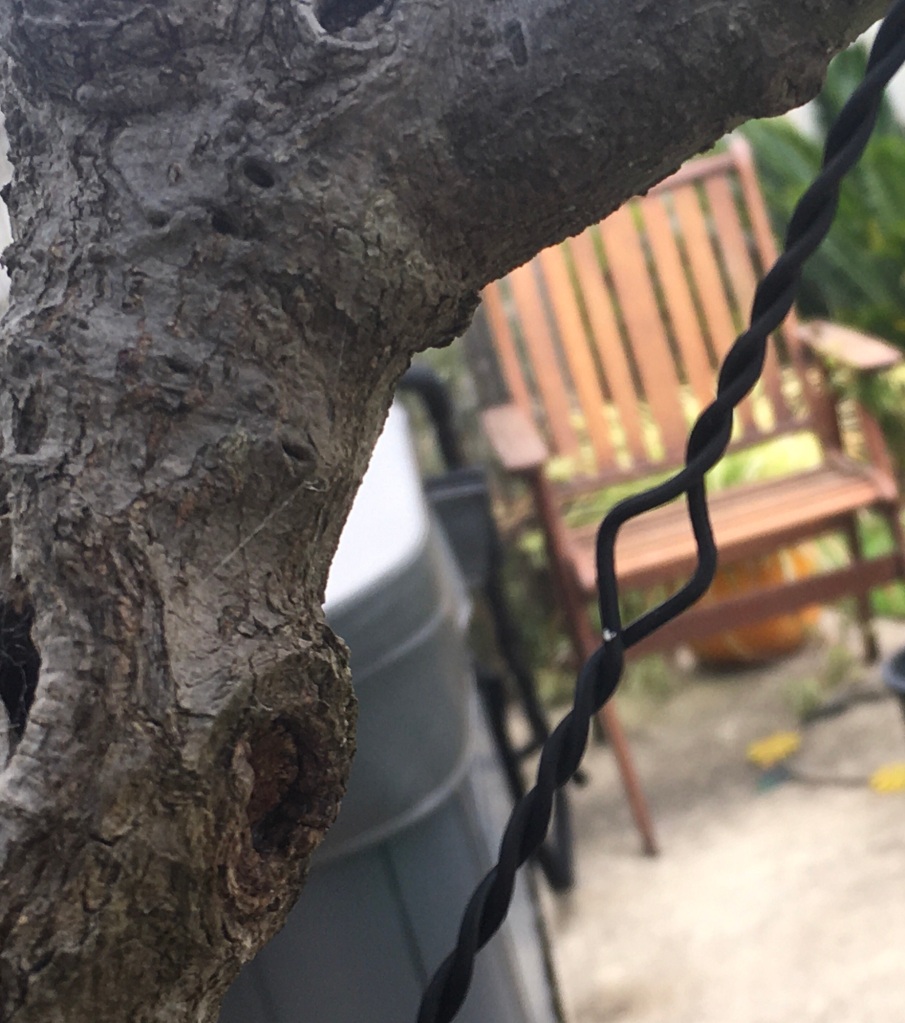
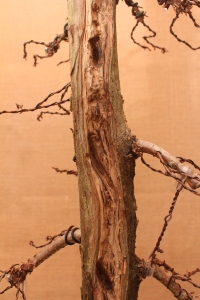
Not a good idea to place wire directly on old bark.

My common use for it is on plants with very soft bark and more often, on older trees when I want to preserve the bark and also in cases when I do not want to cover the bark with raffia or cloth. I usually only use it to pull branches down, but it can also be used to get some shape in a branch by using more than one guy wire, pulling in different directions.

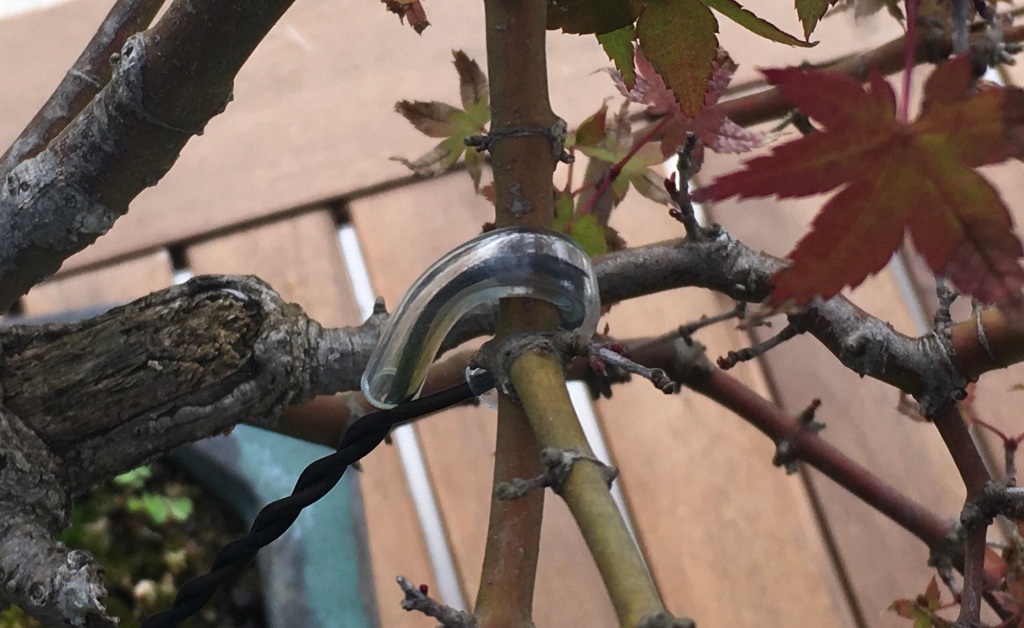
As I use aluminium wire for this task and usually a thin wire, it is important to protect the branch and the bark at the pressure point on the branch. Aquarium tubing is perfect for this task. Short lengths are used and the wire is pulled through it and then it is placed in position. The other end is then securely fastened at an anchor point.

Using aquarium tubing to protect the bark.

An anchor point can be many things. If the tree is in a plastic pot, a hole through the rim of the pot is an easy way to do it. In a timber box, a screw can be used to anchor the wire. As in the example that I show here, the tree is in a ceramic Bonsai pot and a thicker wire is used around the pot through which the guy wire is then threaded and fastened securely.

Once the wire is fastened, I use a short length of wire through the two wires around a branch to wind the two wires together. This does not only has a neater appearance, it can be used to fine tune the positioning of a branch as the branch can be further pulled down by winding the wires up more.

Winding wires up.

This method definitely exerts less pressure and therefore less stress on the tree. As you use a thinner wire, it is less expensive. It is also easier to remove and once removed, the wire can still be used for other purposes, especially if it was not wound tightly.

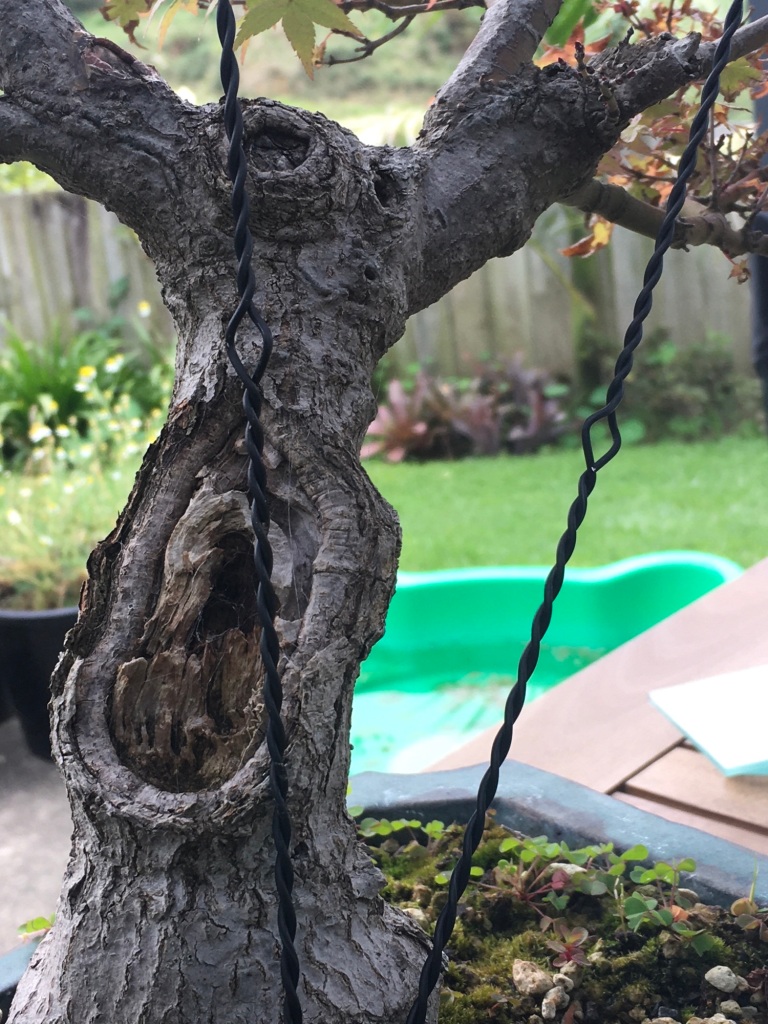
This tree has fourteen guy wires to pull branches in place.

Swamp Cypress – Taxodium distichum

IMG_2943Two years ago this was a two and a half meter nursery tree. I chopped it down to about a meter at the nursery as I could not get it in my car. Then the journey began. It was potted in a Bonsai pot and left to grow, It had a light prune and a bit of a carve a year before and today it was time to revisit the shari and to get some wiring done. The buds are very fragile this time of year and great care has to be taken to not break them off.

The carving wasIMG_2945 done first. The original carving was done with very rudimentary tools. I now have a rotary carver as well as a router that I use for carving. I went deeper today and added a bit more detail to the top. Out came the burner to get rid of all the frilly bits. The bark and branches were protected by aluminium foil. It was finished off with a wire and then a nylon brush.

I used guy wires to pull the thicker branched down and then used 1 mm wire to wire and place the thinner branches. Now it has to rest and grow when Spring comes around again. I will also have to repot at a better time as I discovered that the soil was very wet. It is Winter in New Zealand now and it has been raining non-stop over the last 48 hours. These trees prefer a bit of a wetter soil, but this is just too wet at the moment.IMG_2947

This is a very easy tree to grow and it buds profusely in spring and carry on with this almost right through Summer. There are gaps on the left hand side that must be filled. I will keep an eye on any buds forming in that area like an expectant father. The top branches also must be shortened, but I will leave it as is for now as I need more buds and growth in that area to replace some of the existing branches. It has a soft foliage and contrasts well with other trees as the leaves are a very light green. These turn yellow-brown in Autumn.