Beginner’s Series: Make a start

You are now bitten by the bug and you are well on your way to addiction and now you want to design, bend, shape, cut, wire and do all the other things to expand your growing collection. Yes, there is a lot of art to it, but you can get far by following a few basic steps. I call it my Bonsai Beginner’s Curriculum and have done many workshops based on these basic seven steps. It works well on nursery material as well as field lifted trees which have been planted and allowed to rest for at least a year. Here we go with the seven steps.

Nursery stock

Step 1: Find the front of the tree. This includes looking at the trunk flare / root zone (nebari). You want the widest and most interesting part to face the front. The second part to this step is to find the best front showing the flow or movement of the main trunk line. Hopefully the best nebari view and trunk line is the same side, if not, make a decision based on the best of the two elements.

Step 2: Clean the main trunk. This includes getting rid of all unwanted growth. It could be removing one or more branches reducing the bar branch effect. Also remove branches pointing to the front in especially the bottom third of the trunk and branches crossing the trunk. At this stage remove all growth in the crotches of the main trunk and primary branches.

Step 3: Set the main trunk. If you are lucky, the movement of the trunk will be great and you have nothing to do. This is rarely the case. Use wire to set the shape. There are other more advanced strategies and methods that can be used. If you are using guy wires, it is best to wire the branches first as the wires sometimes get in the way of further work.

Thick wire can be used to bend this trunk.

Step 4: Select the main branches. You have already looked at this during step 2. What you now need to do is to look at the positioning of branches. The historical pattern is to have one to the one side, then to the other side and then one growing backwards. Repeat as you move up the trunk line. Nature and practicality does not always give this to you on a platter and this is where the artistic side of Bonsai kicks in. Also make sure that you do not have branches growing from the inside curve of a bend.

Step 5: Clean the rest of the tree by removing all growth from the axils / crotches of all branches. Remove the rest of the unwanted growth and especially spindly growth. At this point it is important to note that once you remove all leaves / needles from coniferous plants, it is highly likely that the bare branch will die. Perfect for Jin (more advanced technique).

Step 6: Set the main branches. Use wire on the branch or guy wires. Wiring technique is also slightly more advanced and will follow in a future blog or video. Ensure that there is movement in the branches (left, right, up and down). This is an easy way to bring leaves / growth closer to the main trunk on spindly growth.

Step 7: Create the apex. The apex is the top of the tree and plays a major role in determining the flow of a tree. Older trees show a more rounded apex form and this is what you want to recreate by either pruning or wiring the branches into that position.

Crotches are clean and branches set by using guy wires.

By now you should have a design roughly resembling a pre-Bonsai tree. After-care is the next important step. My advice is to not pot the tree into a Bonsai pot at this stage. If you have removed a lot of growth, the tree will be stressed and the last thing it needs now is to have its roots interfered with. Rather just place it in a sheltered position with no harsh afternoon sun. Water regularly and fertilise the tree to encourage health and good growth. Potting can be done in Spring or for certain species, Autumn could be suitable as well.

Keep an eye out for further articles in the Beginner’s series. If you subscribe to this blog, you will not miss any of those.

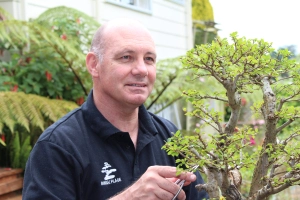
If you need one on one tuition, have a look at the subscriptions page on this website.

Bonsai knowledge and skills resources – How do we learn?

Read as much as you can.

I recently saw a few posts on social media where people new to Bonsai asked for advice and also for good sources of reliable information. The “reliable information” made me think even more. Most of this happens in the internet and as mentioned, on social media. In a lot of cases the credentials of the people answering these questions cannot be easily established and one of the things that really get to me is that people give advice without establishing where the person asking the question is from. I have recently moved 500km north on the North Island of New Zealand and now know that even a relatively short distance like that makes for a very different climate and a complete rethink of when to do what with my trees.

Join a club or two or three.

So, where and what are the best places and people to go to. My personal philosophy on this is that you should use as many resources as possible. One of the answers amongst a whole host of really good ones out of a discussion of which club to join (think this was in Australia), was that one must be weary of clubs as there is usually a dominant teacher there with set ideas and that one should actually just watch You Tube videos. Nothing wrong with the videos, but the person went further to mention one specific series of videos, again with one dominant teacher. No change then.

By all means, join a club. It is a very good thing to do. As a matter of fact, join more than one. Supplement this with watching a variety of videos, there are millions on line. The emphasis here is on the variety. Out of this, always relate it back to what you already know, where your knowledge and skills come from and how that relates to your trees, your philosophy and your climate. This reflection part is to me the most important phase of learning. Digest all of the information that you have and take what suits your situation. Books, whether in digital format or printed (still my favourite) should be part of this learning. Attend conventions, workshops and demonstrations. This is probably where you will learn most.

Many online videos exist.

This learning journey never stops and if you are exposed to a “sensei” who does not learn anymore him- or herself, run as far away and as fast as you can. Bonsai is the ultimate lifelong learning exercise.

The World Around the Tree – getting a Bonsai tree to a show

On returning from the New Zealand National Bonsai Show and Convention, I reflected on my experiences and performance in the run up to the show, during the show and on getting back home.

The context is that I had one tree in the National Show and four trees in the regional show. I also had three more nursery material and cutting grown trees with me that I wanted to use as part of my demonstration at the show (more on this in a blog to follow).

My tools came with, stands of various sizes and shapes were packed, cameras made it into the van as well as a laptop to be used during the demonstration. Cleaning materials, a 5 litre water spray bottle and accent plants filled the last bit of space up and then I realised that I needed to take a bag with clothes and toiletries for three days. What a mission!

The focus is always on the tree and to get that focus right, you need a lot of things to make that tree look good. I have listed my extras above and I must say that I did myself proud in the sense that once I arrived at the venue and unpacked, setting the trees up, I did not rush around missing things. This comes with experience, but more so from thorough planning and organising everything in advance. Use checklists to be safe. Make a list for each tree as each tree might have its own specific requirements. Set your display up in the weeks before the show. Take a photo of the best possible configuration and make sure you have packed everything securely as per the photo.

I have always wondered why people with babies have more bags and things packed for the baby when they travel than for themselves. Now I know, a Bonsai tree demands the same care and preparations to look good at the destination.

Ps. I forgot to mention that I also had two Suiseki and their stands with me. One of which was awarded the top prize / trophy for the best New Zealand sourced Suiseki. More on this in a blog to follow.

Newby

I have been following quite a lot of Blogs from well known and not so well known people within the Bonsai world. I am at that stage where I think I also have something to contribute. The best way for me is to do it through a Blog. My hope is to add some value to other Bonsai enthusiasts who are on this journey that never ends. I also contribute regularly to Bonsai Times, the New Zealand Bonsai Association’s official publication. My intention is to post those articles here as well.

My quest for knowledge has led me to Blogging. New Zealand has very strict laws in place to prevent the spreading of plant based pathogens. This means that we cannot import Bonsai and everything we have in our collections must come from within. The Bonsai community here is also relatively small and we are reliant on International exposure. This is mainly done through reading whatever we can get our hands on and by attending conventions and displays. The NZBA and host clubs do bring high caliber artists and demonstrators in and the knowledge that they spread is soaked up. The internet is also a huge help with Facebook putting many Bonsai enthusiasts in contact with each other.

My interests are focussed on the Philosophy, Art as well as the practical horticulture that provides the foundation for Bonsai. In exploring all of this, I have also recently started Vlogging. These videos are posted on You Tube and this Blog now gives me the opportunity to post those videos here as well.

So here goes …….