Committing a Crime in the name of Bonsai Art.

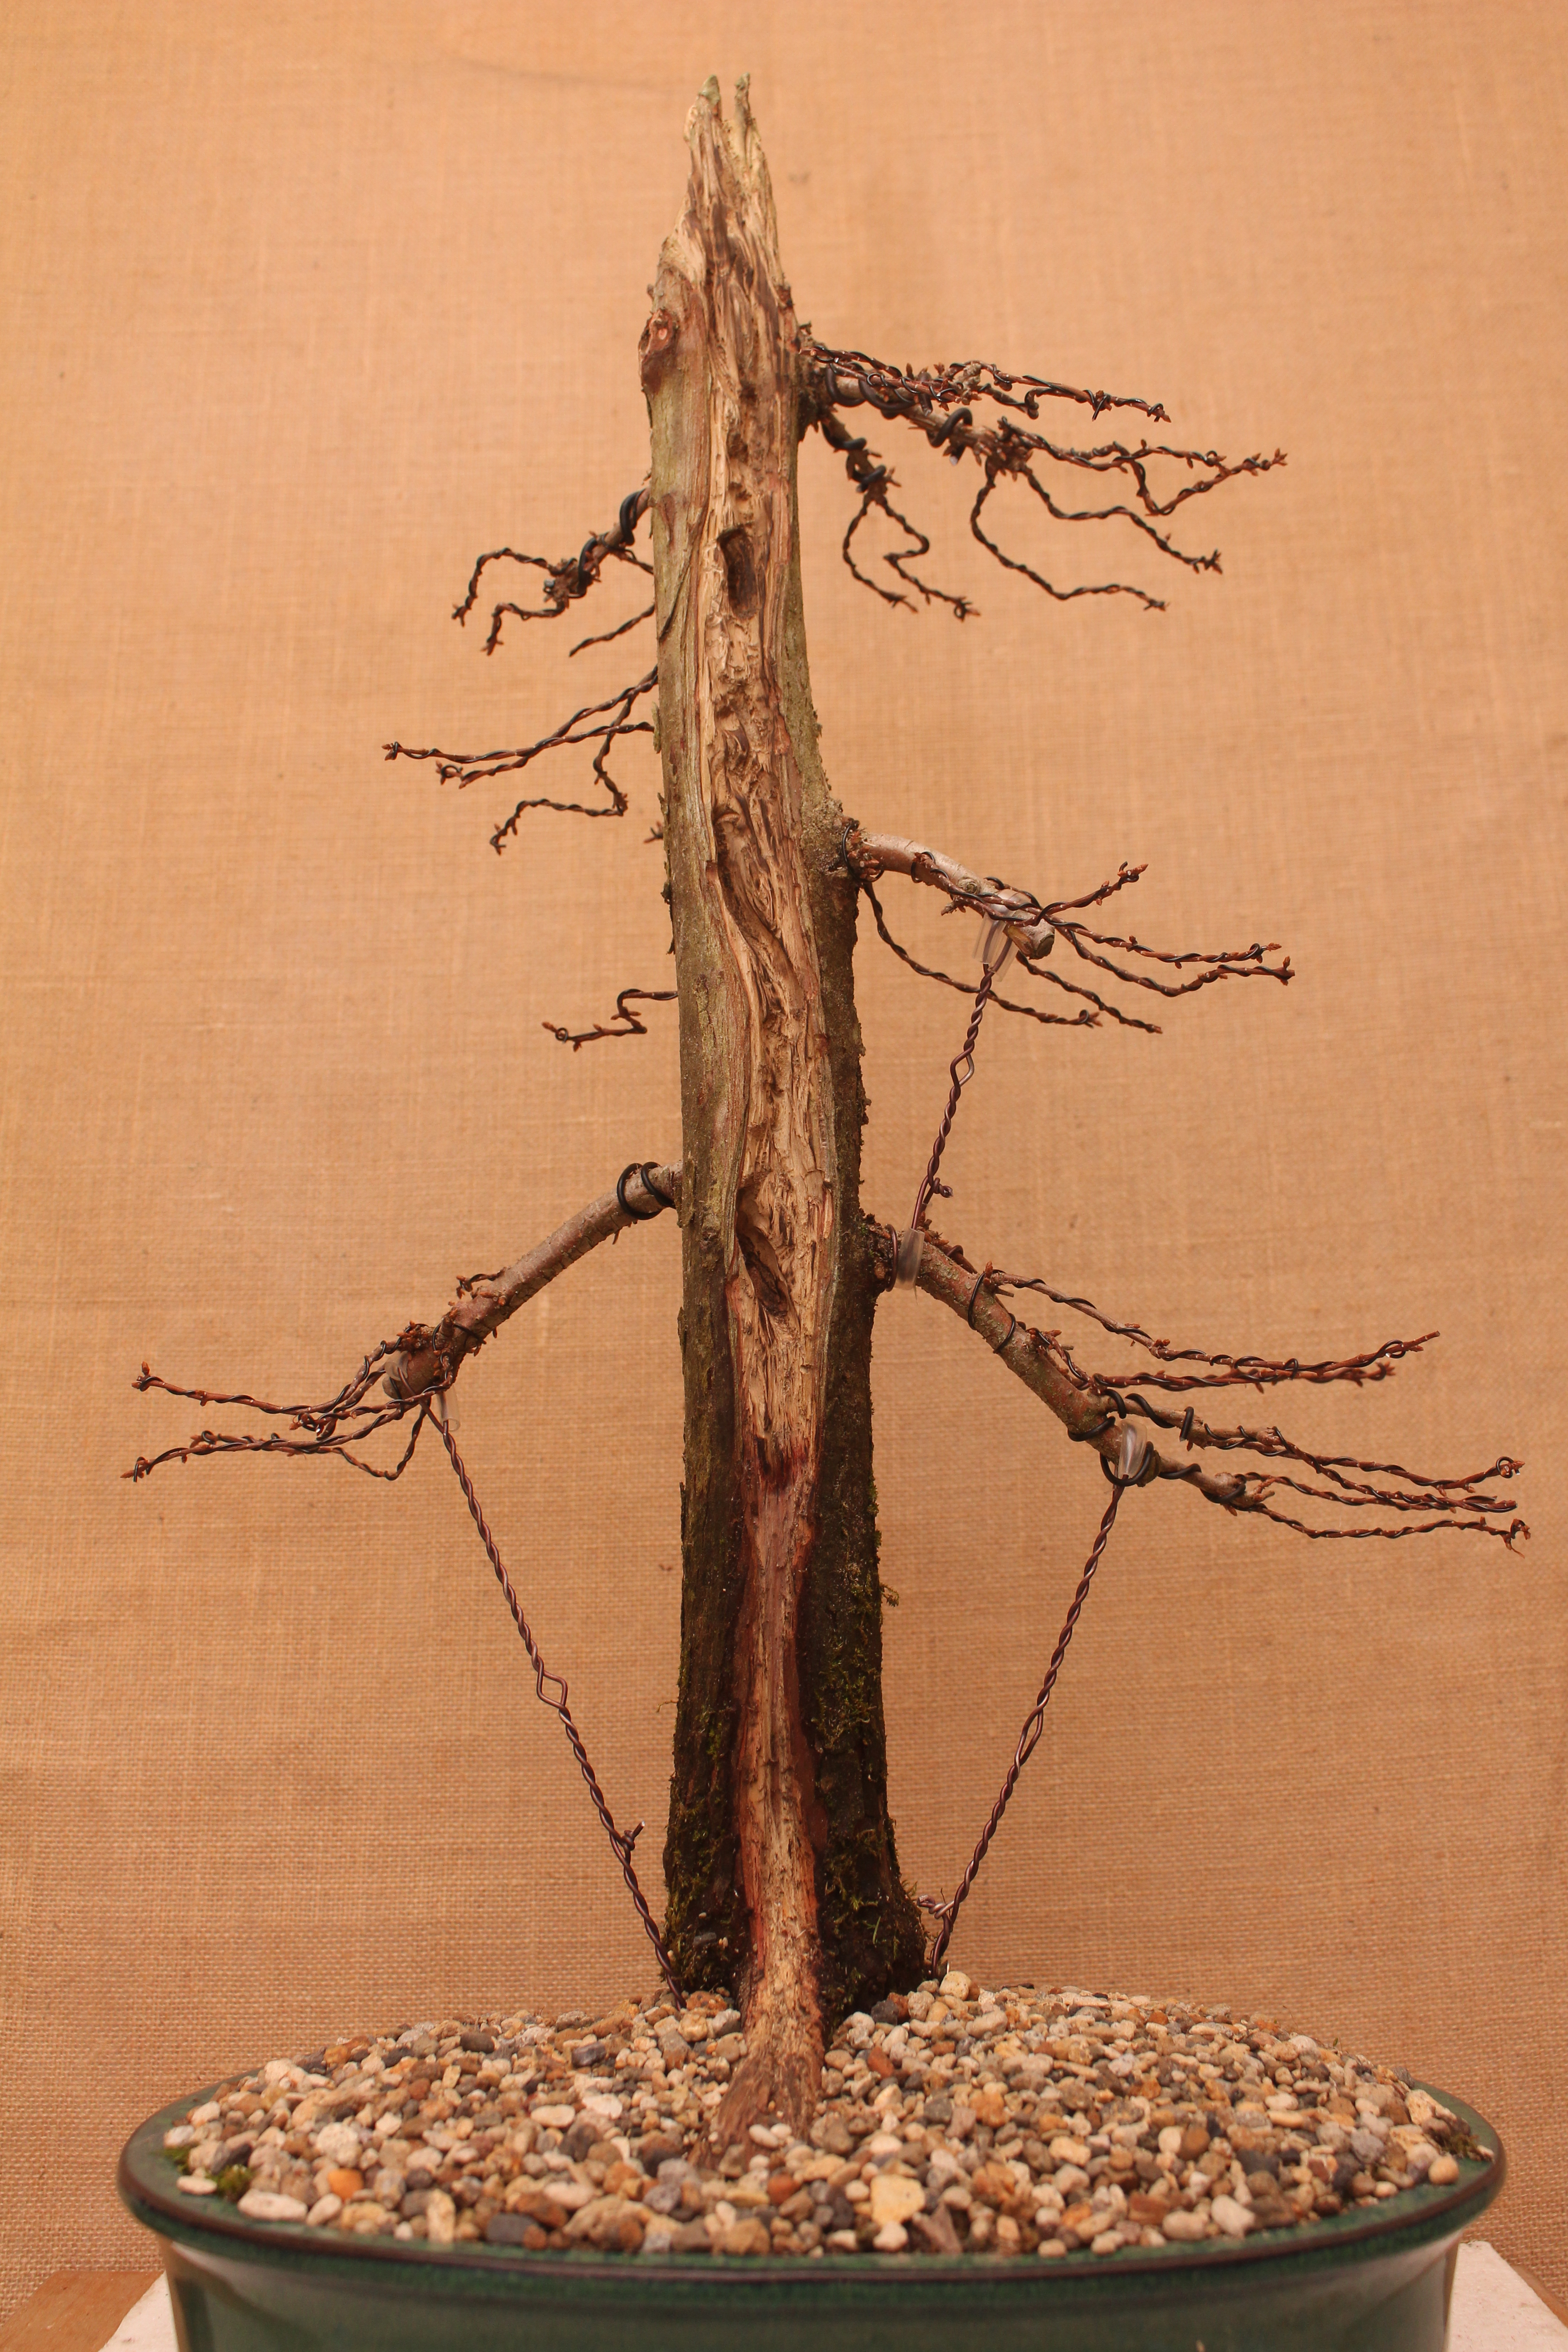
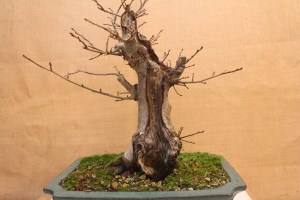
I was confronted with this Mugo Pine and had no idea what to do with it. The two bar branches at the bottom is ugly and the two arms going up from there does not lean itself to any of the Bonsai styles that I know of.

After many days, weeks and months of staring at it from different angles, I one day was working on a small Japanese White Pine that is planted in a crescent shaped pot and a new idea came to me. To do this, many Bonsai “rules” must be broken and the tree put at risk due to a lot of material being removed. This is a calculated risk. More about that later. Here is the culprit in all its former glory.

What to do with it?

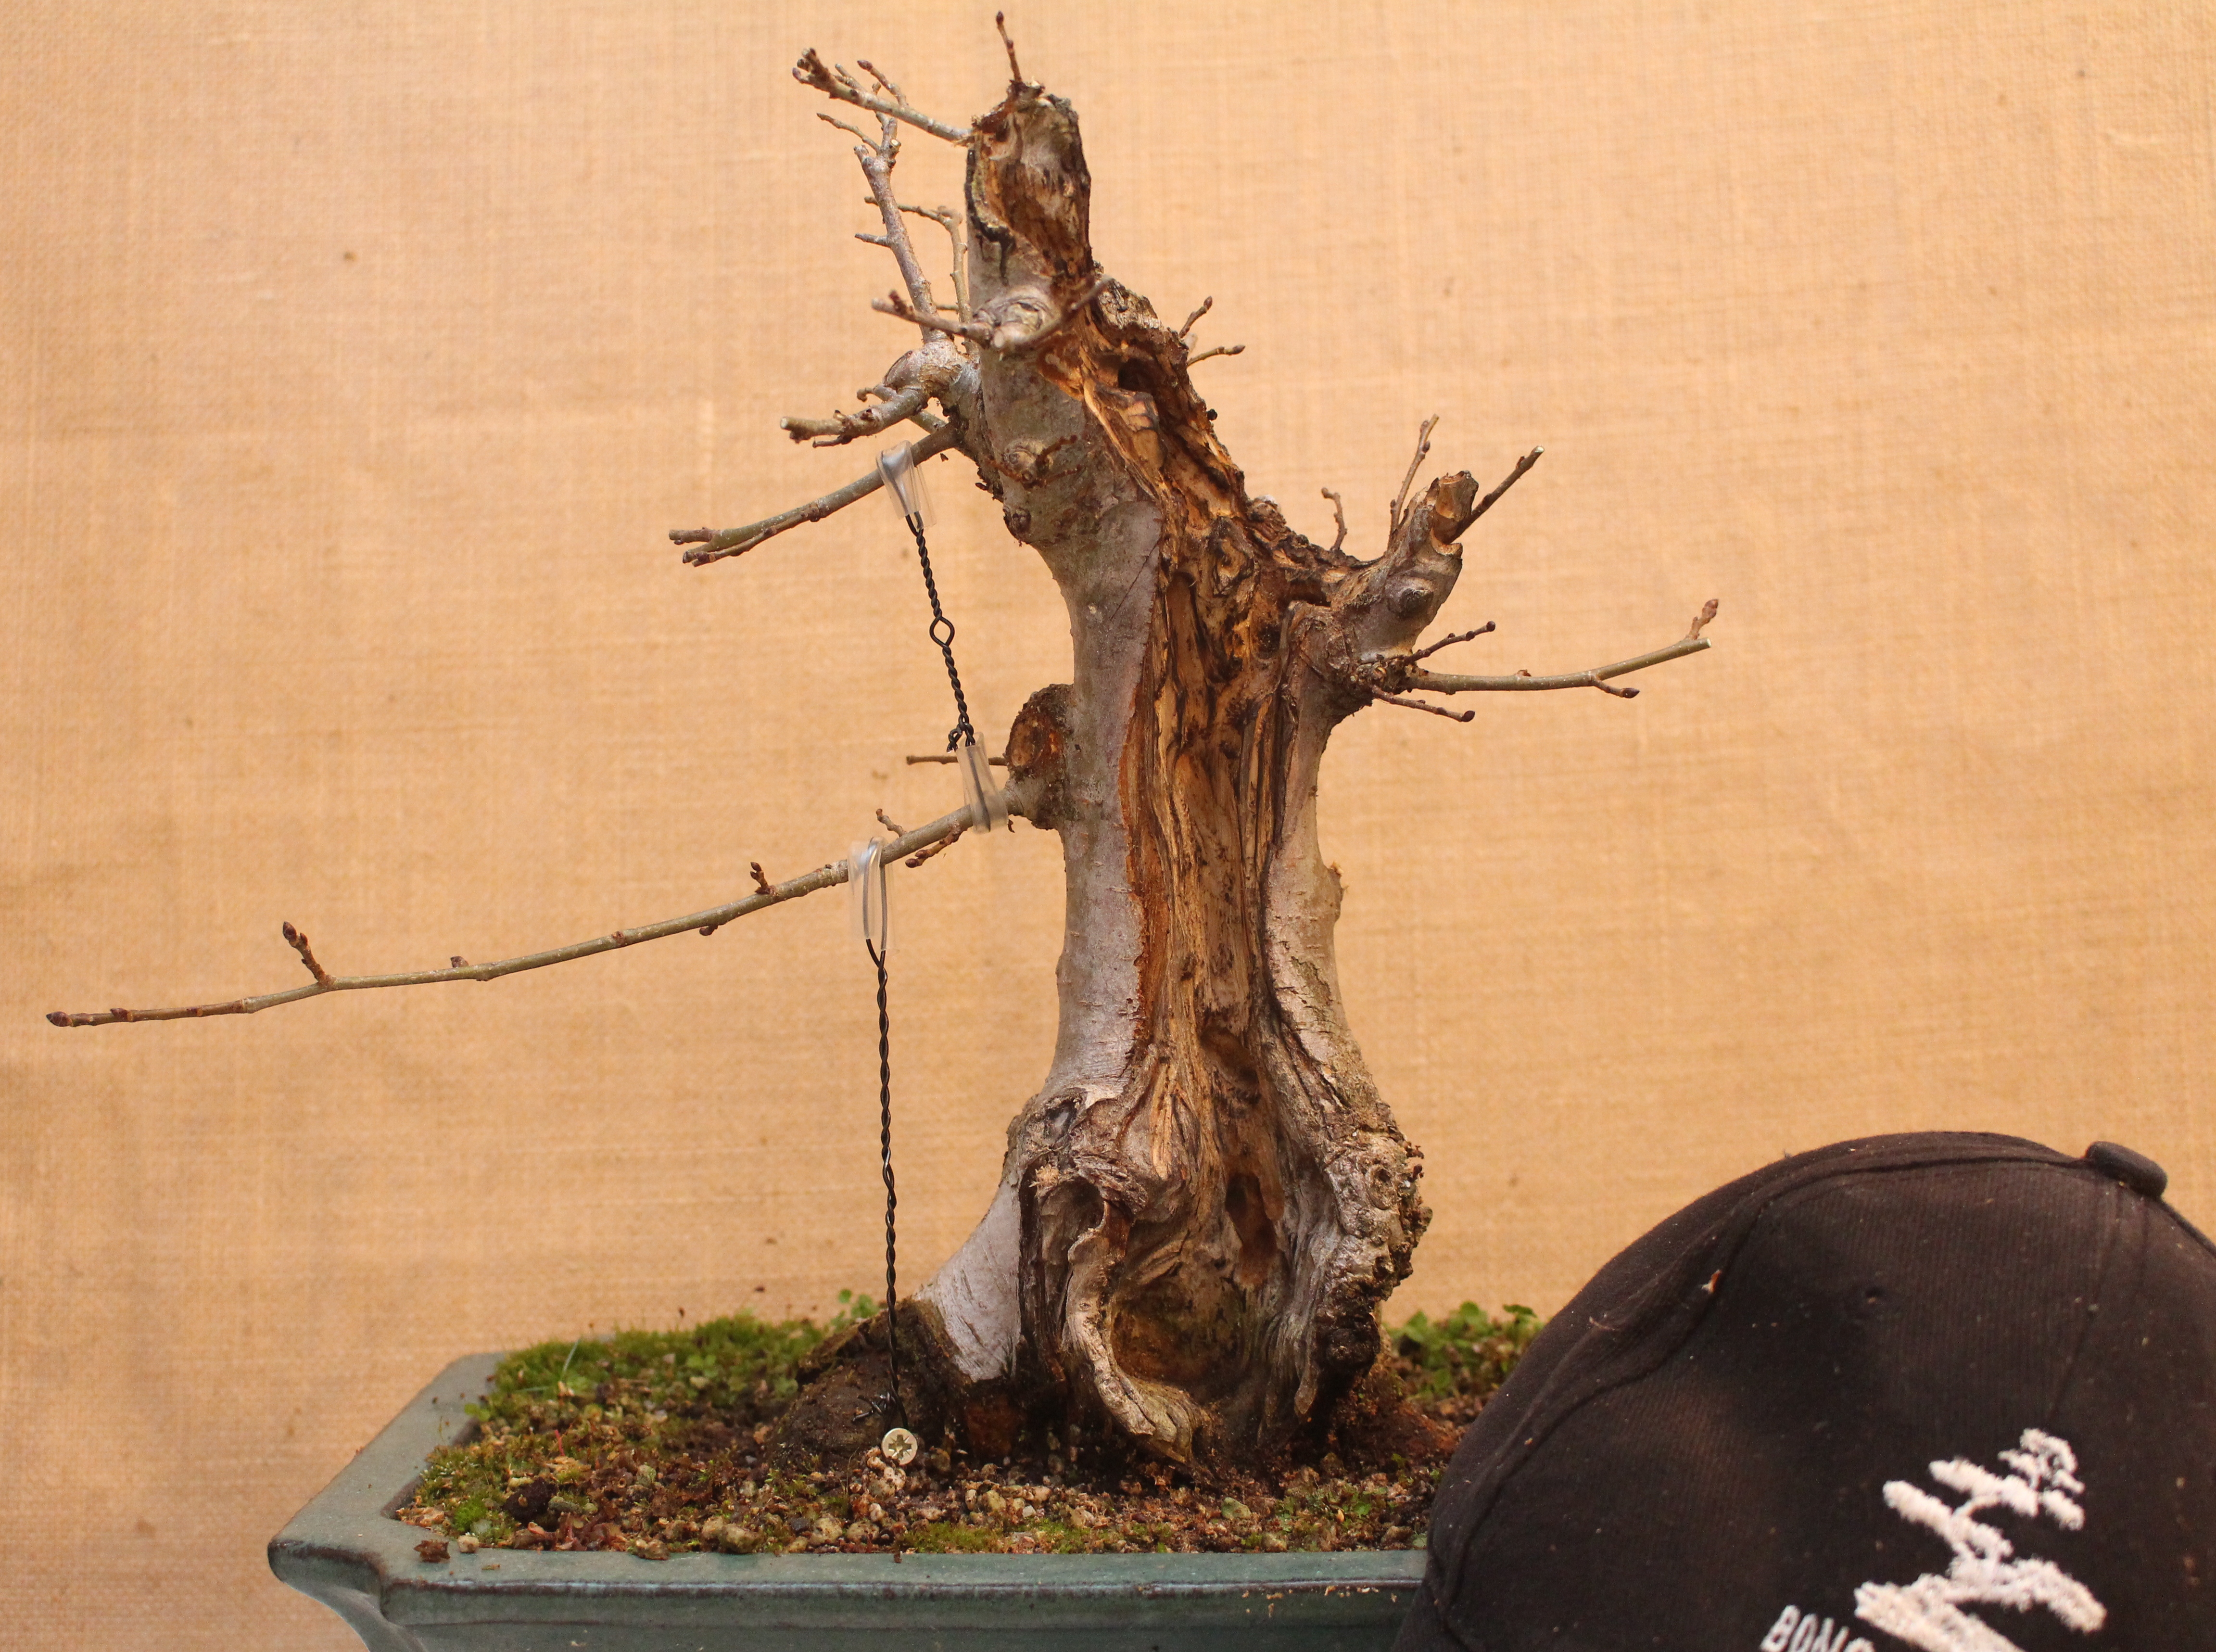
The decision was made to remove the one thick branch on the one side and create a two inch long Jin out of it.

The Jin on the right.

Then the other branch was stripped and Jinned as well.

One short Jin and one long Jin.

This longer Jin is now wired up and bent in the shape of a crescent, the same as what a crescent shaped pot would look like.

Now the only branch that is left is shaped to represent an informal upright style Bonsai tree with a loop in what is now the trunk to get the height correct.

The end product for now.

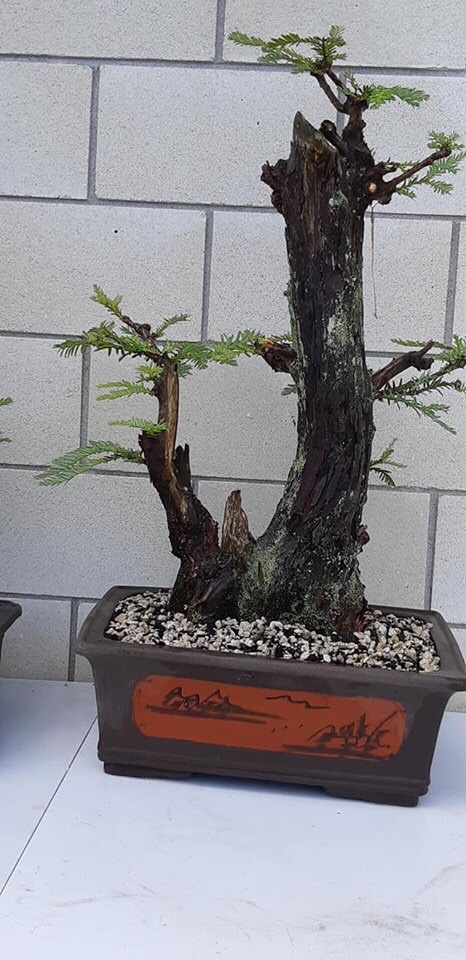
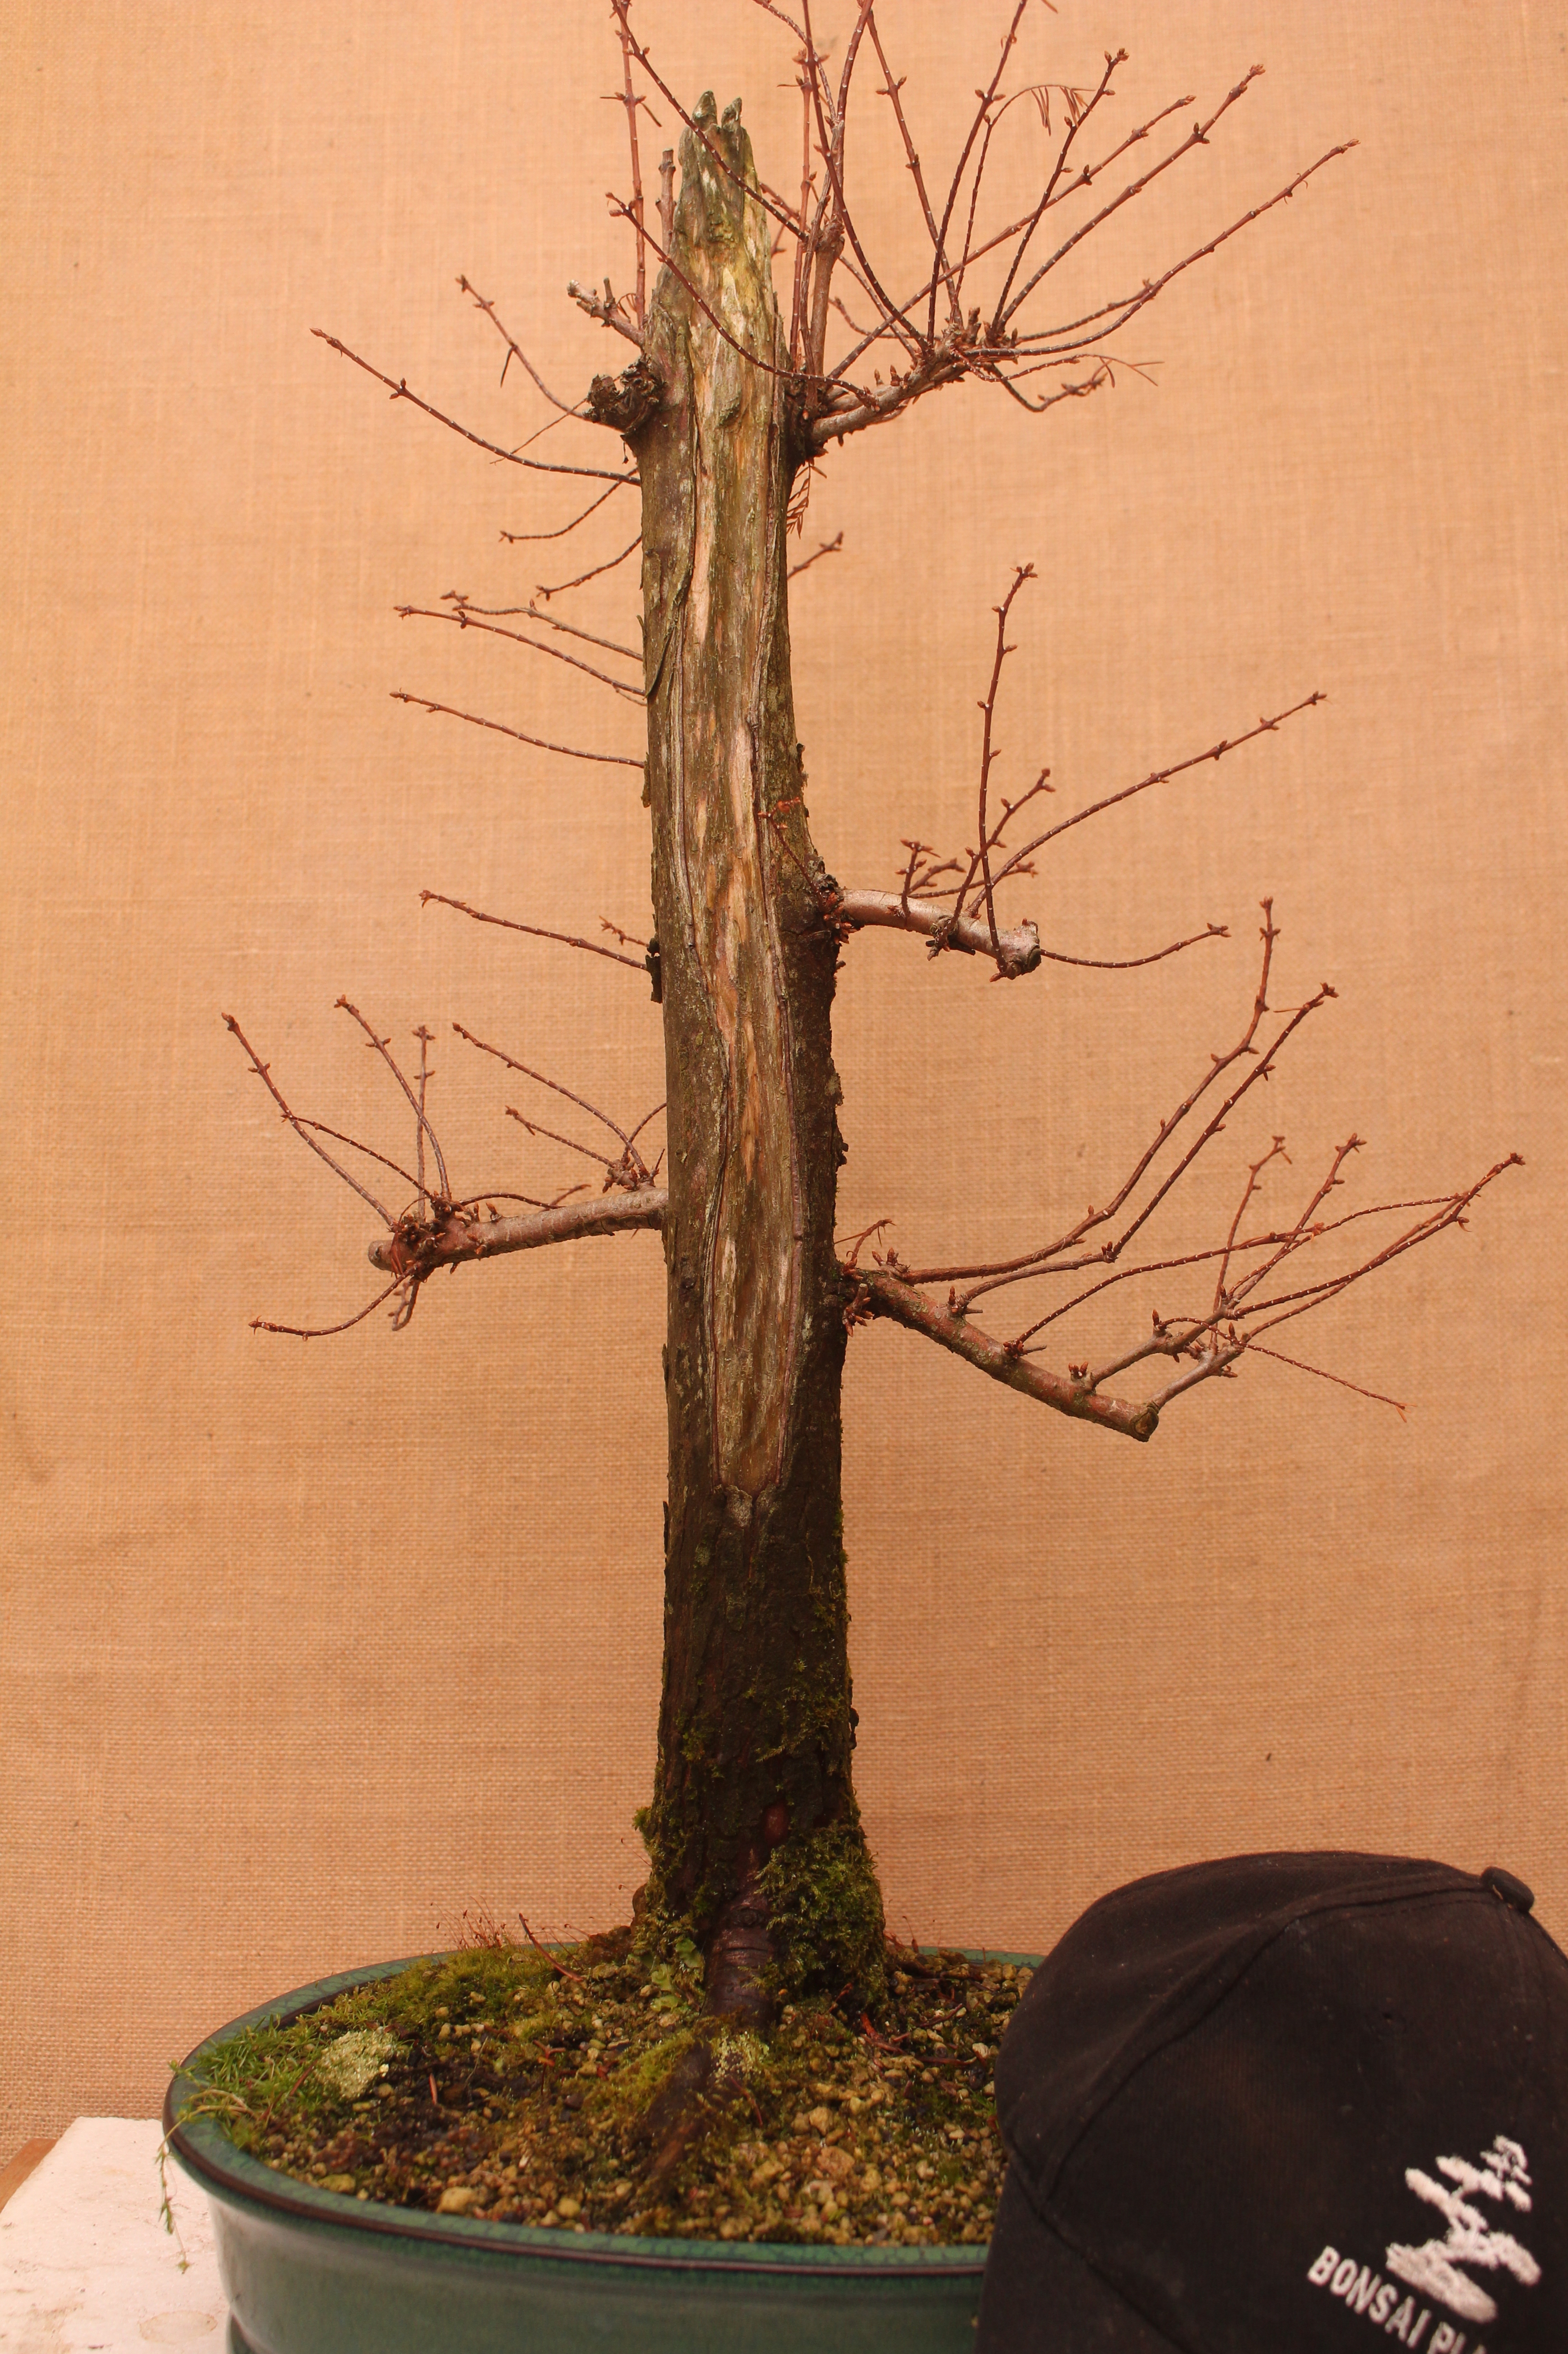
Aftercare and the future: the tree will now be placed in a sheltered spot and remain there for at least a year. Fertilisation, watering, checking on the wire and weeding is the most excitement this tree will see for a long time. When the time is right, the wire will be removed and the Jin will be further developed. That will just be some detail work, inclusive of using fine carving tools, torching it and lime sulphur treatment. The tree will also go into a Bonsai pot once the growth is strong.

I mentioned taking calculated risks earlier. It really comes down to mitigating the risks by thinking through each risk and finding a way to minimise the risk. These include not potting anytime soon which means no root work at this time, sealing all the wounds and keeping the tree out of wind and harsh sunlight. Extensive wiring took place and this is mitigated by placing guy wires in places to support the harder wiring as to take some of the load off. Guy wires are attached to the wire on the branches / Jin and not on the branches itself. Now, let’s pray.

The shorter Jin that will undergo further development.

Carving on Bonsai: Sculpture

A previous blog post addressed sculpture as an art form and how it relates to Bonsai (https://bonsaiplace.net/2021/03/28/bonsai-as-sculpture-an-art-form/). This blog post will take an more practical approach by making use of photos to describe the process.

The start.

Carving is usually done to create or enhance jin, uro (holes), shari (stripped bark) or getting rid of areas where large branches were removed. In this case a large branch, about one inch thickness, had to be removed and it was decided to leave a 15cm piece of it and sculpt a jin (deadwood) out of it.

I use a die grinder with a carving bit to remove material fast and to roughly shape the dead straight branch by making grooves in curves and alternating the depth of the grooves. Once this is done I burn the jin to get rid of wood fibres and then repeat the process with the trusted Dremel and a smaller carving bit.

As mentioned, burning the jin with a butane torch gets rid of the loose fibres, but it also helps to get rid of sharp edges and tool marks. After a heavy torching, the jin is brushed with a copper brush and then with a nylon brush. Sand paper can be used to smooth areas that needs it, but I find that the brushing works well on its own.

To preserve the newly carved jin, I wash the whole tree off and then let it dry and rest for a few days. Lime sulphur or a wood hardener can then be applied. For a darker finish, mix some ash (burnt paper) in water and paint on. Some of the grooves can also be painted by making use of black ink. All fluids should be diluted. Lime sulphur is usually diluted with water 50/50%.

Safety aspects:

  • Wear safety glasses during the carving phase.
  • Use gloves when using the power tools.
  • When using the torch, protect the rest of the tree from the flame by using aluminium foil or a wet cloth around foliage and nearby parts.

Please like and subscribe to this blog to be notified when new posts are done. Thank you for the support and feel free to shore this post as well as the blog site.

Deadwood inspiration from Driftwood

In a recent Blog post by Harry Harrington (Bonsai4me), I was amazed by this artist’s technique in creating deadwood. His carvings are superb. On the same day, I happened to be at a beach on the west coast of the North Island of New Zealand (Paraparaumu). The beach was filled with driftwood and I could not resist studying them to find inspiration to style dead wood when I get back home. Fortunately I had my iPhone with me and took the following photos. There is nothing like nature (and Harry Harrington) to create the ultimate natural deadwood designs. In studying these photos I did get a few ideas and now have to get the practice in to recreate this on trees.

Siberian Elm – Ulmus pumila

This little Elm had a huge ugly cut right at soil level when it came IMG_2951
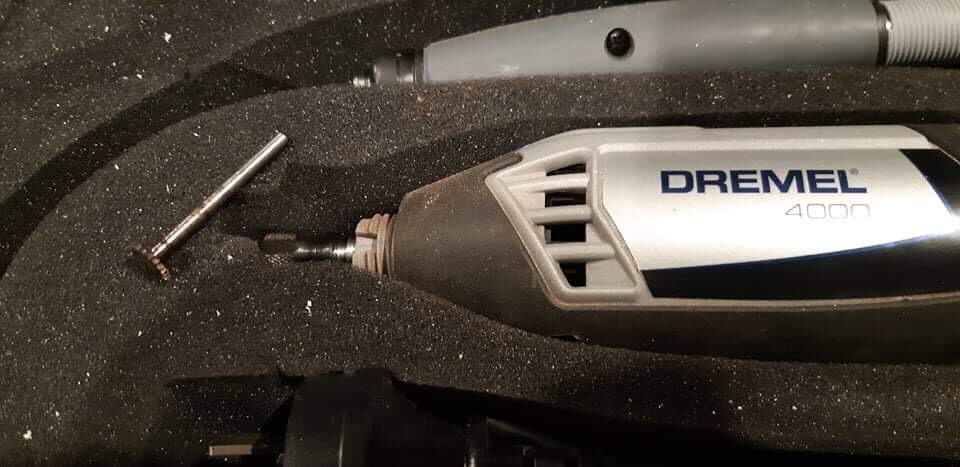
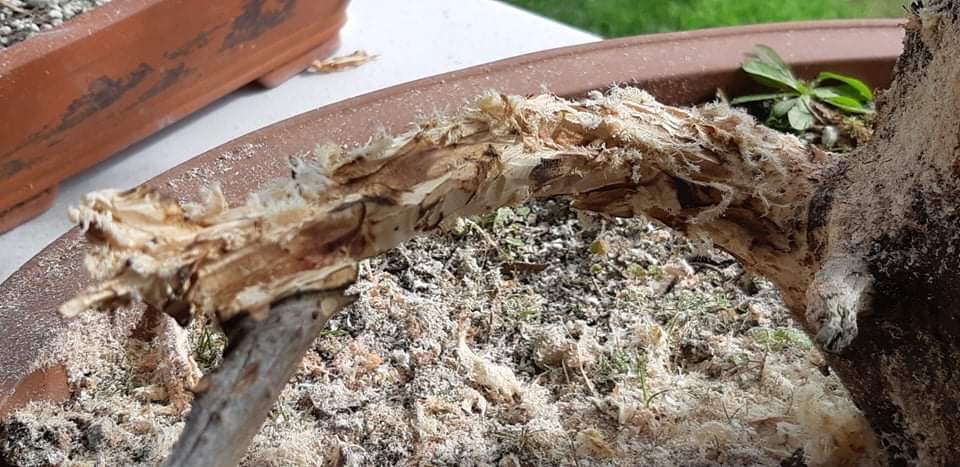
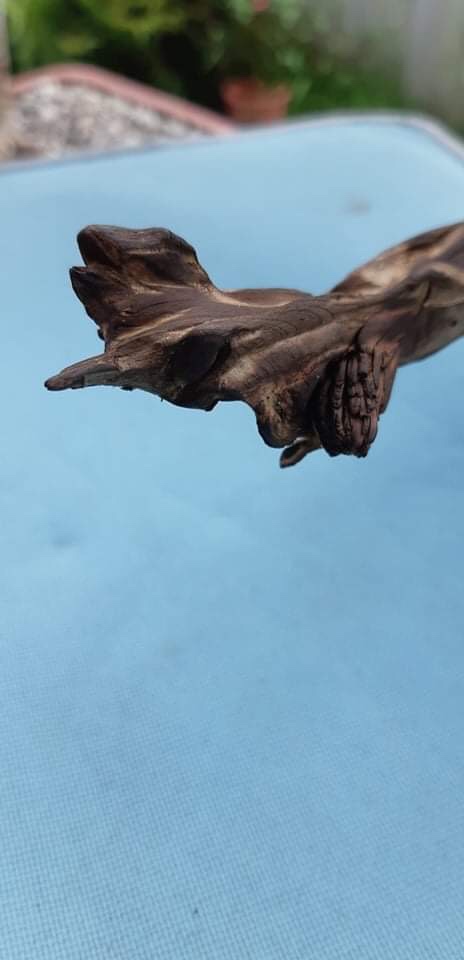
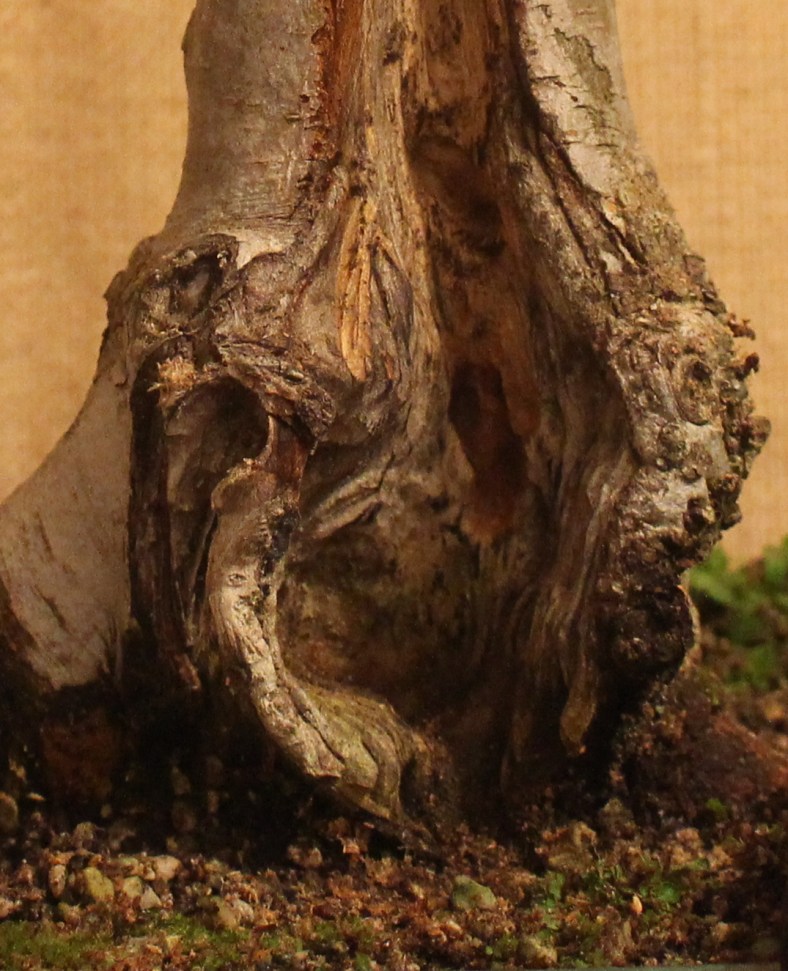
into my possession a year and a half ago. This was carved quite deeply to get rid of and then it was extended upwards to try and get a more natural look. The carving was further worked on today. The large carving at the bottom has weathered well and the shari extending upwards from here was made deeper as well as fine carved with a Dremel. A small carving was done on the back where another large (not as large as the front one) cut was made. This resulted in a hole now going through from the back to the front. It is quite high up near the apex.IMG_2953

The leaves have now all dropped and it was decided to work on the carving a bit more and then to also pull the branches on the left down a bit. The flow is to the left. The branches on the right will be kept short and at the next repotting, the tree will be slanted to the left slightly and it is leaning to far forward at the moment.

I have not seen too many of these around and treat it as I would any other Elm. The leaves are still very large and with proper pruning it will hopefully get smaller. The bottom left branch will also be left to grow as it needs to get some width on it.IMG_2956

Swamp Cypress – Taxodium distichum

IMG_2943Two years ago this was a two and a half meter nursery tree. I chopped it down to about a meter at the nursery as I could not get it in my car. Then the journey began. It was potted in a Bonsai pot and left to grow, It had a light prune and a bit of a carve a year before and today it was time to revisit the shari and to get some wiring done. The buds are very fragile this time of year and great care has to be taken to not break them off.

The carving wasIMG_2945 
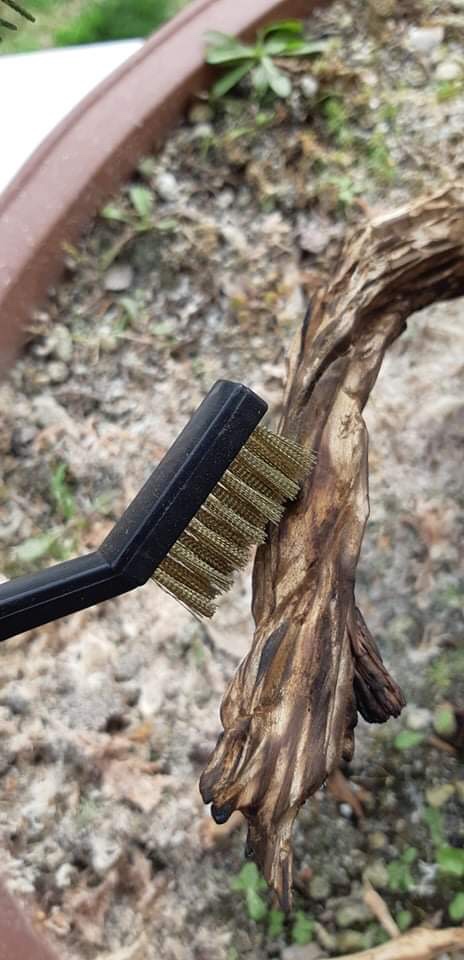
done first. The original carving was done with very rudimentary tools. I now have a rotary carver as well as a router that I use for carving. I went deeper today and added a bit more detail to the top. Out came the burner to get rid of all the frilly bits. The bark and branches were protected by aluminium foil. It was finished off with a wire and then a nylon brush.

I used guy wires to pull the thicker branched down and then used 1 mm wire to wire and place the thinner branches. Now it has to rest and grow when Spring comes around again. I will also have to repot at a better time as I discovered that the soil was very wet. It is Winter in New Zealand now and it has been raining non-stop over the last 48 hours. These trees prefer a bit of a wetter soil, but this is just too wet at the moment.IMG_2947

This is a very easy tree to grow and it buds profusely in spring and carry on with this almost right through Summer. There are gaps on the left hand side that must be filled. I will keep an eye on any buds forming in that area like an expectant father. The top branches also must be shortened, but I will leave it as is for now as I need more buds and growth in that area to replace some of the existing branches. It has a soft foliage and contrasts well with other trees as the leaves are a very light green. These turn yellow-brown in Autumn.