

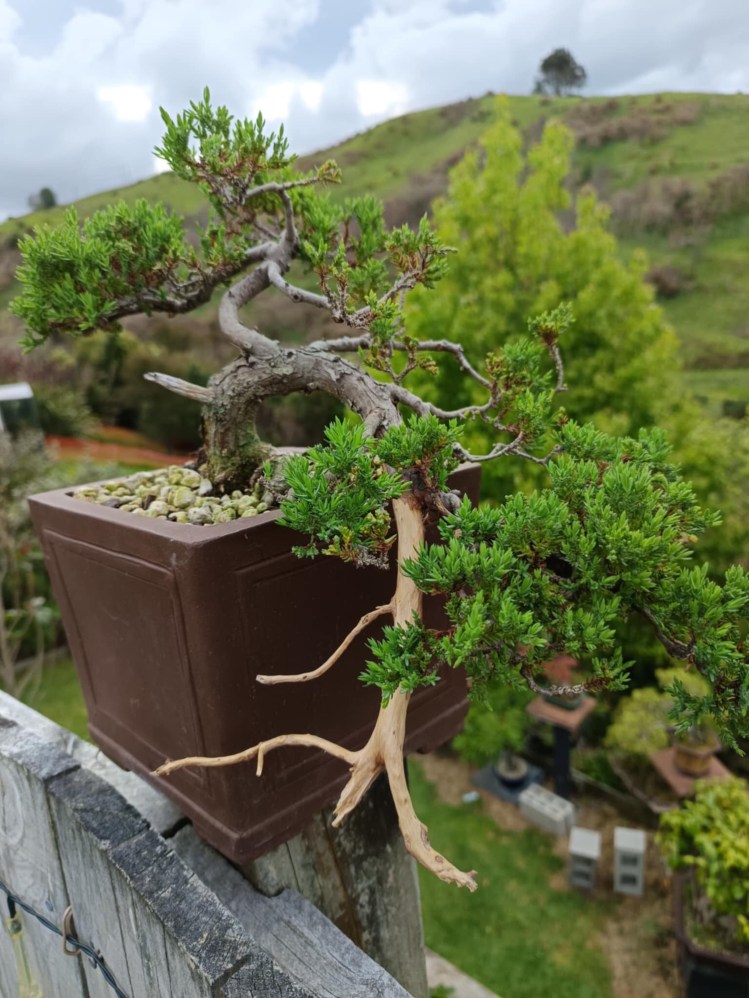
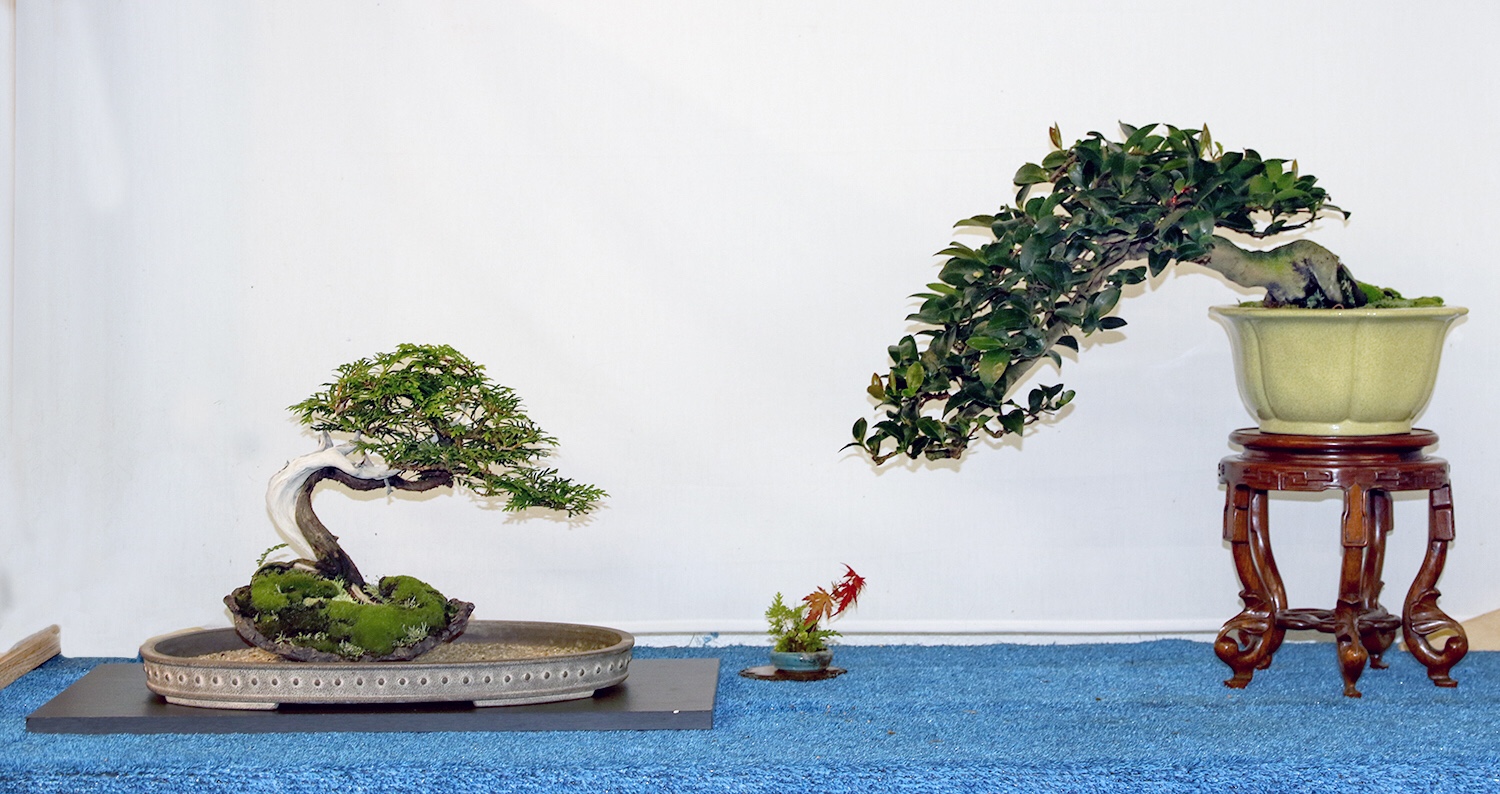
Semi-cascade Juniper Bonsai

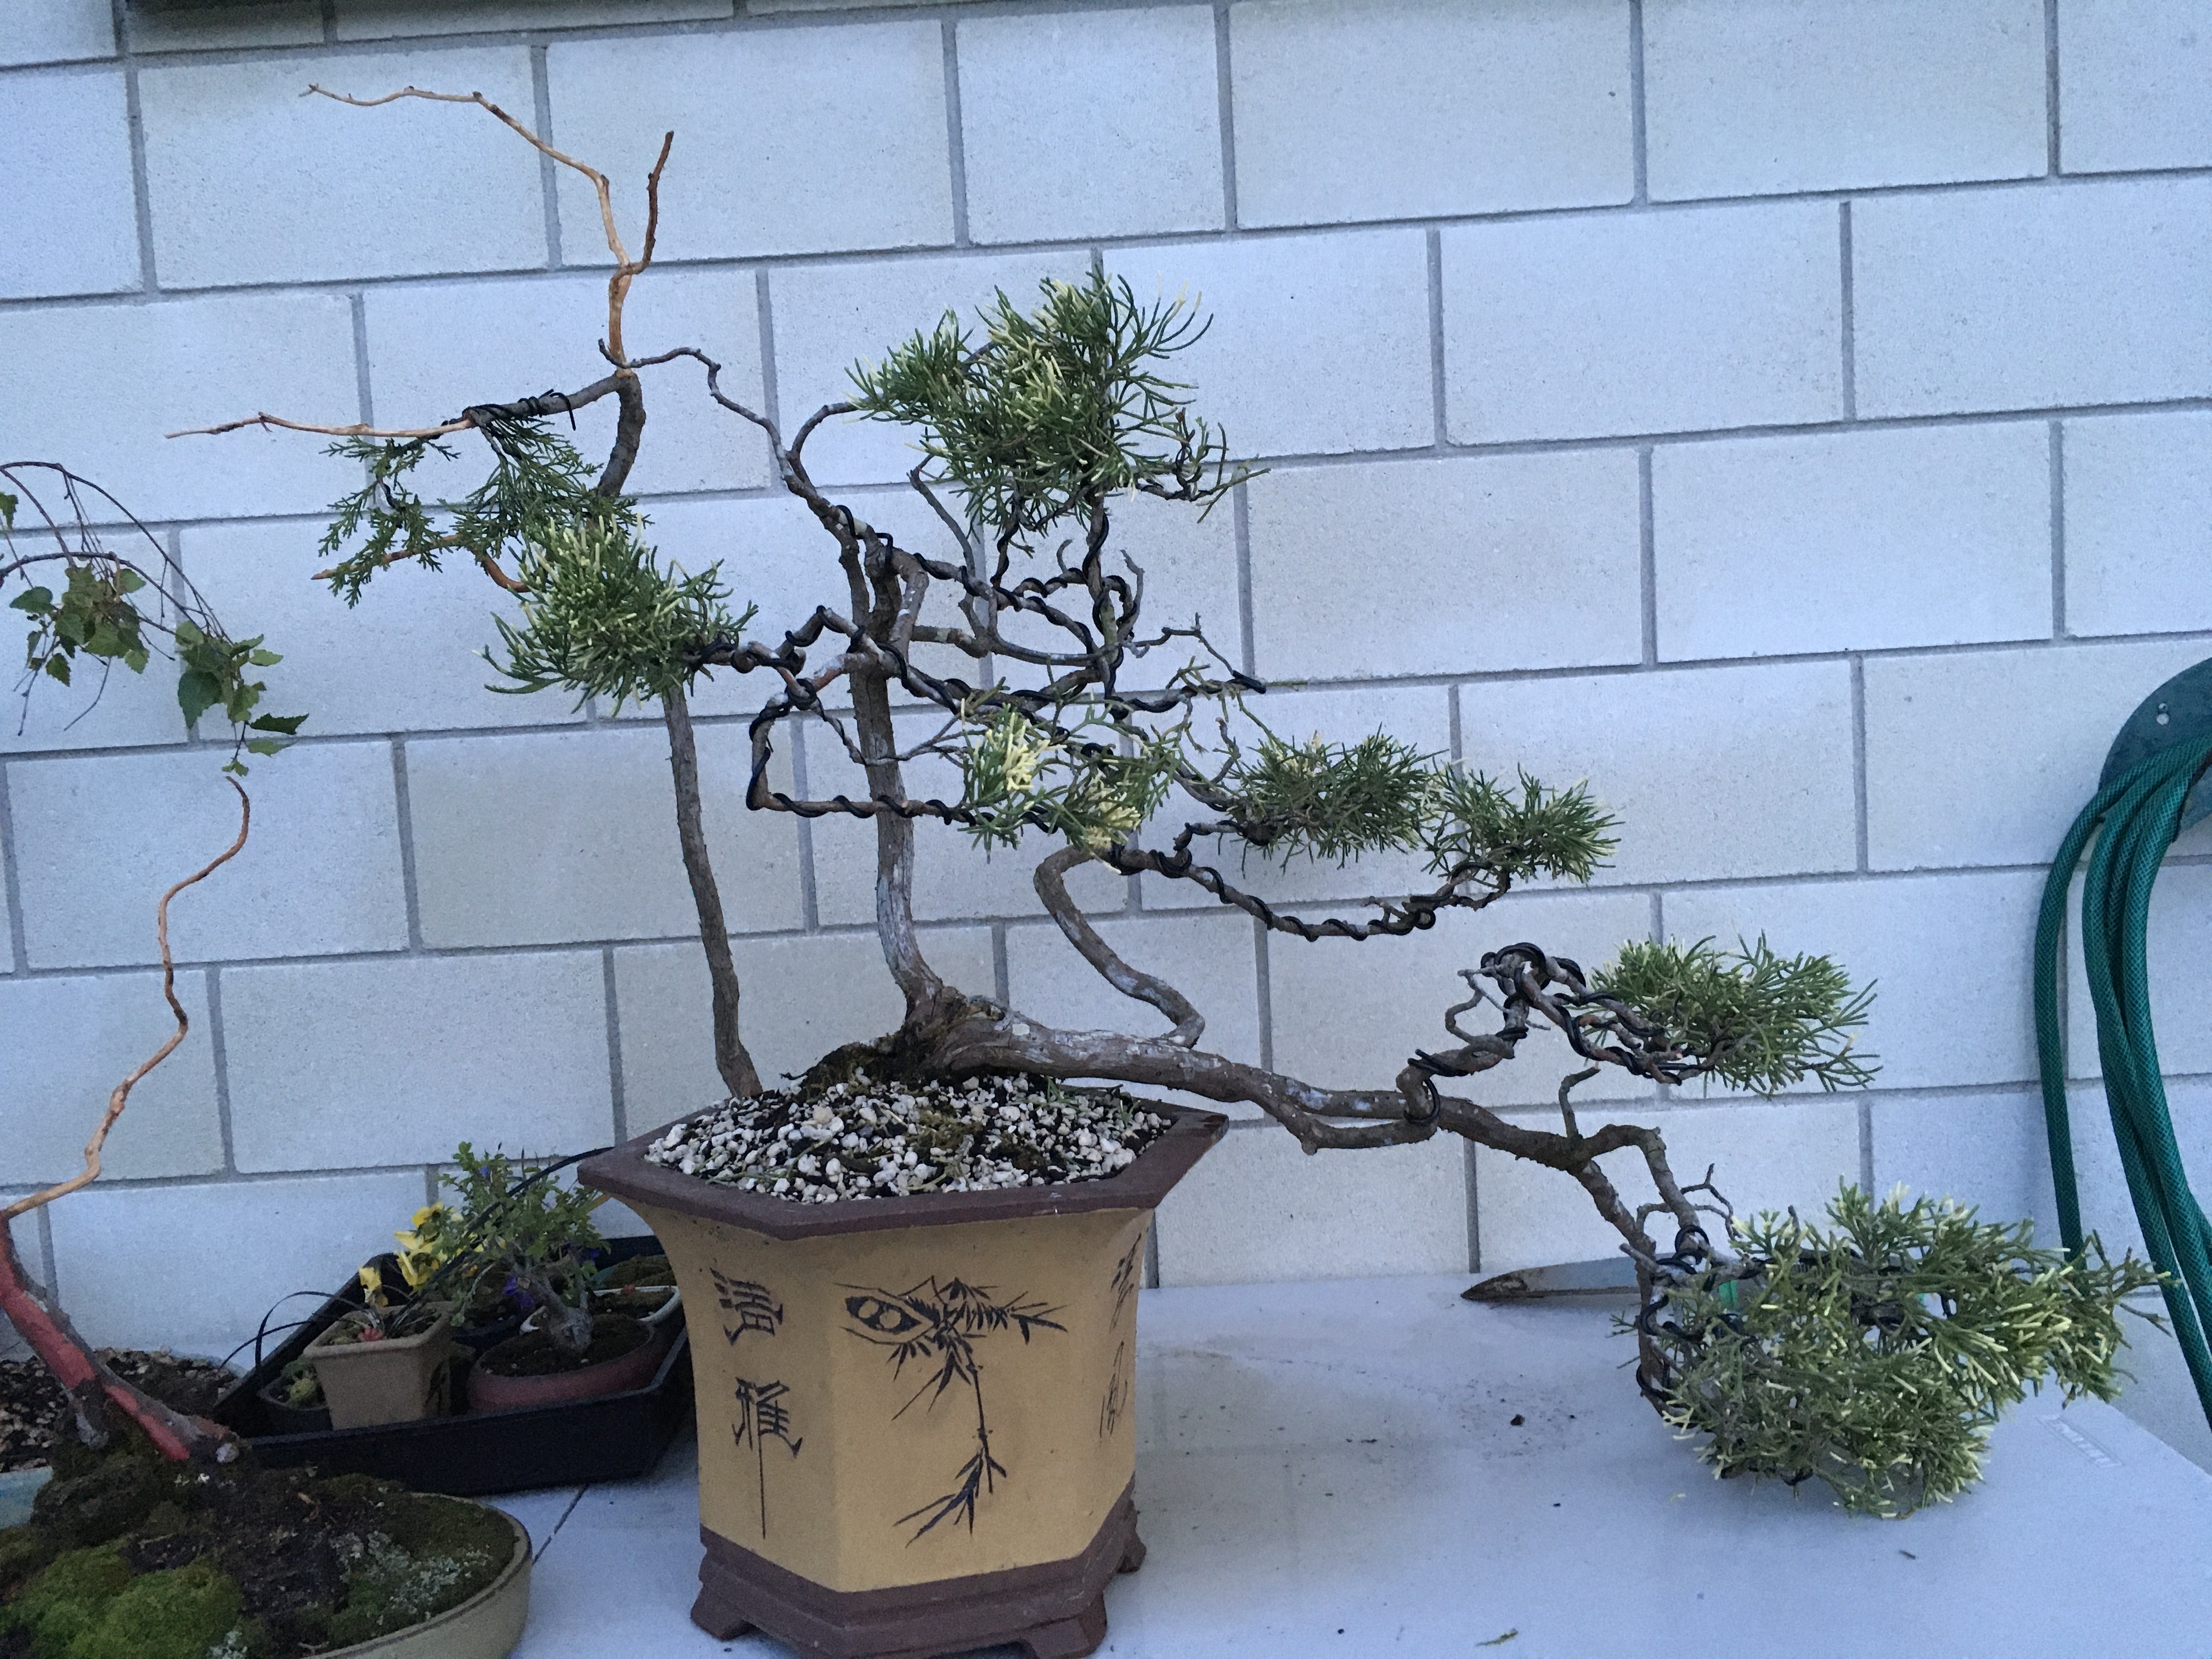
I was confronted with this Mugo Pine and had no idea what to do with it. The two bar branches at the bottom is ugly and the two arms going up from there does not lean itself to any of the Bonsai styles that I know of.
After many days, weeks and months of staring at it from different angles, I one day was working on a small Japanese White Pine that is planted in a crescent shaped pot and a new idea came to me. To do this, many Bonsai “rules” must be broken and the tree put at risk due to a lot of material being removed. This is a calculated risk. More about that later. Here is the culprit in all its former glory.

The decision was made to remove the one thick branch on the one side and create a two inch long Jin out of it.

Then the other branch was stripped and Jinned as well.

This longer Jin is now wired up and bent in the shape of a crescent, the same as what a crescent shaped pot would look like.
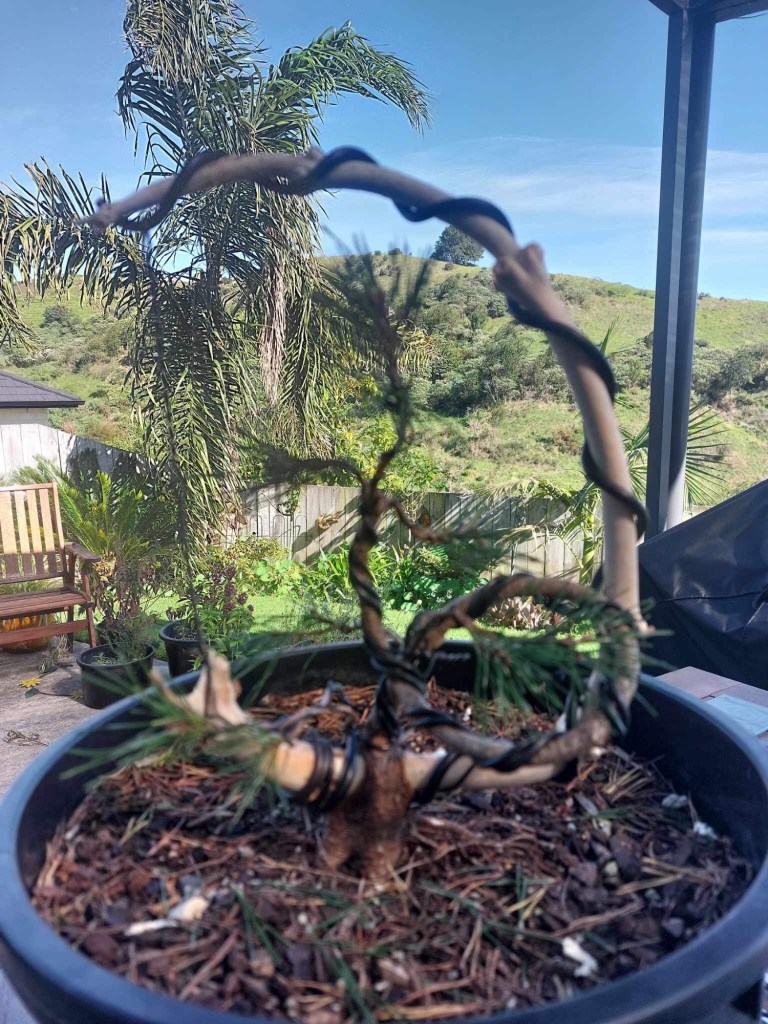
Now the only branch that is left is shaped to represent an informal upright style Bonsai tree with a loop in what is now the trunk to get the height correct.

Aftercare and the future: the tree will now be placed in a sheltered spot and remain there for at least a year. Fertilisation, watering, checking on the wire and weeding is the most excitement this tree will see for a long time. When the time is right, the wire will be removed and the Jin will be further developed. That will just be some detail work, inclusive of using fine carving tools, torching it and lime sulphur treatment. The tree will also go into a Bonsai pot once the growth is strong.
I mentioned taking calculated risks earlier. It really comes down to mitigating the risks by thinking through each risk and finding a way to minimise the risk. These include not potting anytime soon which means no root work at this time, sealing all the wounds and keeping the tree out of wind and harsh sunlight. Extensive wiring took place and this is mitigated by placing guy wires in places to support the harder wiring as to take some of the load off. Guy wires are attached to the wire on the branches / Jin and not on the branches itself. Now, let’s pray.

A previous blog post addressed sculpture as an art form and how it relates to Bonsai (https://bonsaiplace.net/2021/03/28/bonsai-as-sculpture-an-art-form/). This blog post will take an more practical approach by making use of photos to describe the process.

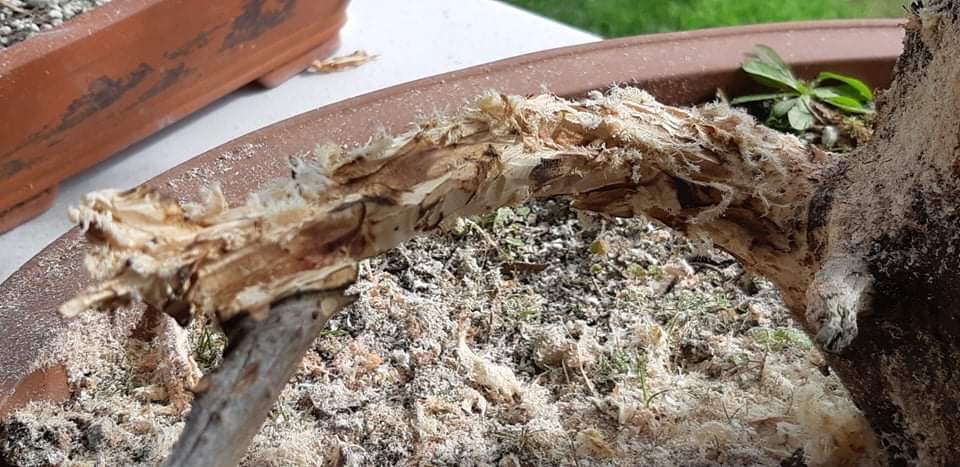
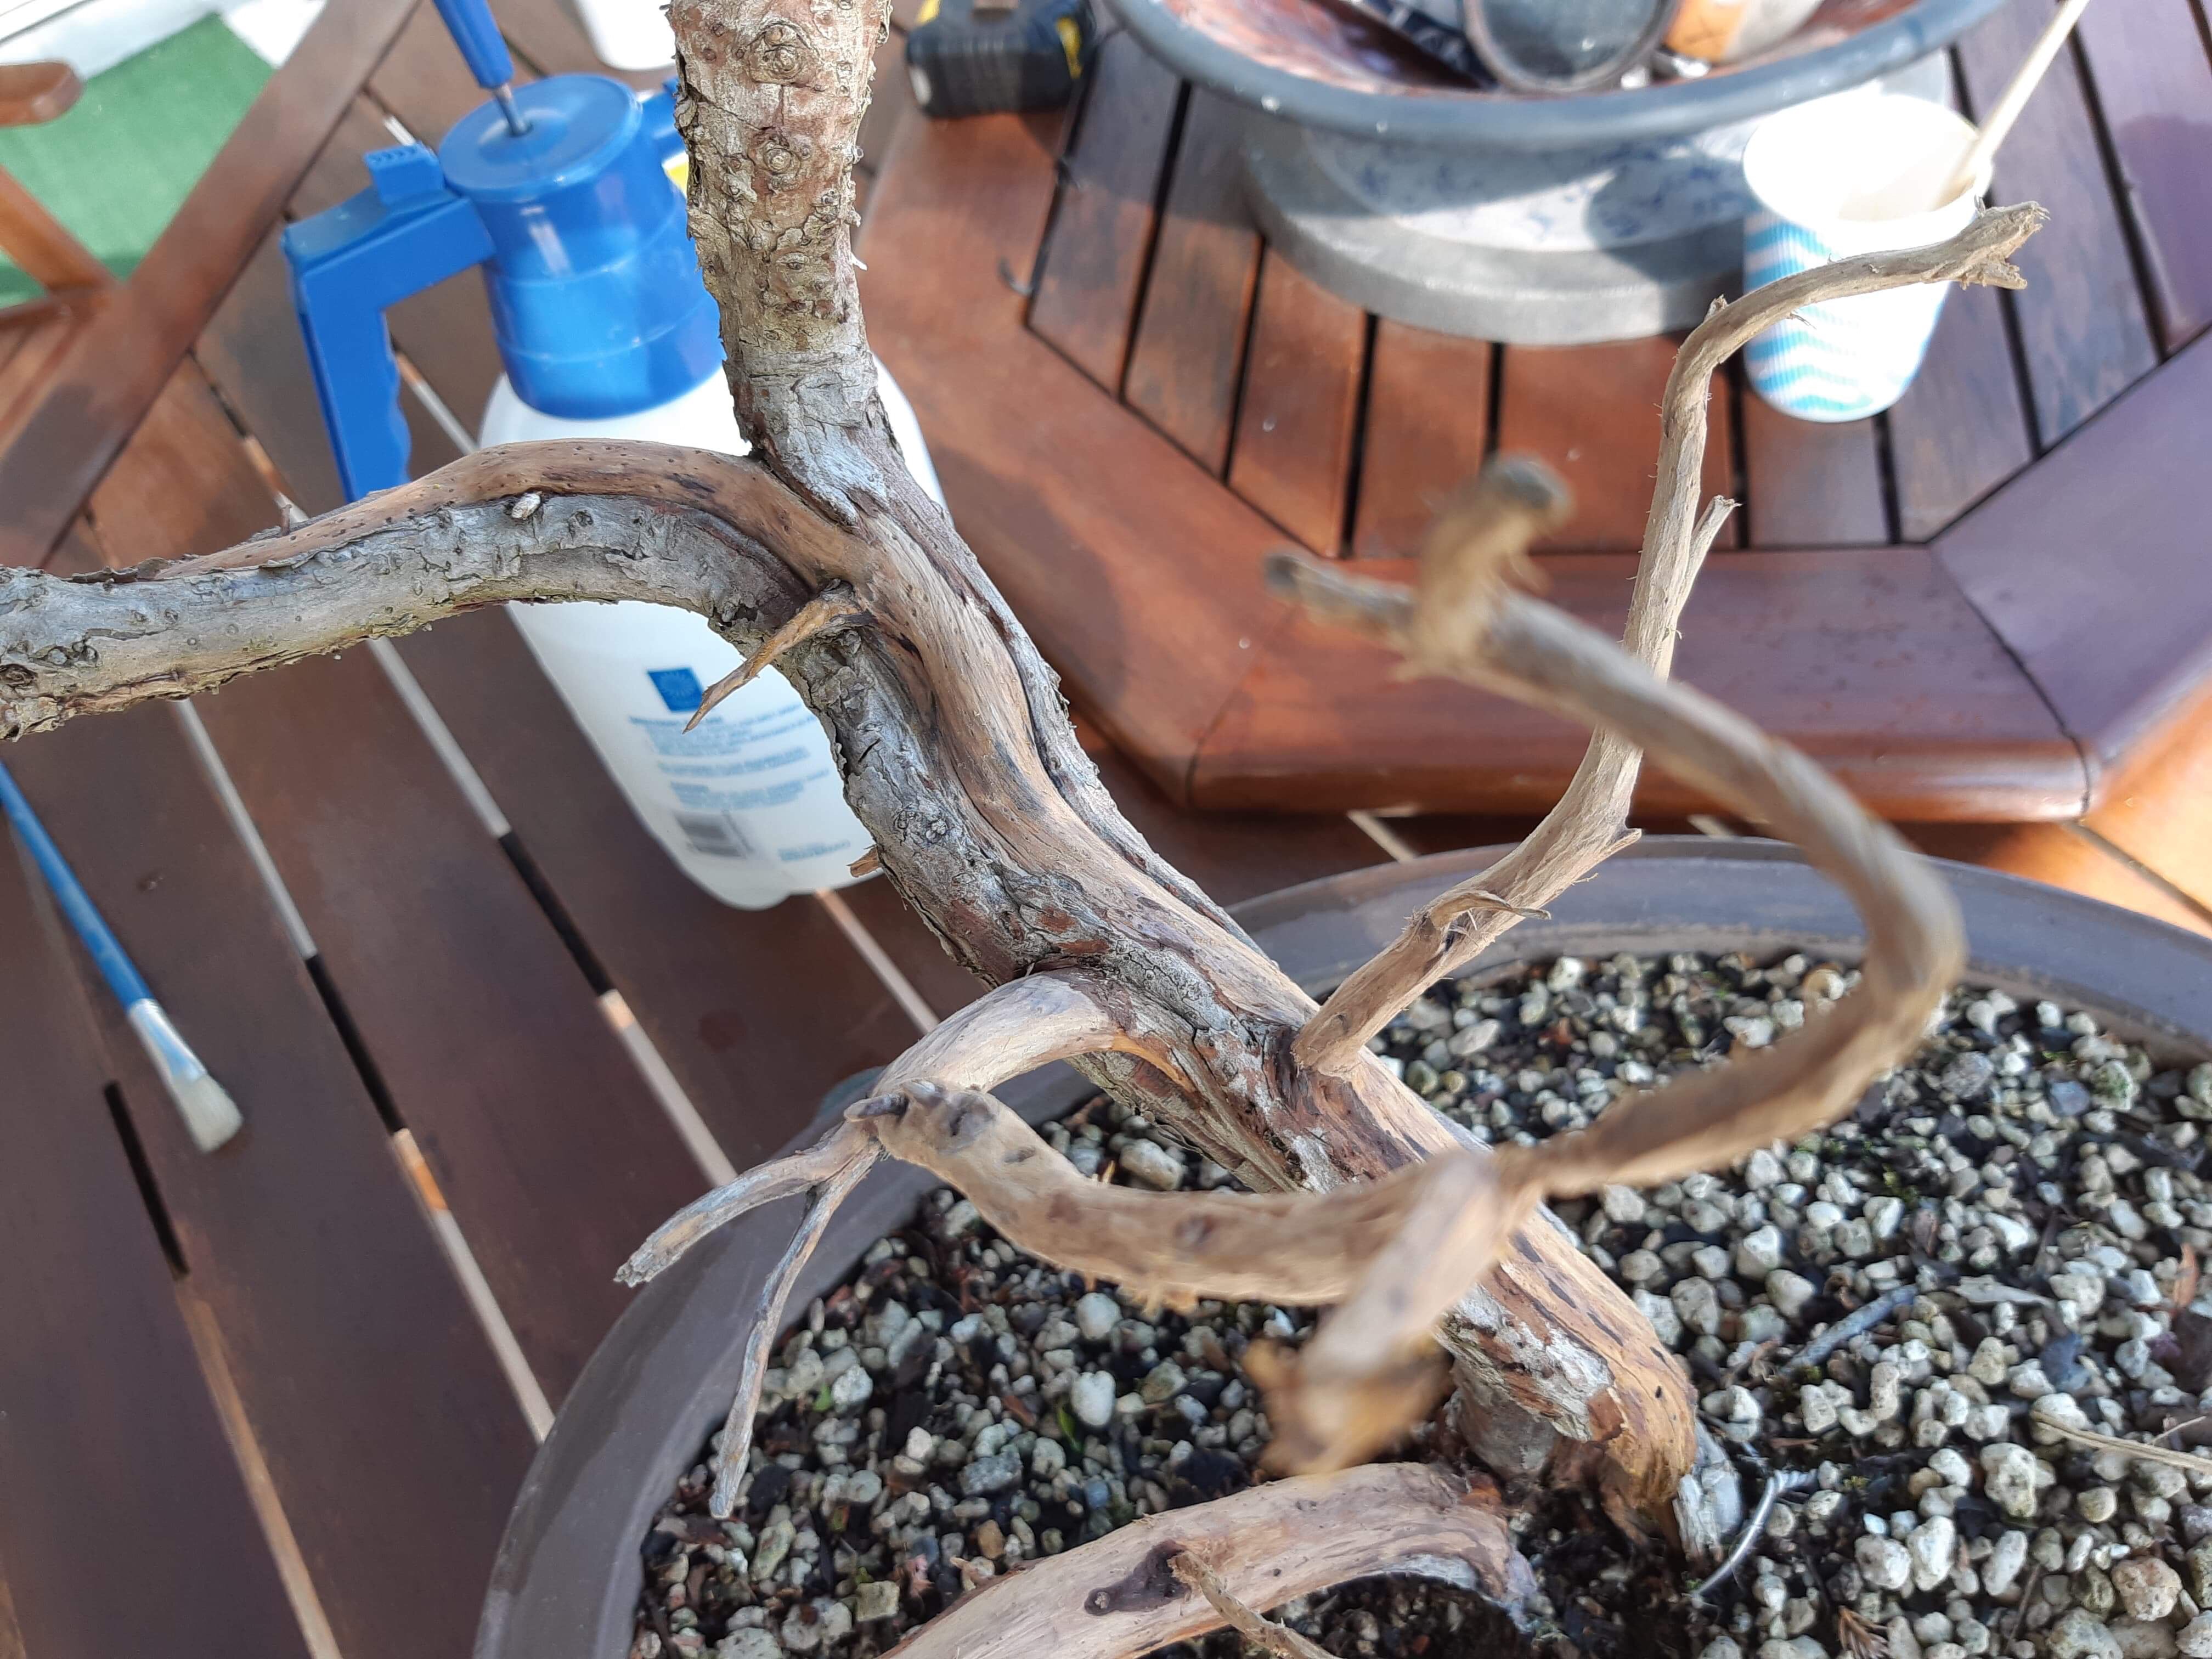
Carving is usually done to create or enhance jin, uro (holes), shari (stripped bark) or getting rid of areas where large branches were removed. In this case a large branch, about one inch thickness, had to be removed and it was decided to leave a 15cm piece of it and sculpt a jin (deadwood) out of it.


I use a die grinder with a carving bit to remove material fast and to roughly shape the dead straight branch by making grooves in curves and alternating the depth of the grooves. Once this is done I burn the jin to get rid of wood fibres and then repeat the process with the trusted Dremel and a smaller carving bit.


As mentioned, burning the jin with a butane torch gets rid of the loose fibres, but it also helps to get rid of sharp edges and tool marks. After a heavy torching, the jin is brushed with a copper brush and then with a nylon brush. Sand paper can be used to smooth areas that needs it, but I find that the brushing works well on its own.

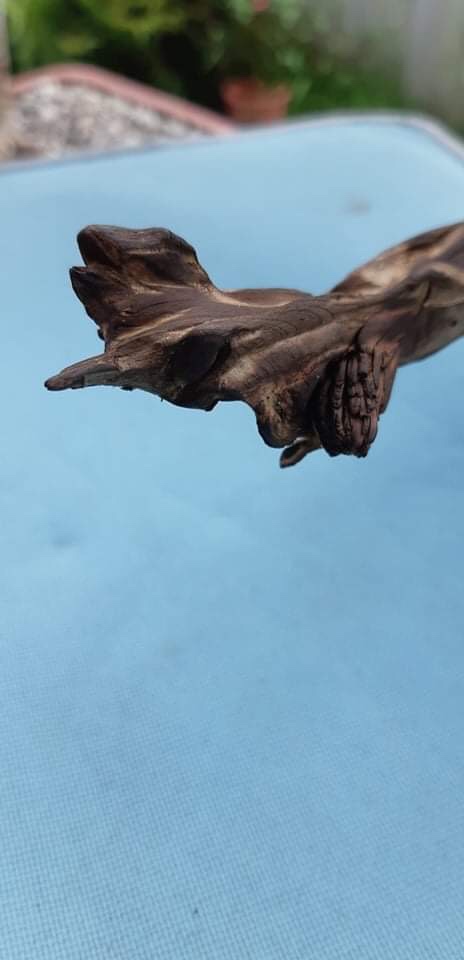

To preserve the newly carved jin, I wash the whole tree off and then let it dry and rest for a few days. Lime sulphur or a wood hardener can then be applied. For a darker finish, mix some ash (burnt paper) in water and paint on. Some of the grooves can also be painted by making use of black ink. All fluids should be diluted. Lime sulphur is usually diluted with water 50/50%.
Safety aspects:
Please like and subscribe to this blog to be notified when new posts are done. Thank you for the support and feel free to shore this post as well as the blog site.

I have recently been privileged to get hold of a few older trees that has not had a lot of care and maintenance done on them. They came from an older person whose health is not that great and he cannot look after the trees that well anymore.

Just a plant in a pot. Some of the character is there, but growth is leggy and not well maintained.
While studying the trees I had this overwhelming feeling of responsibility that came to sit on me and I realised that I now have to look after these trees better than the trees that I have cultivated from scratch. Why this feeling? I have been part of many discussions and even said it to many people in audiences wherever I go, that Bonsai is something that we get to enjoy now, but that we also start something for the next generation. I now realise that when it lands on the next generation, it comes with a burden, but it is a positive one. We are just caretakers of the Bonsai trees coming through our hands right now. It is part of our journey just as we are part of the tree’s journey.
You are privileged to receive a tree from the previous generation and you inherit with it, a responsibility to support that tree for the next generation. And on the cycle goes. All privilege comes with responsibility and this is no different when it comes to Bonsai. Is it more than just looking after your own trees? Yes, I do think so. The tree comes with a history, a story, and you might not be aware of this as I certainly have no idea what this looks like for my new (old) trees. That does not matter as we are lucky in that some of this history is told by the tree itself.
The roots will tell you how it has been struggling to hold on to the ground and how it searched for water and food. The bark, the angle of the branches, the presence of jin and shari and what it looks like, are all parts of this story being told. It is now my job to ensure that this tree’s story can still be told and then when it goes off to the next generation that my contribution to the life story of the tree is visible and seamlessly integrates with the tree’s existing story. This is privilege and this is responsibility.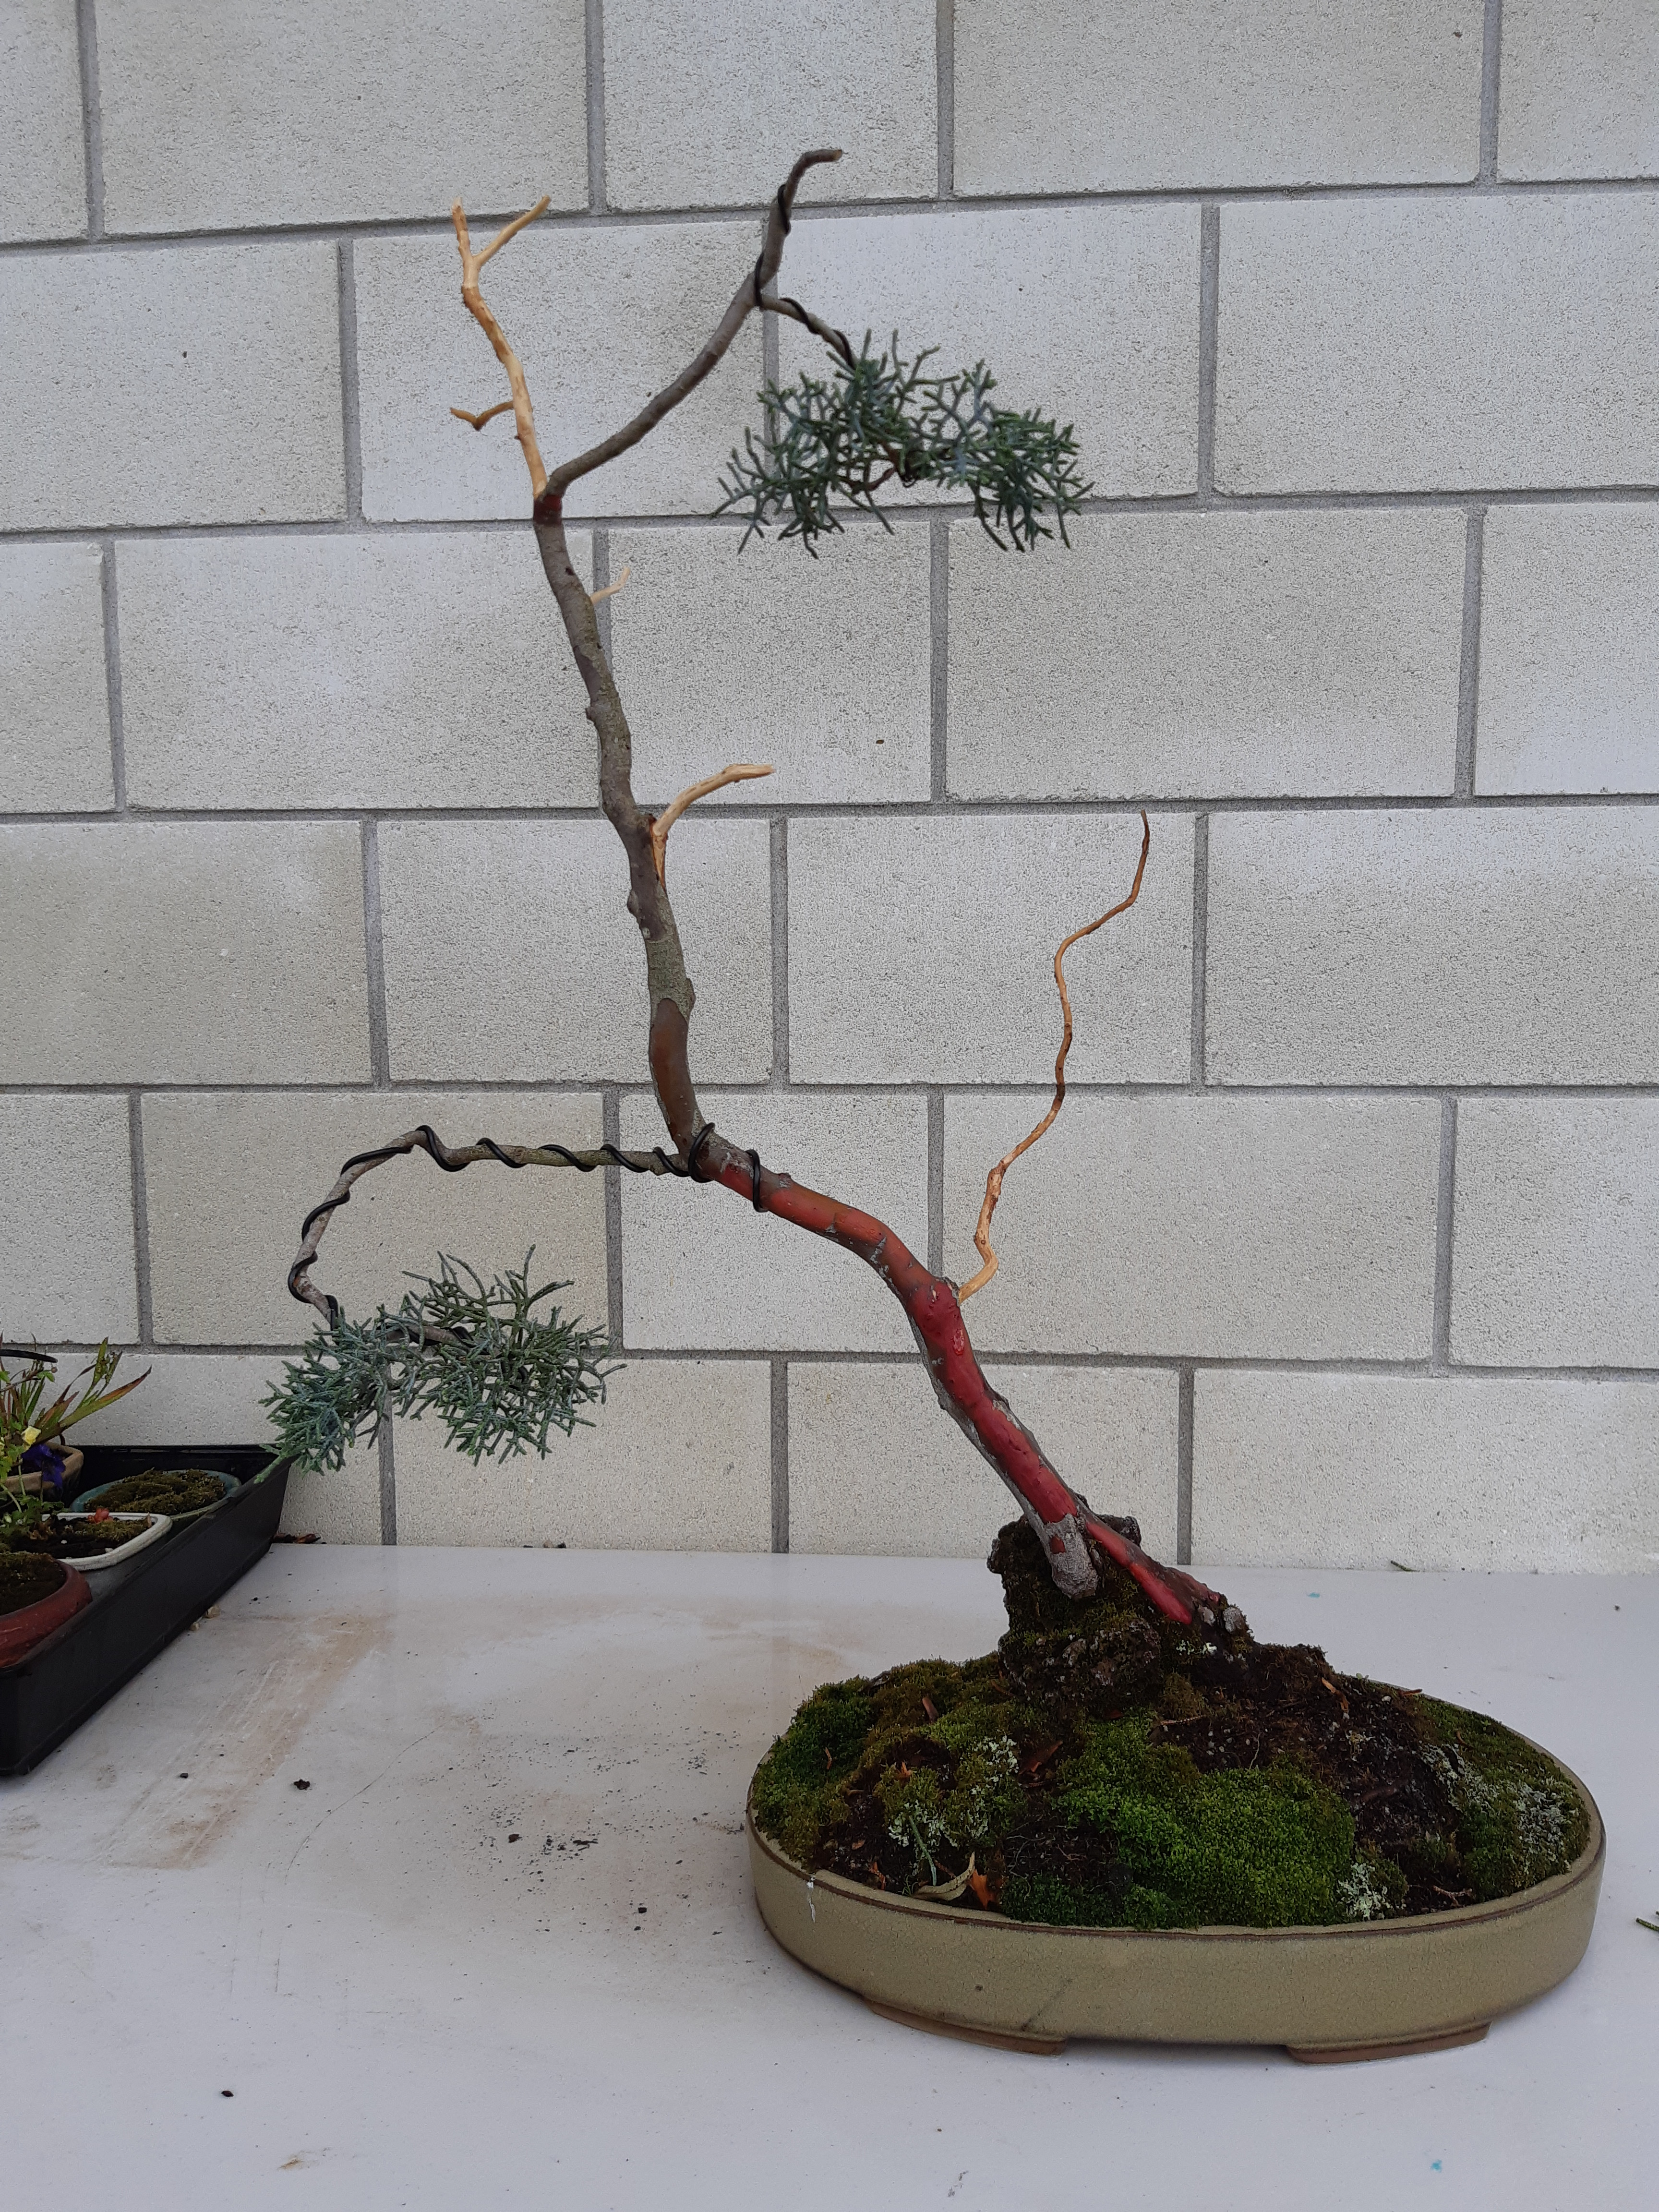

 To prepare a tree for a show starts a long time out from the show. It actually starts with your general maintenance regime, your design philosophy and daily dedication to your overall collection. The normal sequence for getting a tree in a show is to decide on which tree will be entered and then an acceptance from the organisers to have that tree in the show. This could at times be problematic as the time between the acceptance and the show could be very short. My advice is to start the show preparation before the tree is entered as it should be of a more than passible quality when entered.
The Tree
The tree must be in excellent health and show the characteristics of the species. Al dead and not so healthy looking leaves and needles must be removed and all excessive and not needed wiring should be taken off as well. It is OK to have some wiring, but this must be discrete and only used to refine minor things. Wiring must be applied correctly as it can detract from the overall scoring if not done so. Also ensure that all leaves and needles growing downwards (species and style specific) are removed and that foliage clouds are distinct and neat.
Ensure that the main trunk line is clear and clean (the whole tree must be clean). Look out for insects and spiders and remove these. A smooth trunked tree can be cleaned by spraying a little bit of vegetable oil on it and rubbing gently with a paper towel.
The nebari and roots must be checked as well. All of the above apply to this area also.
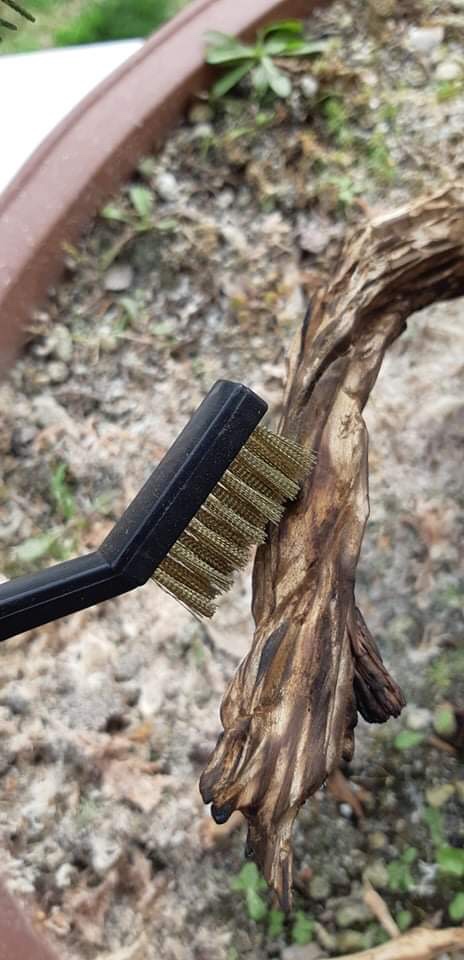
Deadwood (Jin) should be clean. This can be done by brushing it with a toothbrush and using tweezers to get small pieces of debris out of narrow and hard to reach places. Lime sulphur should be applied a few weeks out from the show to allow it to settle. If needed give it a brush for the colour to settle in with the rest of the tree.
Soil
All weeds and fine protruding roots must be removed. Take weeds out and the finer roots can be covered with moss if it cannot be removed. Moss should be in pristine condition. This is one of the tasks that cannot be left to the last minute. If you do not have moss ready, you can grate old moss and apply this to the soil surface, even better if it is on a layer of fine sphagnum moss. Pay as much attention to this aspect as you would a prize-winning lawn.
Pot
The To prepare a tree for a show starts a long time out from the show. It actually starts with your general maintenance regime, your design philosophy and daily dedication to your overall collection. The normal sequence for getting a tree in a show is to decide on which tree will be entered and then an acceptance from the organisers to have that tree in the show. This could at times be problematic as the time between the acceptance and the show could be very short. My advice is to start the show preparation before the tree is entered as it should be of a more than passible quality when entered.
Display
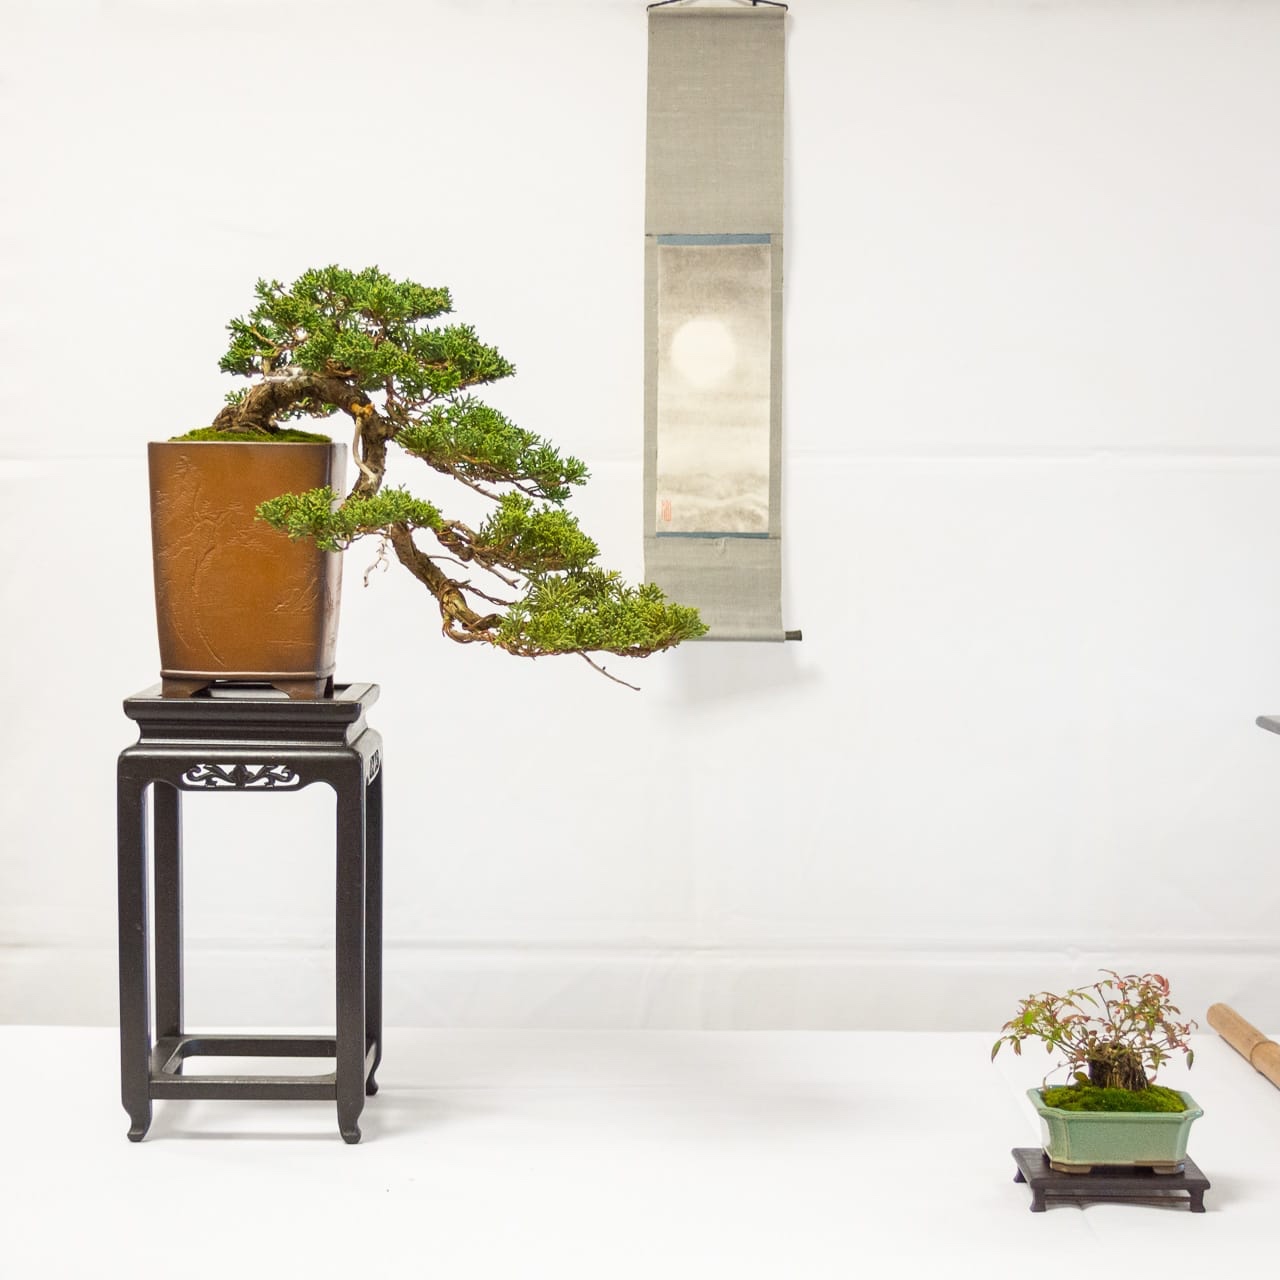
All components making up the display must be clean and in good condition. The so-called three-point display technique will compliment your tree. This usually consists of the tree on a stand, an accent tree or plant and a scroll. One of the two non-tree elements could be a Suiseki. The dimensions and placing of the three elements are crucial to get a view of one, but to still emphasise the tree as the main focal point. My best advice with this is to have a few stands, scrolls, accent plants and even Suiseki at the ready and to try different combinations.
One of the best things you can do is to study as many displays that you can get your hands / eyes on. This is not difficult with the internet at our fingertips. All the top shows across the world are represented in thousands of photos on the internet. Happy showing!


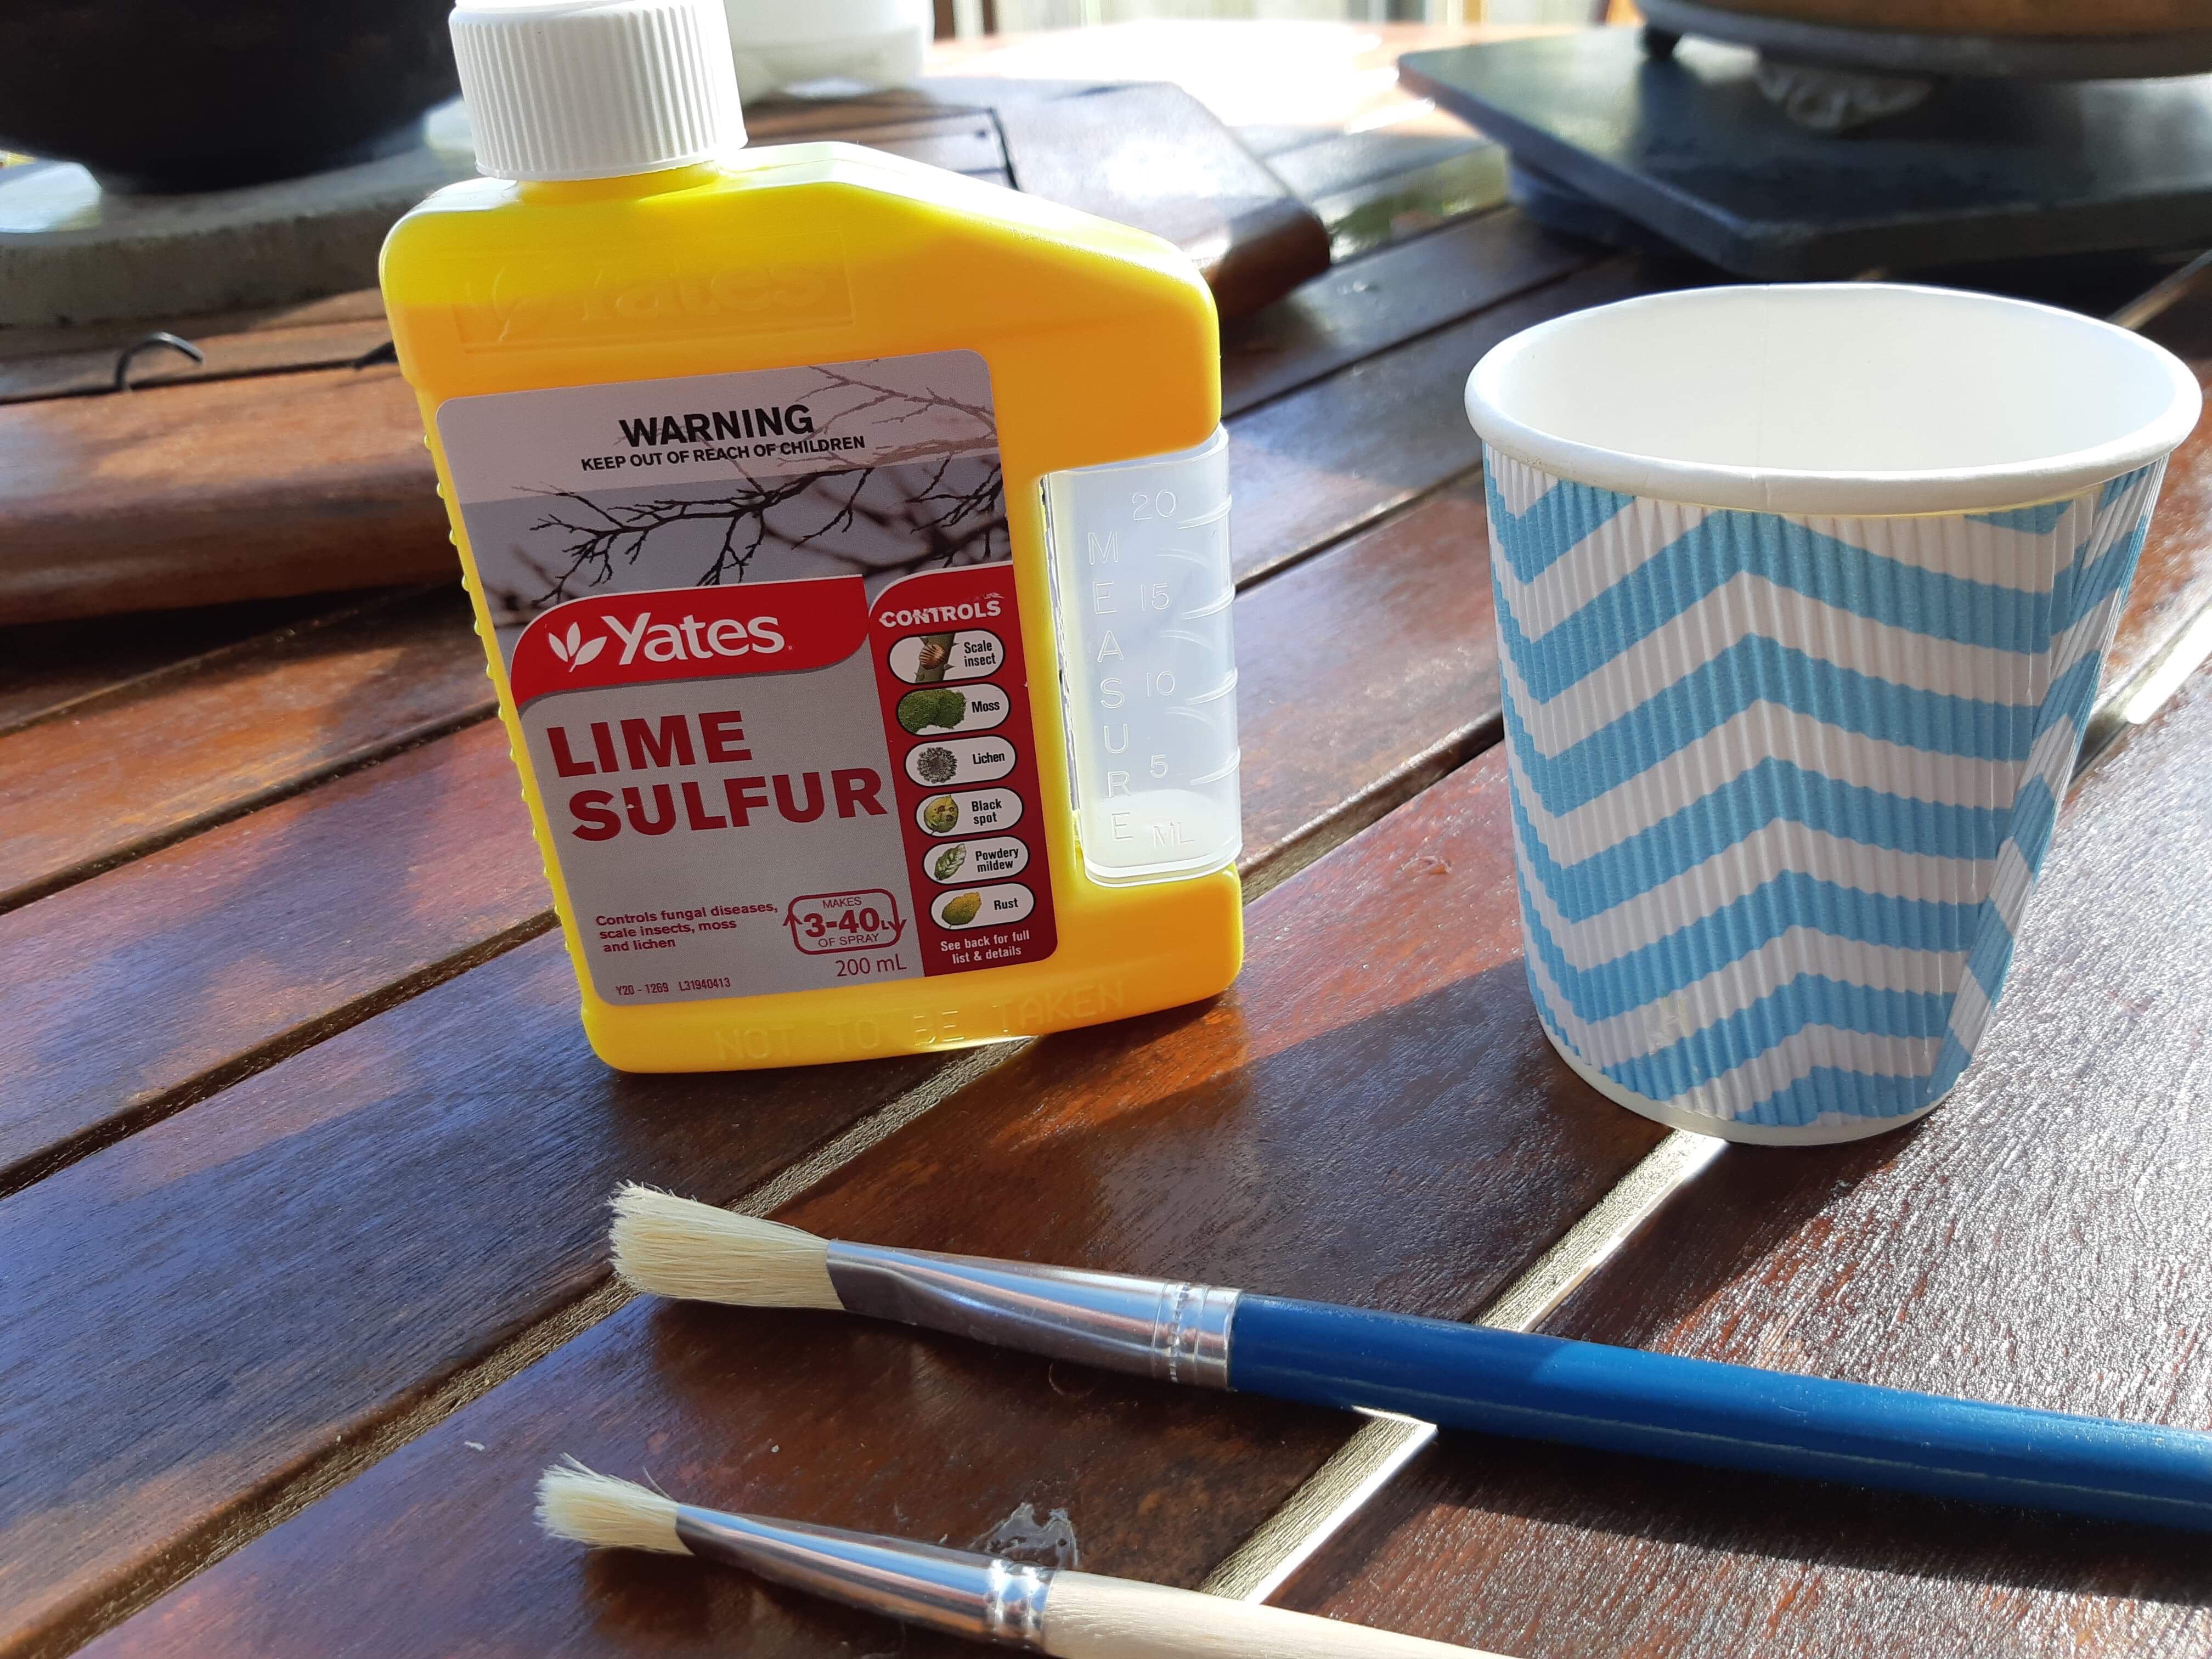
Lime Sulphur is usually used in the Horticulture industry to control scale insects, moss, lichen and fungal diseases on plants. It can be used for all of these issues when it comes to Bonsai. A use that is not listed on the container is to whiten deadwood / Jin.

As always, safety comes first when you use any chemical. In this case, it is not just the smell (rotten eggs comes to mind), but also the fact that this chemical is corrosive. It is a good idea to wear gloves and to protect your eyes. Wash your hands very well afterwards and keep your hands away from your face.

Follow the instructions on the container for all uses. As said, the whitening of deadwood is not listed as a normal use of lime sulphur. One thing to keep in mind is to also protect the soil surface from lime sulphur dripping or being spilt on the surface. Remember, this chemical is also used to kill moss! You do not want to kill of your lush green carpet covering the soil surface. I usually use plastic wrap for this purpose.
I dilute the lime sulphur 50/50 with water and I do this in a plastic or paper cup as it is easier to just throw it away afterwards than trying to clean it and getting rid of the smell. I also use a 12mm brush for most applications, but can go smaller or larger depending on the size of the job.
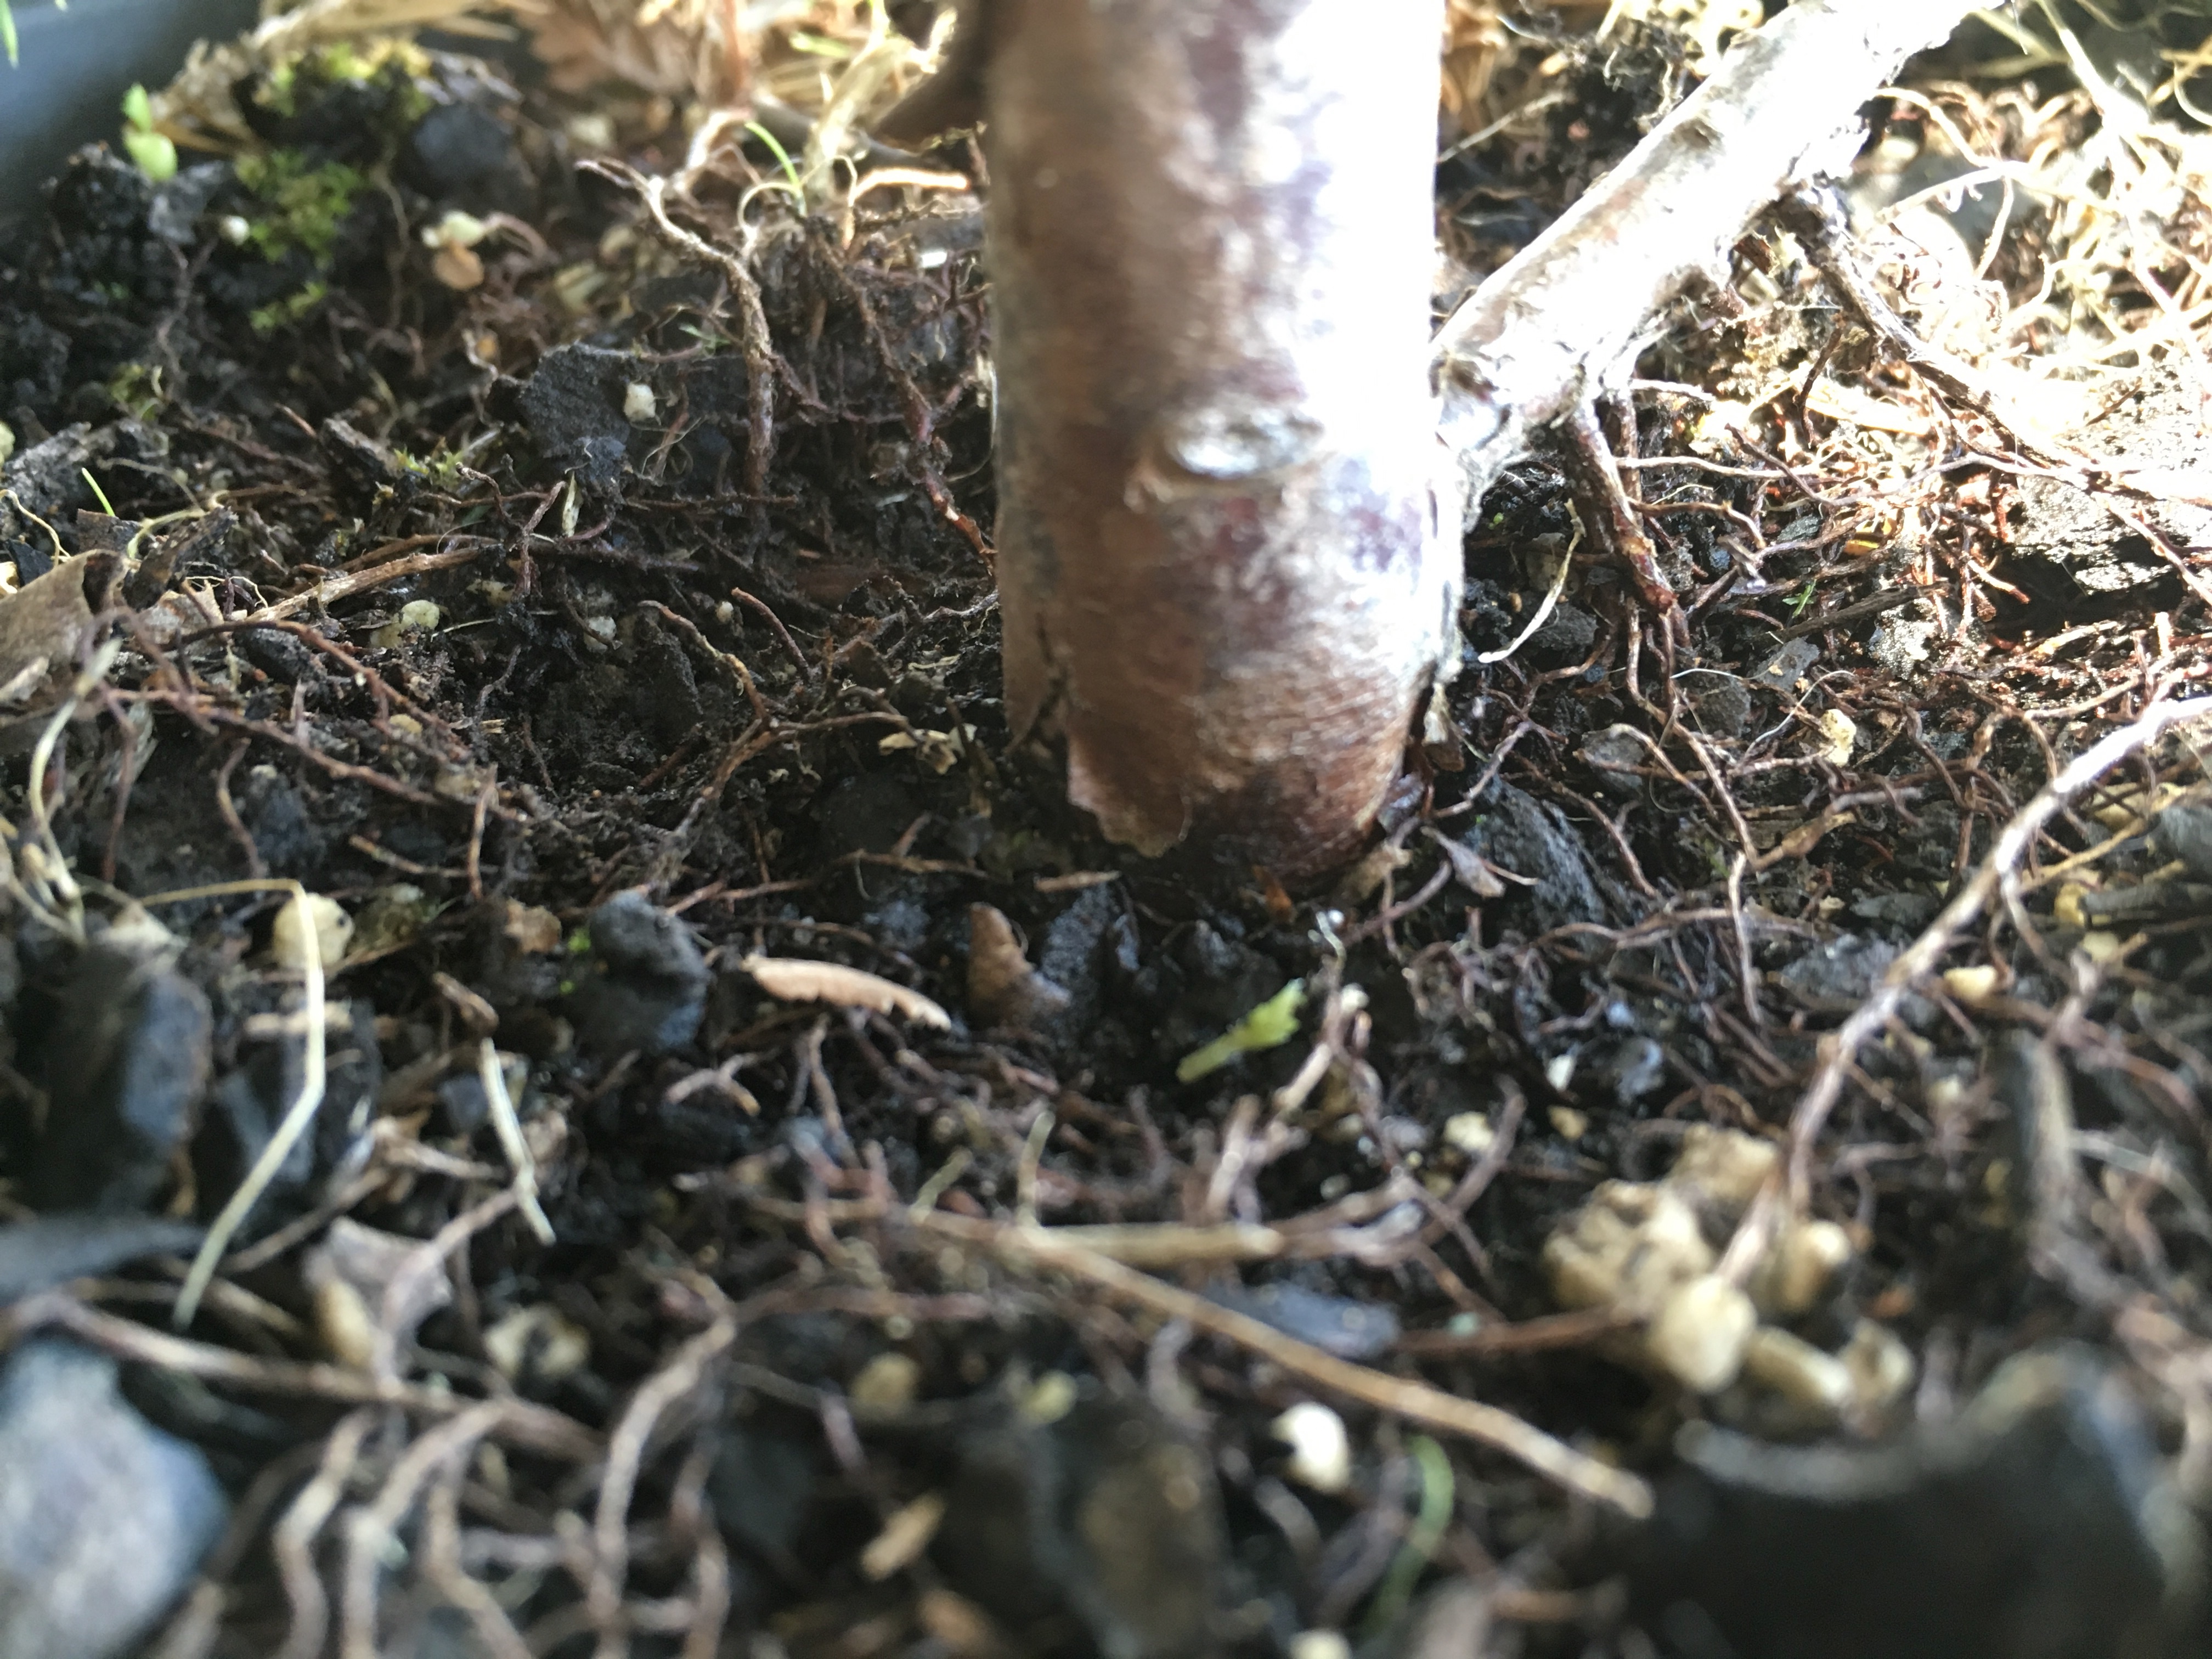
I also find it easier to apply if I slightly wet the surface of the deadwood. The Juniper that I worked on here had a bit of rot at the bottom where the tree meets the soil surface. This was cleaned well and the lime sulphur was liberally applied here. The chemical protects the wood against rot by acting as a preservative.

After application, clean the brushes well and get rid of the container. Wash your hands and allow the lime sulphur to dry and work its magic on the tree.
It is very common to see a photo of a seedling or small nursery stock on social media with the following comment: “I am new to Bonsai, please help with advice”. Where to start? What the follows is a number of people writing one liners or a bit more with a genuine interest to help.
I have been demonstrating and teaching Bonsai now for many years and am following what I think is a logical series of steps to enable the new Bonsai enthusiast to work towards a specific goal. It is almost paint by numbers, but in the absence of knowledge and skills, it is the best way to get the basics across in a short period of time. Here are the steps:
Each of these steps require a lot of knowledge to get to the end result. This is part of the conversation as the design unfolds. Small nursery material can take up to three hours to style with a new enthusiast in a workshop situation. The hands-on work takes only about thirty minutes to complete, but the explanations and answering of questions, in my mind the most important part, takes up a lot of time.
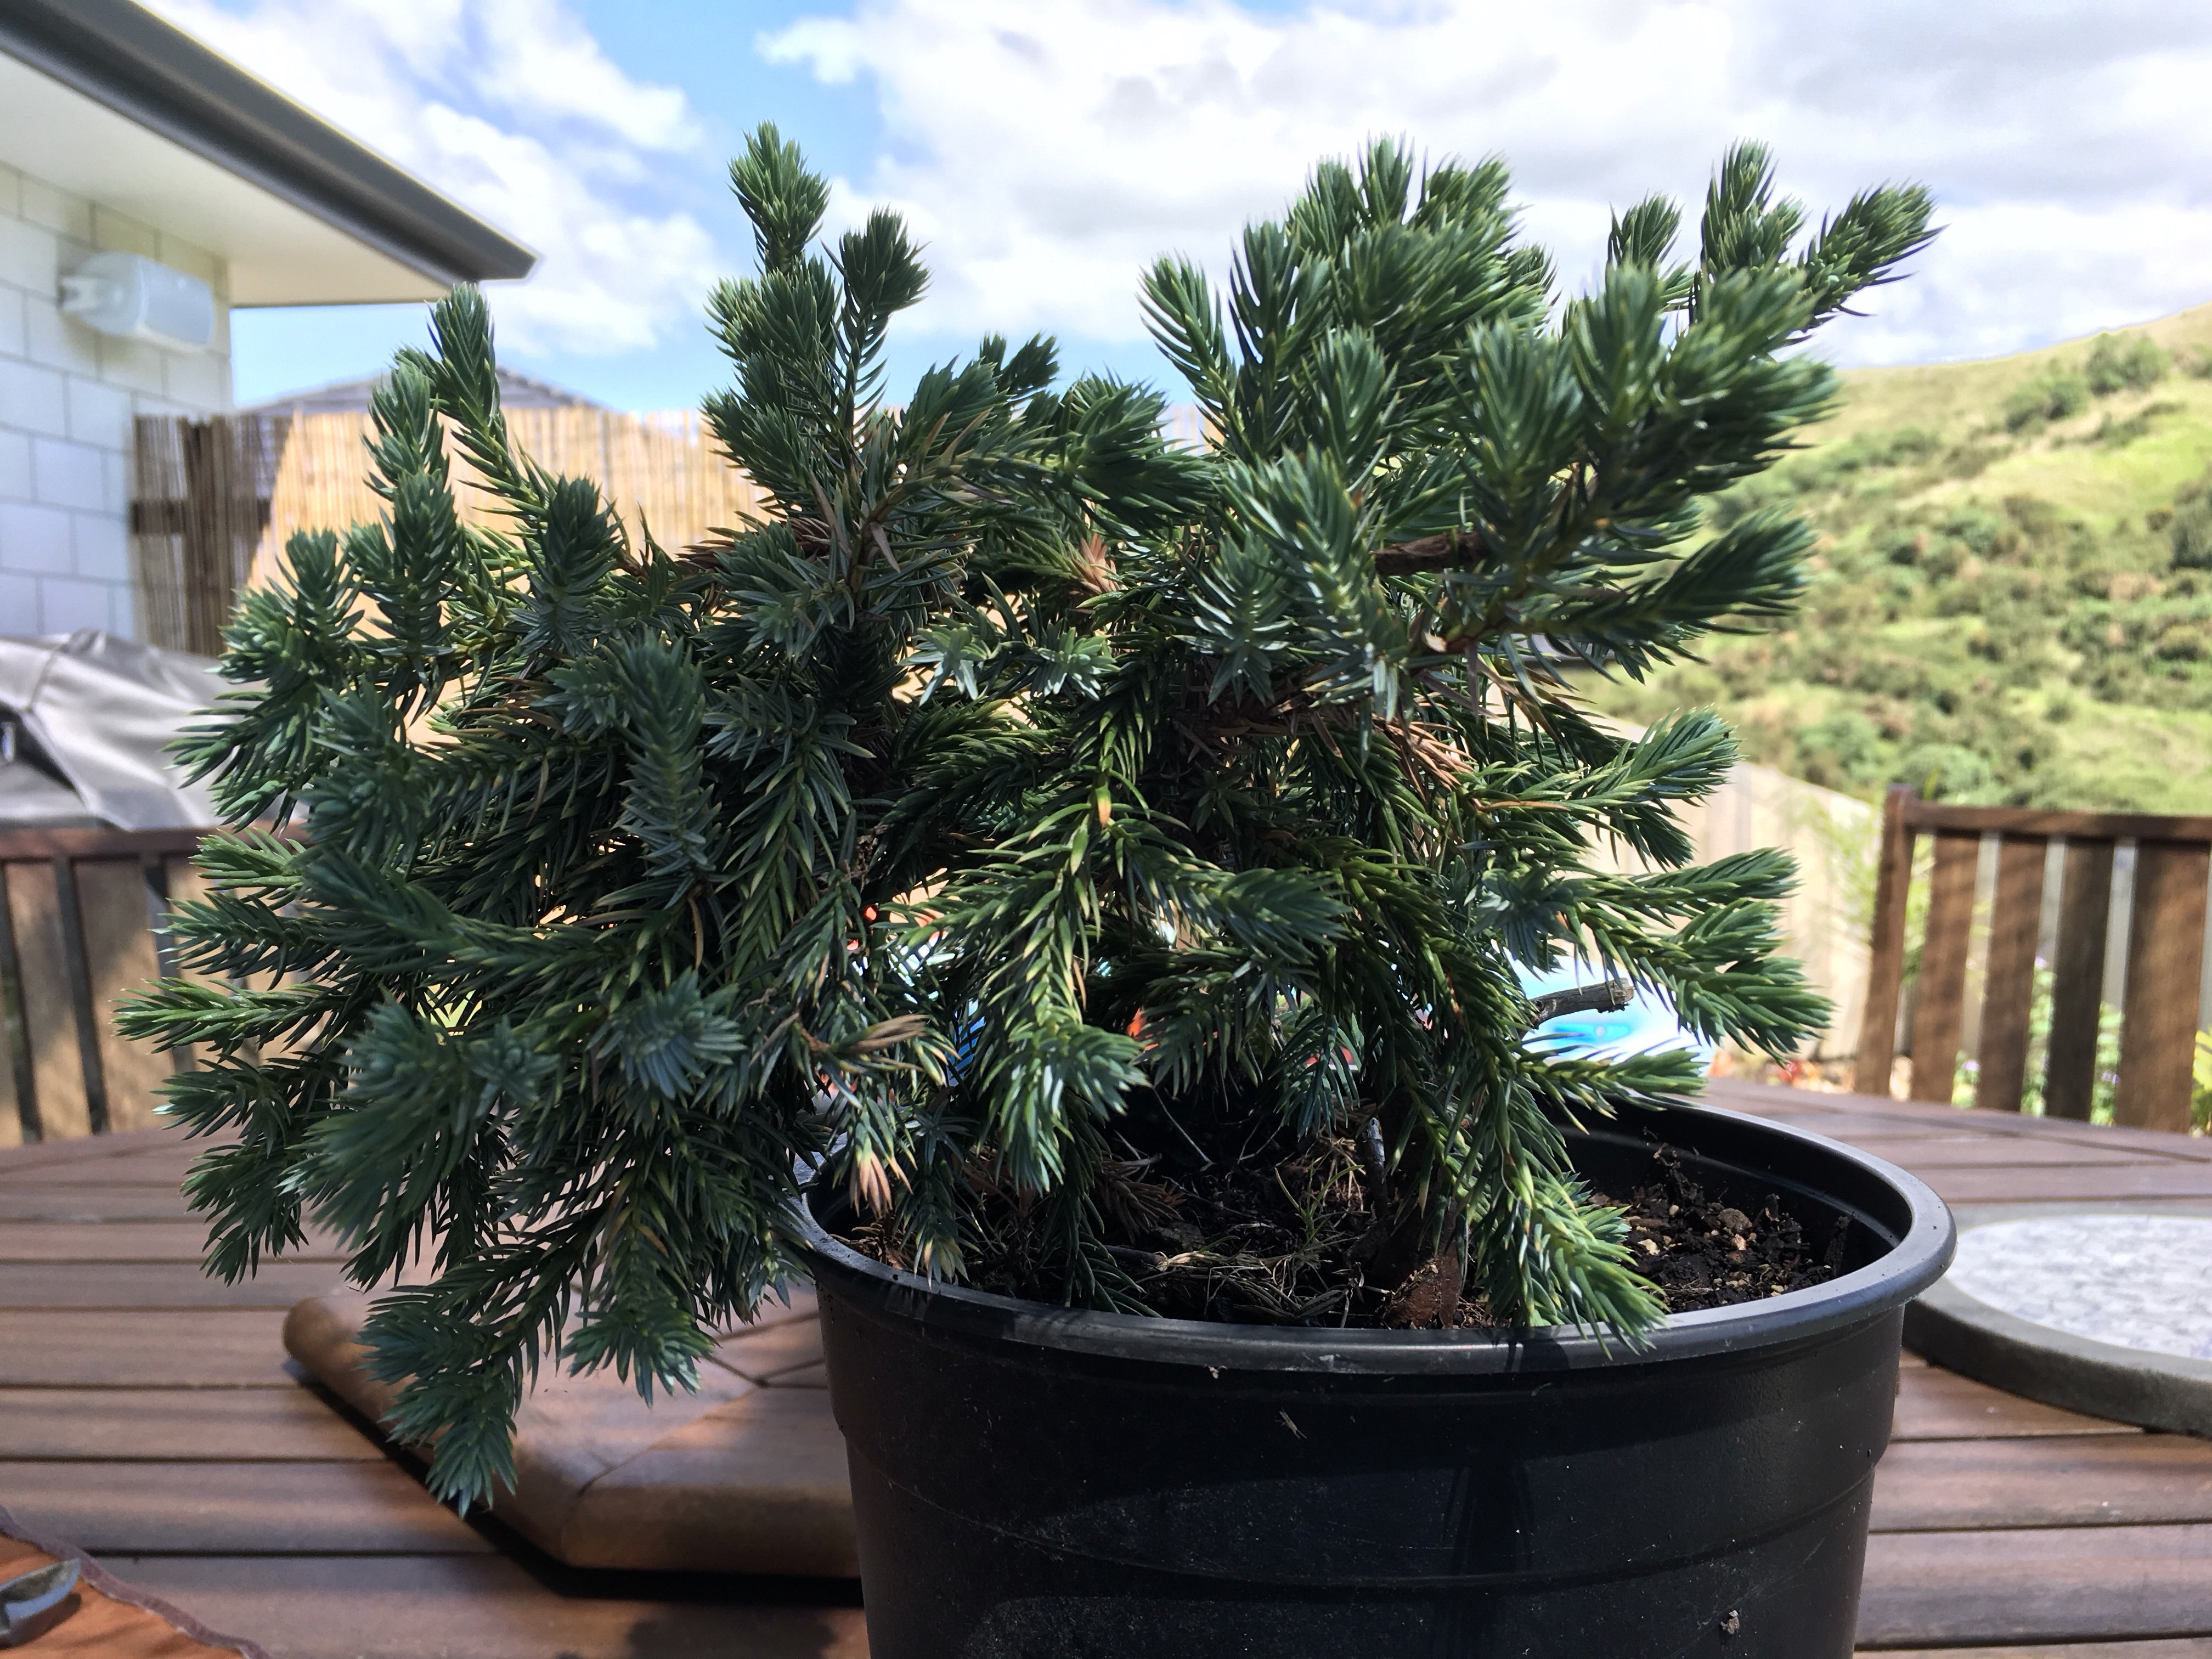
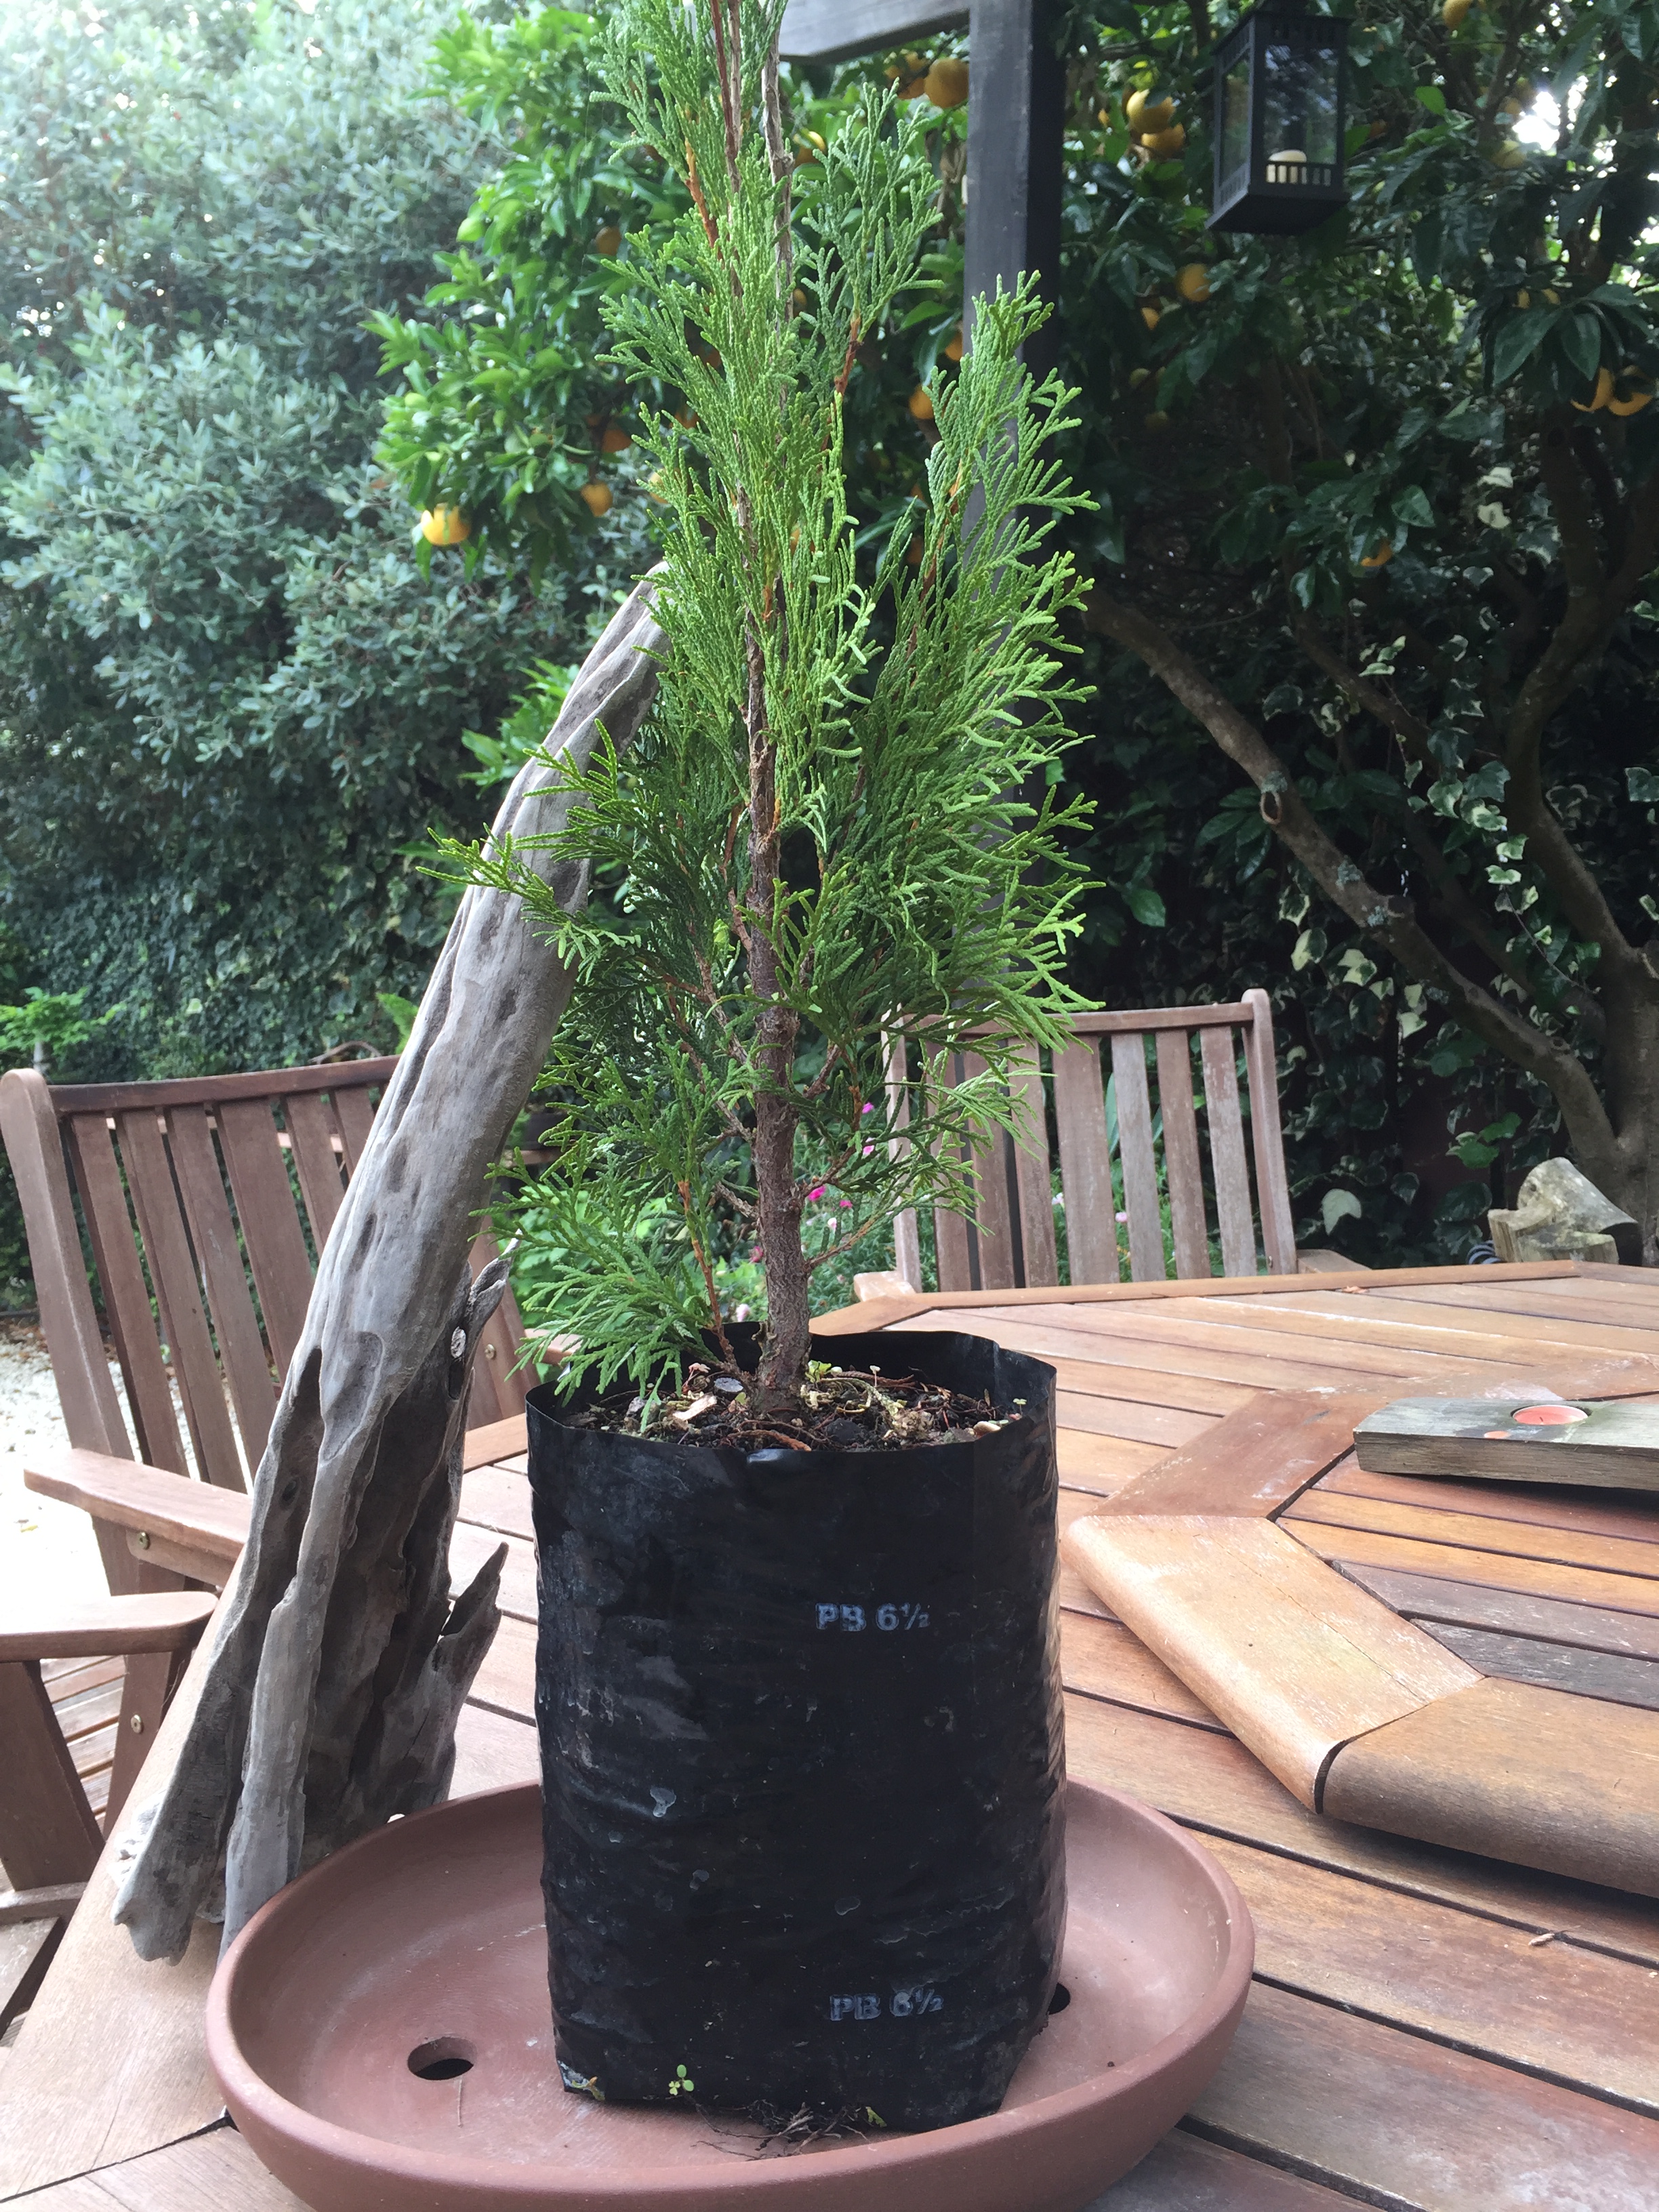
This Juniper is nursery stock and is 20cm high from the top of the soil. It has been standing around here for a year or so and received very little attention.
The first step is to scrape some of the soil away to see if there are any prominent, larger roots that can help to make a decision about the front / viewing side of the tree. In this case it only contained a whole lot of fine fibrous roots.
It is therefore now up to the trunk line to give an indication of what could be a possible front. For newcomers, we usually look for good movement and flow.

Once the best angle is determined to show things like flow and movement as well as taper or interesting features, it is marked and excess branches and foliage can be removed to reveal the trunk line. The conversation at this stage will include things like removing branches growing from the same height, branches on inside curves and crossing branches.
Some of the branches are identified as possible deadwood branches and these are kept a bit longer. Bark is then removed.

All of these steps have cleared the path for the trunk to be wired. Just the basic of wiring is explained and demonstrated at this stage as this skill is seen as a bit more advanced for a newbie. I think it is important to allow the person to start on their wiring pathway as it is an integral part of Bonsai design. As said, we stick to the basics at this point. It is more important to talk about design and flow at this point.

The branches can now be wired.

The next step is to place the branches in position while a conversation about safe bending takes place. Overall tree health is emphasized at all times. Once the placement is done, excess foliage, especially those growing downwards or upwards is removed. The concept of foliage pads is also touched upon. I find it is important to at this stage point things out like depth (back branches) and negative space. These are all explored ta more advanced workshops.

The last part of the workshop is focused on future growth, the role on foliage in feeding the plant (photosynthesis) and then the very important aftercare of the tree. Protection of small buds and the removal of older foliage as the tree buds over the next few months is discussed as well as feeding requirements and protection over the next month or so.
Potting, root management, carving, severe bending and more advanced wiring techniques are all part of more advanced techniques to be covered at advanced workshops.
Quick Sunday afternoon styling job (small one). 15 cm from top of soil. Wiring, styling, jin work. 90 minutes. Apex will get more work done with potting to follow in Spring.


This Juniper was lifted in June 2015 and planted in a plastic container. It came from a garden and was planted in a very sandy soil which came away during the lifting process. It was basically bare-rooted at the time which in my mind was not ideal at the time. I did bring some of the soil with me to add to the new mix with the hope that it contained some michoriza. At this stage I also removed some of the long, whippy branches with very little foliage on it to try and balance the foliage to root ratio.

From this point on it was watered and fertilised and received plenty of sun. A few branches died over the next twelve months, but plenty of new growth showed as well. All of this was of the needle type and then reverted to adult growth. The tree was also planted into a Bonsai pot at which time the roots were reduced a bit.


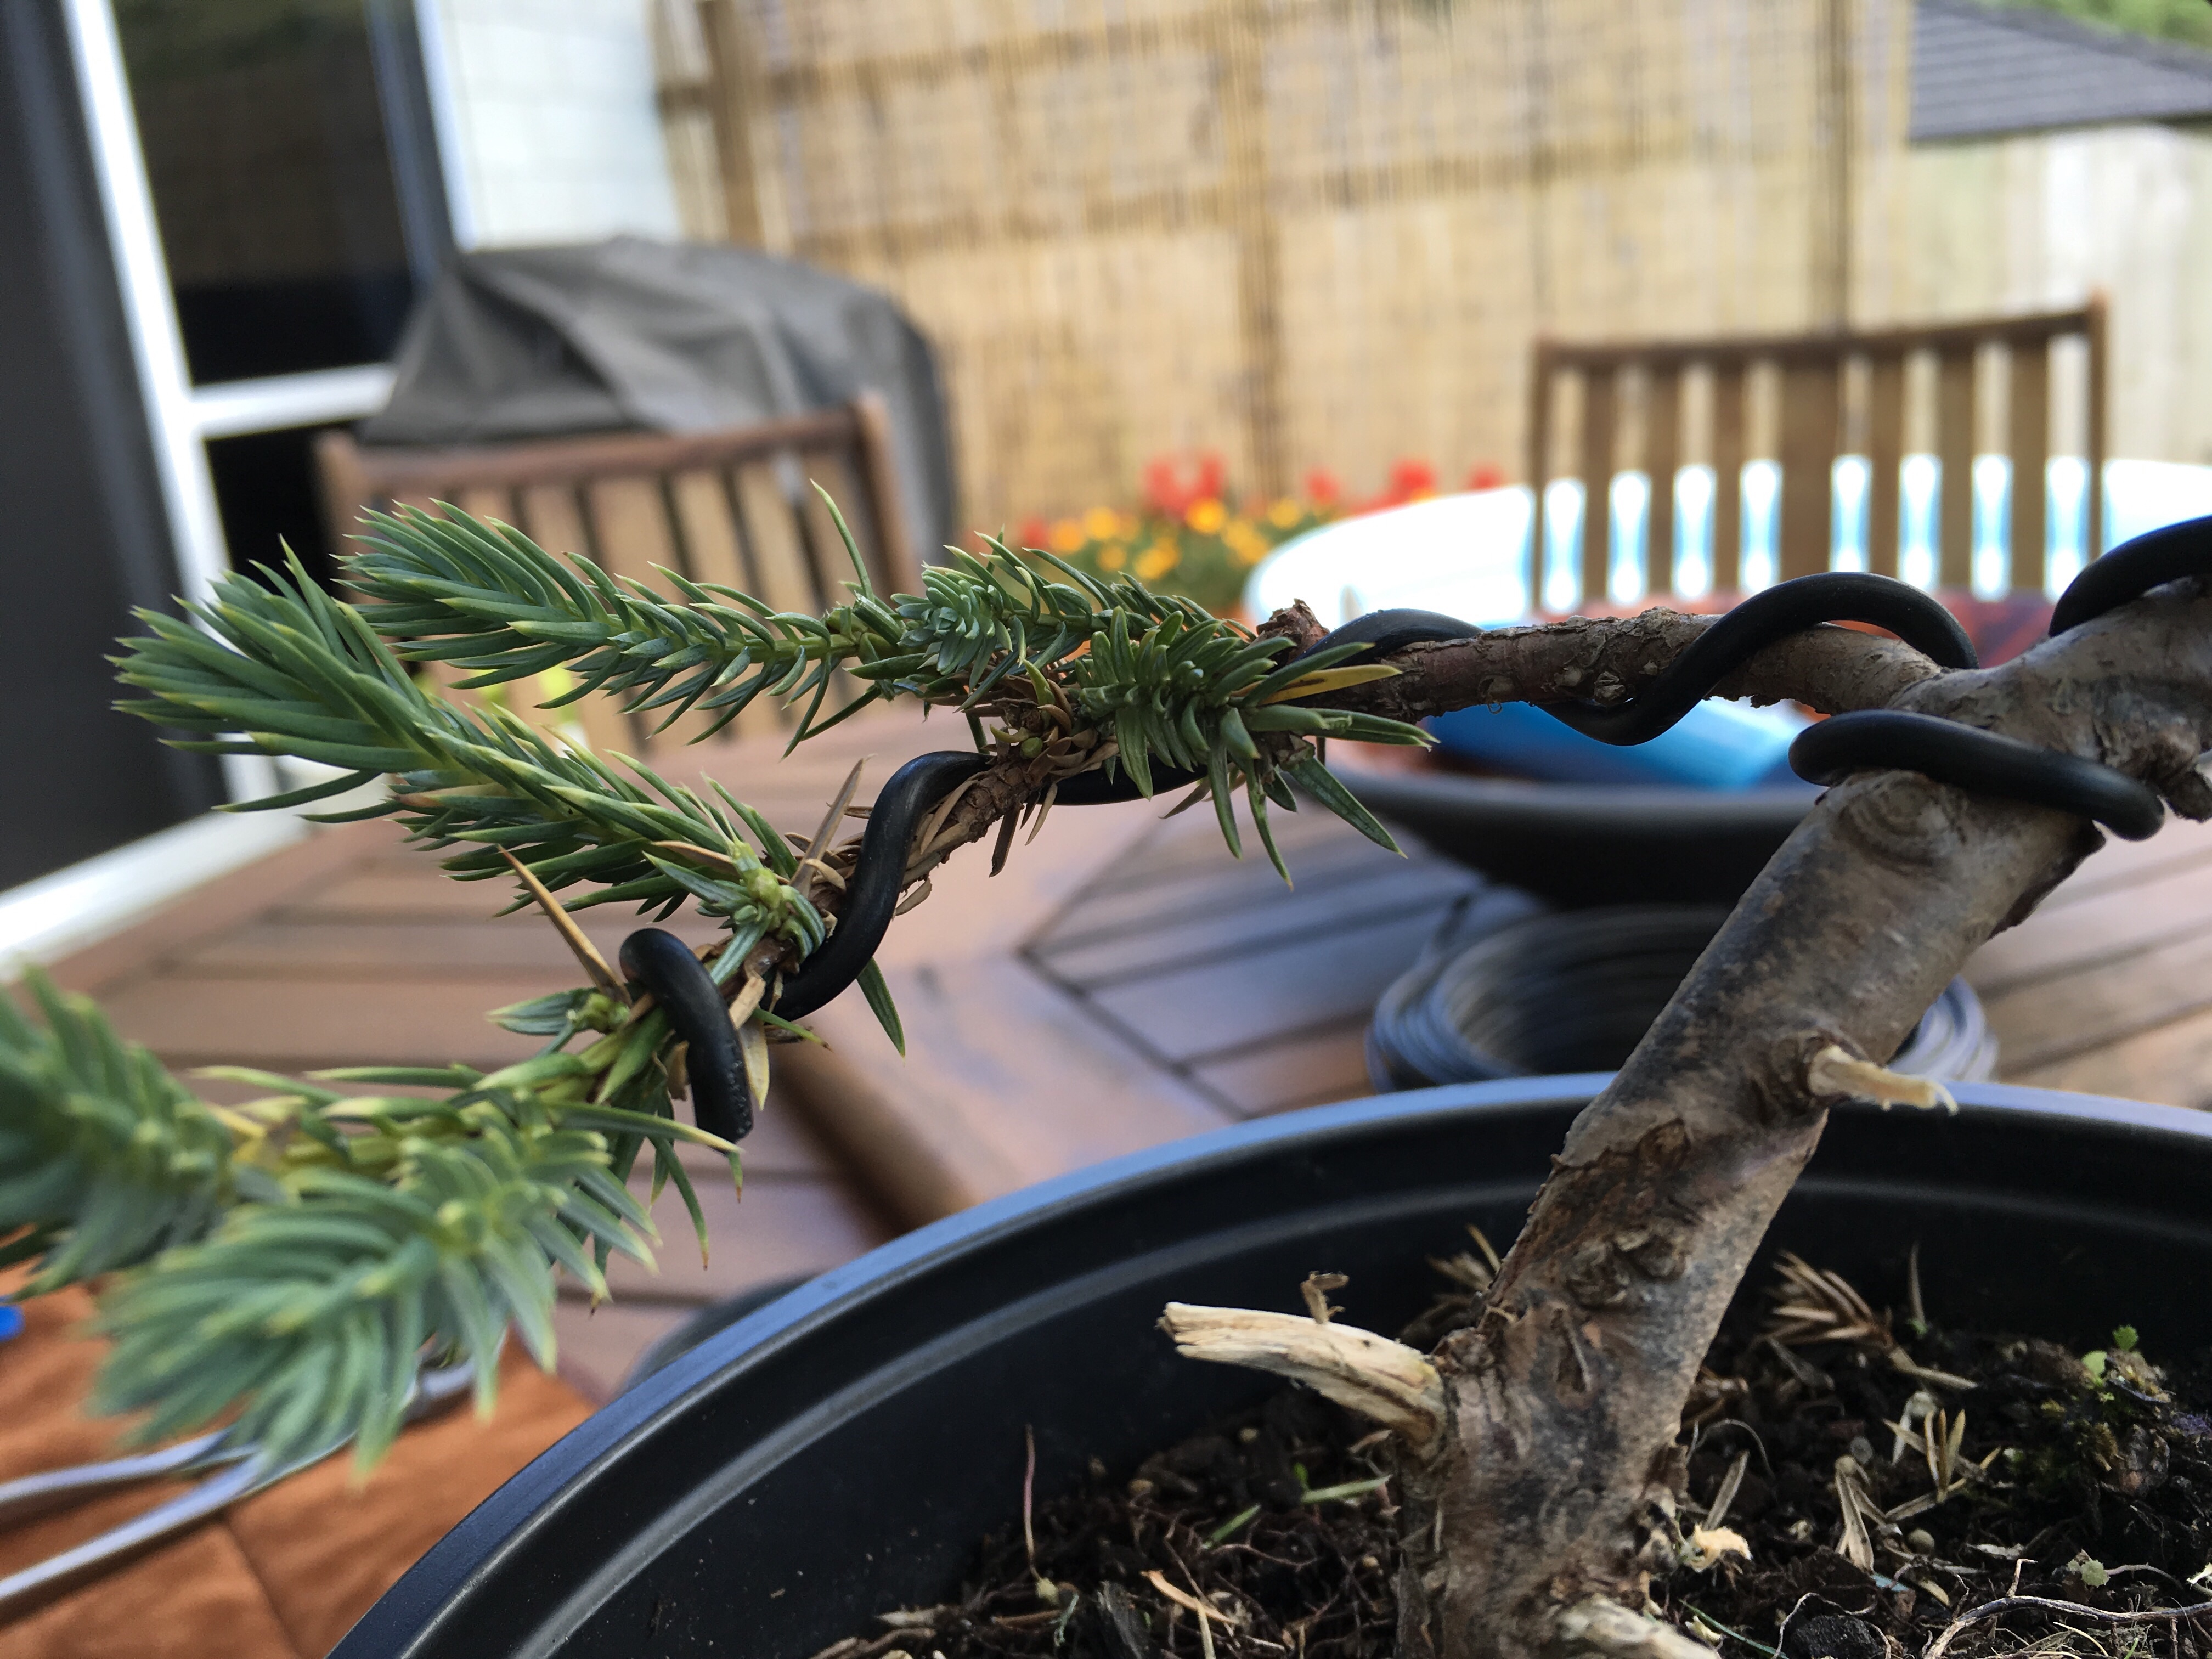
I had to move my trees three in the last six months. First from a colder, wetter part of New Zealand to an almost subtropical climate. The first place was a temporary place while we were shifting our household, then to a rental until we shifted into our own house three months later. Eighteen months after the lifting (January 2018) it was time for its first styling. Deadwood was created on the cut branches and then the wiring started. This took about six hours with not more than two hours done per day. I find it is best to start at the bottom of the tree and then work towards the apex of the tree. I have just used aluminium wire and varies from 1mm thickness to 4mm thickness. Quite a few guy wires were used to pull larger branches down. I use plastic tubing to protect the branches. Due to a few harsh bends, light cracks appeared and these were sealed with cut paste.

Now it is time to let it rest. Water and fertilise, keep an eye on the wire to prevent it from cutting in give it plenty of sun. It could be show ready in about three years. The foliage pads must mature and I have left a bit of new growth on the main branch from where another branch or two can be formed to fill some gaps.


Wikipedia defines Tanuki Bonsai as a technique where a living tree is joined to an
interesting piece of deadwood to create a composite in the

From: artofbonsai.org
driftwood style. It goes further to state that the deadwood usually has the form of a weathered tree trunk. The tree is attached to the deadwood by making use of screws, clamps or wire. Over time, the tree will grow into the channels created and in so doing will disguise the fact that it is a separate entity.
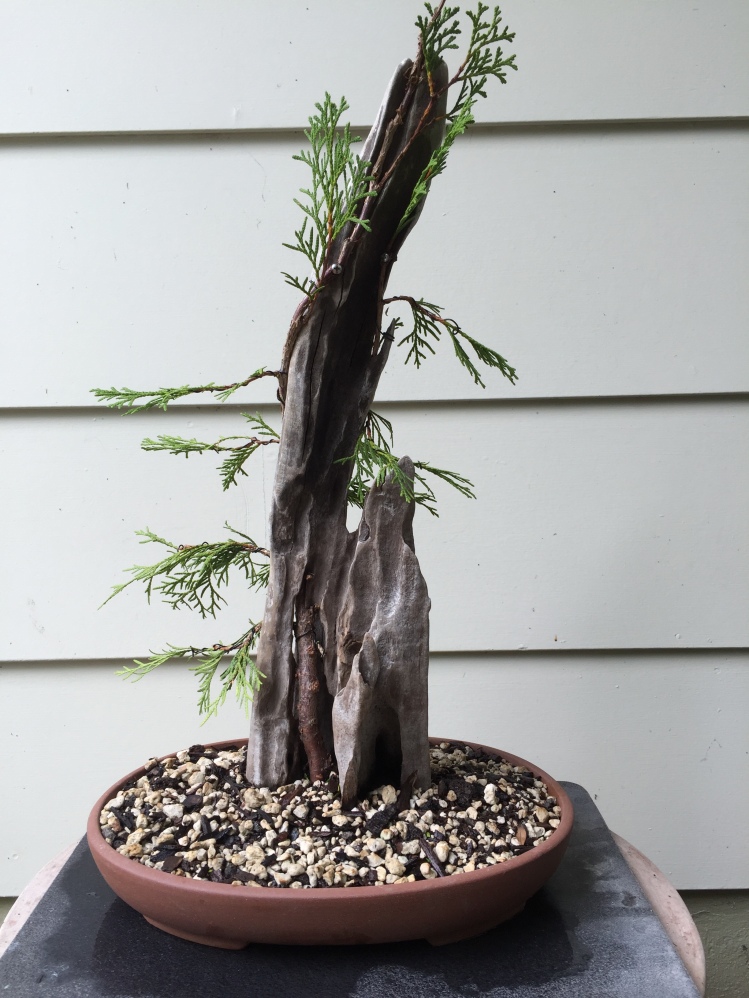
In Japanese folklore, Tanuki, the Japanese raccoon-dog. are shape-changing tricksters. It is also known as Phoenix-grafts in the West. Personally, I think it is a good artistic technique to either enhance a piece of deadwood or a tree. There is no difference in attaching a tree to a rock compared to attaching a tree to a piece of deadwood. I had to try my hand at this. My experience is written up below.
 I first had to find the right tree. I decided on a young Juniper with a lot of flexibility. The next project was to find a suitable, characterful piece of deadwood. I managed to get a piece on the beach. A note of warning is needed here. If driftwood from a beach is used, it is important to get rid of all salt on and in the wood. I submersed the wood for three weeks in fresh water and regularly changed the water as well as used a high pressure stream of water and scrubbing on it. It was then left in the sun for another week. The third component was a pot selected from my pot collection.
The first job on the pot was to get enough tie wires in place as the deadwood and tree must be secured very firmly. It is wise to get a hardener on the deadwood. I treated it with lime sulphur as the bottom part will be in the wet soil. I have read that the end could also be placed on a solid object like a tile to minimise the part in contact with the soil. My first challenge was to drill extra holes in the pot. For the first time in my life, I had a pot which is so hard, that the drill bit did not even make an indentation on the pot. The tie wires therefore had to be attached through the drainage holes.
The next phase was to ensure a flat structure at the bottom of the deadwood to make it stand more solidly in the pot. This was done by simply determining the angle, marking the wood and using a handsaw to make the cut. Next I had to drill holes into the deadwood for the tie wires. Advice found was to use a router to create channels in the deadwood. This was not necessary on this piece as it had natural channels that could be used for the tree to be placed in snugly.


The tree was now prepared by preparing the roots and cleaning up the trunk. It was put in place starting at the bottom and fixing it to the deadwood with non-reacting (copper) thin screws. I pre-drilled the tiny holes as the tree is very thin in places and did not want it to split. Branches which came in the way of this process were removed. I decided to leave the growth at the top as is as I did not want to stunt the growth too much at this stage. The whole idea is that the trunk fattens up to secure itself into the channels and adhere to the deadwood. Branches were wired and now the maintenance work of feeding and watering begins. No pruning will take place until the two entities become one (hopefully).


Cheating or a legitimate technique? You decide! I found a reference on bonsainut.com that mentioned that Masahiko Kimura designed Tanuki and it also mentioned that John Naka once threw one out of a display and told the owner to go and get a real Bonsai. I will update this post as the Tanuki showed here progresses.


In a recent Blog post by Harry Harrington (Bonsai4me), I was amazed by this artist’s technique in creating deadwood. His carvings are superb. On the same day, I happened to be at a beach on the west coast of the North Island of New Zealand (Paraparaumu). The beach was filled with driftwood and I could not resist studying them to find inspiration to style dead wood when I get back home. Fortunately I had my iPhone with me and took the following photos. There is nothing like nature (and Harry Harrington) to create the ultimate natural deadwood designs. In studying these photos I did get a few ideas and now have to get the practice in to recreate this on trees.


