Structural Work on Bonsai

Winter provides good opportunities to do structural work on deciduous Bonsai trees. Sap flow is low, no leaves means you can see what you are doing and wiring can set branches before Spring growth starts.

The tree in all its Winter glory.

This Cherry tree was collected about a year ago and was just a trunk, in this case a triple trunk at collection. The original tree was about four metres high and in a forrest which means it was quite lanky with no branches towards the bottom. One year later and it has put on a lot of new growth and the fine root development is spectacular.

It has three quite large scars on the end of each trunk and then also a very big one on a chopped root. The middle trunk is dead and has been at collection already. This trunk was rotten and easy to just break to shorten it. As the root scar was going to be large, it was decided to have that at the back.

The large root had to be removed.

Once the front was established, extra branches were removed and a few at the top were shortened. All branches crossing the main trunks or too low down on the trunks were removed. The same happened where two new branches grew from the same place or they were just too close to each other. A few branches were in a 50/50 situation and these were left for now to be decided on later. Always start by removing large parts first. In this case it was mainly the root which was removed with a reciprocal saw and then the larger bit on the die grinder was used to set the first grooves by also creating some taper. This was then followed up by ever decreasing sizes of bits and once everything was carved, a wire brush and then a nylon brush was used to clean and polish the carvings. By polish I mean brushing vigorously to remove fine threads and fibres left over from the carving. I usually use a blow torch to help with this action, but in this case it was decided to not use the torch.

Once this phase was completed, the carving started. This was a three hour operation using different sized carving bits with both a Dremel 4000 as well as a trusty old die grinder.

The last step was now to apply wire and set the branches. A few more branches were removed and it was also decided to plant the tree on an angle leaning forward a bit more once Spring sets in. This will be a naturalistic looking tree with a large and rounded top with the shorter trunk carrying the lower branches on the left hand side. There are still a couple of branches that will probably be removed, but that will come later depending on further development. An example of this are the two branches that looks as if they are coming of the front of the main trunk about a third from the top.

Now it will rest and as soon as the buds swell a fertilisation program will start and a sharp eye be kept on the wire as it will cut in quickly as the tree grows. Watch this space for updates.

Branches wired and set.
Video of tree after after carving.

Subscribing to this blog will ensure you see the progress of this tree over the years to come.

Update on Gardenia Bonsai

Gardenia flower

On 28 February 2021, I posted a blog article named “Off the back of a truck”. https://bonsaiplace.net/2021/02/28/off-the-back-of-a-truck/

In that article I speculated about the specie of plant and my guess was correct as it is indeed a Gardenia. It flowered not too long ago, only one flower, but between that and the glassy leaves, the identification is now locked in.

The photos below are of the plant when I found it on the back of a truck on its way to be dumped as well as a photo when it was potted up on that day.

This is now just more than fifteen months later and the photo below shows the growth since the first planting and as mentioned, there was also a flower during the last summer.

The tree has been fertilised regularly, mainly with a liquid seaweed type of fertiliser, but other than that, mainly left alone with a regular watering regime. It is now time to do a bit of thinning of the branches, light wiring where necessary and inspection and a bit of work on the pruning cuts.

There are two things to consider now. The one is to change the angle as shown in the picture below and to even tilt it even more in the direction shown.

The second one is to remove the thinner, lower branch on the right. That might even be done sooner rather than later.

In summary. This is the start and where we are today.

Now it goes back to the bench and another year of watering, fertiliser and providing optimum growing conditions for this tree to thrive.

Please comment on this article to show your support and like it if that is what you think it deserves. Thank you for reading.

Bonsai Culture, Styles and Isms.

Let’s drop the cat in the middle of the pigeons by saying that most art forms have specific styles or movements that are easily recognisable through look, technique or application. This article is just one of many having a good go at describing different painting styles (https://indonesiadesign.com/story/major-art-painting-styles). These include styles like Realism, Impressionism, Expressionism and many others. The artist themselves can in a lot of cases be identified by just looking at their work. Bonsai does not have that and there the cat goes.

How does this relate to Bonsai? Most Bonsai artists will be able to explain the difference between Bonsai and Penjing (see Zhao Qingquan’s work) and then there is also the nuggets of wisdom wanting to explain Niwaki as an art form, and we will rather stay away from saying too much about Topiary (just joking). Then there is also Kenji Kobayashi describing Keshiki Bonsai and many other attempts at identifying styles.

A book of great value is that of Charles Ceronio, Bonsai styles of the world (2015) in which he describes the structural styles of Bonsai design. What I am getting to here is to see if we can identify styles like it is done with paintings as mentioned in the first paragraph. There are attempts made by some artists to add to this knowledge and an example of this could be Walter Pall talking about the Naturalistic style. Is that even a thing? Taking a hedge trimmer to a Bonsai and giving it a name is probably not the best of attempts to give a style a name.

Pierneef style recognisable as from Africa.

It is quite clear that there are many easily recognisable trees or even collections of trees that can be attributed to specific Bonsai artists. Goshin would be a good example of this. I can also think of some of Masahiko Kimura’s trees as easily identifiable. Is that true for many of the current big or trendy names that we currently have in Bonsai? Can you pick a Bjorholm, a Noelanders, a Neil, a Pall out of a line up of trees?

Then there is also a debate going around on specific regional styles. Is their a European style or an American style? What we do see is that artists use native trees from specific areas and do a wonderful job with those trees, but at the end of the day, these trees still relate back to the basic design styles of Bonsai and not necessarily an artist or a region or a philosophical style. The one exception will be that of Literati. Is that the only design style that can be linked to a time period or a movement?

Where to with this argument? Probably nowhere and does it really matter. We have the basic design styles in Bonsai and many derivatives from that, we have individual expression in each tree and if that is recognisable as the work from a specific artist, great. Do we need to link it to the “isms” that we find in other art forms? So far it has been restricted for Bonsai or maybe it is just case of it not being necessary for the Bonsai world. Or is it? Is this the missing bit for Bonsai to be recognised as a true art form? Maybe we can just enjoy Bonsai for what it is and not overcomplicate matters by trying to find its place in mainstream art forms. It could be that it is so far removed from other art forms that the vocabulary needed to describe it is very different. Maybe the vocabulary must still be worked out?

Whatever it is, it is art, a living art. It is an art form that humans use to express themselves within what nature provides to do so. It could be that it is too free to put in a box and put “ism” at the end of the name of the box.

Carving on Bonsai: Sculpture

A previous blog post addressed sculpture as an art form and how it relates to Bonsai (https://bonsaiplace.net/2021/03/28/bonsai-as-sculpture-an-art-form/). This blog post will take an more practical approach by making use of photos to describe the process.

The start.

Carving is usually done to create or enhance jin, uro (holes), shari (stripped bark) or getting rid of areas where large branches were removed. In this case a large branch, about one inch thickness, had to be removed and it was decided to leave a 15cm piece of it and sculpt a jin (deadwood) out of it.

I use a die grinder with a carving bit to remove material fast and to roughly shape the dead straight branch by making grooves in curves and alternating the depth of the grooves. Once this is done I burn the jin to get rid of wood fibres and then repeat the process with the trusted Dremel and a smaller carving bit.

As mentioned, burning the jin with a butane torch gets rid of the loose fibres, but it also helps to get rid of sharp edges and tool marks. After a heavy torching, the jin is brushed with a copper brush and then with a nylon brush. Sand paper can be used to smooth areas that needs it, but I find that the brushing works well on its own.

To preserve the newly carved jin, I wash the whole tree off and then let it dry and rest for a few days. Lime sulphur or a wood hardener can then be applied. For a darker finish, mix some ash (burnt paper) in water and paint on. Some of the grooves can also be painted by making use of black ink. All fluids should be diluted. Lime sulphur is usually diluted with water 50/50%.

Safety aspects:

  • Wear safety glasses during the carving phase.
  • Use gloves when using the power tools.
  • When using the torch, protect the rest of the tree from the flame by using aluminium foil or a wet cloth around foliage and nearby parts.

Please like and subscribe to this blog to be notified when new posts are done. Thank you for the support and feel free to shore this post as well as the blog site.

Pohutukawa as Bonsai

In November 2015, the very early days of this blog site, I wrote about Metrosideros excelsa or Pohutukawa as Bonsai and included a few photos of these magnificent trees in nature. This tree is also known as the New Zealand Christmas tree. The link to that blog post is here.

https://bonsaiplace.net/2015/11/29/pohutukawa-as-bonsai/

For this blog post I will style a Pohutukawa as a Bonsai. As can be seen from the photos in the linked post, these trees very naturally present as multi trunks with great root structures and the very prominent aerial roots. it is this root structure and especially the aerial roots that make these trees ideal for root over rock designs. This tree will not be a full root over rock, but a rock will be placed next to it with roots growing over the rock.

This plant was grown from a cutting for a few years and these photos clearly show that these trees are basal dominant. It basically means that it will keep on growing new shoots from the base compared to tree which are apical dominant where the new growth is at the top of the tree.

Close up of the multiple shoots growing from the base as well as visible aerial roots.

As can be seen from the photos above, the first step is to search for roots and in this case roots in the soil and not the aerial roots. I find it better to remove the top edge of the plastic bag and sometimes remove the bag or pot completely. The presence and position of roots, especially radial roots will help to determine the orientation of the tree. In other words, the front of the tree and the first ideas of what the design could look like. In this case quite prominent roots were found and spread around the tree which means we can now look at the above ground structure as the placement of the roots allow us to look at multiple design options.

The next step is to remove all unwanted growth. To stay more or less true to the natural growth pattern Pohutukawa, the decision was made to design a multi trunk tree with three trunks. Really only two, but the thickest trunk has a fork which visually looks like two trunks. All three trunks have different diameters which makes it visibly more pleasing. All inward growing branches are removed and decisions are made about the three trunks. This includes things like direction, placement and length. As the three main trunks did not grow naturally in the directions needed and the centre trunk needed to be compacted, wire was applied.

A lot of branches and foliage were removed. some of these will be propagated as cuttings.

Wire was applied to bend the branches and also change the direction of the branches.
The pot is prepared.

The final product with a rock added to add visual weight on the right hand side and also allow a backdrop or prop for some of the aerial roots to grow over.

It is important that Bonsai trees are three dimensional. The best way to check that is to view the tree from above. Visual depth adds to the aesthetics and overall view of the tree.

As for all trees, the aftercare is now of the utmost importance. As the pot is not that shallow, not many roots were removed, but the tree will still be kept in a protected spot, out of the wind and cold temperatures. Watering is now also important as well as sun exposure. Just damp, not wet and limited afternoon sun is what is now needed for the further development of this tree.

Lockdown Bonsai work.

We were supposed to have aBonsai Society meeting today, which would have been the first one in a long time. Last night at 9pm, a change in alert levels was announced which means that where we live, social distancing is in place and as the venue is quite small, not the best for safety in the current Covid climate. That was called off.

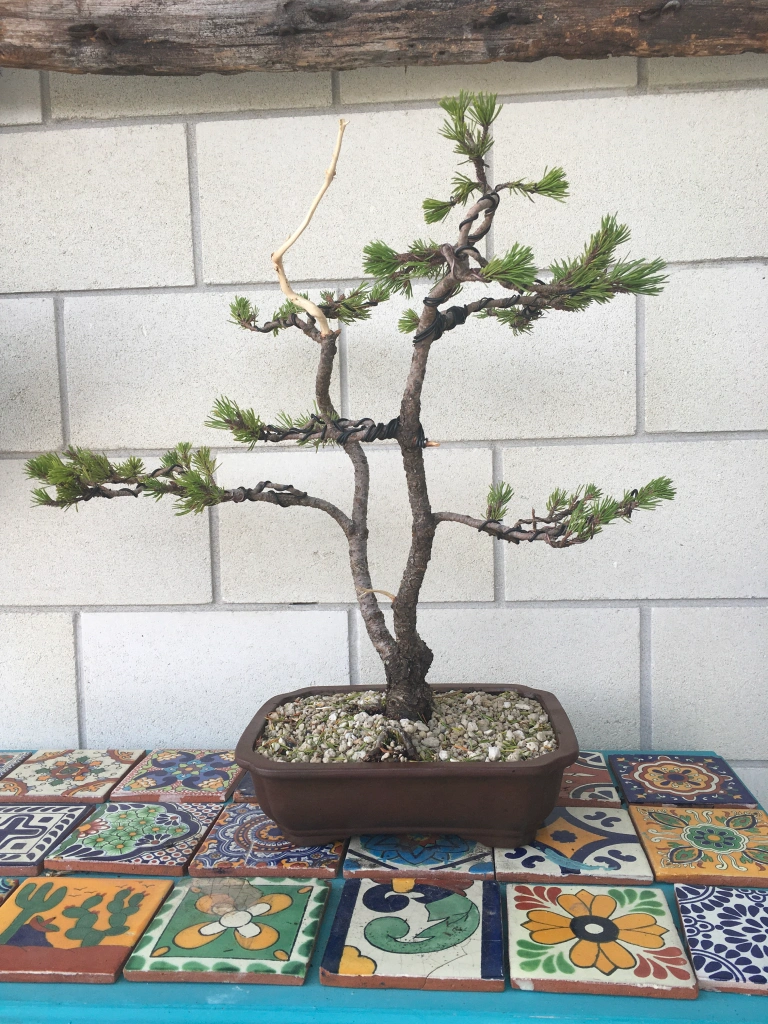
I had this tree that I wanted to work on at the meeting. Basically just a clean up job and then lots of wiring to set the foliage pads. It is a Pine tree and in the twin-trunk style. Here is the before photo.

Before the wiring commenced.

And here is the tree after the pads were set.

Cleaning, Jin work, wiring and branches set. Pity some of the three-dimensionality disappears in these photos. Maybe I just need to get my photography sorted.

Please like and subscribe to this blog as I will post updates on this tree.

Slanting Redwood Styling

This Redwood came to me just over a year ago and ended up on the bottom shelf as it was not a high priority to work on and a little bit ugly. Today was the day for this one to get attention and even if I have to say so myself, the ugly duckling is now well on its way to become a beautiful swan.

It has a very straight trunk and was chopped before it came to me. The taper is minimal, but can be enhanced with a bit of carving at the top. More interest can also be had by creating an interesting Jin out of the dead branch at the bottom. Most of the growth is at the top which normally lends itself to a Literati style tree, but in this case the trunk is nowhere near what one would like to see in a Literati style tree.

Lots of growth right at the top and spread radially around the trunk at this point.

Decision time and it is to slant the trunk and then for the branches to droop downwards at an angle following the trunk line. Normally with this style the branches on the open side, in this case to the right, are longer than those on the closed side, or left side in this case.

The growth is still relatively young with no real solid branches at the top, but it is important to spread the branches / leaves radially out to enable all green parts to receive maximum light.

All leaves should get light.

This Redwood will now rest until Spring, be fed profusely in a sheltered spot.

Literati Juniper work

This Literati style Juniper came into my collection as a very neglected, half of the branches dead and under nourished tree.

Today it was time to get some wiring done through to the growth points. The previous and first wiring from me was just on the main branches to set them. As can be seen, the branches that were dead or with no hope of recovery were all jinned and these branches will be refined with sanding paper and lime sulphur later on.

The living branches, only three of them have responded nicely with new growth and these are kept in tact at this stage to get as much energy as possible to the green and new growth. This tree only received liquid fertiliser in the form of a marine plant / kelp conditioner with one dose of a granular feed, balanced NPK.

Here are some of the before photos

This type of work is quite light and I only used two thicknesses of aluminium wire and a wire cutter for this job. The coffee is not really optional, but I did have the mandatory glass of wine just before this job with a meal.

These are the after photos:

This tree will now rest and carry on with its fortnightly application of liquid food. This is applied over the leaves as well as the soil.

The Addiction Strikes – Collecting Bonsai Trees from Nature

For us in the Southern hemisphere it is that time of year when Bonsai enthusiasts pack their bags, collect their tools and load up on enough supplies to go Yamadori hunting. Yes, we go crazy to get our hands on raw material that we can grow on to become aesthetically pleasing Bonsai.

The big questions related to this activity is based on safety and ethics. How do I do it safely and how do I do it ethically?

Safety always comes first. It starts with weather conditions, through to the equipment needed to keep you safe and also having a plan. If you go on your own, make sure you tell people what your plans are, where you will be and what time you will be back. If you are visiting a remote area and there is no cell coverage, then you will need a personal locator beacon.

Always make sure that you have enough food, shelter and clothing to last for three times longer than what you expect to be out. A safe way to do this is to write a list of what you will need and then use it to pack your stuff. On your return, revisit the list and update it for next time.

I see many people on a Bonsai hunt with very little eye, hand or feet protection when things like spades, saws and power tools like chainsaws are pulled out. Do not forget your ears when the latter starts up.

A big issue that we need to have a lot more conversations about is the ethical removal of trees from nature. It starts with permission to do so and really comes down to the survivability of the tree once lifted. There is a skill to this as well as the transport and after care of the tree. You need to know the species. Is it something you can lift and transport bare rooted or is it something that you start the preparation a year ahead of the actual removal of the tree?

My general rule is that if I am not one hundred percent sure that the tree will survive or that I do not have the skills to care for that specific specie of tree, then I leave it where it is. Not a fifty percent chance, a one hundred percent chance.

There are many You Tube videos and a lot of information available on the technical aspects of how to do this. I have always wondered about what some of these collected trees look like after a few years. Responsible collectors follow their videos and photos up with progress videos and photos. Probably because they have live trees to show for their efforts. Those are the ones that you want to look at or follow. If you never see these trees again, stay away from these people.

In conclusion, think, plan and over organise your trip. Have all the correct equipment needed and only take what you have permission for and what you can keep alive.

Bonsai Art – What does Banksy have to say?

“Art should comfort the disturbed and disturb the comfortable.”

A Banksy Art piece.

The quote above is attributed to Banksy and it sits quite comfortably with me. How can this be applied to Bonsai as an Art? My own personal experience is that an hour’s work on a Bonsai tree is equal to the same amount of time meditating. One can therefore say that it comforts the disturbed and at the least calms the mind down.

It is quite interesting to watch people at a Bonsai exhibition. There is the initial excitement and almost “cannot believe my eyes” moments, but as they move through the exhibition, a calmness sets in, almost as if you are in a library. I have even seen people talking softly when in the presence of these miniature giants of the floral kingdom. Except for the cultural links, could that be why it is not uncommon to see a Bonsai tree or three near or part of a Zen garden or space?

A calm workshop space.

Not so sure about the disturbing the comfortable part. Maybe that is the bit where you see non-Bonsai people just wanting to get into the art after they have seen Bonsai trees in real life. A real inquisitiveness sets in and it rocks their world. Or is this the bit that forms the basis of Bonsai activities leading to an addiction?

I must say that even seasoned Bonsai people do get disturbed when in the presence of an especially spectacular tree or composition. This disturbance is evident in the slightly angled heads, dead silence even with a few people around the tree and then followed by a lot of pointing and increase in volume as the tree is discussed. You can almost see how mental notes are being made and mental photos being taken to go and copy some of what they are seeing the moment they get home.

At the Hamilton Bonsai show.

I am picking up six raw material trees this weekend and I can feel the excitement building up, a disturbance of my normally very calm inner self. Can’t wait to work on the trees. I do know that when I start the work, the deepest state of calmness will set in. The opposite of the excited, disturbed state is counteracted by the meditative state.

Maybe that is what is in Banksy’s quote, the yin and the yang, the stillness and the turbulence, the Bonsai tree and the Bonsai artist. It is one, it is the whole, it is the two sides of the same coin.

Share your thoughts on this in the comments.

Let there be Light – Bonsai light requirements.

Photosyntheses — the process through which plants use energy from the sun, water from the soil and carbon dioxide from the air, to produce food for itself and then also oxygen. From this, we see that it is really important to get the light requirements of your Bonsai trees right.

Phototropism – the phenomenon where plants grow towards light. This is mainly caused by hormone stimulation that forces plants to grow towards the light source.

Too little light can cause issues and then you also have the other side of this continuum, the heat caused by direct sunlight, that can also cause harm.

Let’s look at situations where the tree is in the shade too much. This could cause a deficiency in energy production, unless it is a plant adapted to grow in shade. Shady conditions can also cause leaves to grow larger and then also for branches and especially new growth to become spindly with very long internodes. Both of these growth patterns are not very good things for Bonsai where you need smaller leaf sizes and also more compact growth.

Another light consideration is where you place your Bonsai trees in relation to the light source, i.e. the sun. Plants tend to grow towards the sun and if placed against a wall, it could be that the tree will grow away from the wall. It is also possible that you will have very little growth on the shady or wall side of the tree. The solution to this problem is to turn your trees often. Some of my trees, that are on stands / monkey posts with no wall near them, quickly show me that they need to be turned as well. It could be slight yellowing of the leaves or needles on the southern side (I am in the Southern Hemisphere) or denser growth on the sunnier side than the shadier side.

What is the most important here is to know more about the natural habitat of your trees. If it is a natural shade lover, you could get the opposite to what is described in the previous paragraph. Also look out for burn or scorching of these shade lovers on the sunny side.

Think about the placement of your trees. Study the different microclimates that can be caused by high walls or fences as well as trees and other plants. The construction of your display stands and where these are placed in your garden are all very important aspects of your Bonsai cultivation. When it comes to the regular turning of trees, I have a fixed day twice per month and I turn the tree through ninety degrees, always in the same direction (for me that is clock-wise). Sometimes I will keep it longer in a specific position due to the fact that there could be an undeveloped branch that needs the light source for longer to get its development up to speed.

You also need to think about the light requirements when it comes to specific maintenance tasks. After root pruning or repotting it is also best to keep your tree away from direct sunlight for a few days to a couple of weeks. The opposite when you get into the different grades of defoliation.

One of the reasons for defoliation, whether it is fully or partial, is to stimulate back budding and for this, more light is needed.

If you are heavily invested in Maples as Bonsai, it will be worth your efforts if you look at different light requirements of Maples as it can influence stunning Autumn colours and even new colours in Spring. That is a topic for another day.
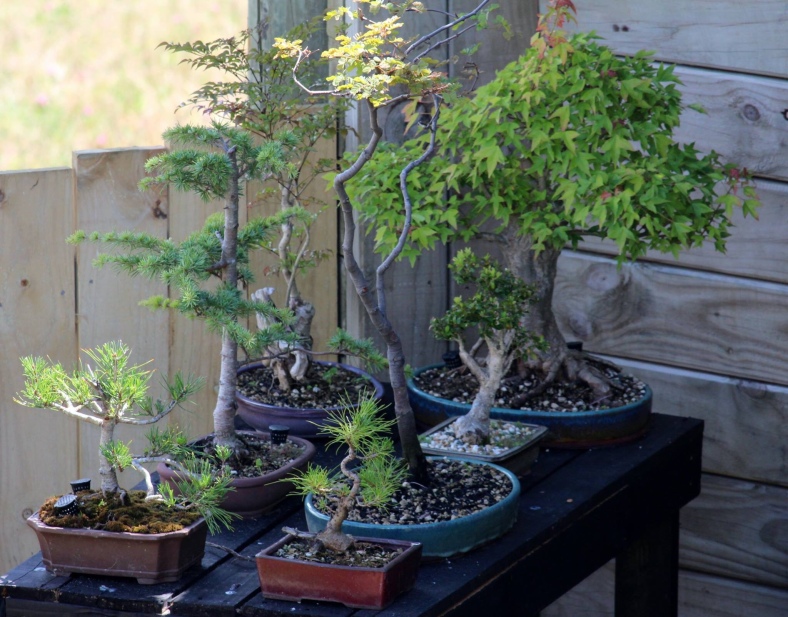
It is not complex, but certainly something to think about when you position your trees and every time when maintenance tasks are undertaken.

Beginner’s Series: Make a start

You are now bitten by the bug and you are well on your way to addiction and now you want to design, bend, shape, cut, wire and do all the other things to expand your growing collection. Yes, there is a lot of art to it, but you can get far by following a few basic steps. I call it my Bonsai Beginner’s Curriculum and have done many workshops based on these basic seven steps. It works well on nursery material as well as field lifted trees which have been planted and allowed to rest for at least a year. Here we go with the seven steps.

Nursery stock

Step 1: Find the front of the tree. This includes looking at the trunk flare / root zone (nebari). You want the widest and most interesting part to face the front. The second part to this step is to find the best front showing the flow or movement of the main trunk line. Hopefully the best nebari view and trunk line is the same side, if not, make a decision based on the best of the two elements.

Step 2: Clean the main trunk. This includes getting rid of all unwanted growth. It could be removing one or more branches reducing the bar branch effect. Also remove branches pointing to the front in especially the bottom third of the trunk and branches crossing the trunk. At this stage remove all growth in the crotches of the main trunk and primary branches.

Step 3: Set the main trunk. If you are lucky, the movement of the trunk will be great and you have nothing to do. This is rarely the case. Use wire to set the shape. There are other more advanced strategies and methods that can be used. If you are using guy wires, it is best to wire the branches first as the wires sometimes get in the way of further work.

Thick wire can be used to bend this trunk.

Step 4: Select the main branches. You have already looked at this during step 2. What you now need to do is to look at the positioning of branches. The historical pattern is to have one to the one side, then to the other side and then one growing backwards. Repeat as you move up the trunk line. Nature and practicality does not always give this to you on a platter and this is where the artistic side of Bonsai kicks in. Also make sure that you do not have branches growing from the inside curve of a bend.

Step 5: Clean the rest of the tree by removing all growth from the axils / crotches of all branches. Remove the rest of the unwanted growth and especially spindly growth. At this point it is important to note that once you remove all leaves / needles from coniferous plants, it is highly likely that the bare branch will die. Perfect for Jin (more advanced technique).

Step 6: Set the main branches. Use wire on the branch or guy wires. Wiring technique is also slightly more advanced and will follow in a future blog or video. Ensure that there is movement in the branches (left, right, up and down). This is an easy way to bring leaves / growth closer to the main trunk on spindly growth.

Step 7: Create the apex. The apex is the top of the tree and plays a major role in determining the flow of a tree. Older trees show a more rounded apex form and this is what you want to recreate by either pruning or wiring the branches into that position.

Crotches are clean and branches set by using guy wires.

By now you should have a design roughly resembling a pre-Bonsai tree. After-care is the next important step. My advice is to not pot the tree into a Bonsai pot at this stage. If you have removed a lot of growth, the tree will be stressed and the last thing it needs now is to have its roots interfered with. Rather just place it in a sheltered position with no harsh afternoon sun. Water regularly and fertilise the tree to encourage health and good growth. Potting can be done in Spring or for certain species, Autumn could be suitable as well.

Keep an eye out for further articles in the Beginner’s series. If you subscribe to this blog, you will not miss any of those.

If you need one on one tuition, have a look at the subscriptions page on this website.

Guiding branches with Guy Wires

I am not sure where the word Guy wire comes from, but a wild guess is that it is from the word Guide. It is defined as a wire or cable used to stabilise something, like a mast and seeing that dictionaries and Wikipedia will not relate this to Bonsai, here is my version of it: A Guy wire is used to pull branches down and is used instead of normal Bonsai wiring due to various reasons.

Not a good idea to place wire directly on old bark.

My common use for it is on plants with very soft bark and more often, on older trees when I want to preserve the bark and also in cases when I do not want to cover the bark with raffia or cloth. I usually only use it to pull branches down, but it can also be used to get some shape in a branch by using more than one guy wire, pulling in different directions.

As I use aluminium wire for this task and usually a thin wire, it is important to protect the branch and the bark at the pressure point on the branch. Aquarium tubing is perfect for this task. Short lengths are used and the wire is pulled through it and then it is placed in position. The other end is then securely fastened at an anchor point.

Using aquarium tubing to protect the bark.

An anchor point can be many things. If the tree is in a plastic pot, a hole through the rim of the pot is an easy way to do it. In a timber box, a screw can be used to anchor the wire. As in the example that I show here, the tree is in a ceramic Bonsai pot and a thicker wire is used around the pot through which the guy wire is then threaded and fastened securely.

Once the wire is fastened, I use a short length of wire through the two wires around a branch to wind the two wires together. This does not only has a neater appearance, it can be used to fine tune the positioning of a branch as the branch can be further pulled down by winding the wires up more.

Winding wires up.

This method definitely exerts less pressure and therefore less stress on the tree. As you use a thinner wire, it is less expensive. It is also easier to remove and once removed, the wire can still be used for other purposes, especially if it was not wound tightly.

This tree has fourteen guy wires to pull branches in place.

Bonsai as Art

I am seeing more Bonsai being exhibited as part of other art forms in what is generally referred to as an art gallery or a general art exhibition. This, in my mind is great, but we need to do more of it. One of the things we probably need to do as Bonsai artists is to promote it better as an art form. Where we see this happening, the results are normally outstanding. Without this general exposure to the general art public, the acceptance of Bonsai art in mainstream art circles, just will not happen.

From Pinterest

In my search for links between art and Bonsai to help with this infiltration into the general art world, I started by looking at definitions of what art is. See below.
Art is the expression or application of human creative skill and imagination, typically in a visual form such as painting or sculpture, producing works to be appreciated primarily for their beauty or emotional power.
It will be so easy to slip the word Bonsai in there along with painting or sculpture. It is the second part of this definition that really speaks to me. For me Bonsai is appreciated primarily for their beauty or emotional power. That speaks for itself. Bonsai does exactly that. The debate is over and all we now need to do is to get our Bonsai into mainstream art galleries. As mentioned, this happens, but I would like to see it happen more often and in a way where there is no debate and just a general acceptance of Bonsai as a legitimate art form that can hold its own in any art exhibition and not just for horticultural shows or Bonsai on their own.

Some useless, but interesting statistics:

An internet search for Bonsai art presented 3.5 million results.

Another search for Bonsai horticulture yielded 493 thousand results.

My deduction from that is that Bonsai is seen as an art form, but when that vast amount of results are further analysed, very few of those relate to Bonsai as a mainstream art form. We are getting there, but there is still a lot of work to do.

Please share your thoughts on this in the comment section on this page.

My Bonsai Test

I love watching Bonsai demonstrations, whether it be live or on You Tube. The quick transformations, the inspiration, the magnificent material that these artists work with, it is pure drama, pure theatre.

I do that as well. Pluck the odd tree out of a field or hunt for suitable nursery material to test my skills and knowledge and then compare my design outcomes with the artists who I follow or are exposed to. This is very satisfying and keeps on inspiring me and as said, tests my abilities.

This however is not my real test, my real challenge. My real Everest is the daily grind. The seasonal grind. Yes, those tasks that must be performed to keep your trees healthy and thriving. The weeding, the feeding, the watering, the wire on and the wire off. Especially the latter. Maintaining pots, tools, irrigation system and weather protection. Being able to do all of this is the real challenge, the real test.

It is therefor important to see it all as one. The not so nice work as well as the inspirational stuff. Hey, is that not life. The good days and the bad days. Look at the big picture, that is the reality.

Show them off – Preparing a tree for a show

To prepare a tree for a show starts a long time out from the show. It actually starts with your general maintenance regime, your design philosophy and daily dedication to your overall collection. The normal sequence for getting a tree in a show is to decide on which tree will be entered and then an acceptance from the organisers to have that tree in the show. This could at times be problematic as the time between the acceptance and the show could be very short. My advice is to start the show preparation before the tree is entered as it should be of a more than passible quality when entered.

The Tree

The tree must be in excellent health and show the characteristics of the species. Al dead and not so healthy looking leaves and needles must be removed and all excessive and not needed wiring should be taken off as well. It is OK to have some wiring, but this must be discrete and only used to refine minor things. Wiring must be applied correctly as it can detract from the overall scoring if not done so. Also ensure that all leaves and needles growing downwards (species and style specific) are removed and that foliage clouds are distinct and neat.

Ensure that the main trunk line is clear and clean (the whole tree must be clean). Look out for insects and spiders and remove these. A smooth trunked tree can be cleaned by spraying a little bit of vegetable oil on it and rubbing gently with a paper towel.

The nebari and roots must be checked as well. All of the above apply to this area also.

Deadwood (Jin) should be clean. This can be done by brushing it with a toothbrush and using tweezers to get small pieces of debris out of narrow and hard to reach places. Lime sulphur should be applied a few weeks out from the show to allow it to settle. If needed give it a brush for the colour to settle in with the rest of the tree.

Soil

All weeds and fine protruding roots must be removed. Take weeds out and the finer roots can be covered with moss if it cannot be removed. Moss should be in pristine condition. This is one of the tasks that cannot be left to the last minute. If you do not have moss ready, you can grate old moss and apply this to the soil surface, even better if it is on a layer of fine sphagnum moss. Pay as much attention to this aspect as you would a prize-winning lawn.

Pot

The To prepare a tree for a show starts a long time out from the show. It actually starts with your general maintenance regime, your design philosophy and daily dedication to your overall collection. The normal sequence for getting a tree in a show is to decide on which tree will be entered and then an acceptance from the organisers to have that tree in the show. This could at times be problematic as the time between the acceptance and the show could be very short. My advice is to start the show preparation before the tree is entered as it should be of a more than passible quality when entered.

Display

All components making up the display must be clean and in good condition. The so-called three-point display technique will compliment your tree. This usually consists of the tree on a stand, an accent tree or plant and a scroll. One of the two non-tree elements could be a Suiseki. The dimensions and placing of the three elements are crucial to get a view of one, but to still emphasise the tree as the main focal point. My best advice with this is to have a few stands, scrolls, accent plants and even Suiseki at the ready and to try different combinations.

One of the best things you can do is to study as many displays that you can get your hands / eyes on. This is not difficult with the internet at our fingertips. All the top shows across the world are represented in thousands of photos on the internet. Happy showing!

Lime Sulphur and Bonsai – multitasking chemical

Lime Sulphur is usually used in the Horticulture industry to control scale insects, moss, lichen and fungal diseases on plants. It can be used for all of these issues when it comes to Bonsai. A use that is not listed on the container is to whiten deadwood / Jin.

As always, safety comes first when you use any chemical. In this case, it is not just the smell (rotten eggs comes to mind), but also the fact that this chemical is corrosive. It is a good idea to wear gloves and to protect your eyes. Wash your hands very well afterwards and keep your hands away from your face.

Follow the instructions on the container for all uses. As said, the whitening of deadwood is not listed as a normal use of lime sulphur. One thing to keep in mind is to also protect the soil surface from lime sulphur dripping or being spilt on the surface. Remember, this chemical is also used to kill moss! You do not want to kill of your lush green carpet covering the soil surface. I usually use plastic wrap for this purpose.

I dilute the lime sulphur 50/50 with water and I do this in a plastic or paper cup as it is easier to just throw it away afterwards than trying to clean it and getting rid of the smell. I also use a 12mm brush for most applications, but can go smaller or larger depending on the size of the job.

I also find it easier to apply if I slightly wet the surface of the deadwood. The Juniper that I worked on here had a bit of rot at the bottom where the tree meets the soil surface. This was cleaned well and the lime sulphur was liberally applied here. The chemical protects the wood against rot by acting as a preservative.

After application, clean the brushes well and get rid of the container. Wash your hands and allow the lime sulphur to dry and work its magic on the tree.