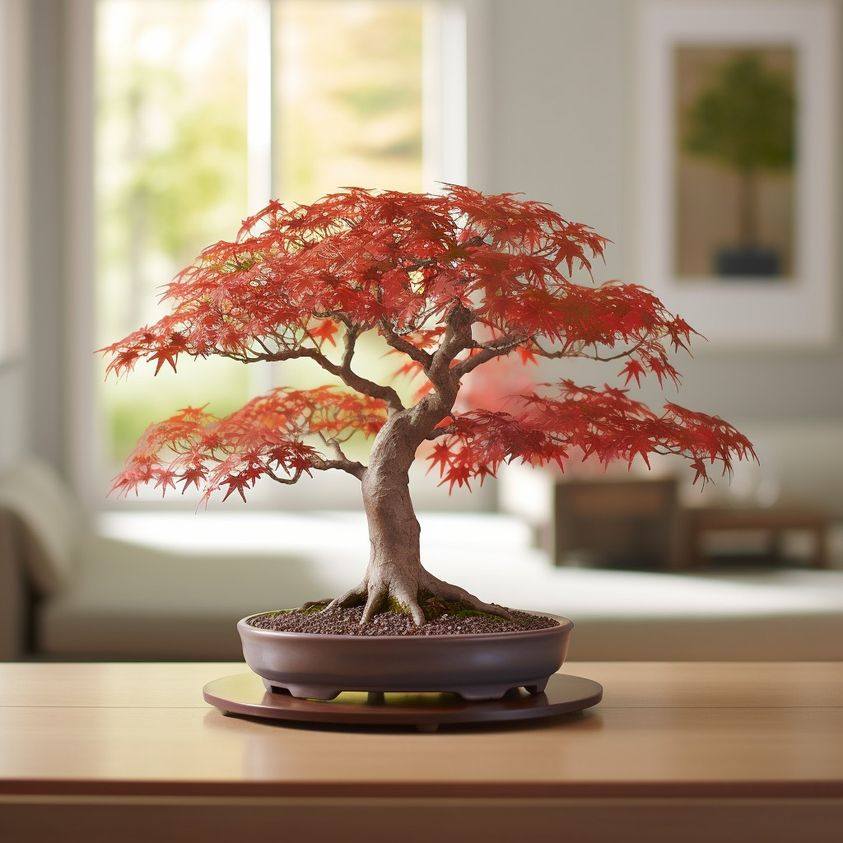
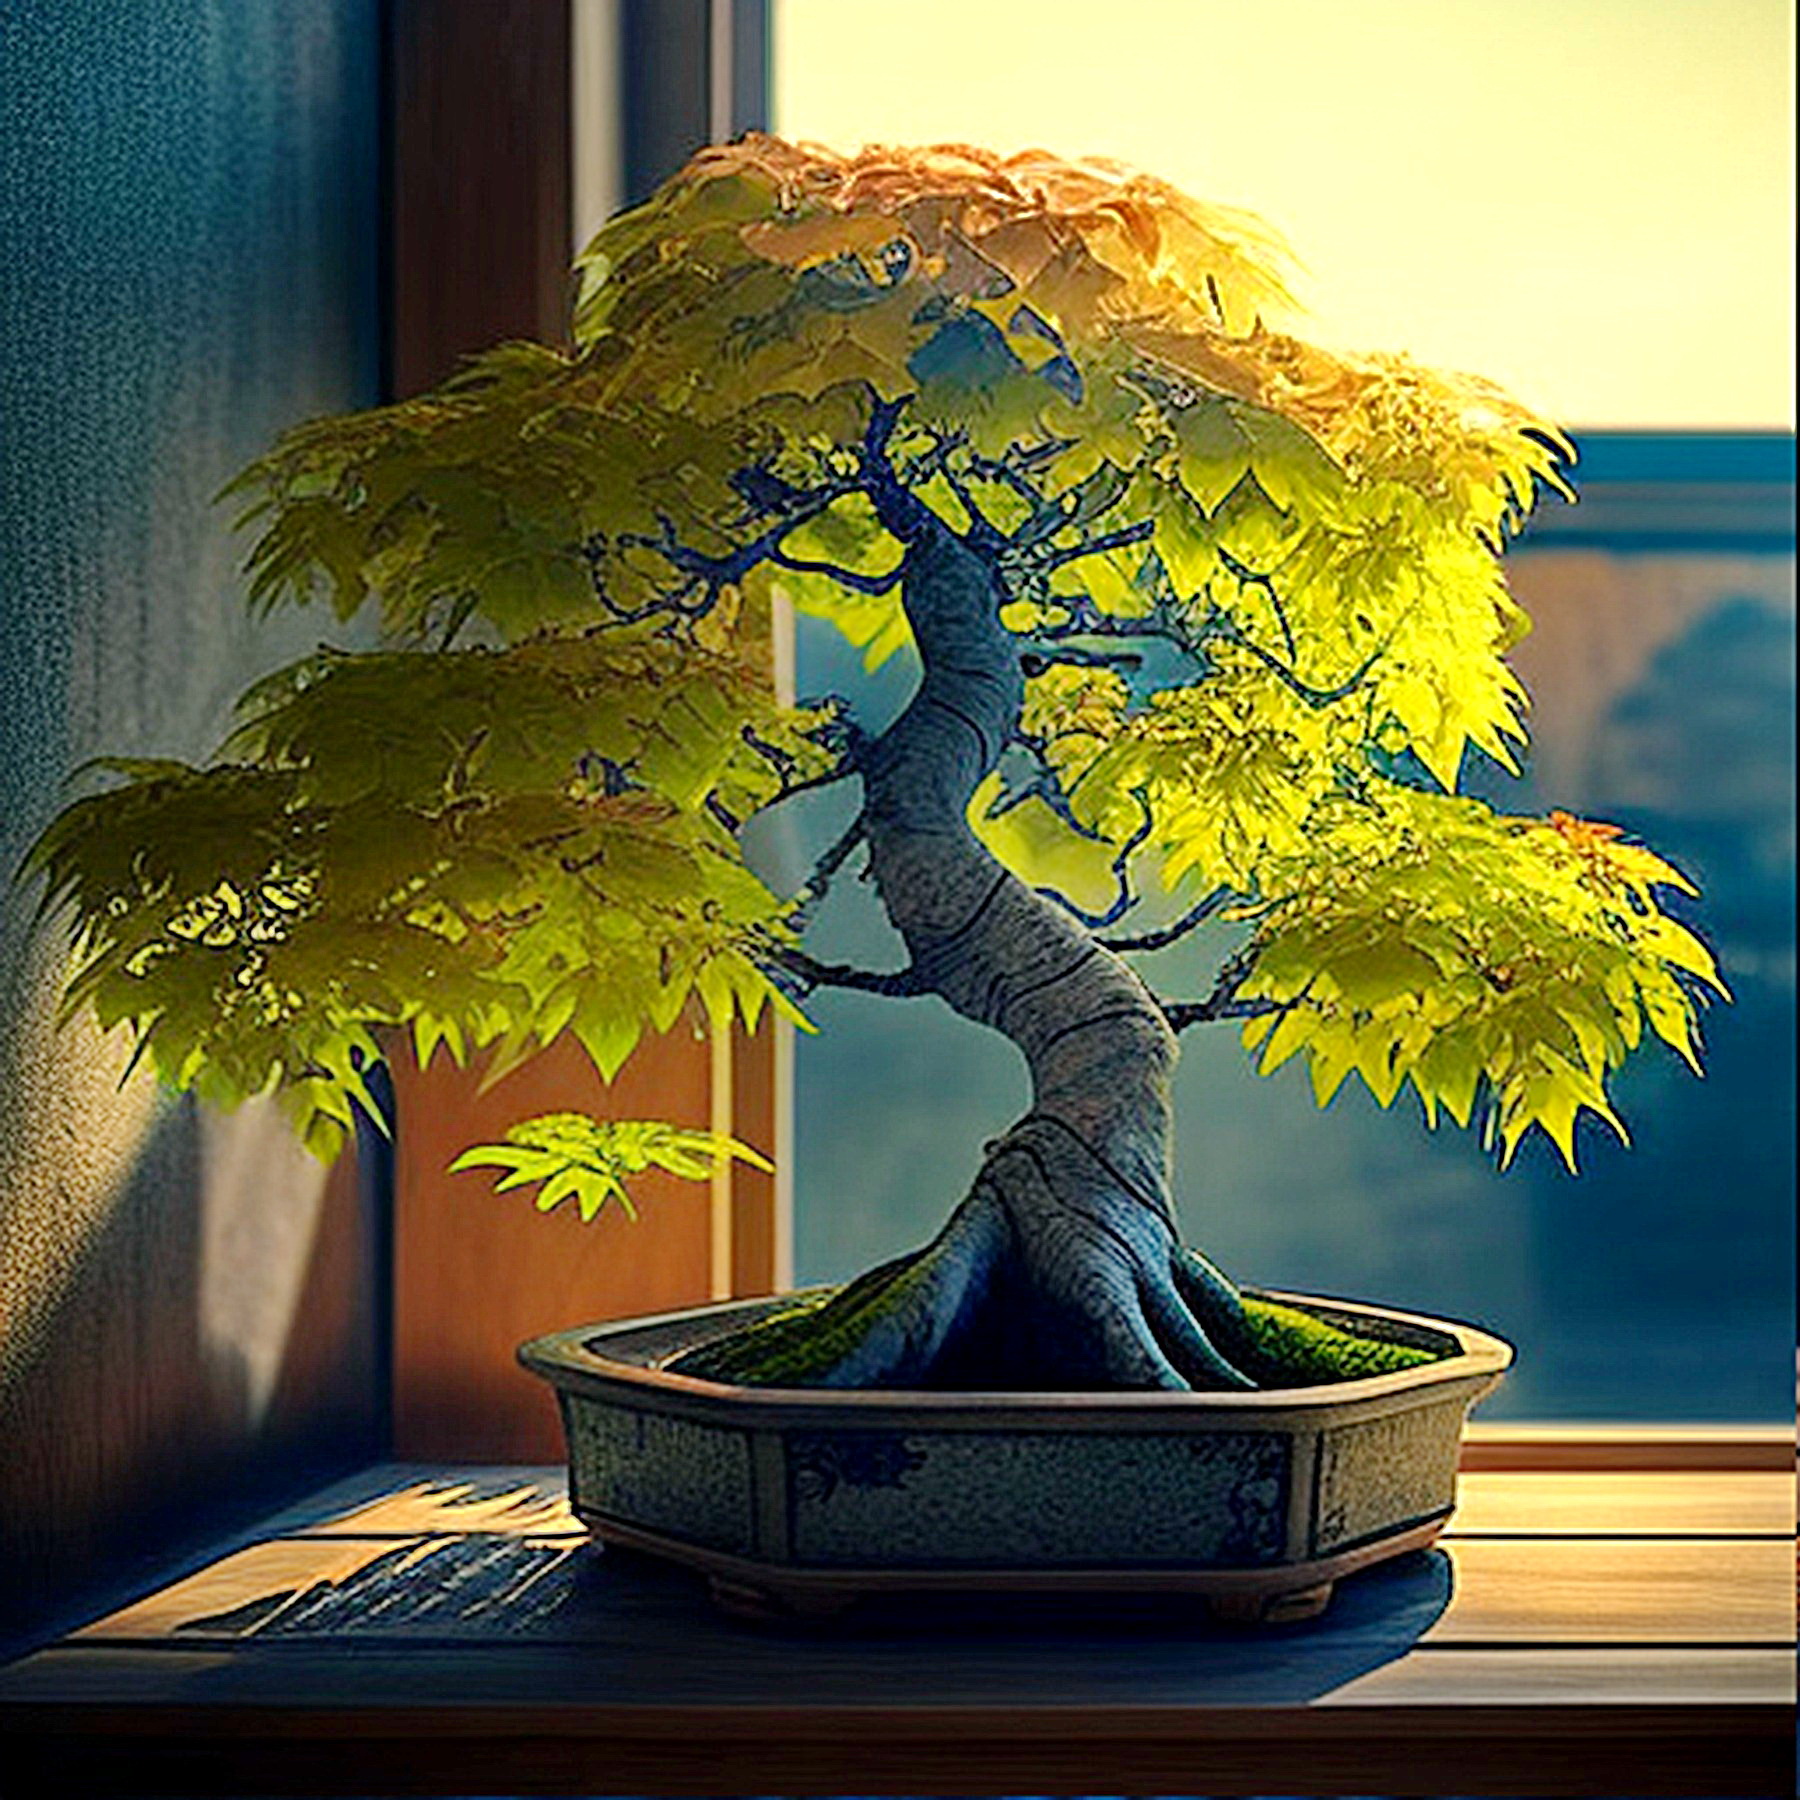
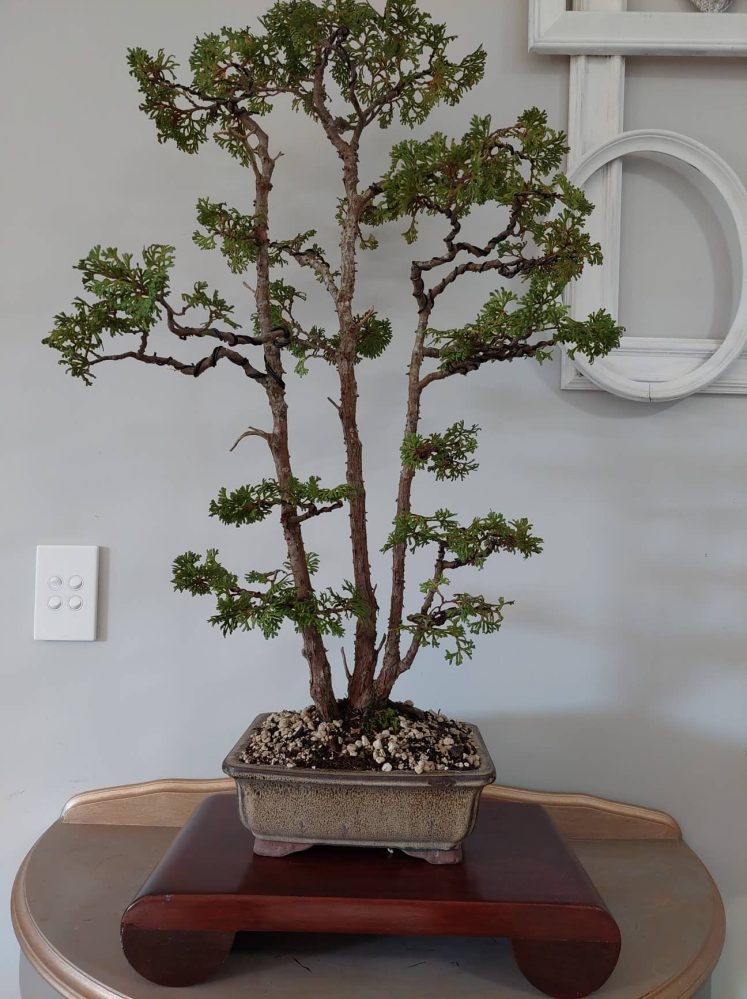
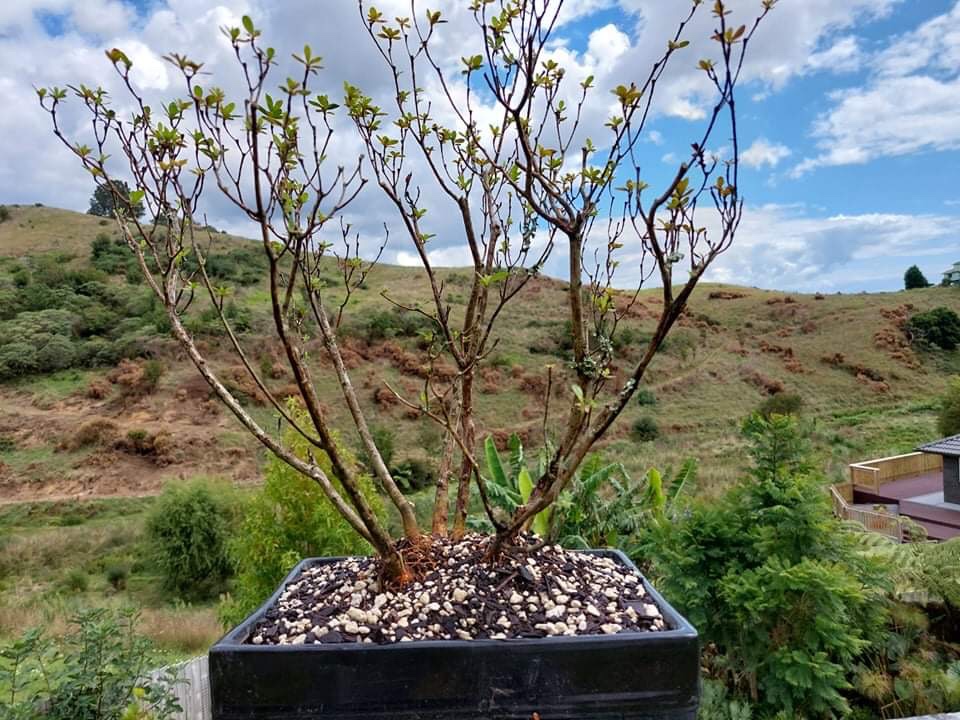
Here we are, four years later and the progression is slow but deliberate. This is within the principle of Kaizen which means doing small bits of work over time. In this case towards maturity as a Bonsai. The photos below are of the main phases of the progression with the last photos of what it looks like today.
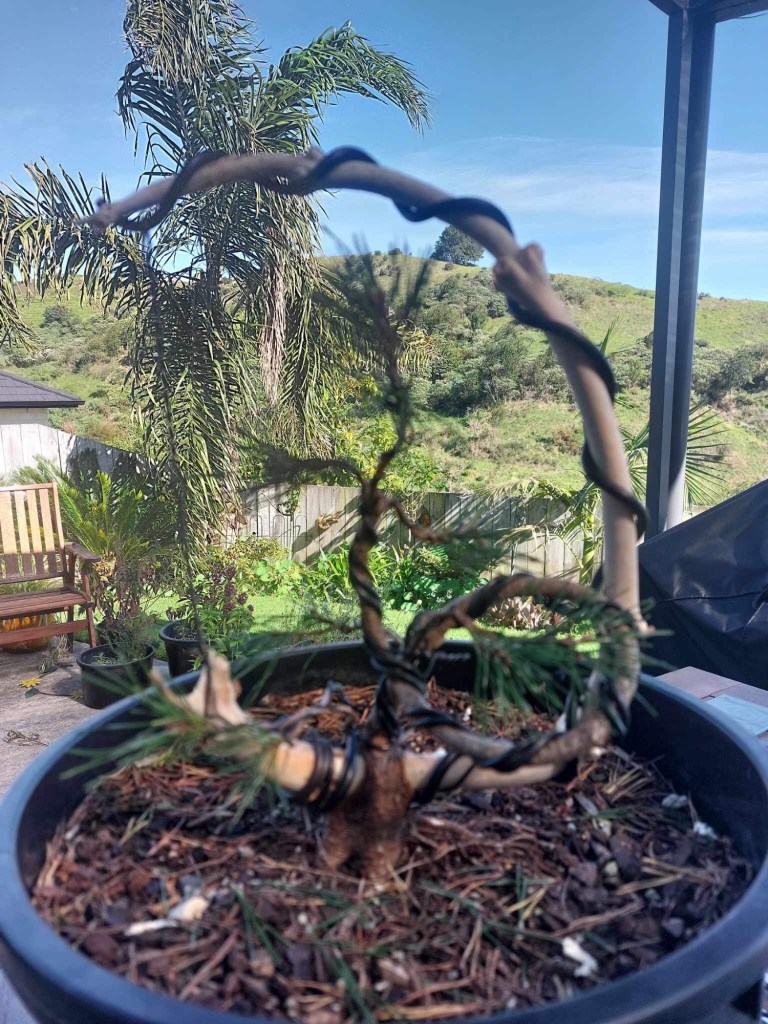
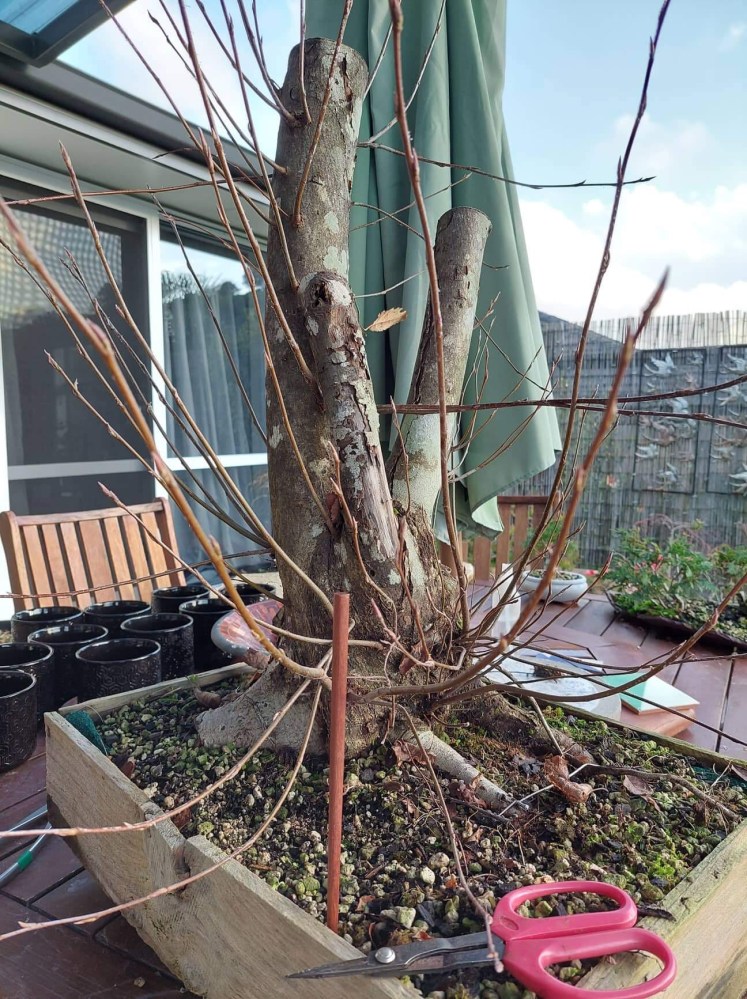
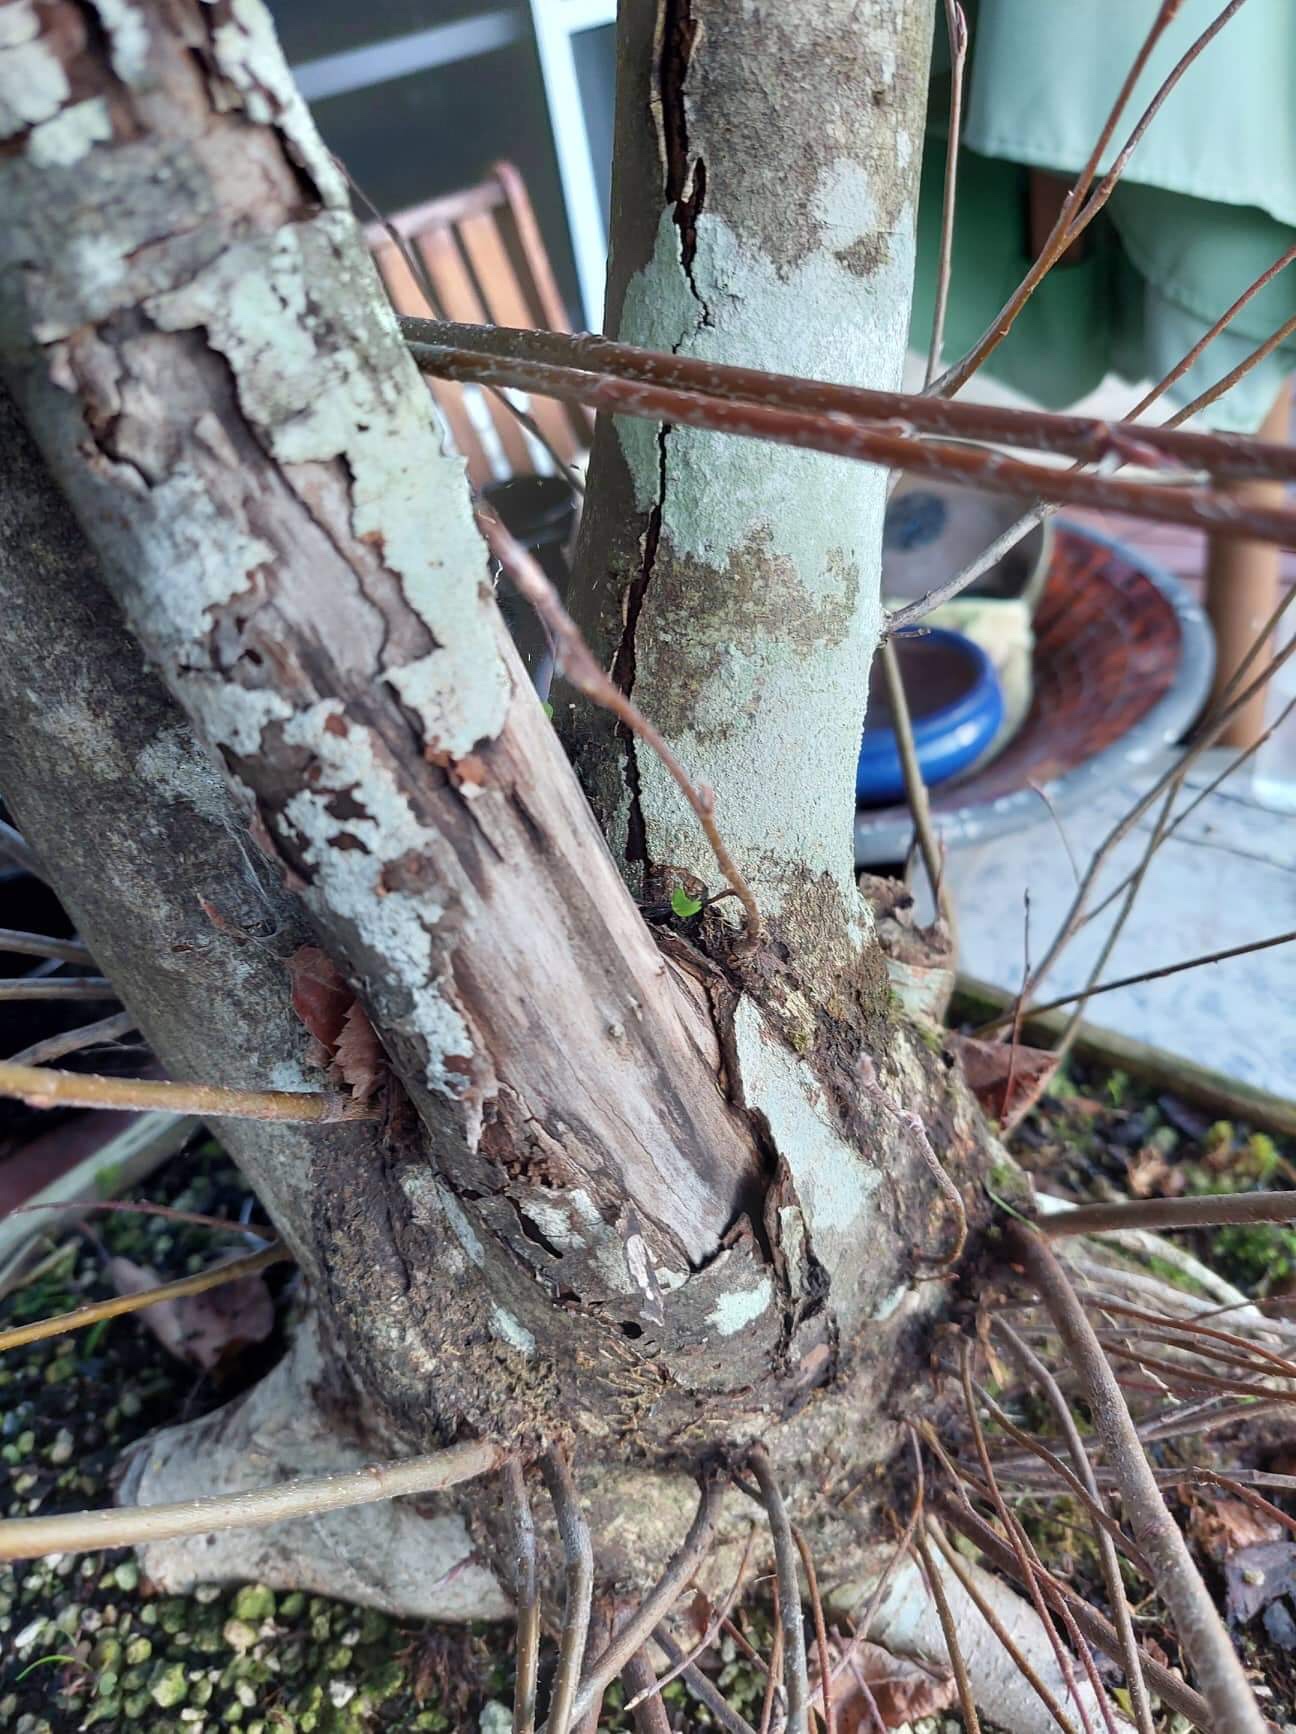
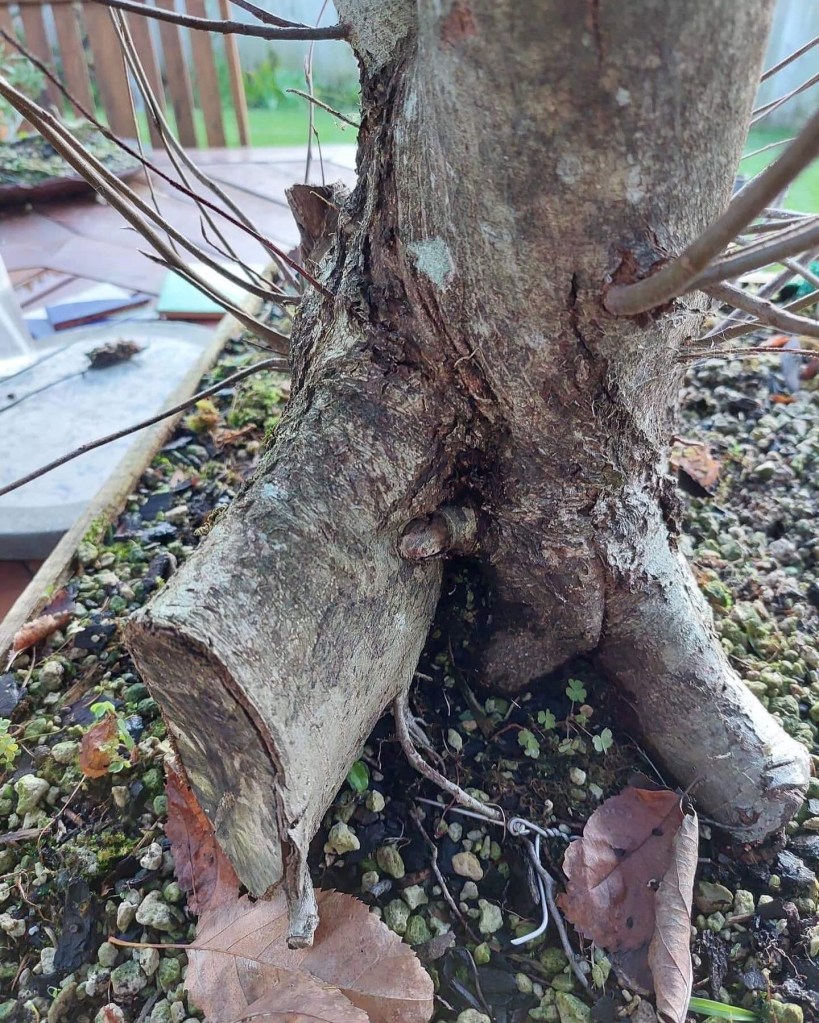
The full story is at the link above. In short, this tree came of the back of a truck on its way to the rubbish dump.A few hours later, branch selection took place and the tree was potted up in mostly pumice.This is the progression on 5 June 2022, roughly 15 months later.At this stage it was thought that the bottom branch on the right was out of place and not needed to develop the Nebari and was promptly removed.January 2025. Today saw a bit of secondary branch selection and a bit of wiring in the apex.Very happy to see some back budding.Another flower bud is in production.
Overall, the progression is slow, but steady. The back budding is a welcome addition compared to the previous year.
Next steps:
Keep fertilisation going. This is a very hungry feeder and shows very quickly if it is in need of something.
Cut back to minimise long internodes.
Wire more branches over time.
Pot selection. This tree will be ready for its first Bonsai pot come August. Any suggestions? I am thinking a glazed pot, not sure about colour or shape. Feel free to leave a comment on your thoughts for the pot.
Thank you for reading. Please subscribe to never miss out on new posts.
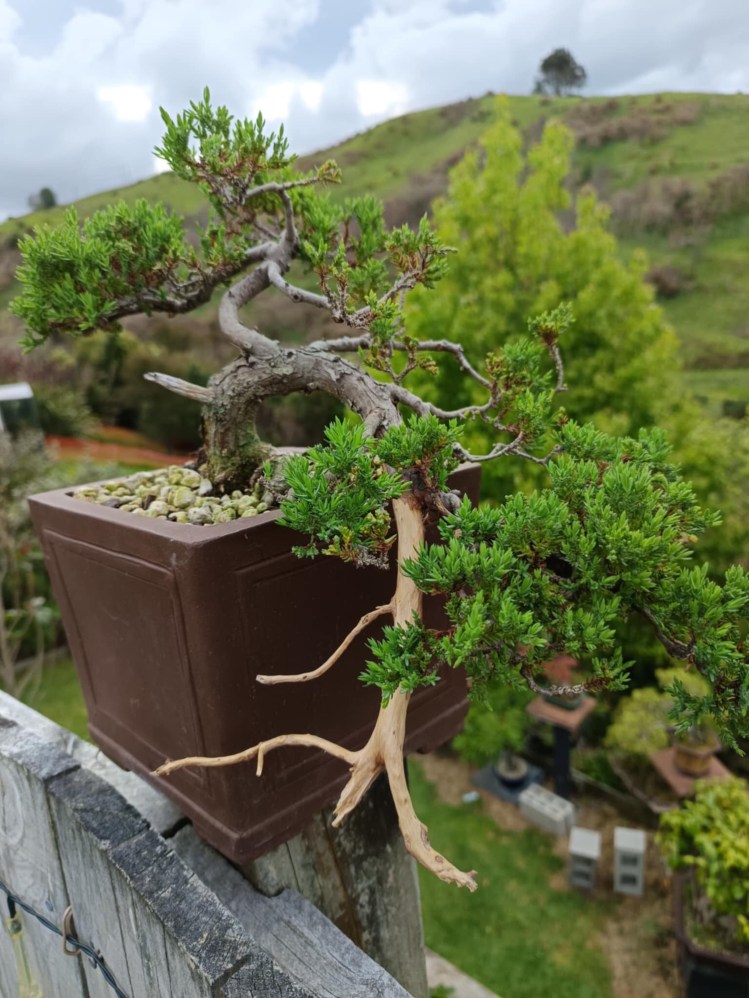
This semi-cascade Juniper Bonsai lost the bottom section and had to be restyled as a semi-cascade. A large part of the original cascade was transformed into a jin. This was done in late winter, then repotted from a taller cascade pot to this pot. At the start of Spring the fertilisation cycle was intensified and now we have a great colour on the Juniper as well as bud burst all over the plant. The next step is to let it grow more for another month and to then trim and wire the foliage pads back into place.
The video. It can also be watched on our You Tube channel.
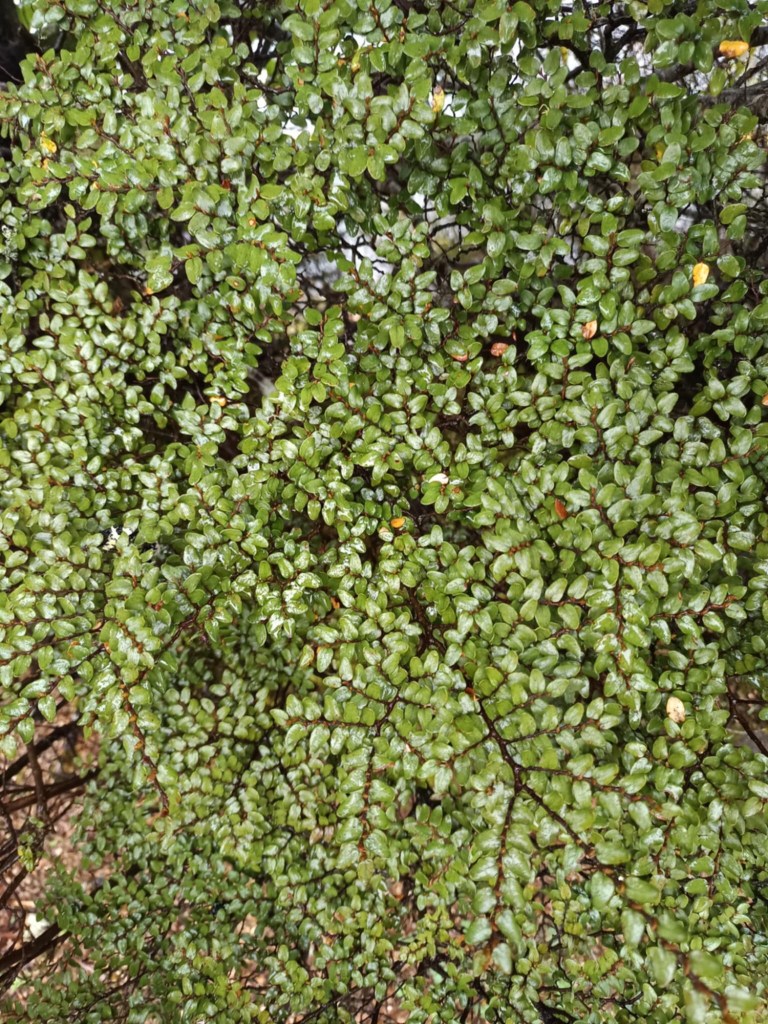
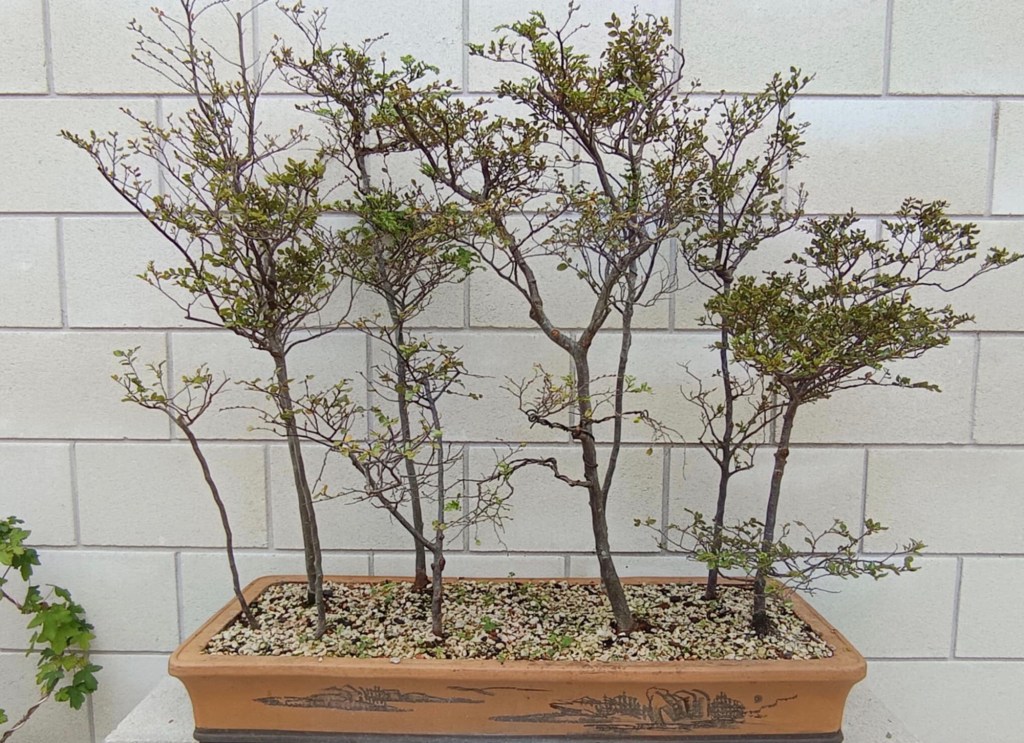
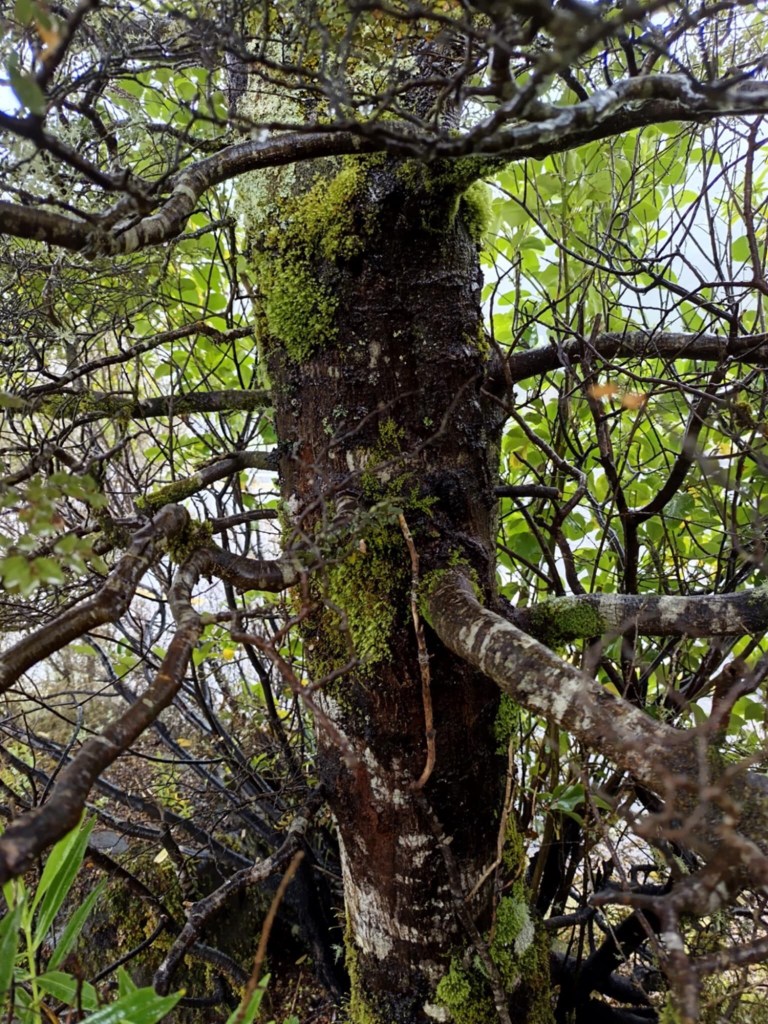
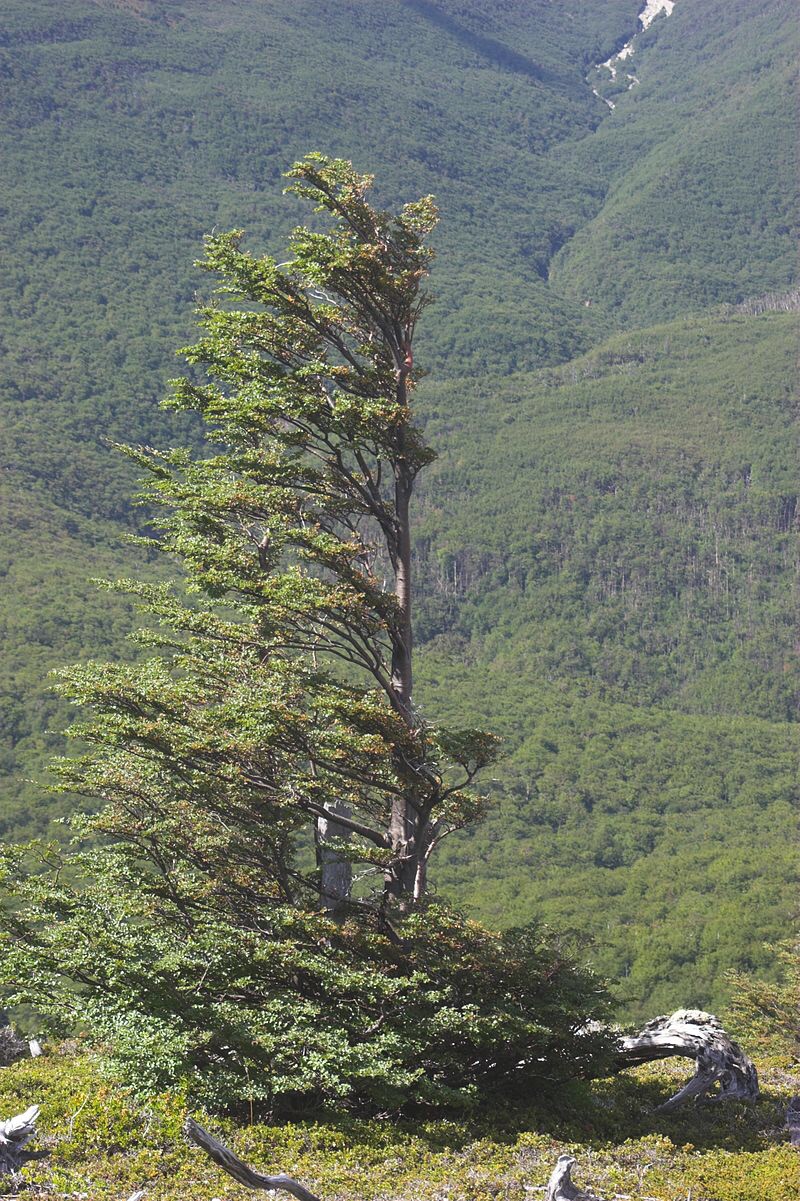
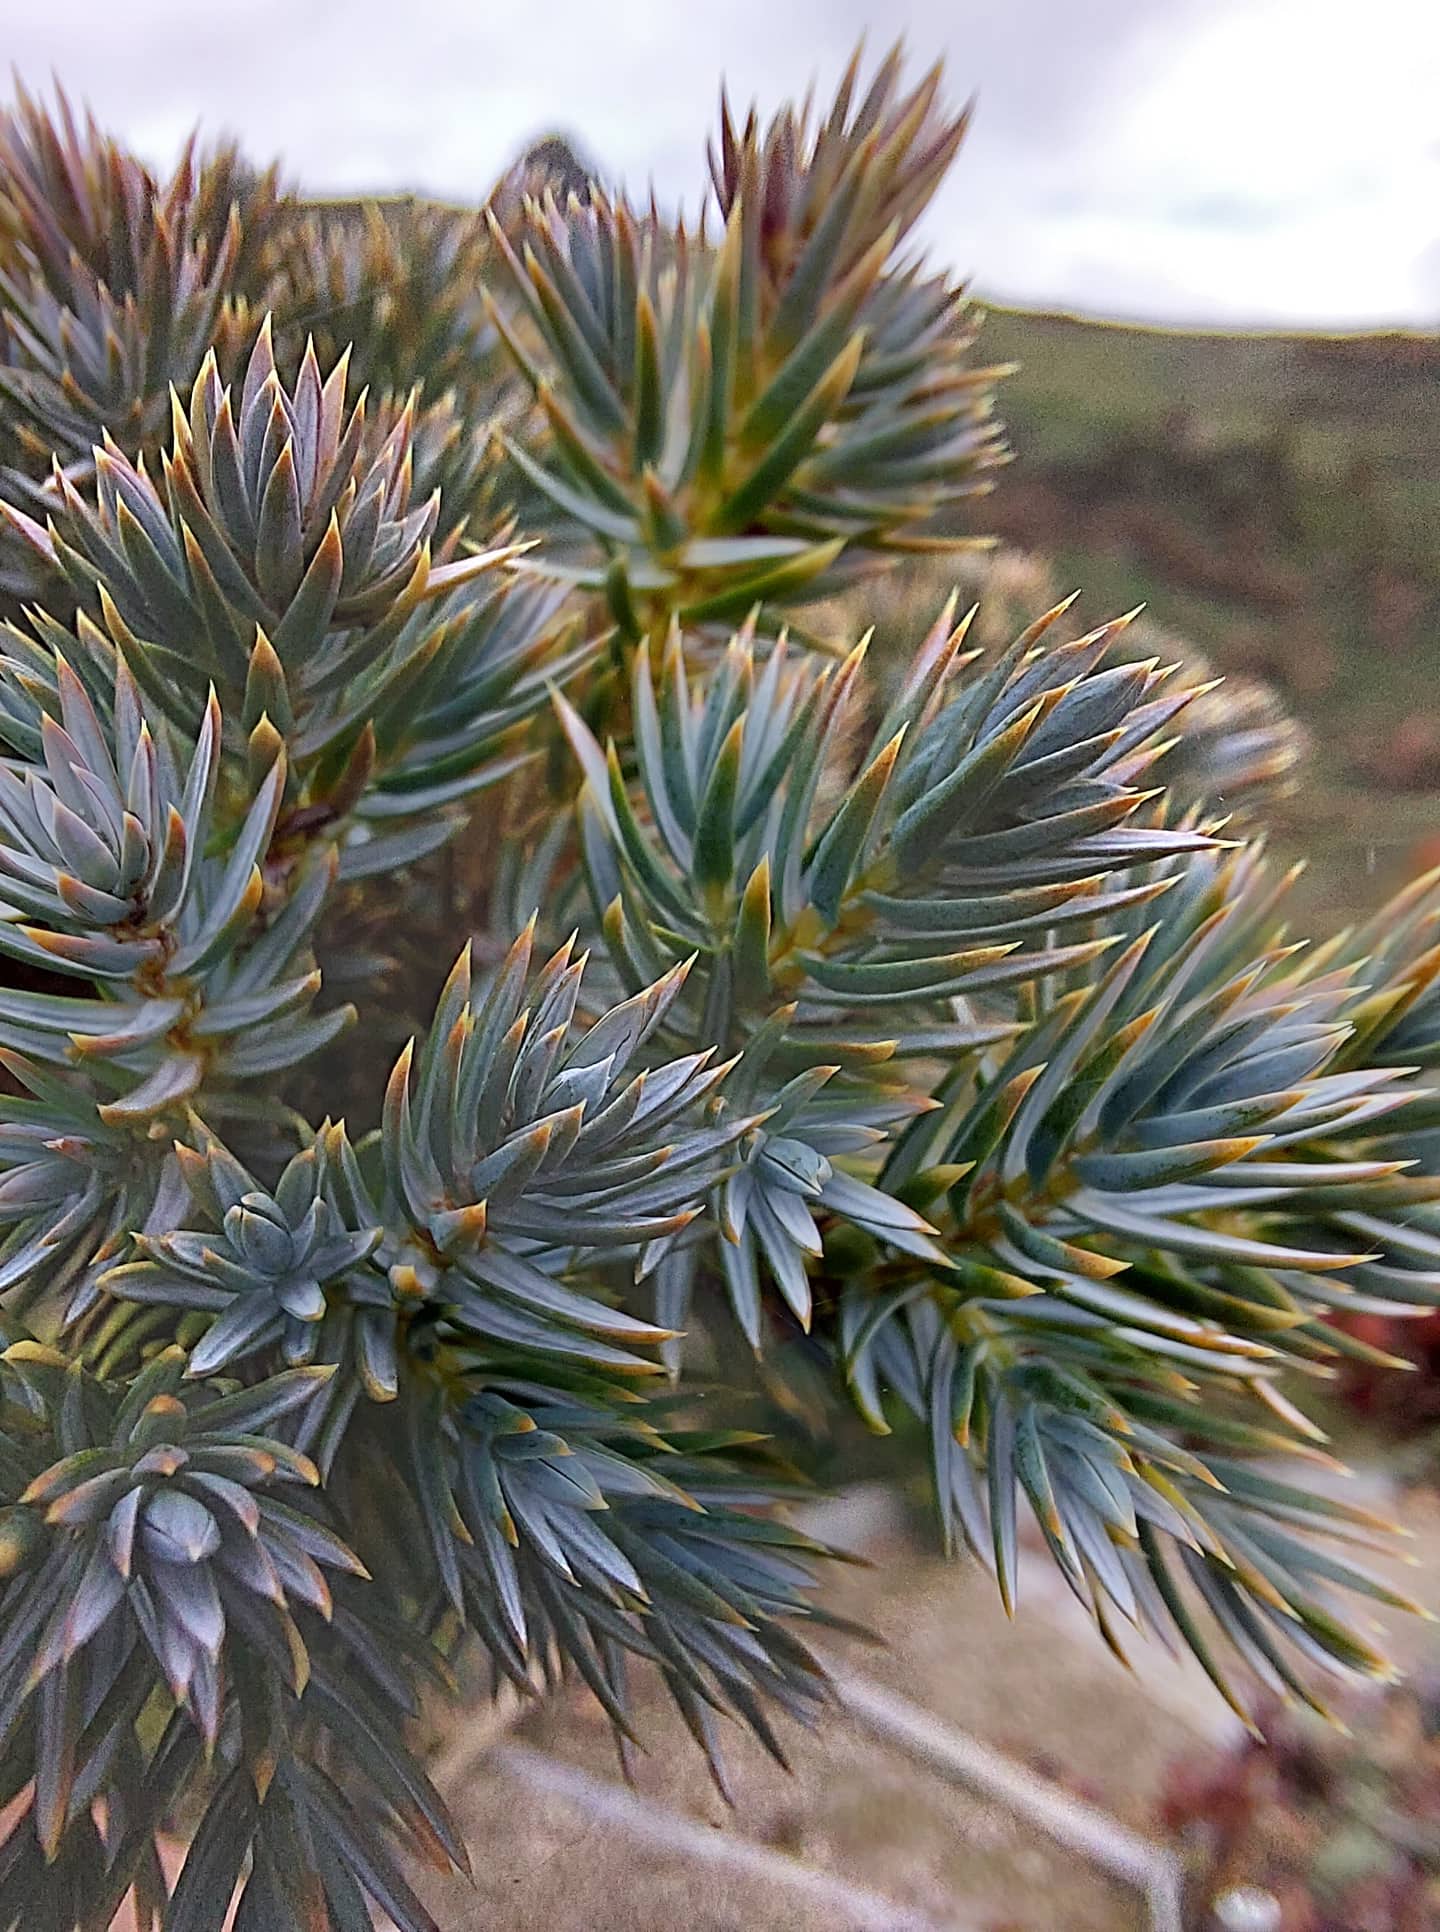
Nothofagus cliffortioides, known as Mountain Beech, is a large, evergreen tree native to New Zealand. The taxon is also known as Fucospora cliffortioides in New Zealand. It is found on the South Island and around higher altitude areas of the North Island. The photos in this article were taken in the Tongariro National Park area (Whakapapa).
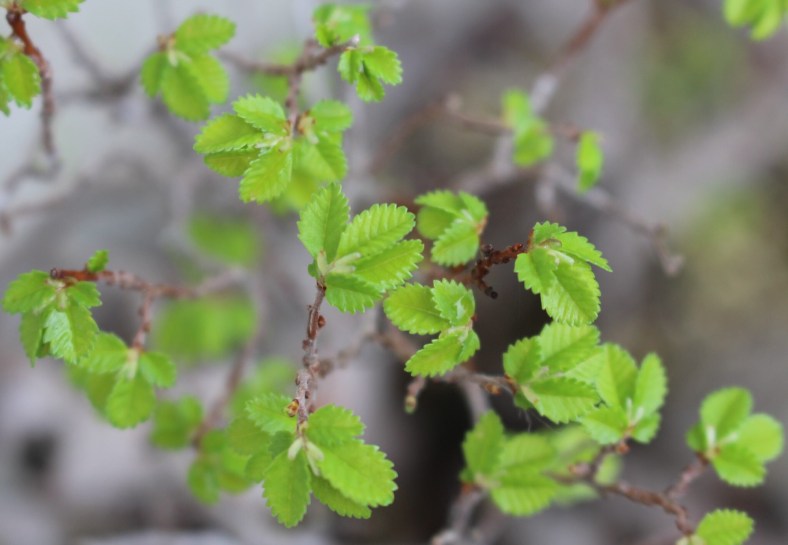
The foliage consists of small, dark green leaves which are carried closely on short stems in fan-like sprays. In its natural habitat the branches and leaves form natural foliage pads as commonly seen in Bonsai. It is this growth pattern that caught my attention while out and about studying trees and looking for Bonsai related inspiration. Masses of tiny, red flowers are borne across the tree in spring. It grows with a broad and somewhat rounded habit to about 30 m tall and 12 m wide. Will these trees make it as Bonsai?
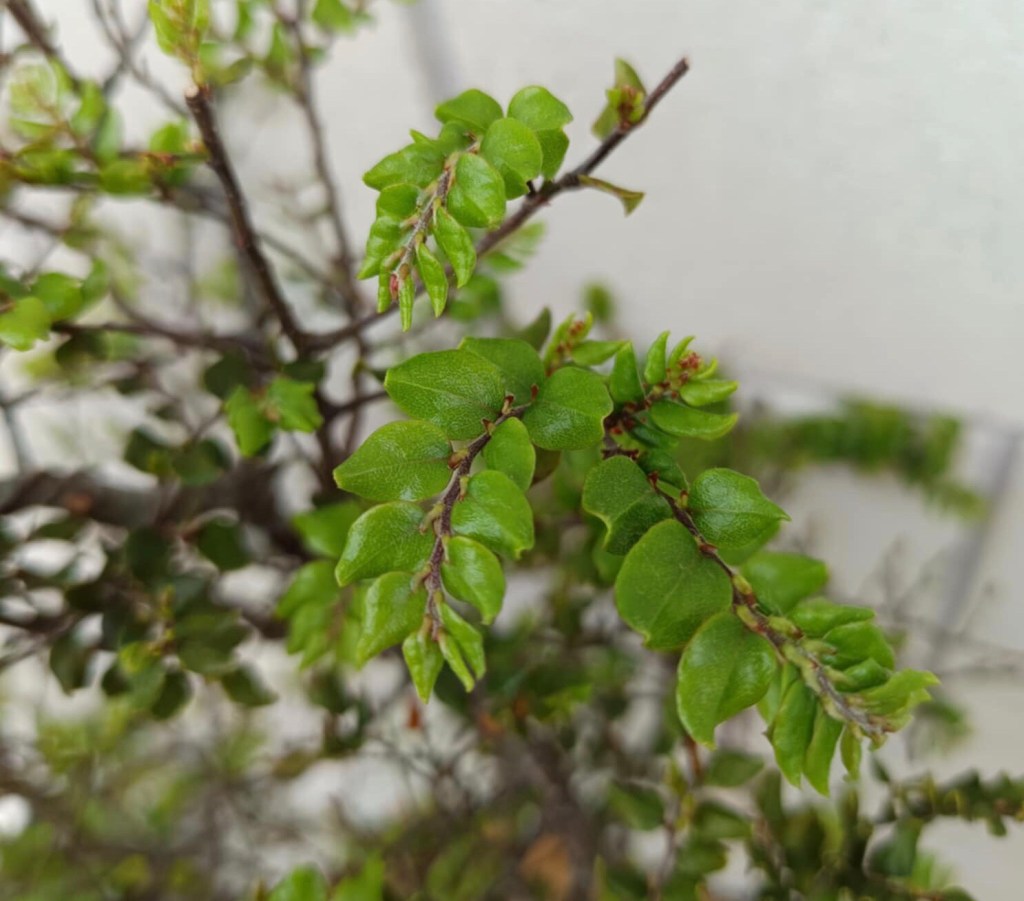
I ordered a few nursery trees a few years ago and these were planted in a long and narrow pot. The soil mix is made up of about 50% compost, 40% pumice and 10% scoria. In its natural habitat the soil is mostly organic with a high percentage of scoria and other volcanic rock mixed in. The photos in this article were taken of trees in a sub-alpine area with a few other native species in the immediate environment.
The trees that I have are arranged in a forest formation and since planting, the trunks have only marginally thickened with most of the growth originating from the canopy area, a clearly apically dominant species. The trees are ok with pruning, at times dropping leaves, but generally budding and forming new leaves within six weeks after partial leaf drop. I am not sure if this is a natural occurrence or a reaction to pruning.
I have wired some branches into a flattened foliage pad direction to imitate the natural growth. In young trees the growth tends to be vertically upright and as the branches get older, start to grow more horizontally with the nice evergreen foliage pads forming.
Still skinny but ready for canopy shaping.
My next plan is to source more nursery material and to grow these in the ground for a few years for the trunks to fatten up before they go into a pot. At this early stage of my current trees, I am leaning towards the fact that they do not add a lot of width to trunks as soon as they go into a pot.
Thus far no disease or pests have been encountered and except for the hysterical leave drop after pruning, no other quirks have been observed.
Below are trees in forest style plantings done by New Zealand forest planting specialist, Mark Fredric. Mark has managed to capture the naturalistic style of these Beech trees.
Small mountain beech, lancewood and fern grove Mark has put on the rock 14 years ago. The combination has never been repotted. In the background to the right is a mountain beech group and to the left rear is a silver beech forest planting. Great examples of using Beech trees in group plantings.
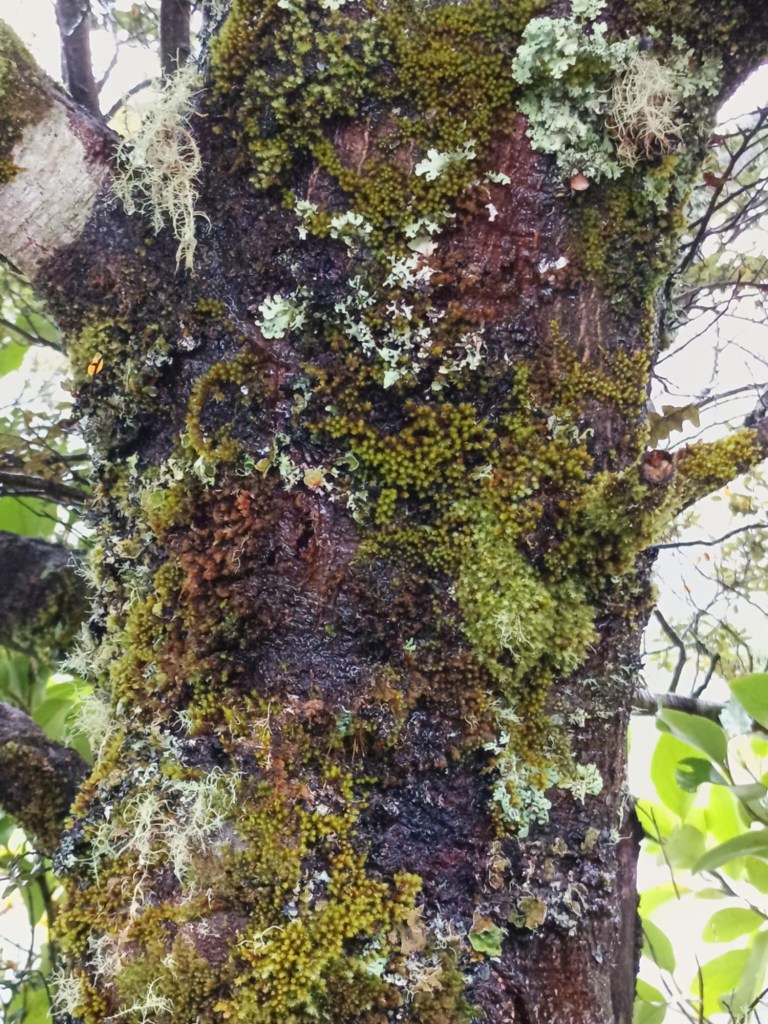
One of the debates we also still need to properly have here in New Zealand and probably in other areas where there is prolific moss and lichen growth, is the one about especially the growth of lichen on our Bonsai specimens. Lichen grows naturally on trees and shrubs in New Zealand forests and is a feature of natural habitats where moisture and shade enhances the growth of these symbiotic organisms. Do we leave them on or do we take them off? Let’s talk about it and feel free to leave your ideas and thoughts below.
Moss and Lichen are naturally found on New Zealand forest trees.
I was confronted with this Mugo Pine and had no idea what to do with it. The two bar branches at the bottom is ugly and the two arms going up from there does not lean itself to any of the Bonsai styles that I know of.
After many days, weeks and months of staring at it from different angles, I one day was working on a small Japanese White Pine that is planted in a crescent shaped pot and a new idea came to me. To do this, many Bonsai “rules” must be broken and the tree put at risk due to a lot of material being removed. This is a calculated risk. More about that later. Here is the culprit in all its former glory.
What to do with it?
The decision was made to remove the one thick branch on the one side and create a two inch long Jin out of it.
The Jin on the right.
Then the other branch was stripped and Jinned as well.
One short Jin and one long Jin.
This longer Jin is now wired up and bent in the shape of a crescent, the same as what a crescent shaped pot would look like.
The crescent pot.The branch is bent.
Now the only branch that is left is shaped to represent an informal upright style Bonsai tree with a loop in what is now the trunk to get the height correct.
The end product for now.
Aftercare and the future: the tree will now be placed in a sheltered spot and remain there for at least a year. Fertilisation, watering, checking on the wire and weeding is the most excitement this tree will see for a long time. When the time is right, the wire will be removed and the Jin will be further developed. That will just be some detail work, inclusive of using fine carving tools, torching it and lime sulphur treatment. The tree will also go into a Bonsai pot once the growth is strong.
I mentioned taking calculated risks earlier. It really comes down to mitigating the risks by thinking through each risk and finding a way to minimise the risk. These include not potting anytime soon which means no root work at this time, sealing all the wounds and keeping the tree out of wind and harsh sunlight. Extensive wiring took place and this is mitigated by placing guy wires in places to support the harder wiring as to take some of the load off. Guy wires are attached to the wire on the branches / Jin and not on the branches itself. Now, let’s pray.
The shorter Jin that will undergo further development.
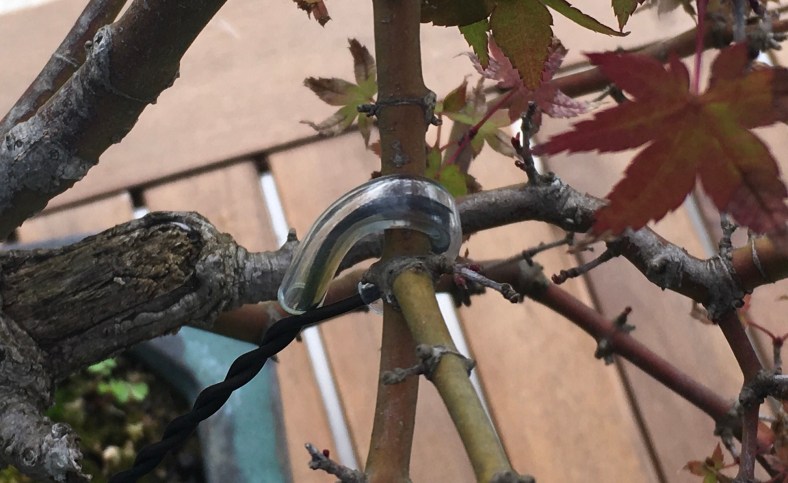
Someone recently asked about the use of guy wires in Bonsai. I find that guy wires are particularly useful when used on older Maple trees.
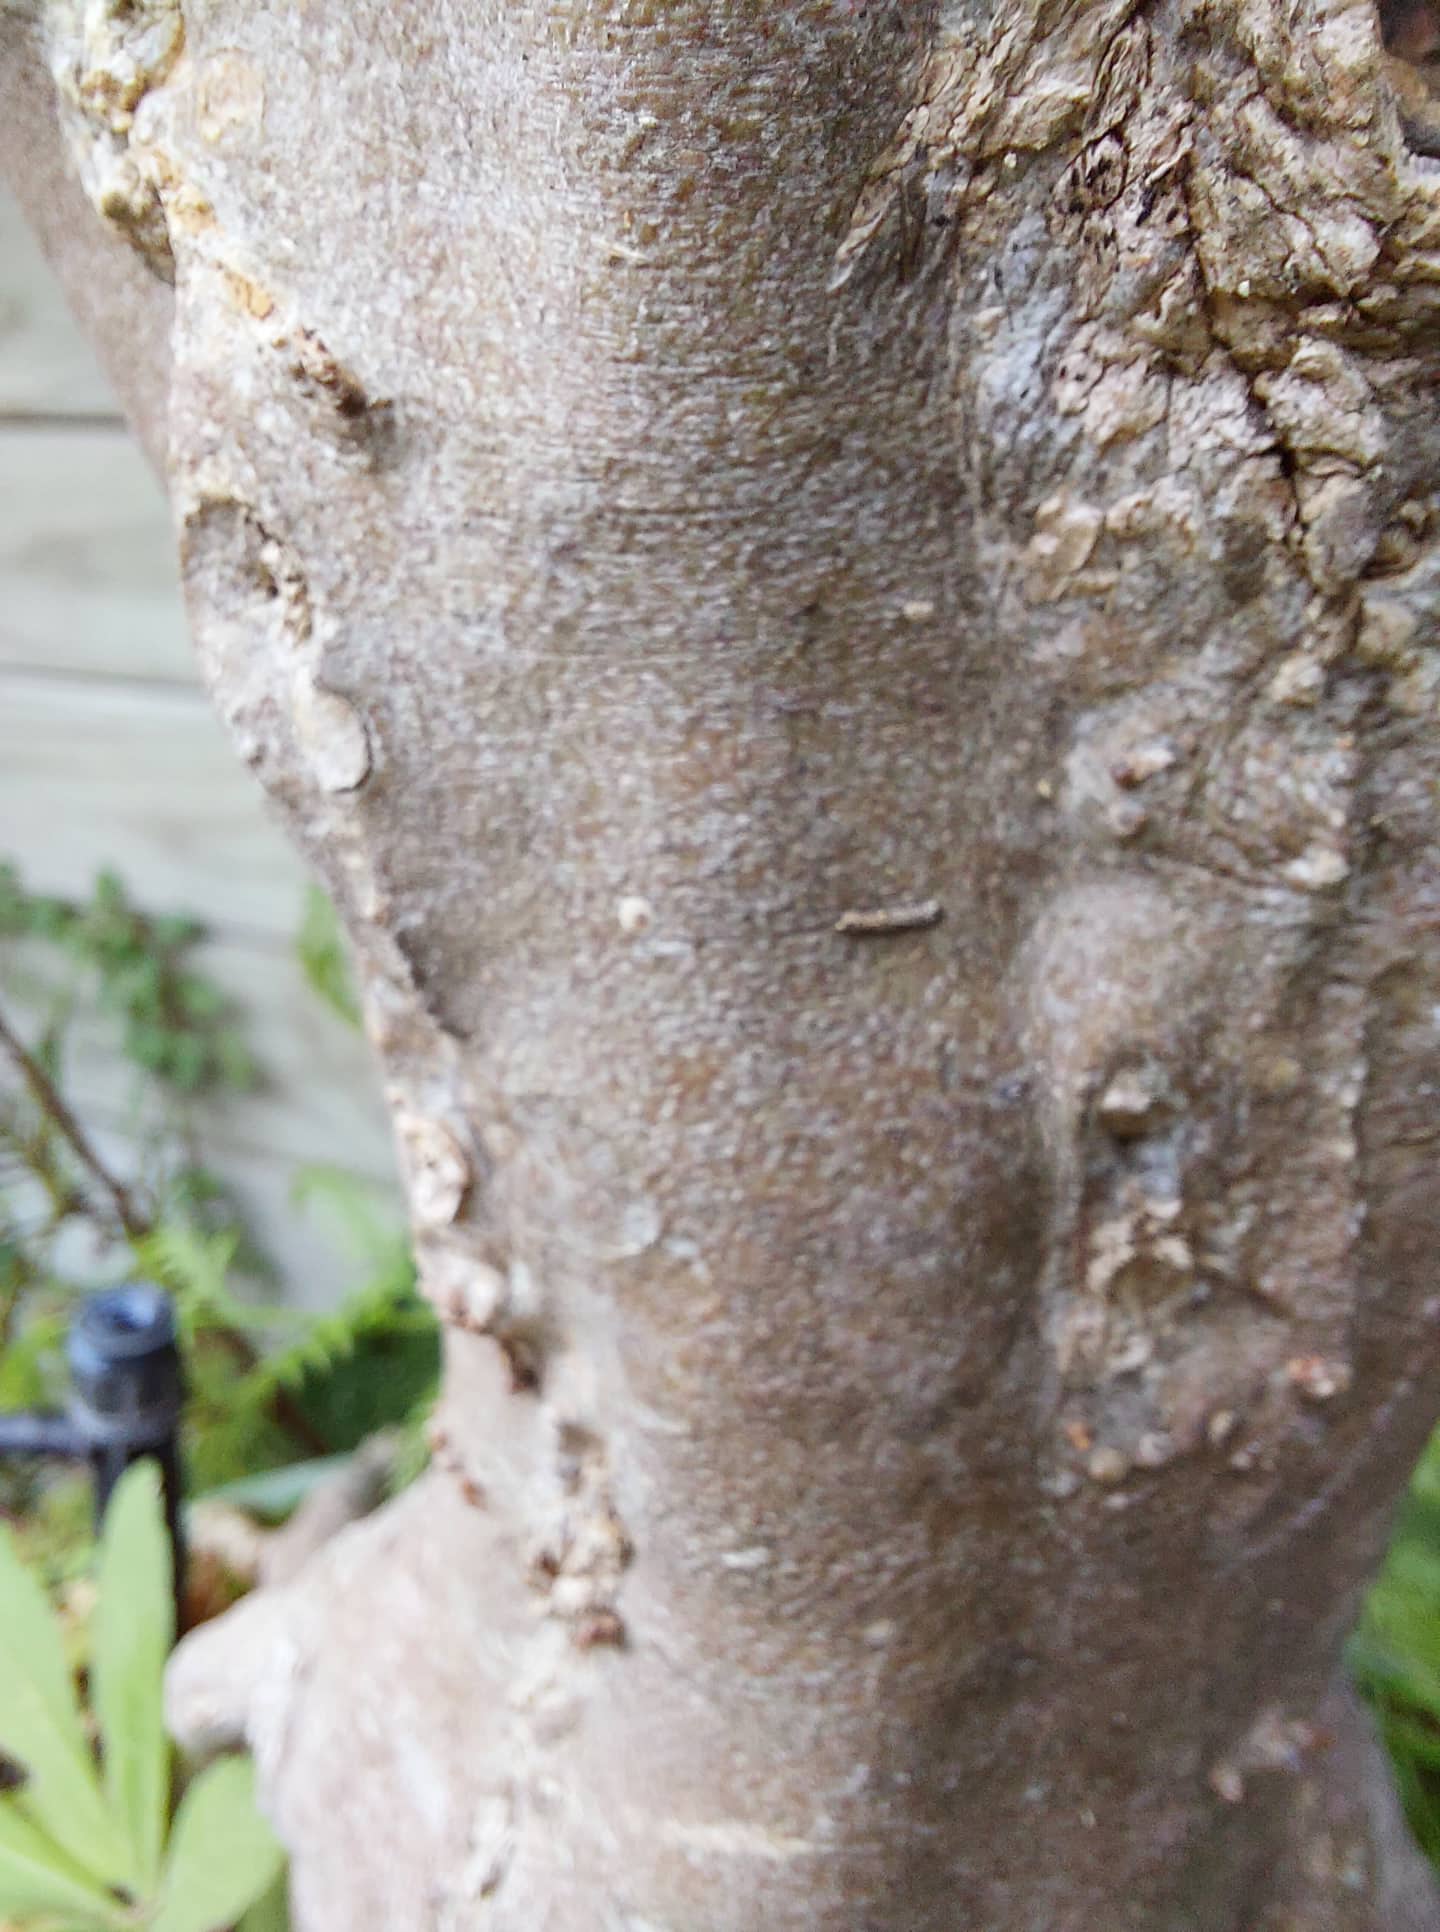
The branches are very brittle and not flexible at all (the older ones). The tree in the photos is a prime examples of this. Two branches were lost over the last few years trying to set the branches with wire directly applied to the branches. The first photo below has a little stump just under the wire (middle) where one of these branches, which just happened to be critical in filling the back of the tree, broke while bending.
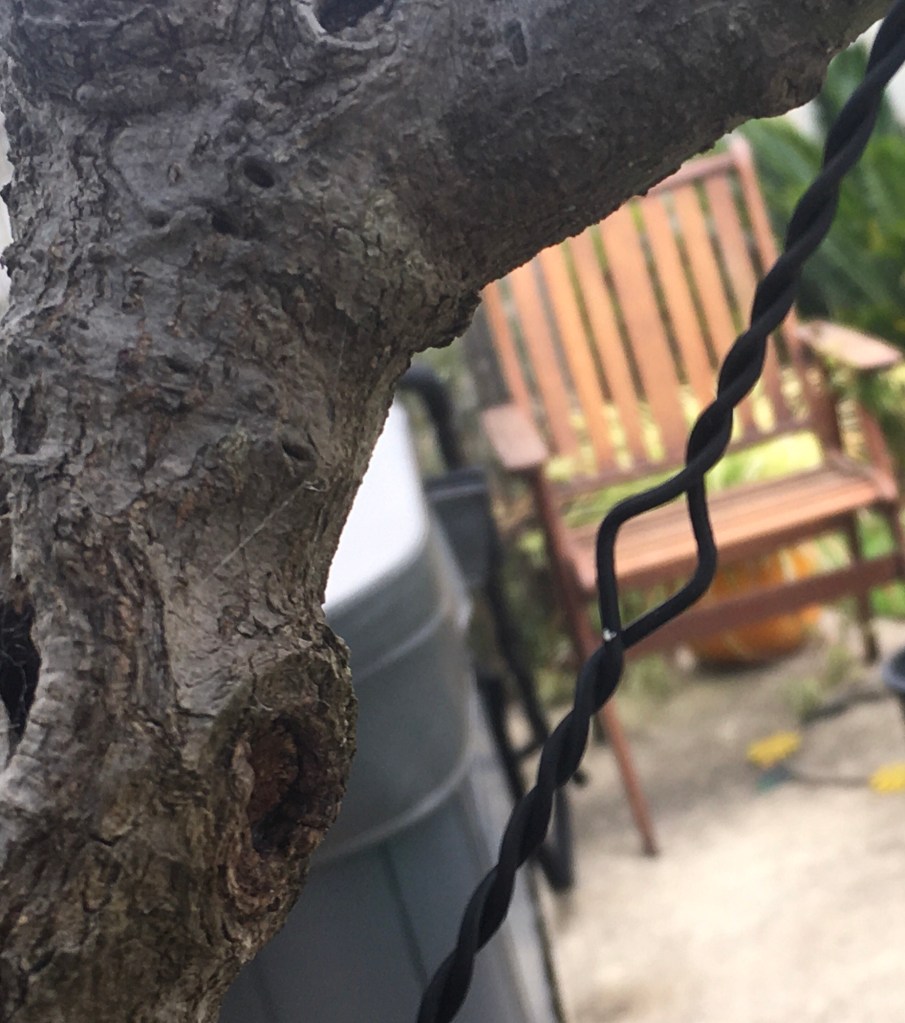
I apply a guy wire if I need to pull a branch down or sideways on these brittle branches. A screw is placed at the bottom of the trunk, preferably under soil level or as close as possible to it. The hole left once removed will close quickly.
The important thing is to set or twist the wire over time. The tree in the photos had two turns per day over five days to get the branch where it is suppose to be.
It is important to use some sort of protection on Maple branches as a naked wire will cut in. There is an article at http://www.bonsaiplace.net that has more details on the use of guy wires.
It is always exciting for me to apply wire to a tree and I feel the same excitement unwiring a tree. Applying wire is part of the creative process. You wire and you place the branches in place and when done, you can stand back and admire the design. Removing the wire for me brings the same excitement in that once the wire is off, two emotions are detected. One is happiness that you managed to remove the wire in time with no nasty wire bite marks on the branches. The second emotion is about the same as seeing an infant take the first steps on his or her own or seeing your puppy successfully toilet trained. Your tree is now on its own, with no help from wires to keep its shape. It is resembling something more advanced from the time that you applied the wire. It is another step towards maturity as a Bonsai tree.
Wire off.
How do you do this job? Some people cut the wire in short bits and others uncoil it from the branches. I do both. Usually thicker wire gets cut and thinner wire gets uncoiled from the branches. It also depends on the size of the tree for me in that I prefer to use my fingers on smaller trees as my wire cutter is quite bulky, but perfect to use on the thicker wire where the chances of damaging bark is greater. Using the cutter is just easier, especially on Copper wire. Aluminium is softer and much more pliable which makes for safer removal of the wire. And that brings us to a very important point. Safety and the health of the tree always comes first. If you cannot remove the wire safely by hand and the uncoiling method, the appropriate tool should be used. Never compromise on the health of a tree.
I also usually start with all the thinner wire first. In other words, the reverse order of which the wire was applied in. My technique is to set the thicker branches first, therefor using thicker wire and from there use thinner wire as the branches taper out to the thinnest ones. Starting with the thinner ones also means working from the outside in and avoiding the odd wire that naughtily crossed a thicker wire in its pursuit to support the tree. Yes, it does include some planning on order of work and technique to be used. I also usually start at the bottom of the tree and work my way up, one branch at a time. That will minimise the chance of missing a wire somewhere and then discovering it a few weeks later, by then causing damage to the branch where it was missed.
Do you re-use uncoiled wire? I do, especially for students to practice their wiring technique. To do this, it is best to get all the bends out of the wire first. I use a smooth steel pipe that is fixed on both ends and then all you have to do is take the ends of the wire around the pipe in each hand and pull it across the pipe a couple of times and it is as straight as new wire again.
Unwiring is part of the process. Do it mindfully and your tree will reward you not just with its aesthetic appeal, but also with good health and a feel good emotion of accomplishing something worthwhile.
Feel free to comment on how you approach this task and any tips that will make the job easier.
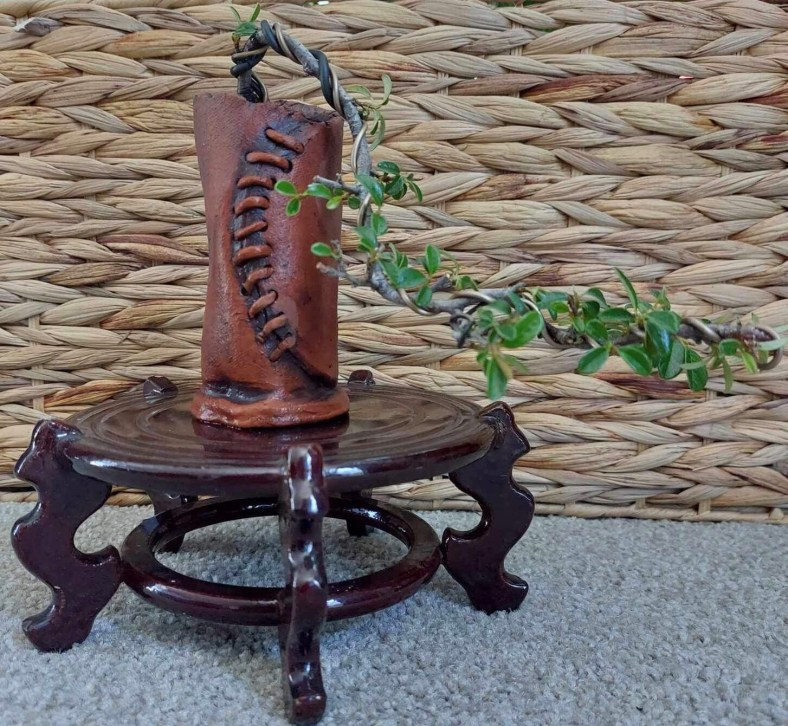
The composition is 14cm high. The pot is by Fionna from @How I make Bonsai pots in New Zealand. The plant is a Cotoneaster and has already flowered. Flowers were removed as the focus is on development of the branch structure. It feels like a fun toy to play with.
A lot of posts are daily made on social media from people who are just starting out with Bonsai on where to start. There is a big difference between going off to your local nursery and buying your first Bonsai tree, create one from garden material (https://bonsaiplace.net/2021/05/30/garden-trees-to-bonsai/) or being gifted one, and then successfully maintaining and developing it further. What advice would one give to such a budding Bonsai artist?
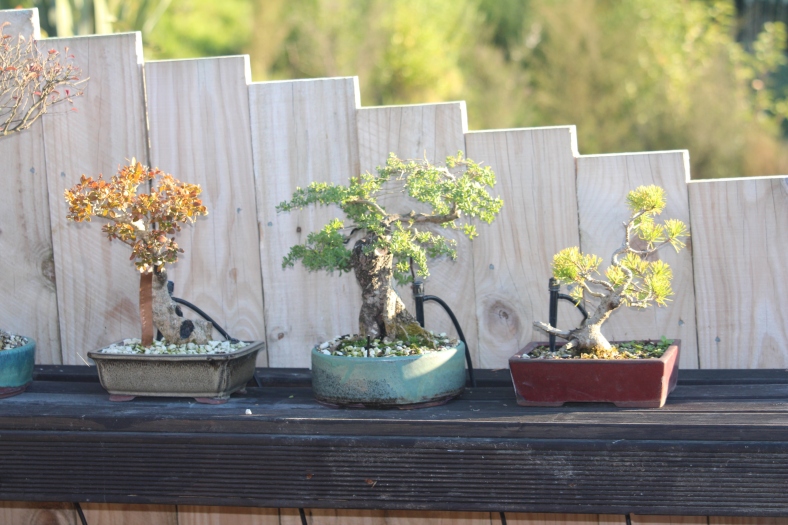
A well-developed more mature Bonsai tree (left) and a very young starter tree (right)
The Advice
The first part would be to gain some knowledge and basic skills and to realise that Bonsai is an art form (https://bonsaiplace.net/2021/10/09/bonsai-culture-styles-and-isms/). One of the earlier blog posts on this website discusses what a Bonsai Curriculum could be like and it is worth reading. That was more written for Bonsai teachers whereas for the person just starting out, the advice will be different.
Ensure you understand what Bonsai is and what it is not. The first tree will probably be an under-developed and very young tree in a cost-effective pot with hopefully some care instructions. Whatever you have, it will take commitment and in most cases a daily commitment. It is very much the same as having a pet.
Secondly, get some knowledge on basic care. Things like most Bonsai need to be kept outdoors for optimum light conditions. They are trees after-all. Water requirements will depend on the type of tree, the size of the pot, climatic conditions and the soil mix. Nutritional knowledge will come later, but the basics of fertilization should be picked up early on.
For most people that will be the end of it, but for those wanting to take it up as a hobby, allow the addiction to flourish and before long, have a collection of trees, you will need some additional knowledge and some practical skills. This is where things like wiring, pruning techniques and repotting skills come in handy. Best at this stage is to join a club or at least regularly catch-up with like-minded people. Videos (see You Tube) will help, but it is still better to spend time with people and talking about your specific trees.
Through all of this a sizeable vocabulary will be added to the mix and before long, the starter will move into the intermediate phase where debates about nebari, branch structure (https://bonsaiplace.net/2021/04/26/branch-selection-101/), ramification and soil-medium debates dominate. Not to mention pots. Colors, shapes, sizes, textures and it goes on and on and on.
A later but very important part of personal development as a Bonsai artist is to know some of the history and especially some of the philosophical themes attached to Bonsai. That is where you start to understand the difference between Penjing and Bonsai and some of the styles like Literati.
On that last point, there are some golden themes running through all of Bonsai and these mainly relate to the philosophical concepts (Wabi-Sabi) regardless of the structure or style of the tree. It would be wise to get to know these as well. https://bonsaiplace.net/2023/06/17/bonsai-perfection-in-imperfection/
By subscribing (no cost) to this website (https://bonsaiplace.net/), you will have access to updates to help you with acquiring the knowledge and skills and hopefully, the passion to succeed and provide many happy hours with your trees.
A Bonsai friend recently commented on a social media post showing an AI-generated image of a Bonsai tree that it was too perfect and that it does not display the characteristics of true Bonsai identified through the concept of Wabi-sabi. This is not the first time that I am writing about Wabi-sabi, but in this blog I would like to dig a little bit deeper into the concept and then apply it to Bonsai. I would specifically like to explore the concept of Perfection in Imperfection, one of the meanings of Wabi-sabi.
AI-generated ImageAI-generated Image
Let’s recap quickly on what Wabi-sabi means. According to Wikipedia (Wikipedia link), the term refers to a world-view focused on the acceptance of transience and imperfection. It is at times described as appreciating beauty that is imperfect, impermanent and incomplete in nature. Further on it is quoted stating that “from an engineering or design point of view, wabi may be interpreted as the imperfect quality of any object, due to inevitable limitations in design and construction/manufacture especially with respect to unpredictable or changing usage conditions; in this instance, sabi could be interpreted as the aspect of imperfect reliability, or the limited mortality of any object, hence the phonological and etymological connection with the Japanese word sabi“.
This takes us to Bonsai as a living art form, one that is never finished, one that is constantly changing due to nature and the hand of humans impacting on its growth, design and health. It is not just the tree itself, but it can also incorporate the elements making up a traditional display, the pot, the soil cover, the stand, the accompanying plantings and then also the scroll or art work in the background. The paragraph above mentions the limitations in design as one example of impact. When it comes to Bonsai there are many others.
Not everything can be controlled when it comes to Bonsai cultivation. When a tree is harvested from nature, there will no doubt be imperfections caused by insect or mechanical damage, the direction of growth and the effect of wind, snow, animals, substrate and sun. This needs to be incorporated into the design and these features, if managed correctly, will become part of the tree’s aesthetic, its character and be part of the tree’s story. These imperfections add to its history, its aura and a kind of spiritual presence that cannot come from a “perfect” tree.
Another natural example illustrating this concept, is the changing nature of the art work. The colour changes due to seasonal changes, the appearance of flowers and fruit, and then these disappearing again. It is seen in deciduous trees through being cloaked in leaves during the warmer months and then being bare during the colder months. Development of bark (craggy, flaky), fissures, Jin, Shari and Uro are all examples of natural imperfections that adds to the aesthetic of the tree, showing the beauty through these imperfections, making it perfect.
The paragraph above mentioned things that can occur naturally and some of those and others can be done by human hand. The artist can purposefully create some imperfections in line with the characteristic of the tree to add beauty through these imperfections. Here we are thinking about jin, shari and uro, but then there is also the way in which the tree is displayed. Is the position in the pot off-set or in the middle, the style of the tree plays a leading part in this. Yes, we try to match the style of the tree with the pot, size, shape and colour, but is is very rare to get all of these elements to align perfectly. On top of that you will always have different opinions on shapes, size, colour of pots as well as the general flow of the tree in relation to the pot. We try to provide one picture, one whole, but on closer inspection, the “flaws” will be there. Are they flaws, no, they are imperfections, all adding up to the complete picture being perfect. And then the tree grows ……!
Winter provides good opportunities to do structural work on deciduous Bonsai trees. Sap flow is low, no leaves means you can see what you are doing and wiring can set branches before Spring growth starts.
The tree in all its Winter glory.
This Cherry tree was collected about a year ago and was just a trunk, in this case a triple trunk at collection. The original tree was about four metres high and in a forrest which means it was quite lanky with no branches towards the bottom. One year later and it has put on a lot of new growth and the fine root development is spectacular.
It has three quite large scars on the end of each trunk and then also a very big one on a chopped root. The middle trunk is dead and has been at collection already. This trunk was rotten and easy to just break to shorten it. As the root scar was going to be large, it was decided to have that at the back.
The large root had to be removed.
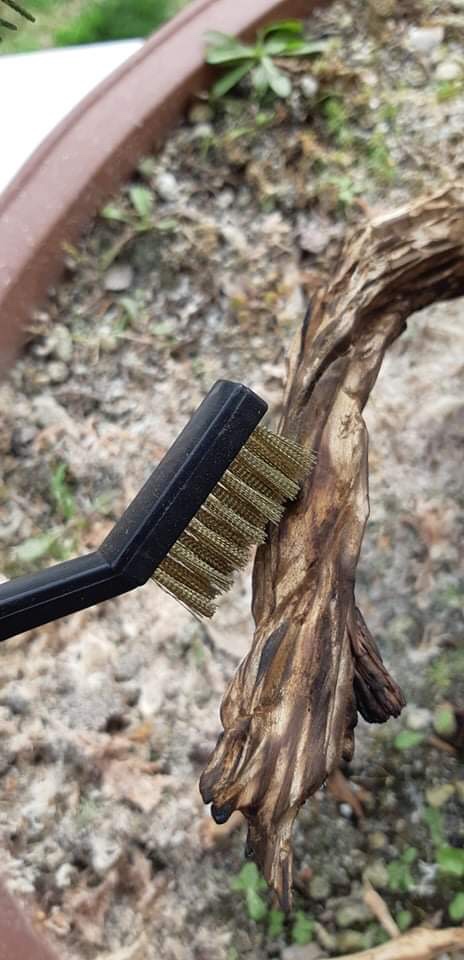
Once the front was established, extra branches were removed and a few at the top were shortened. All branches crossing the main trunks or too low down on the trunks were removed. The same happened where two new branches grew from the same place or they were just too close to each other. A few branches were in a 50/50 situation and these were left for now to be decided on later. Always start by removing large parts first. In this case it was mainly the root which was removed with a reciprocal saw and then the larger bit on the die grinder was used to set the first grooves by also creating some taper. This was then followed up by ever decreasing sizes of bits and once everything was carved, a wire brush and then a nylon brush was used to clean and polish the carvings. By polish I mean brushing vigorously to remove fine threads and fibres left over from the carving. I usually use a blow torch to help with this action, but in this case it was decided to not use the torch.
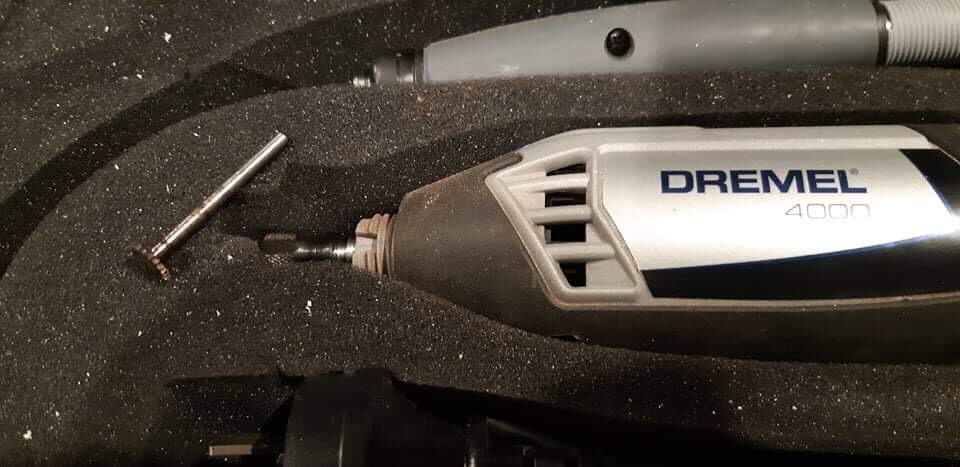
Once this phase was completed, the carving started. This was a three hour operation using different sized carving bits with both a Dremel 4000 as well as a trusty old die grinder.
The root carving.The main branch carving.The short branch carving.The dead branch carving.
The last step was now to apply wire and set the branches. A few more branches were removed and it was also decided to plant the tree on an angle leaning forward a bit more once Spring sets in. This will be a naturalistic looking tree with a large and rounded top with the shorter trunk carrying the lower branches on the left hand side. There are still a couple of branches that will probably be removed, but that will come later depending on further development. An example of this are the two branches that looks as if they are coming of the front of the main trunk about a third from the top.
Now it will rest and as soon as the buds swell a fertilisation program will start and a sharp eye be kept on the wire as it will cut in quickly as the tree grows. Watch this space for updates.
Branches wired and set.Video of tree after after carving.
Subscribing to this blog will ensure you see the progress of this tree over the years to come.
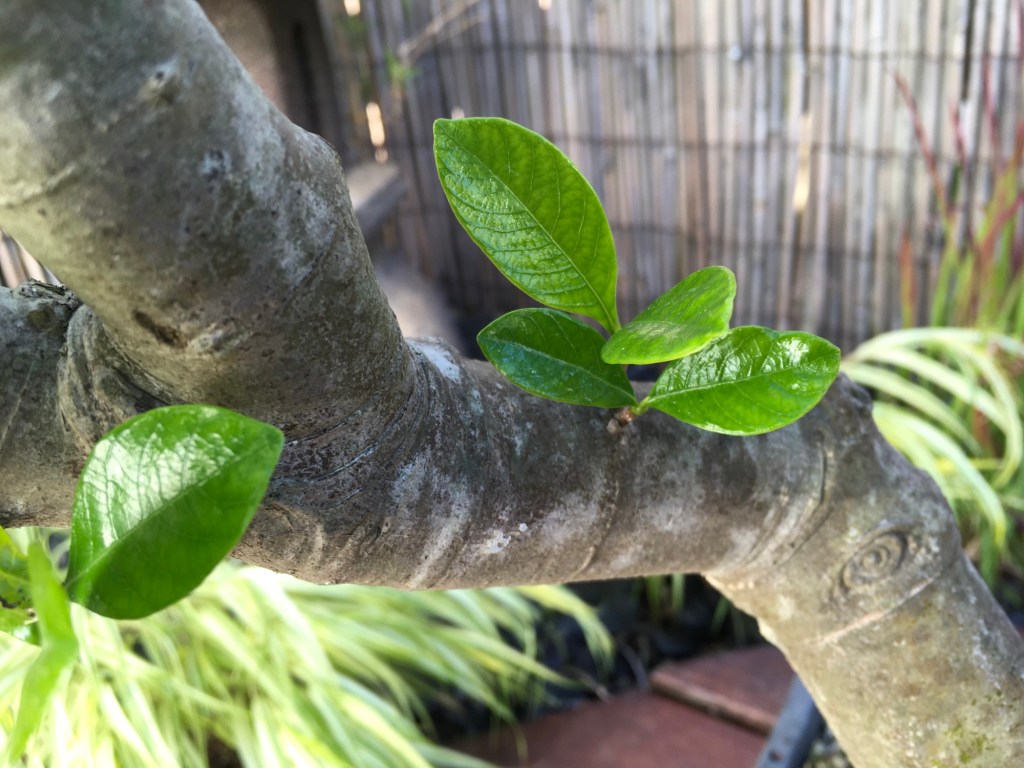
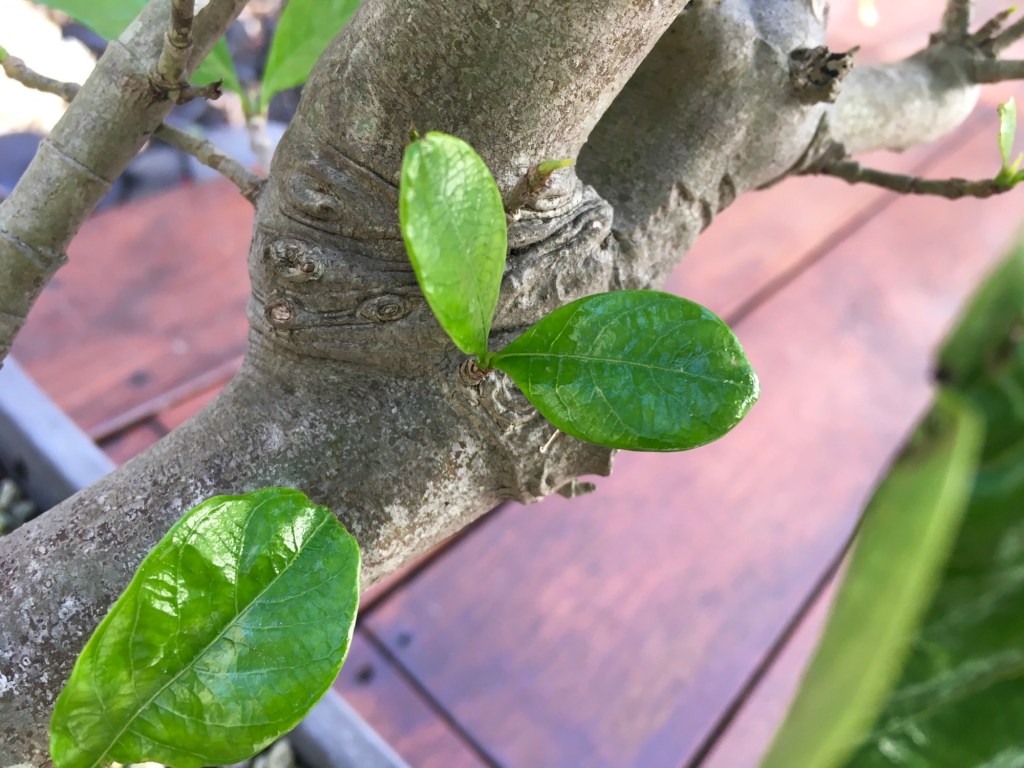
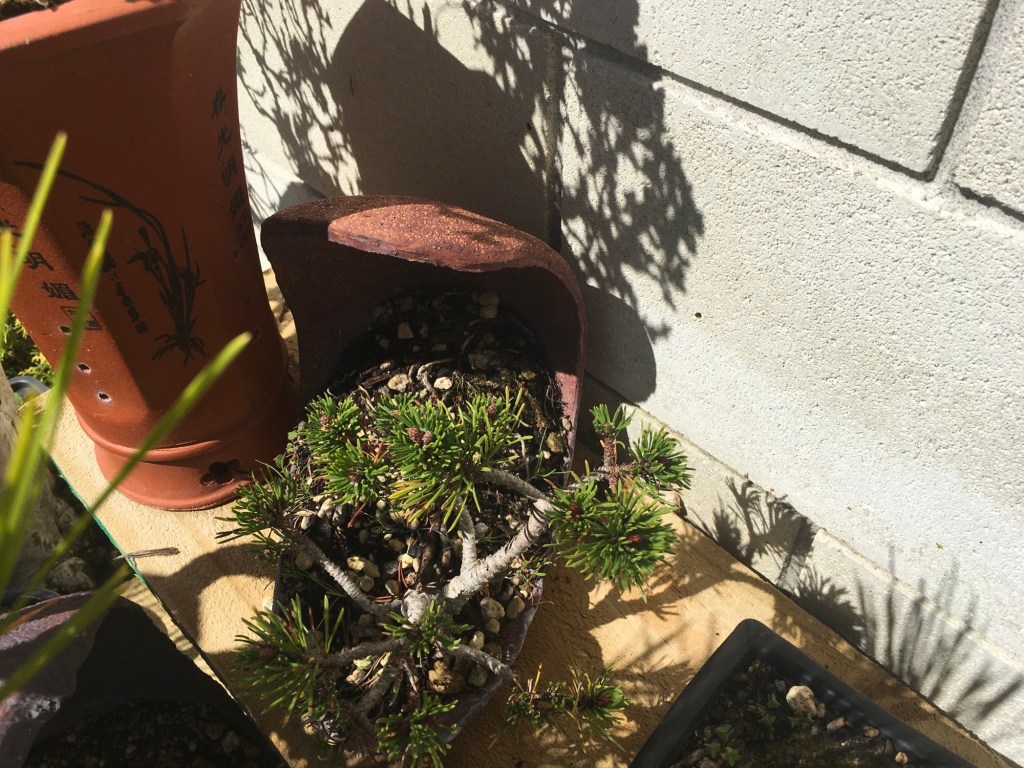
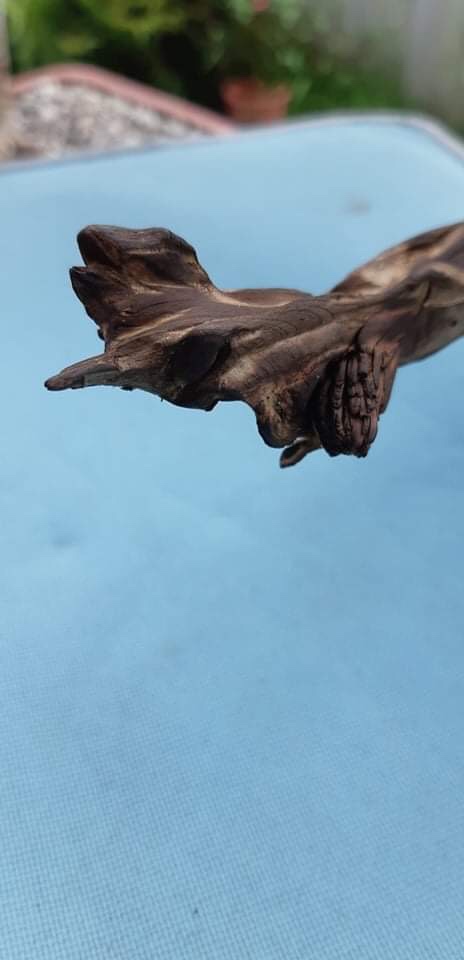
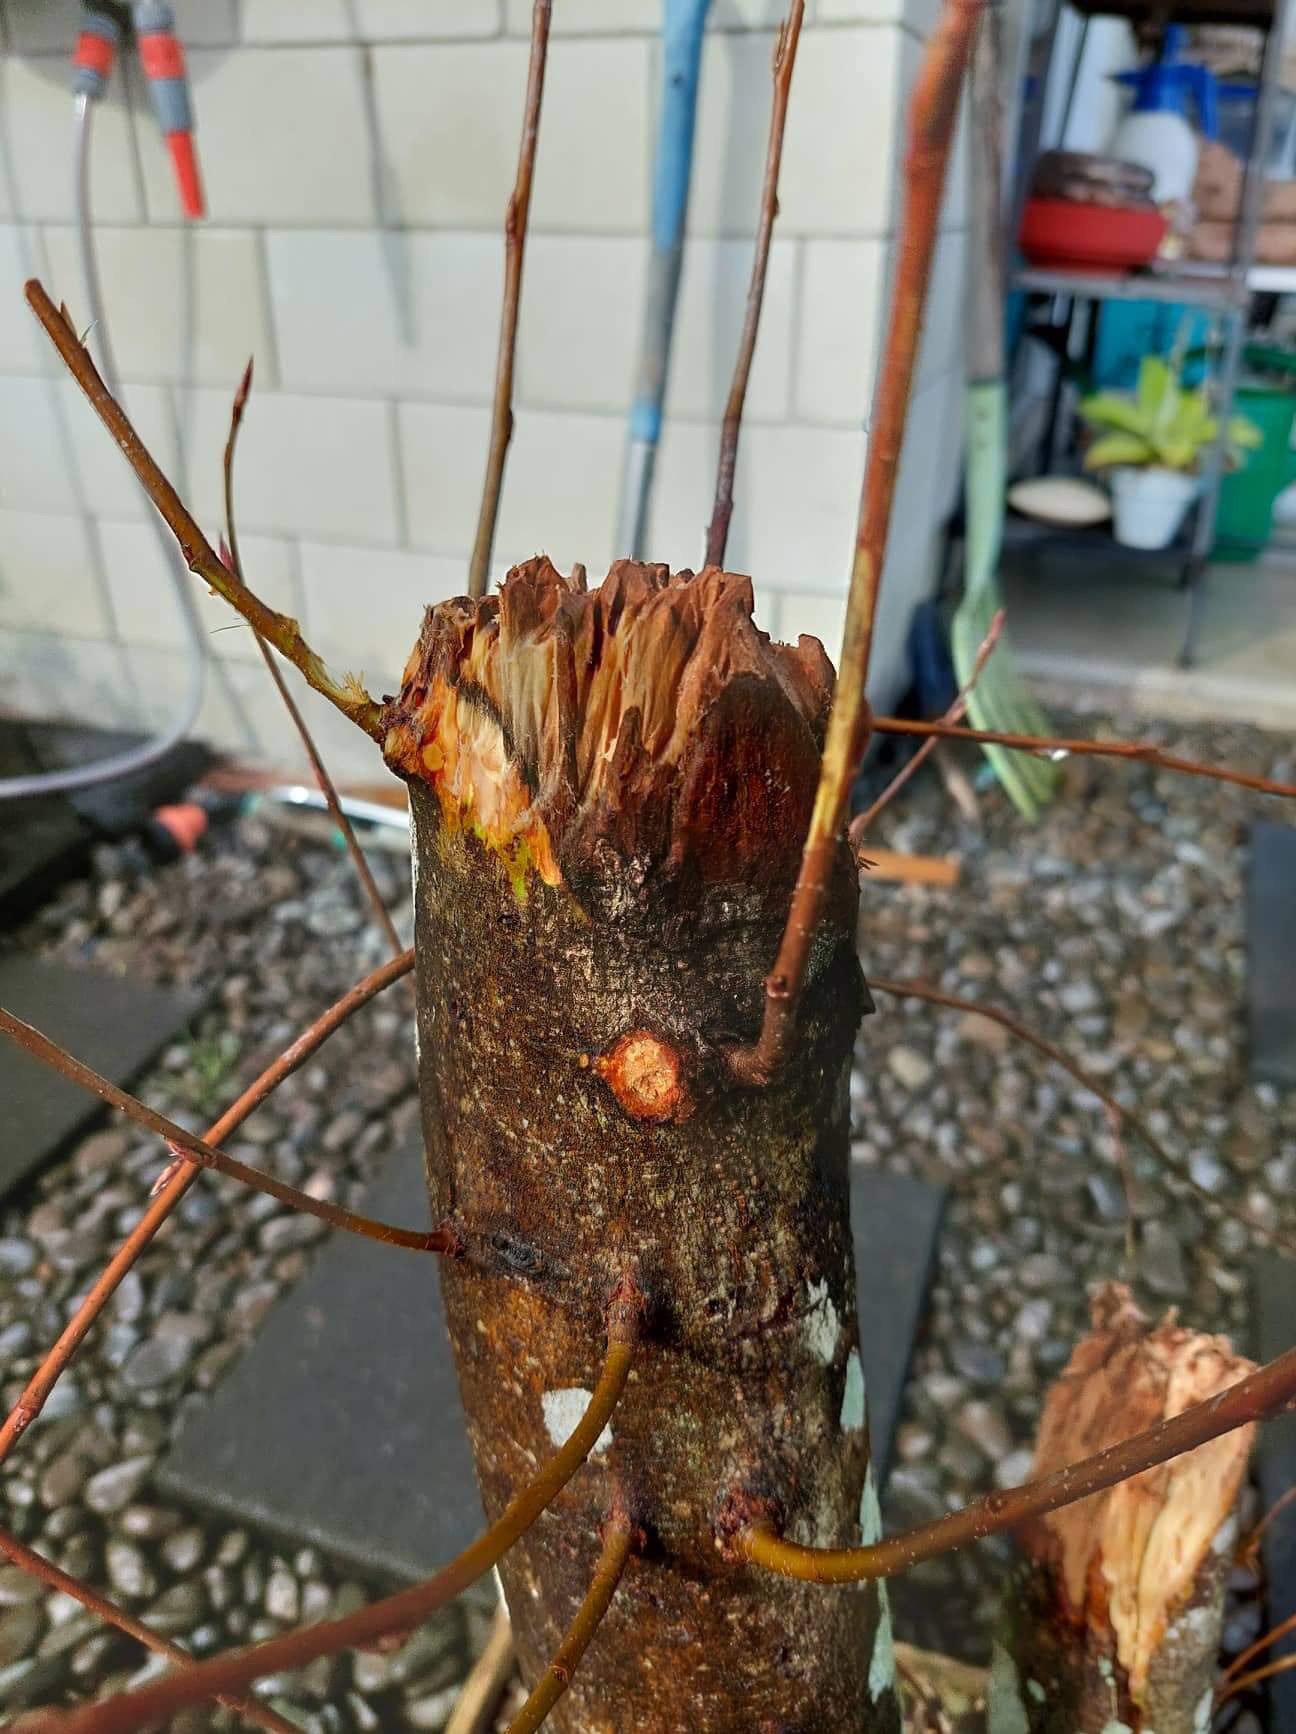
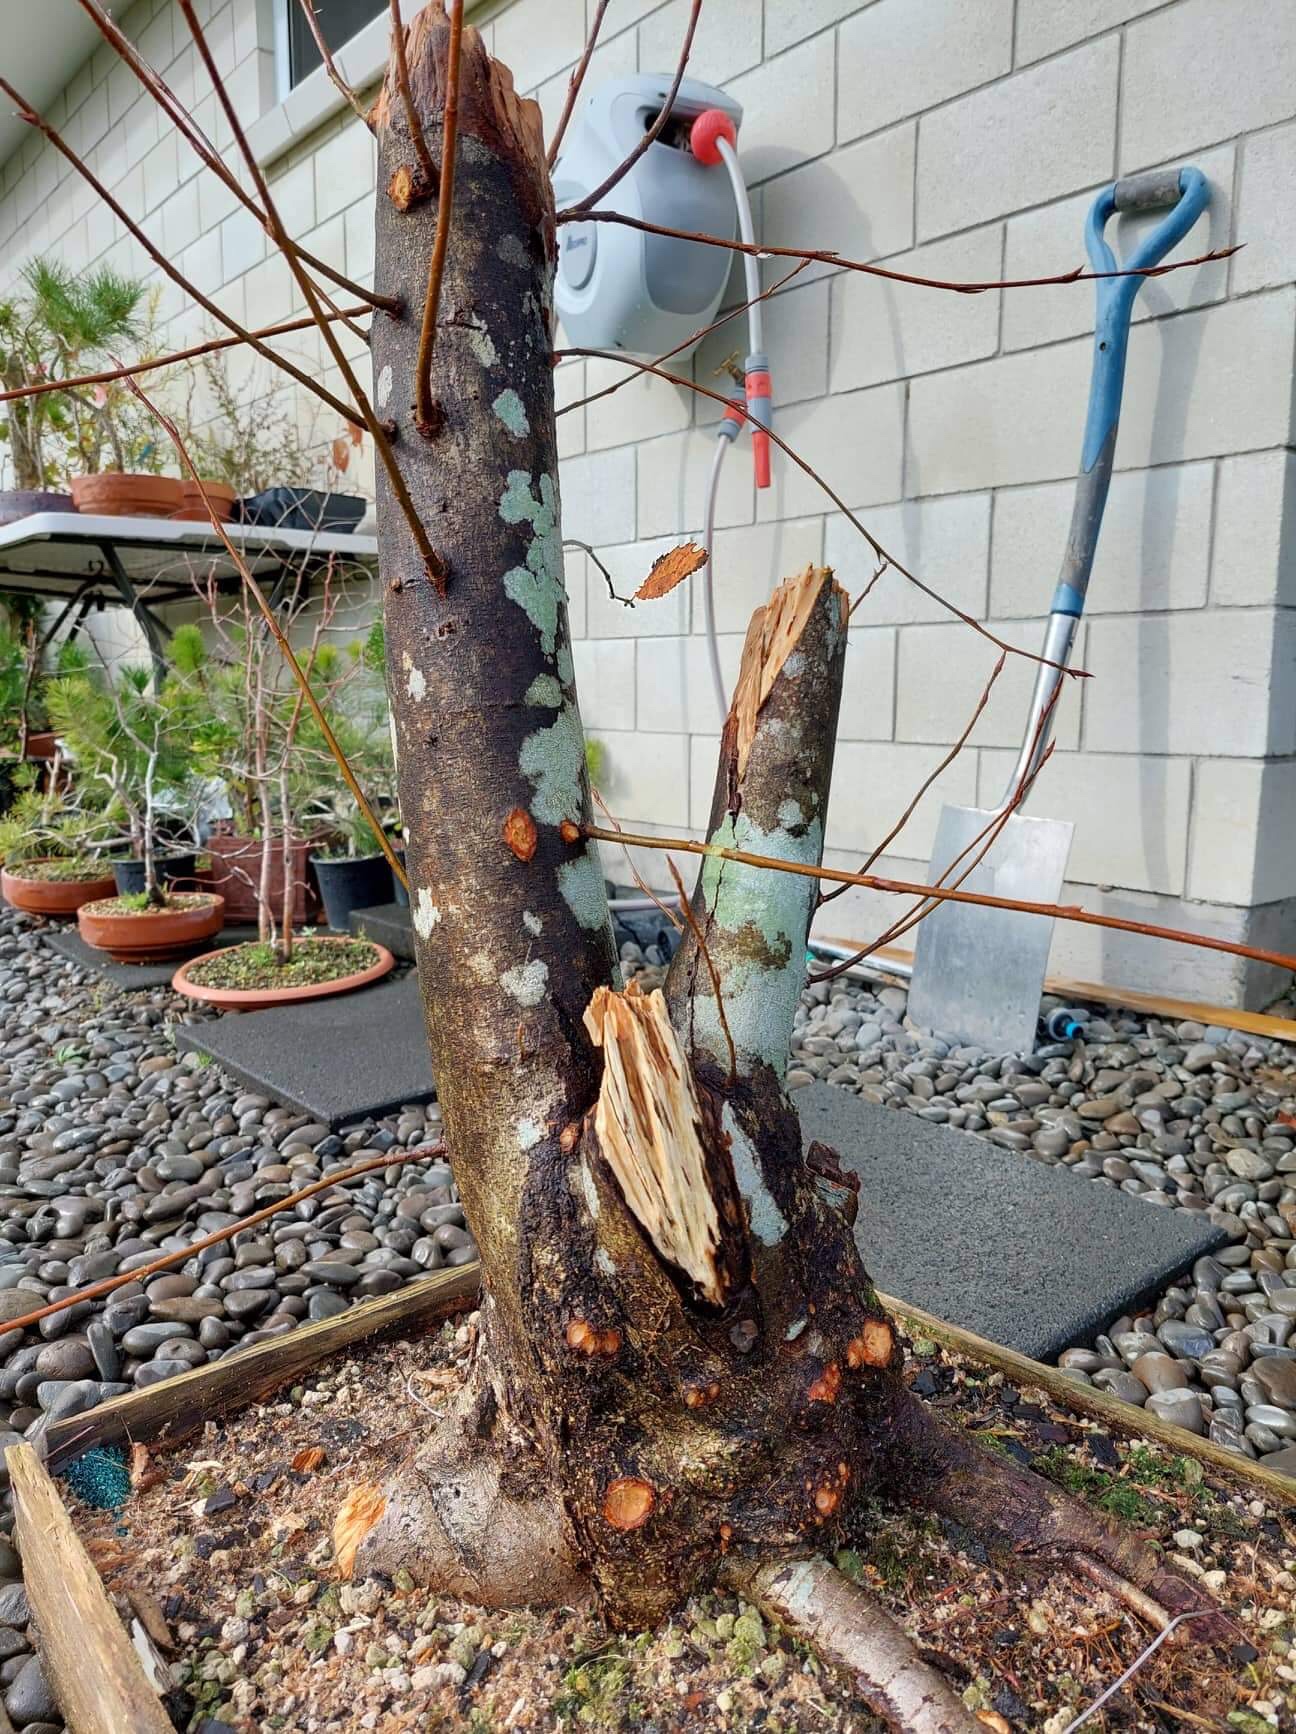
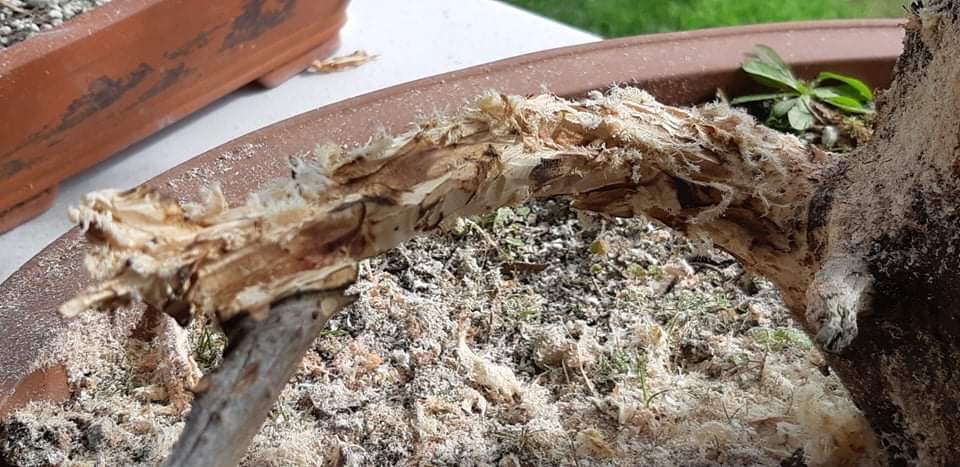
In that article I speculated about the specie of plant and my guess was correct as it is indeed a Gardenia. It flowered not too long ago, only one flower, but between that and the glassy leaves, the identification is now locked in.
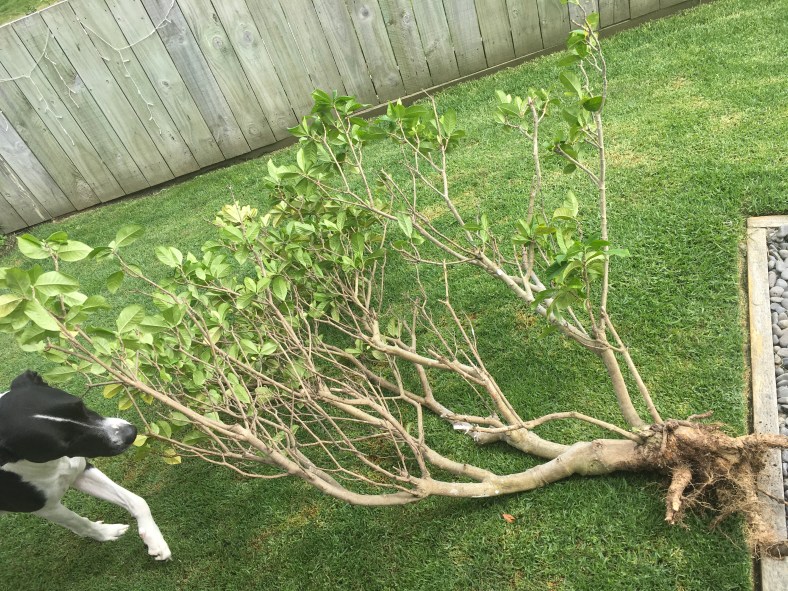
The photos below are of the plant when I found it on the back of a truck on its way to be dumped as well as a photo when it was potted up on that day.
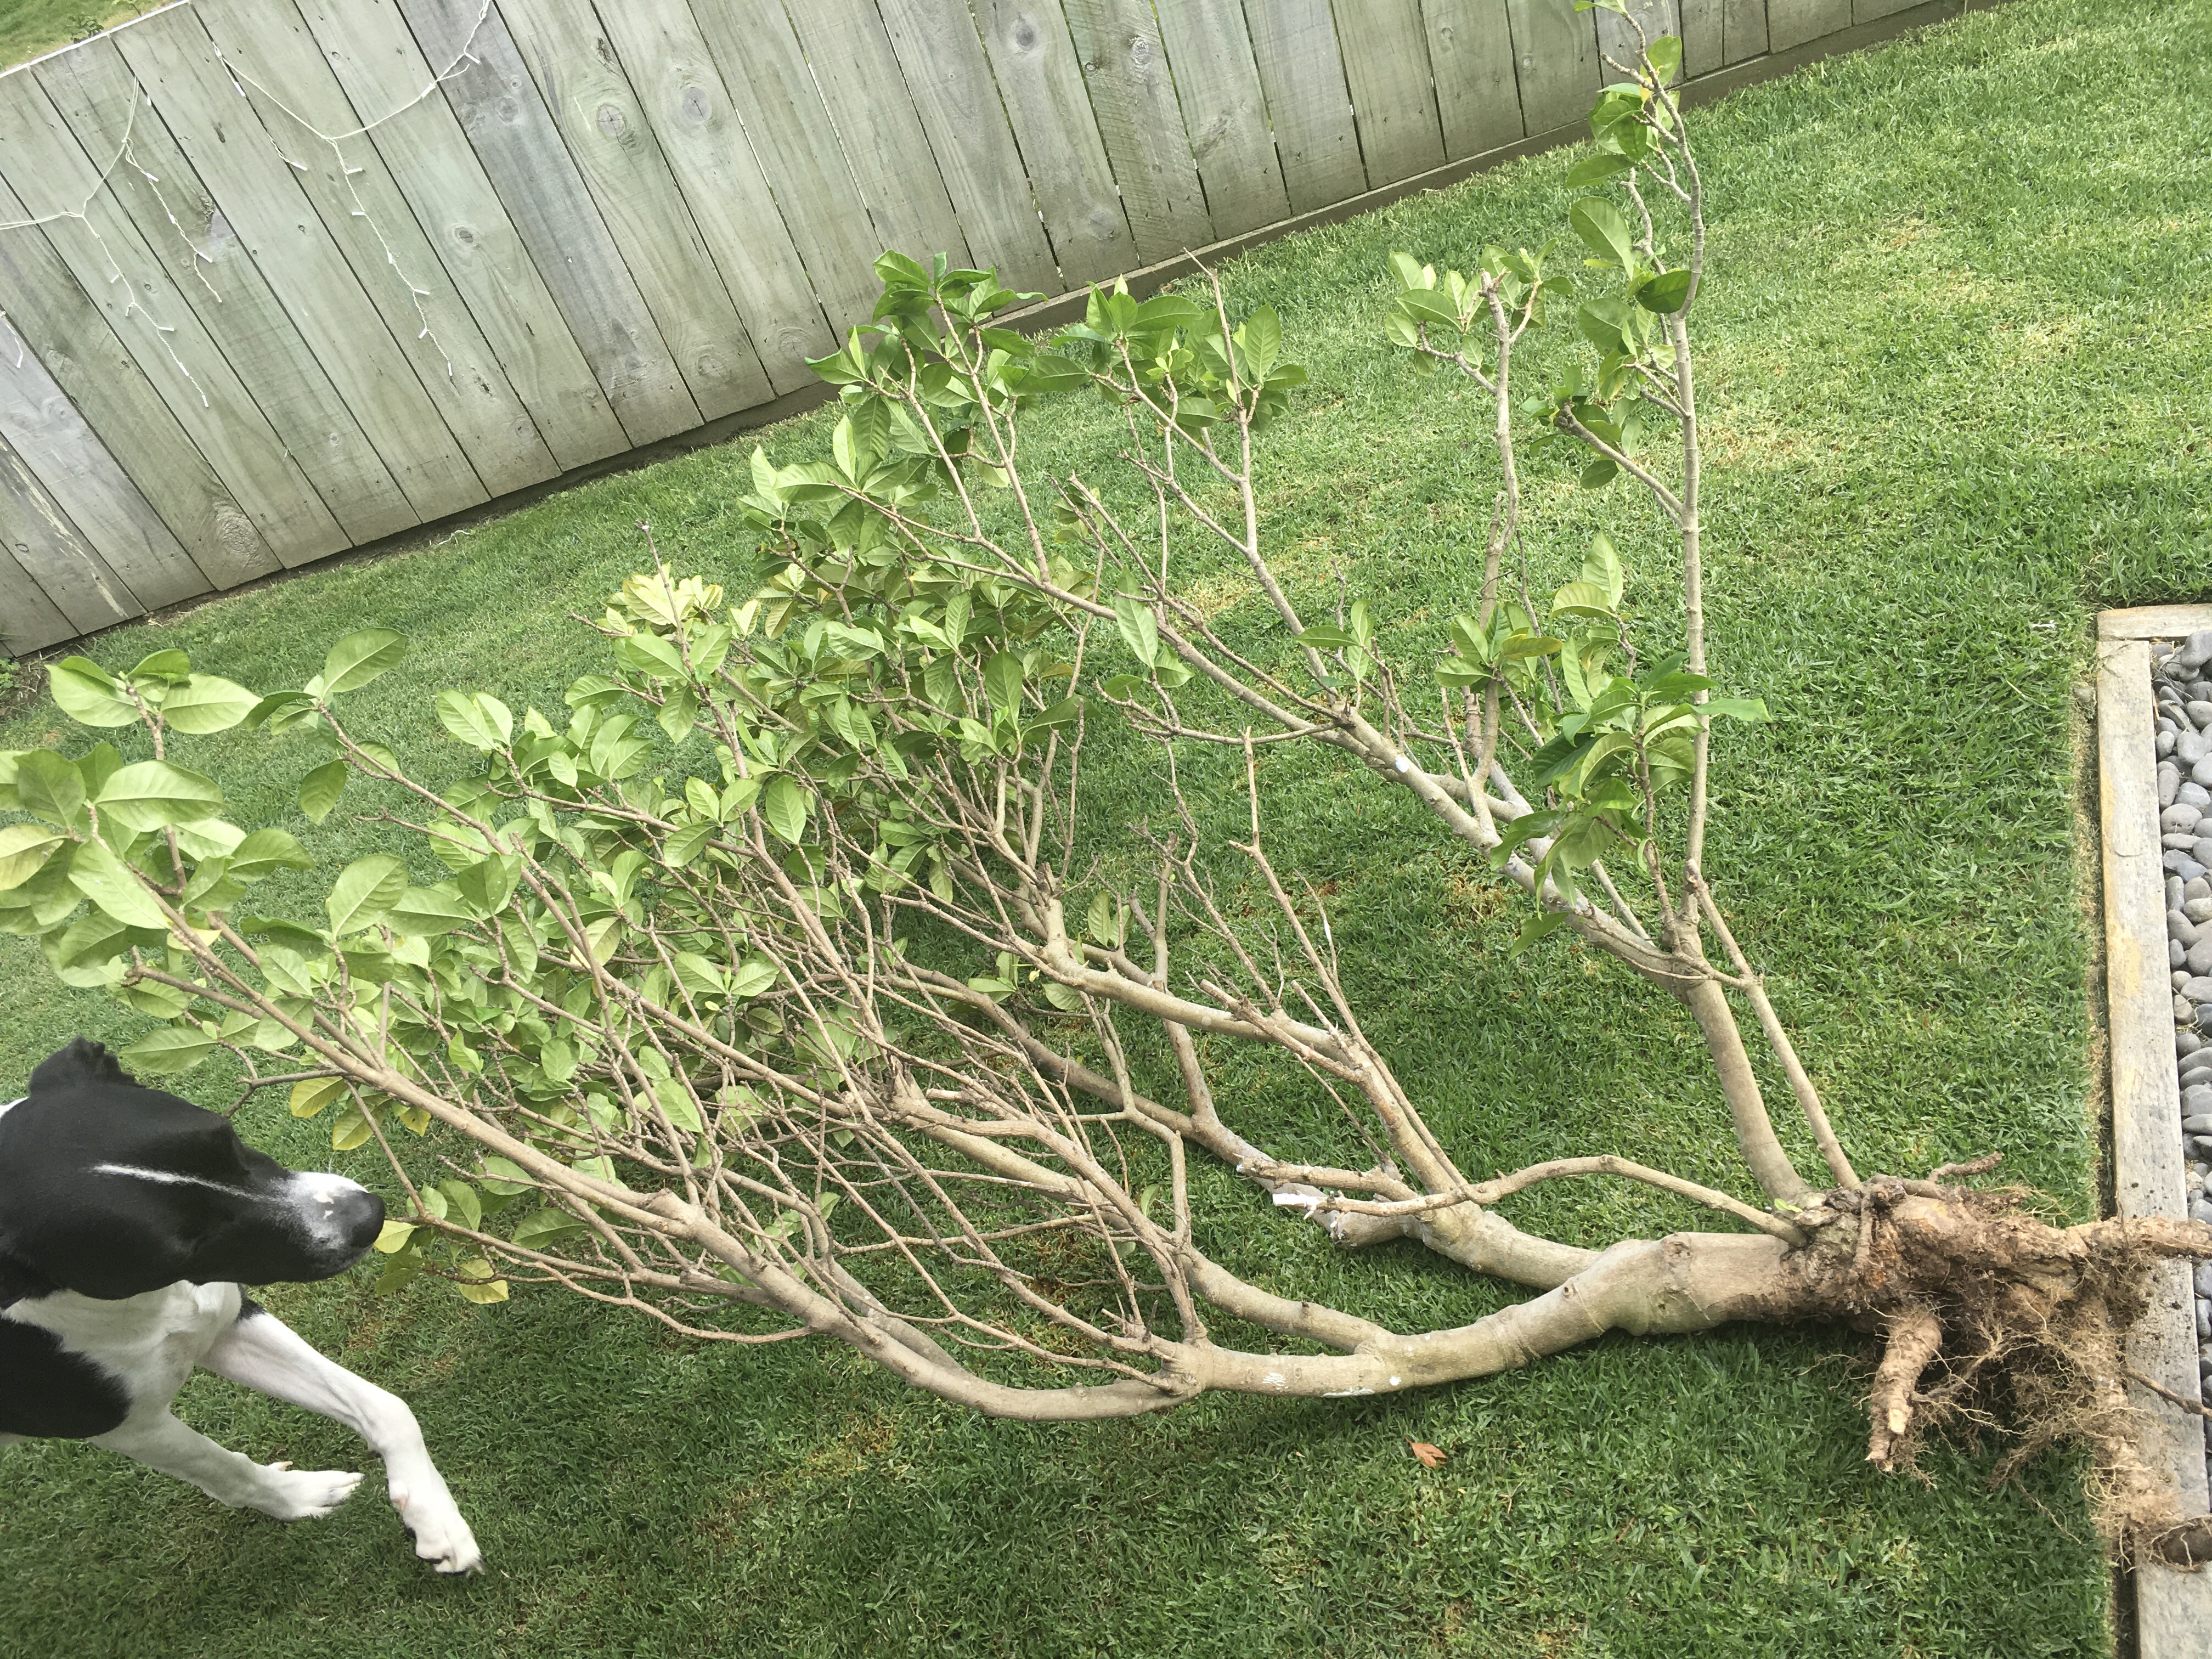
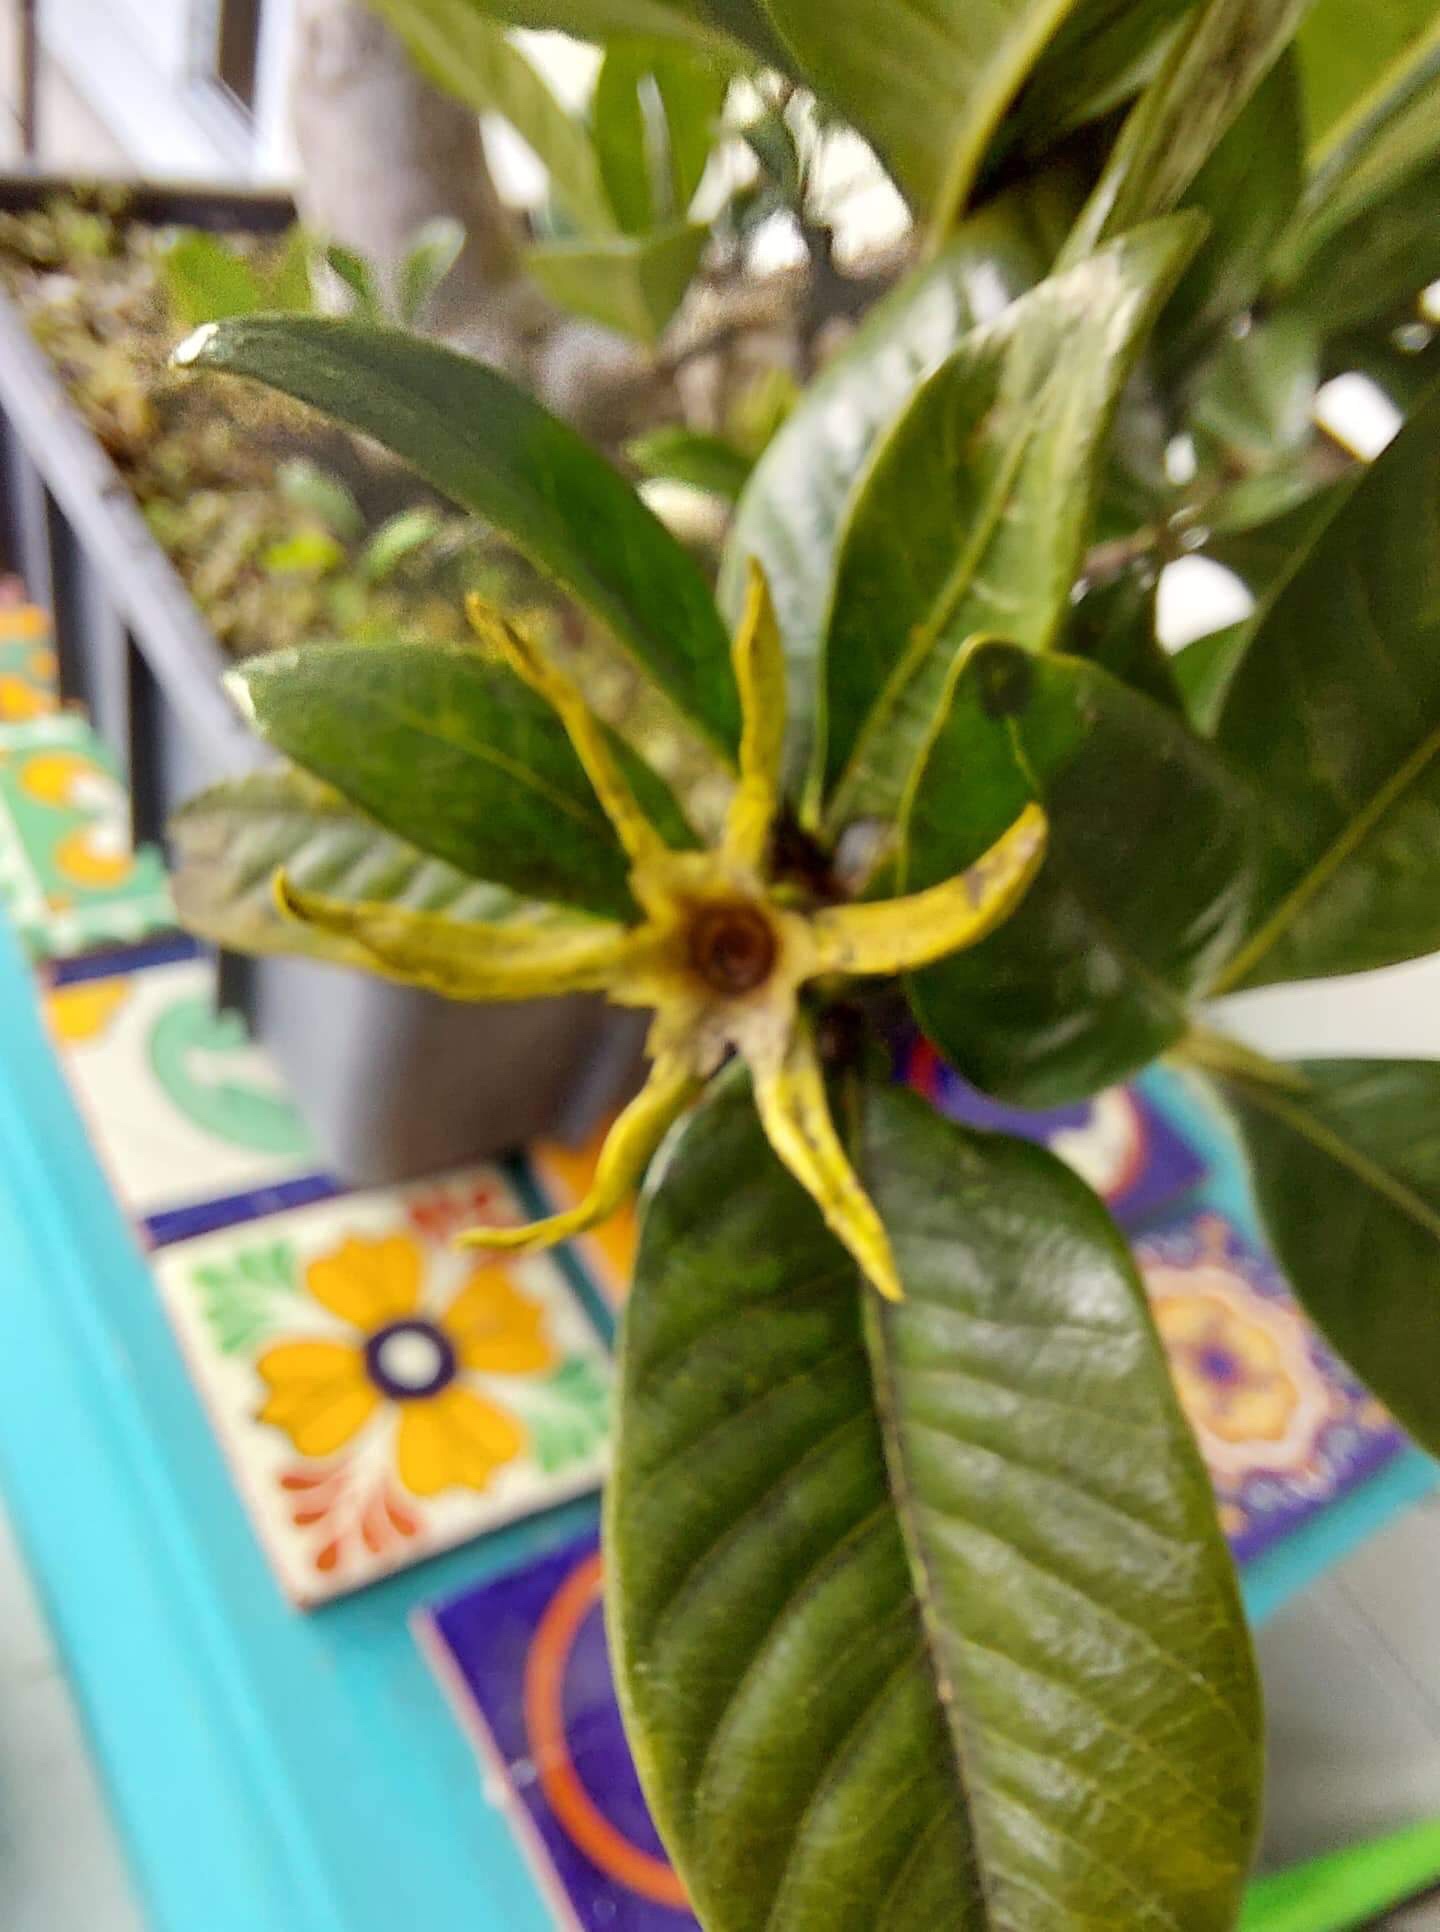
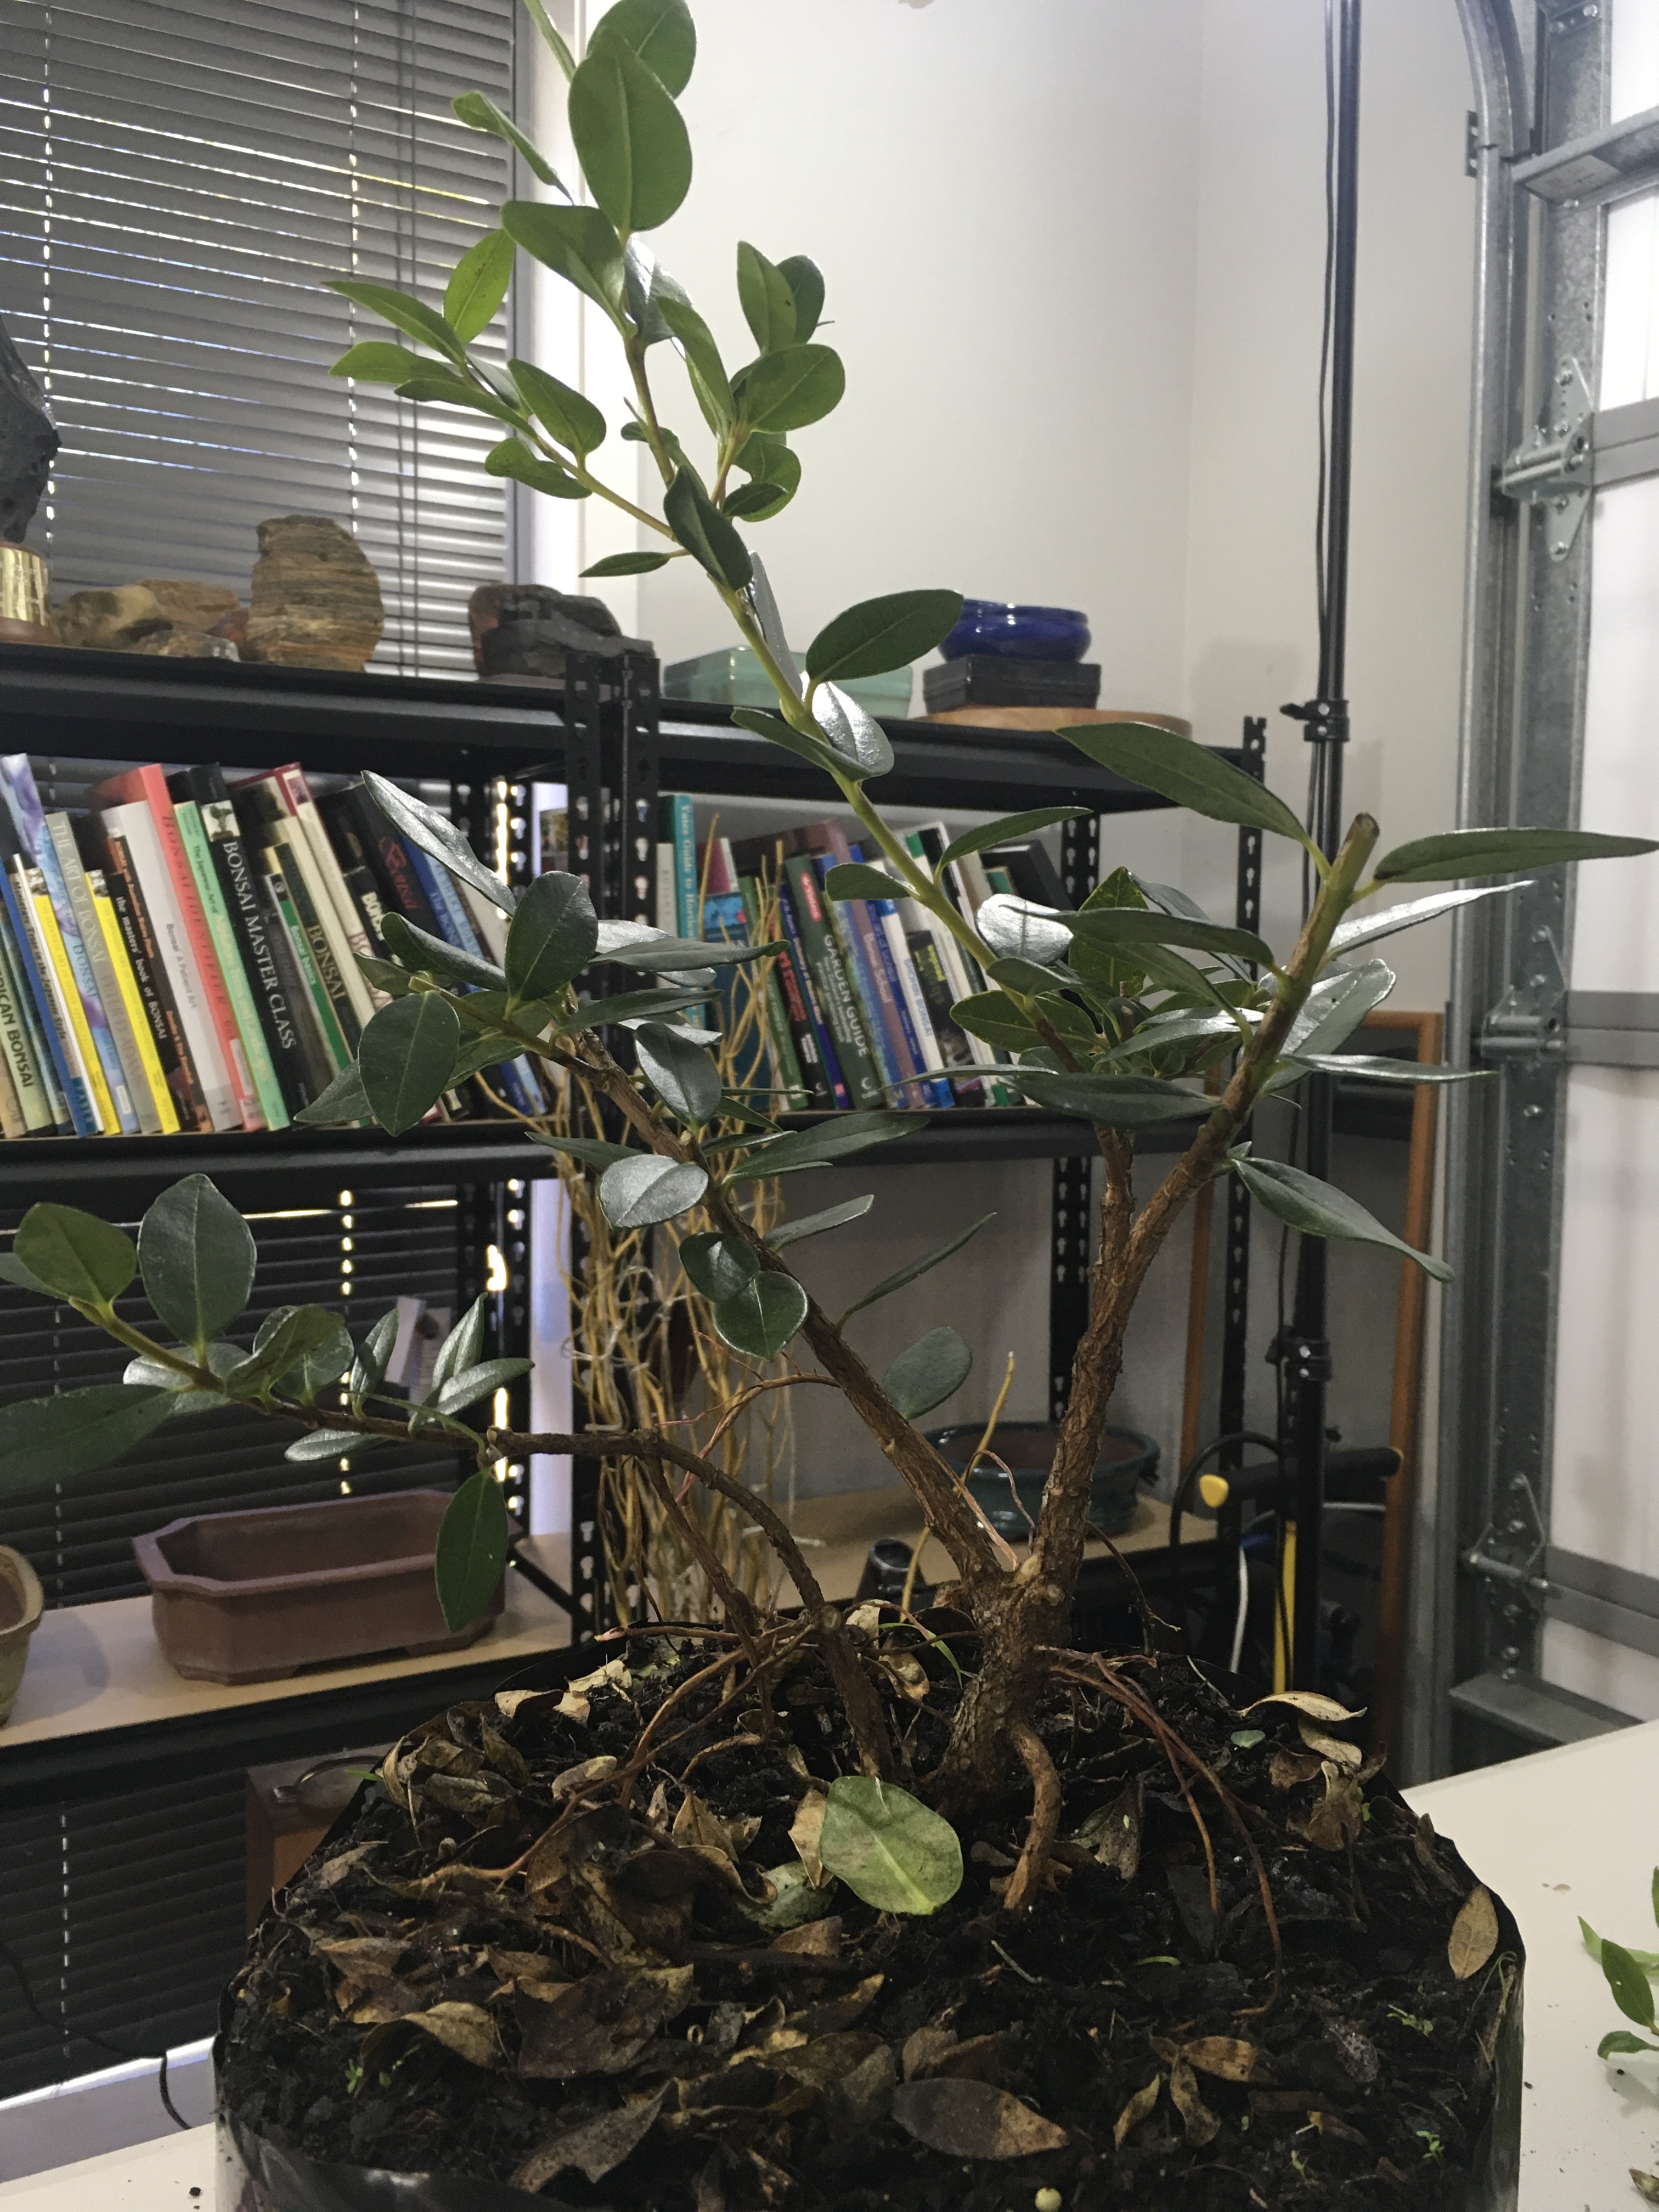
This is now just more than fifteen months later and the photo below shows the growth since the first planting and as mentioned, there was also a flower during the last summer.
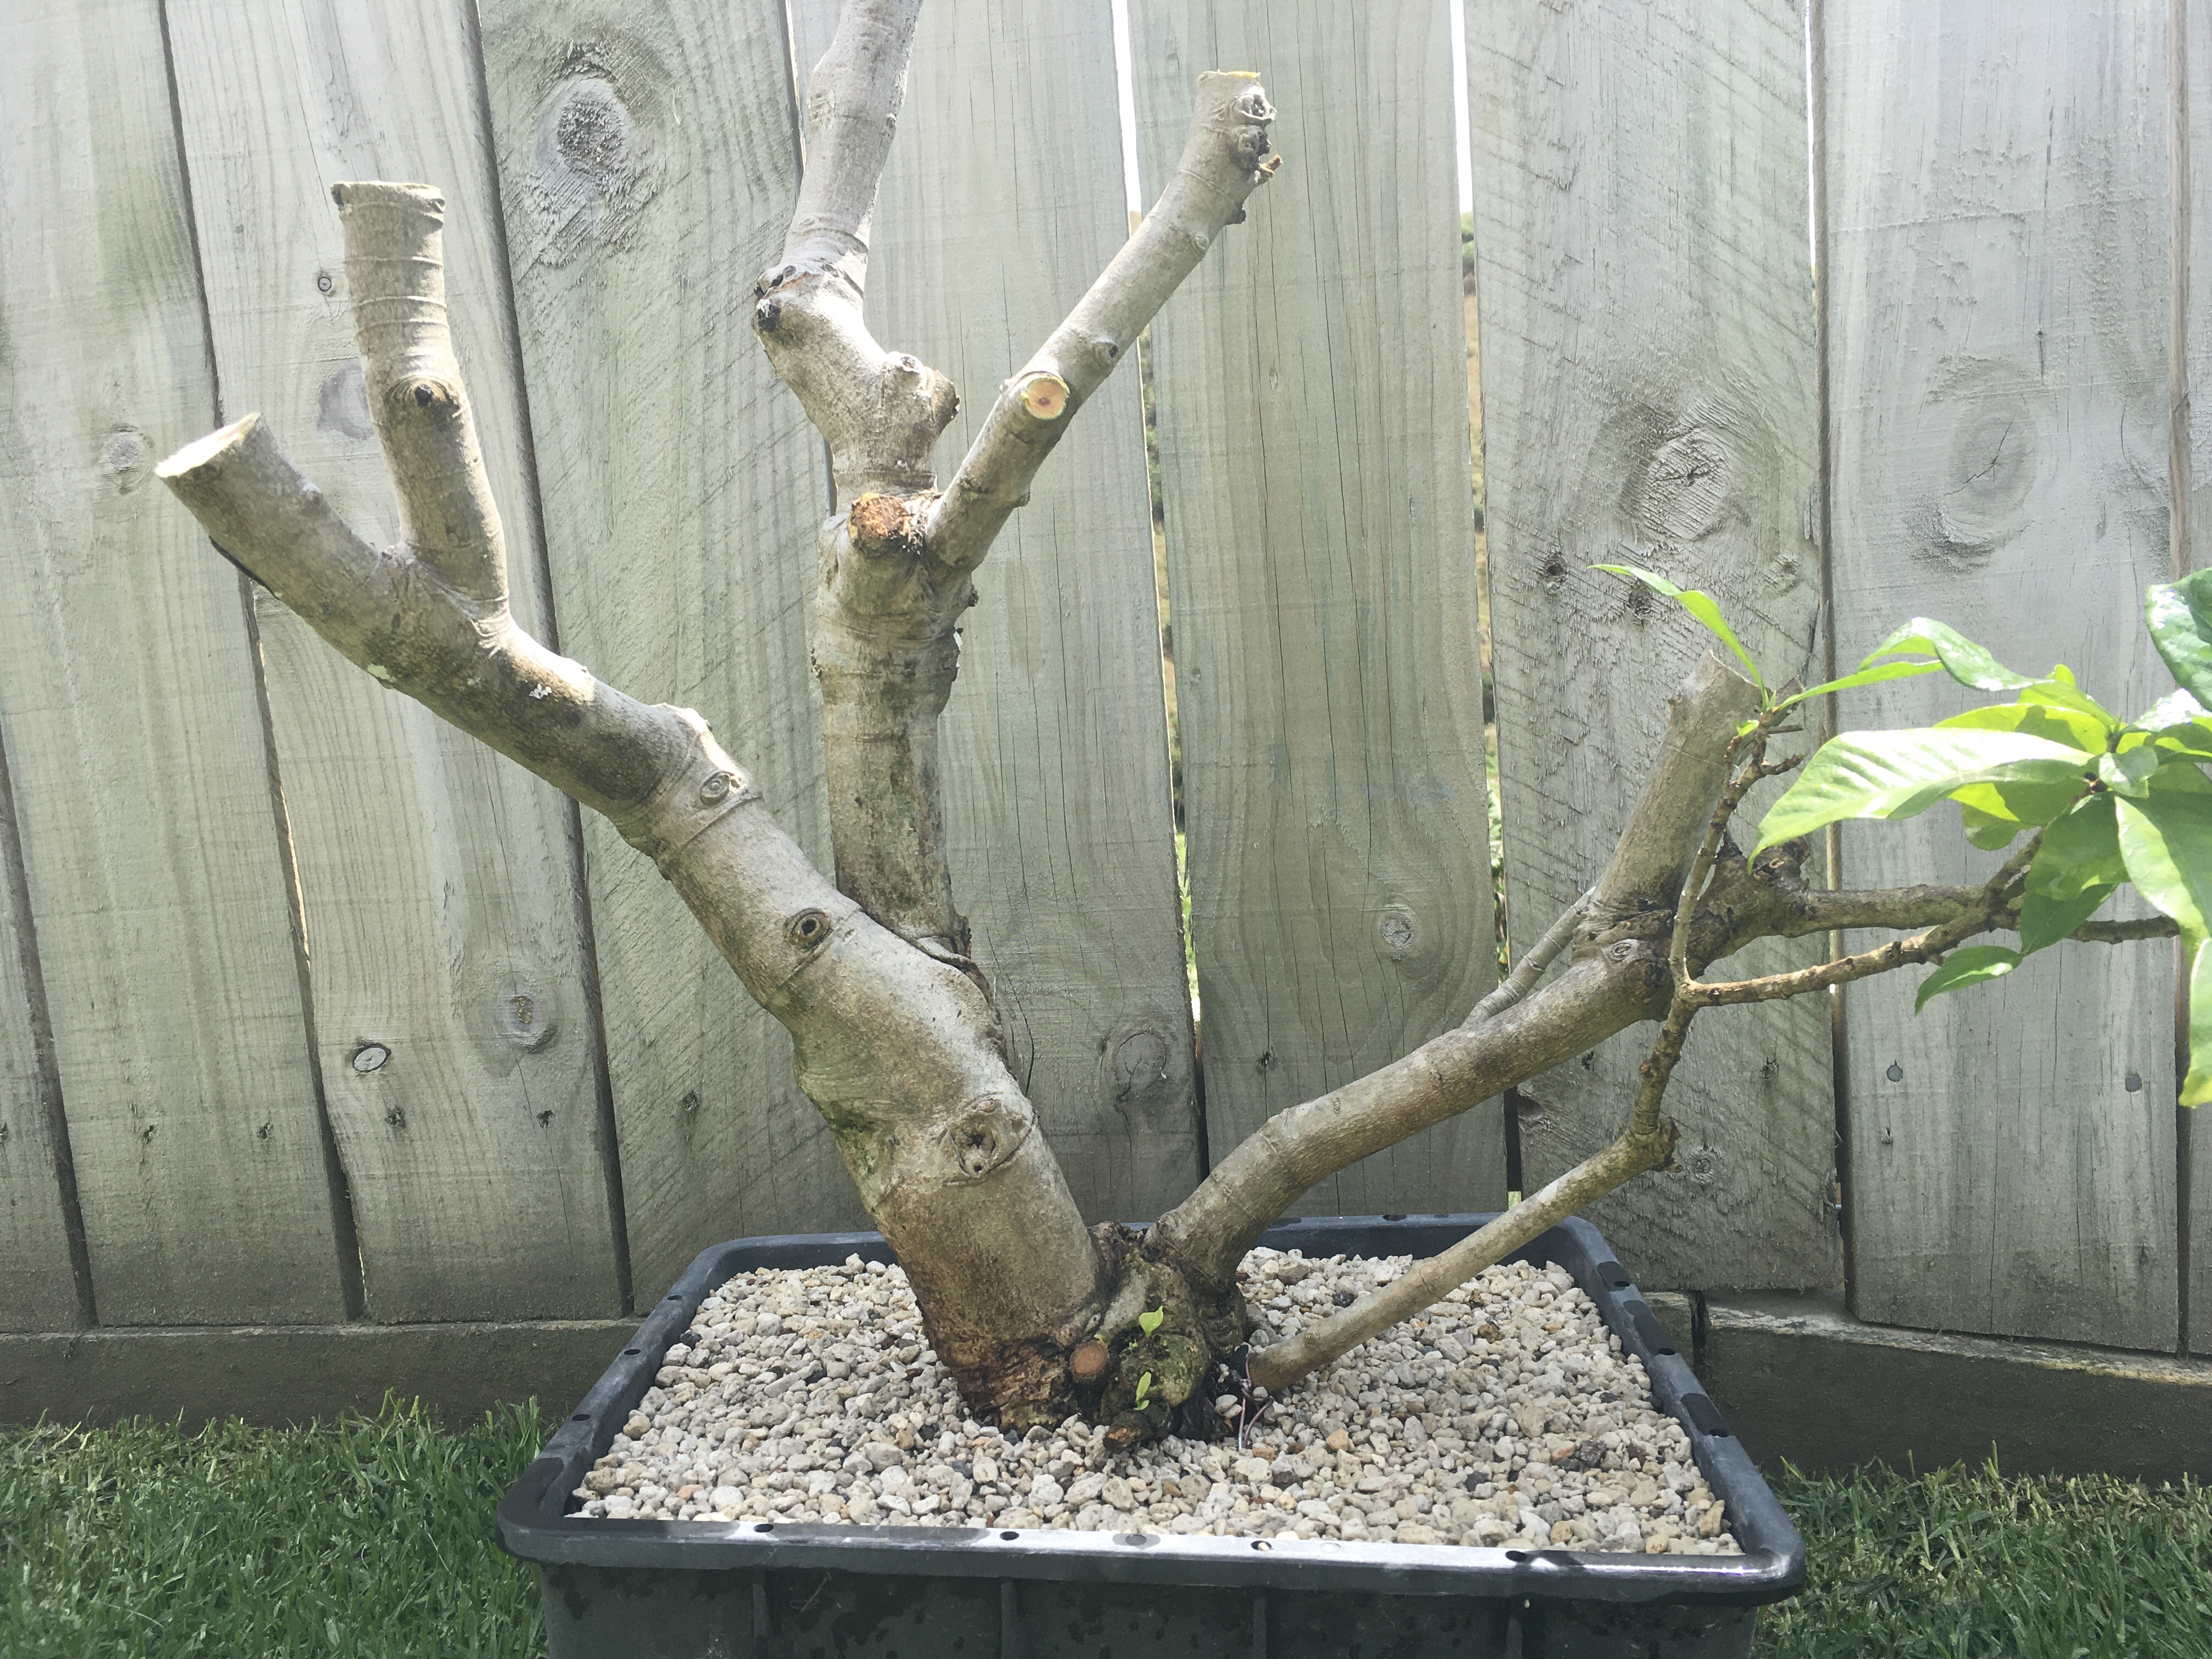
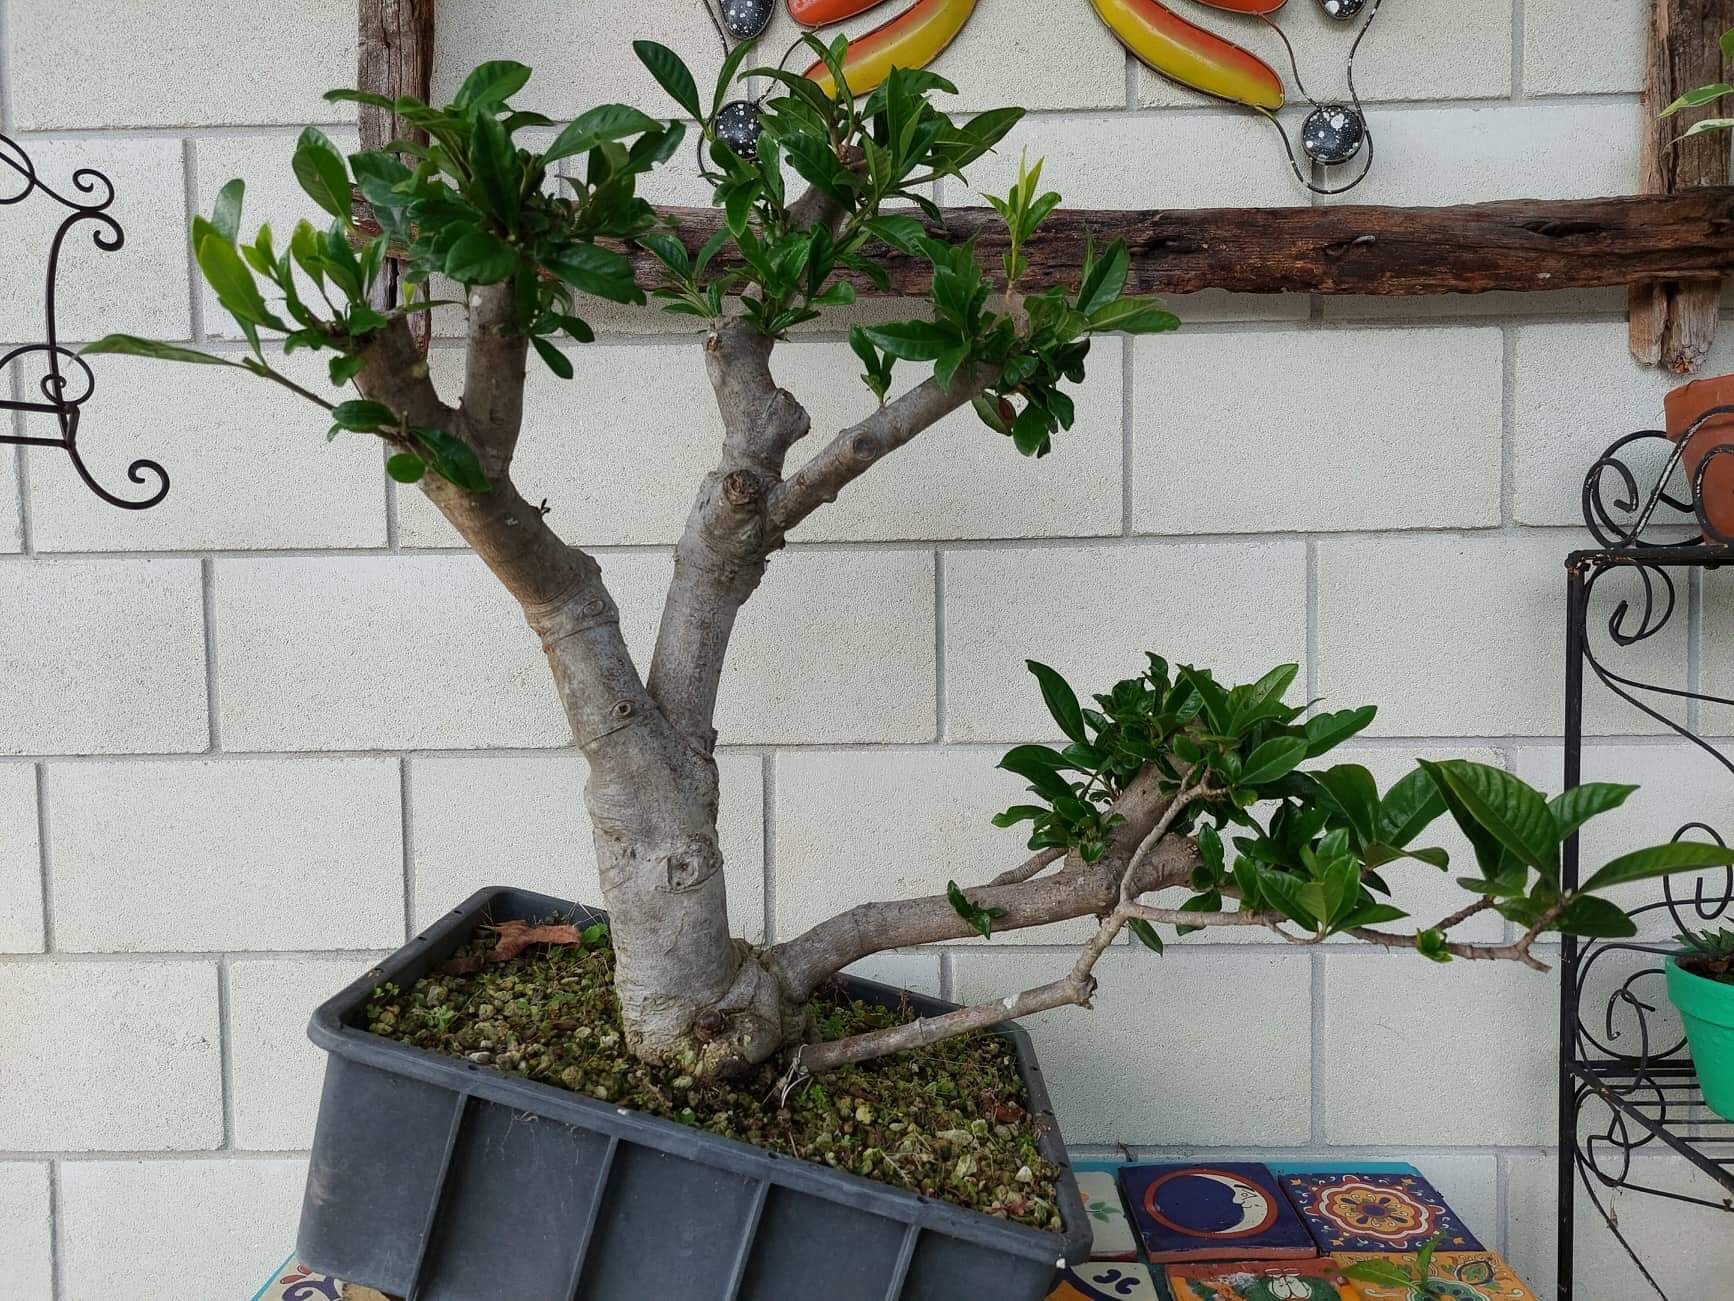
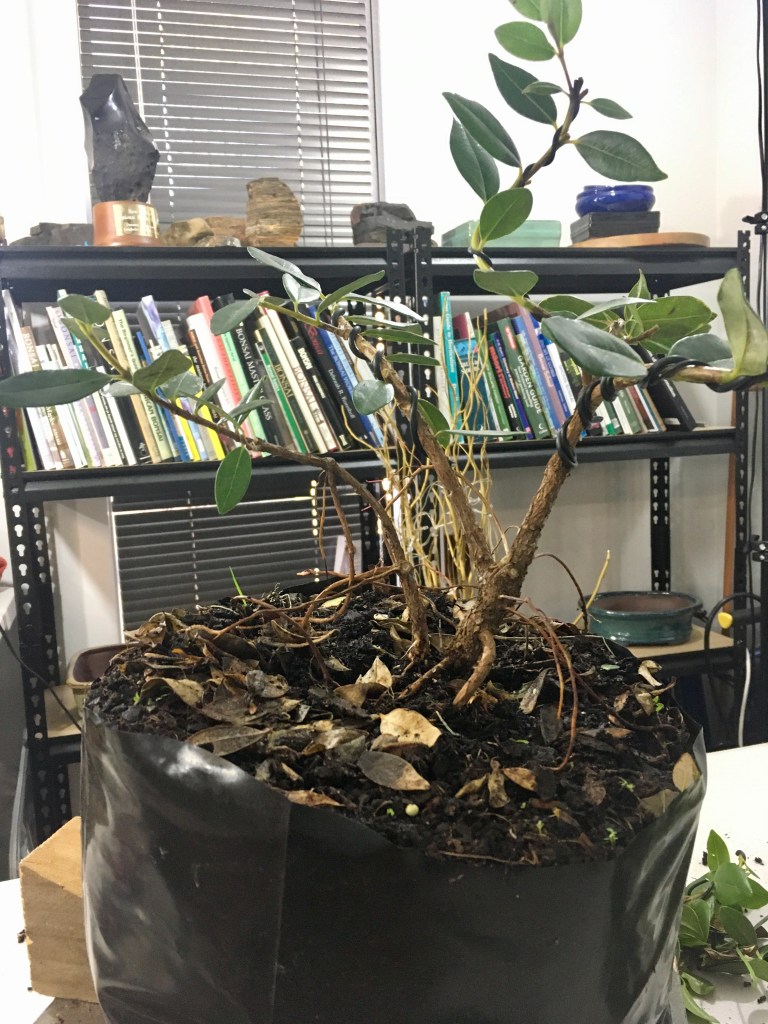
The tree has been fertilised regularly, mainly with a liquid seaweed type of fertiliser, but other than that, mainly left alone with a regular watering regime. It is now time to do a bit of thinning of the branches, light wiring where necessary and inspection and a bit of work on the pruning cuts.
There are two things to consider now. The one is to change the angle as shown in the picture below and to even tilt it even more in the direction shown.
On an angle.
The second one is to remove the thinner, lower branch on the right. That might even be done sooner rather than later.
In summary. This is the start and where we are today.
Now it goes back to the bench and another year of watering, fertiliser and providing optimum growing conditions for this tree to thrive.
Please comment on this article to show your support and like it if that is what you think it deserves. Thank you for reading.
The Merriam-Webster dictionary defines Texture as the visual or tactile surface characteristics and appearance of something. Bonsai is a very visual art form and therefore texture does play a vital part, not just in the individual parts of the Bonsai picture, but the whole picture as a whole. There are already so many things that play a role in the overall aesthetic display and look of a Bonsai tree, that to bring out one specific aspect, might be one step too far for some. However, we will break it down in the different parts and as you develop on your Bonsai journey, more of these features can be combined. Each individual aspect will make reference to its place as part of the larger whole.
Pots or containers
These come in various sizes, colours, shapes and also textures. There are some generalisations around like conifers do not necessarily go into glazed pots, but only unglazed pots, and then also that the pot colour should either match the flower colour or be of a contrasting colour. Let’s for the sake of this article, focus on texture. Needless to say is that a very refined tree, with a more feminine appearance and feel, will look odd in a rustic, unglazed pot. There is also a saying that the pot is like the frame of the picture and should enhance the visual appearance of the tree. It is therefore logical to say that smooth pots, usually glazed, is better off with trees which have smooth bark or a smooth leaf surface. A very rustic old Pine tree will probably look better in a more rustic container that could even have the texture of a rock or similar to the craggy old bark. The word generalisation has already been used here and it is common place to bend and break “rules” if the appearance of the whole visual picture will be enhanced in so doing. In short, as the pot or container is such an important part of the final look, it will pay to think about texture as well in selecting the best pot for the tree. It is definitely more than just size, colour, shape, depth, glaze, texture matters.
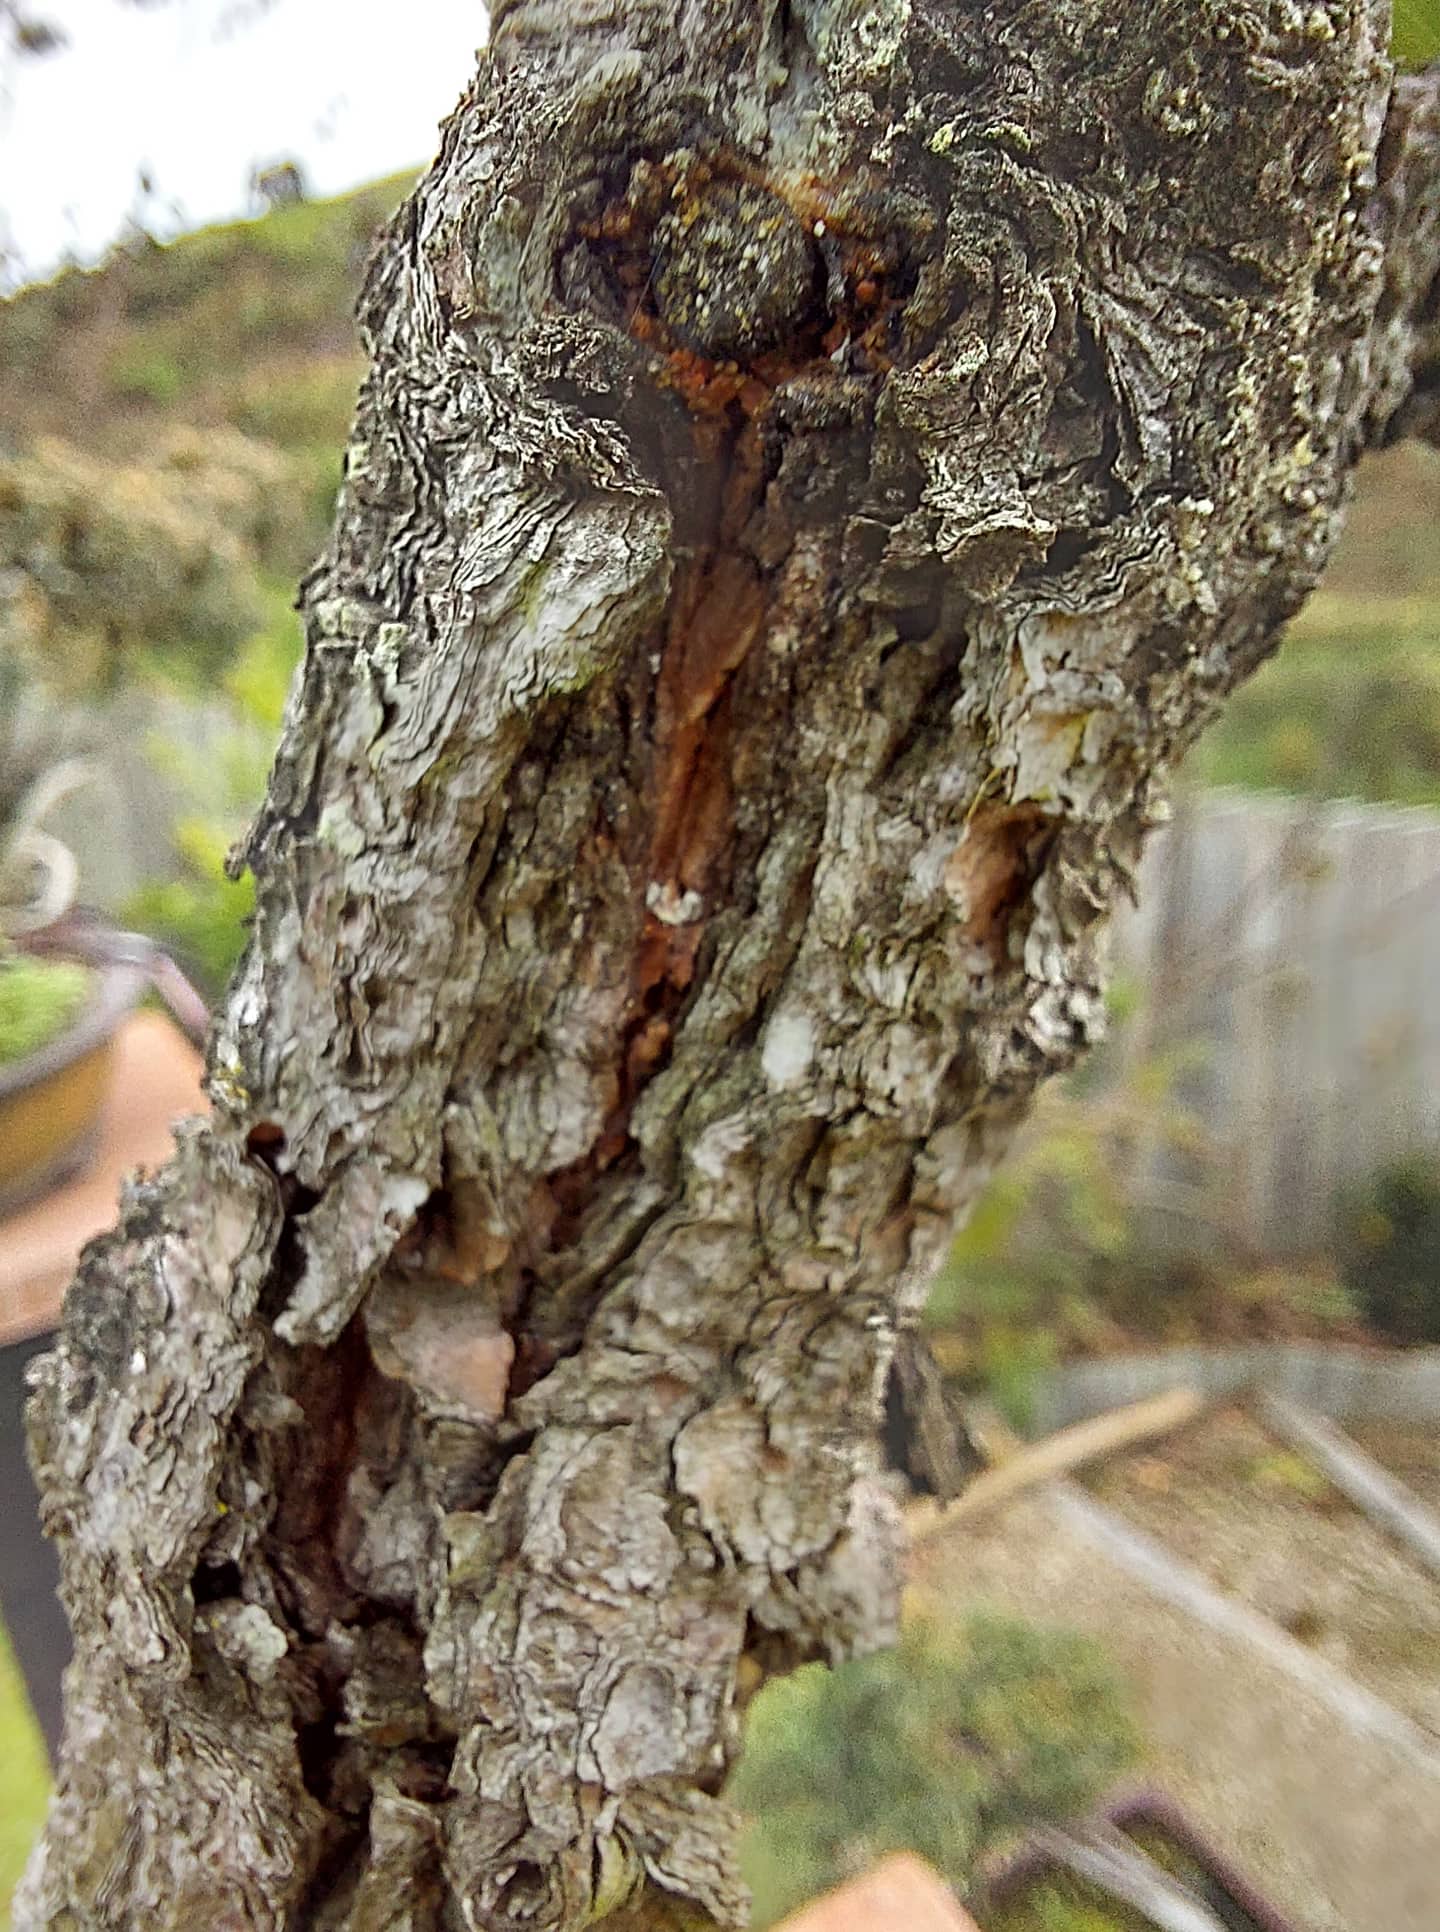
Bark
From a visual perspective, and especially when the bark is well-developed and stretches down to the soil surface, it is one of the most striking aspects of a tree from a textural perspective. Bark comes in many forms, shapes, colours, sizes and thickness. The same can be said for texture. The two main characteristics will be either smooth or rough with anything in-between. Then there is also the fact that some trees will form bark plates and others could have flaky bark. All of this is determined by the species and is a natural characteristic that is genetically determined. All the Bonsai artist can really do here is to ensure that the bark is protected or removed if it needs to be. The latter refers to some Junipers where the flaky bark is removed to show the rich contrasting reddish live veins off against the stark white of deadwood. Bark is a sign of age and therefore a very important aspect of increasing the aged look of the tree.
Jin, Shari and Uro
This goes hand in hand with Bark and influences textural aesthetics of the tree. This also can be used to enhance aging characteristics due to the textural differences between these features and the rest of the trunk, stems or bark.
Foliage
When it comes to leaves or needles, the usual visual impacts are those of shape, colour and size. There are textural aspects when it comes to foliage that are important when it comes to overall appearance of the art work. Things like, softness, hardness, smoothness and then also in a lot of broadleaves, like Rhododendron and some Magnolia, the two leaf surfaces showing completely different textures on the two leaf sides. We do find some leaves with a smooth top (adaxial side) and the underside (abaxial side), could be hairy. In Bonsai, it is rare to see the lower side of leaves, but if there is a unique difference in texture, it might pay to find ways to show it off. That is where creativity can trump practicality or “rules”. We all know about the spectacular autumn colour changes we see in some deciduous trees, but it is good to note that when the colour changes happen, there is at times also a textural change at the same time.
Other aspects
Flowers: The more striking aspects of flowers and fruit would be the colour, size and shape. It is worth noting that flowers have different textures, not just the whole flower, but also parts of the flower can be different.
Soil or surface cover: This refers to the upper layer of the soil that is visible in the pot or container. Texture here is important as well. The soil particles itself can form a visual pleasing aestehtic, but it is more common to cover this with something like moss. Just within different moss varieties a whole lot of different textures can be found.
Stands: Bonsai are usually displayed on a stand and traditionally these are made from wood. In modern displays it is not uncommon to see different materials being used. This could be steel, composites and even glass.
It all comes down to the aesthetic and the visual impact that will enhance the tree and texture is a force to be reckoned with when these decisions are made.
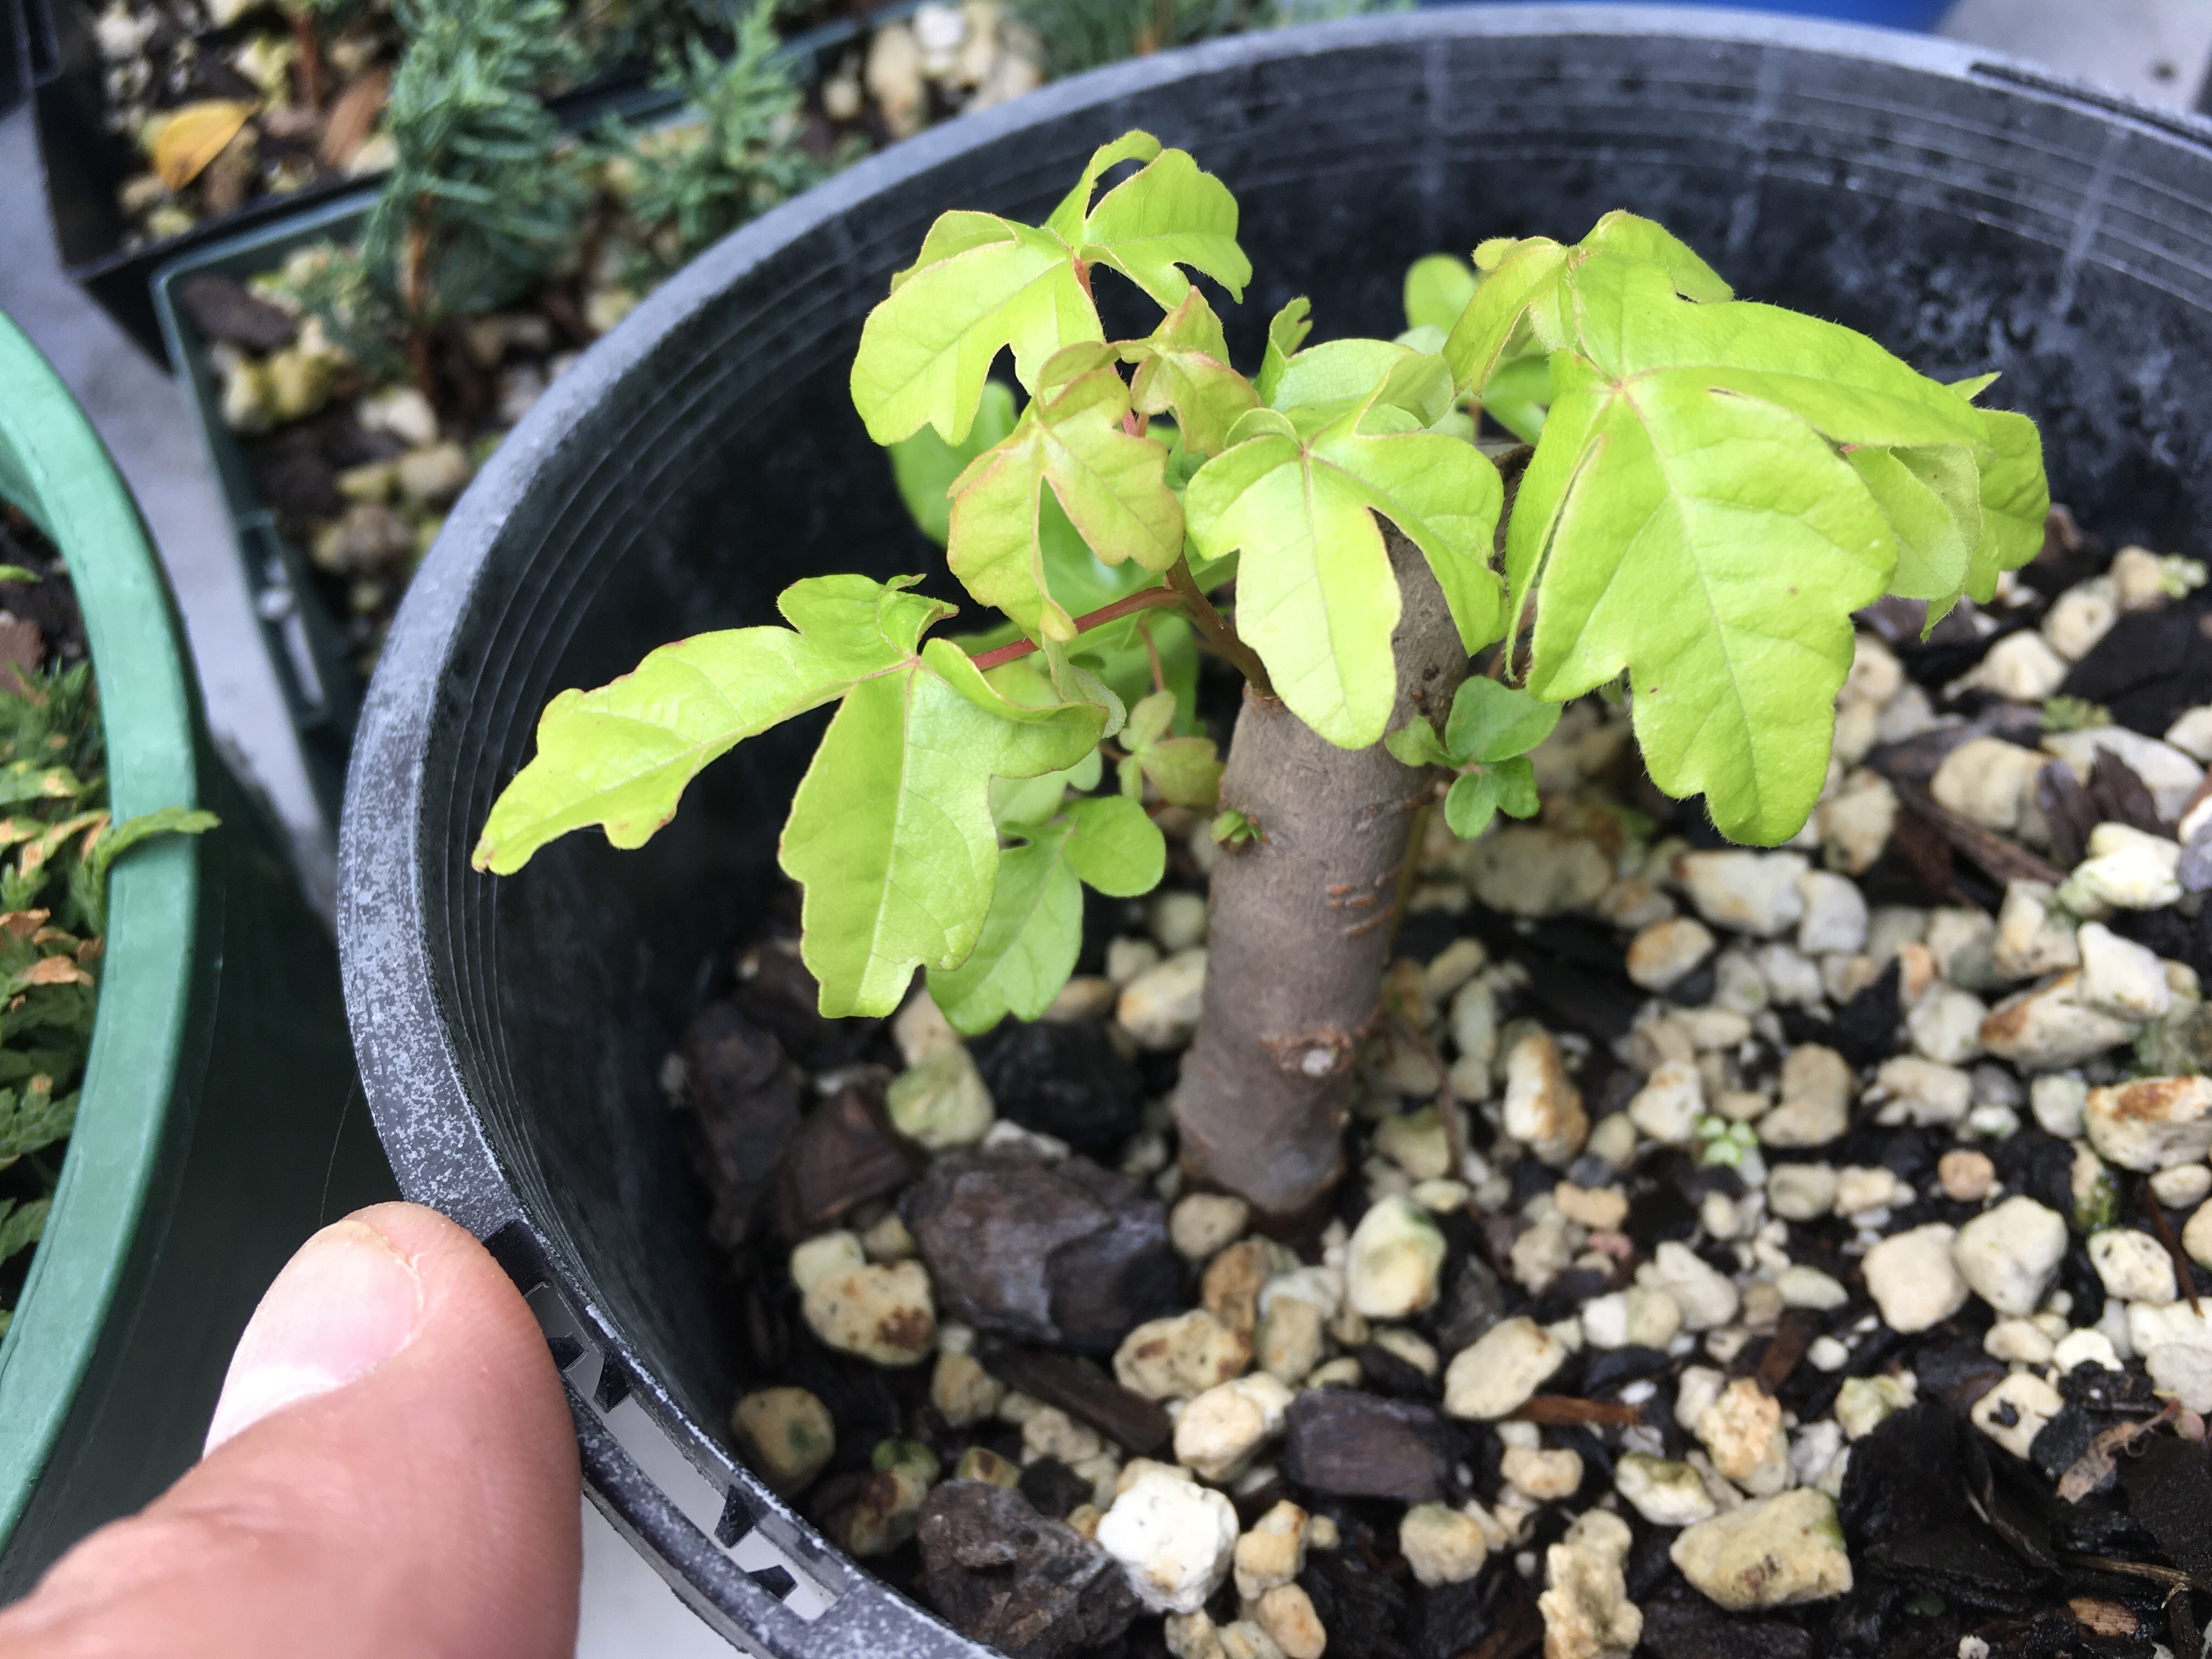
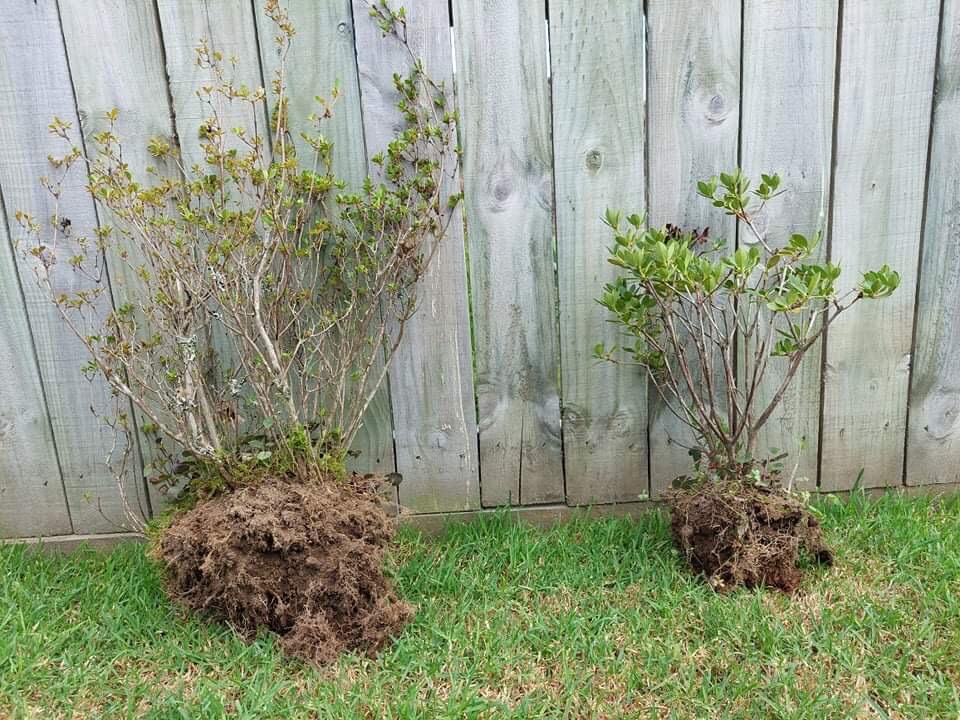
I am always on the lookout for new material and prefer to work with material that has accumulated some age and character through being garden plants or from nature during the first phase of their lives. Sometimes they come for free and sometimes you have to pay. These two Azalea plants were advertised for free and just needed to be dug out. That took two minutes as these are shallow rooted plants.
Freshly dug Azalea plants from a garden.
Freshly dug Azaleas and the first step is to remove all dead branches and then also to remove most of the garden soil. It is better to remove all old soil, but in some cases it is ok to leave some of the garden soil depending on the season. You do not always have a choice when the plants become available and then you have to make informed decisions about how far you can go, especially when it comes to root work.
These two were potted up and we also managed to get seven smaller plants off the larger clump. Needless to say, these two are clump style and will be grown and refined over the next few years as such.
Potted up and ready to start the Bonsai journey.
Aftercare is the most important aspect when it comes to doing work on plants out of the optimum season. Watering is a big part of this and after I have watered the plants in, I always water with a nutrient rich tonic and fertiliser and prefer liquid ones. My go to preference is Swift Grow due to the fact that it is organic, contains all needed nutrients and very important for me, the right probiotics to get the roots off to a great start.
It is necessary to have skills and knowledge about the treatment of wounds in Bonsai as pruning leads to the creation of wounds. Here we are not talking about the cutting of thin new or green growth, but more the structural pruning leaving larger wounds in more woody growth.
It is important that the tree is healthy before big cuts are made as it is stressful for the tree and critical that the conditions are maximal for optimal healing and growth. A free draining soil, good light, water and fertiliser are all requirements for good healing.
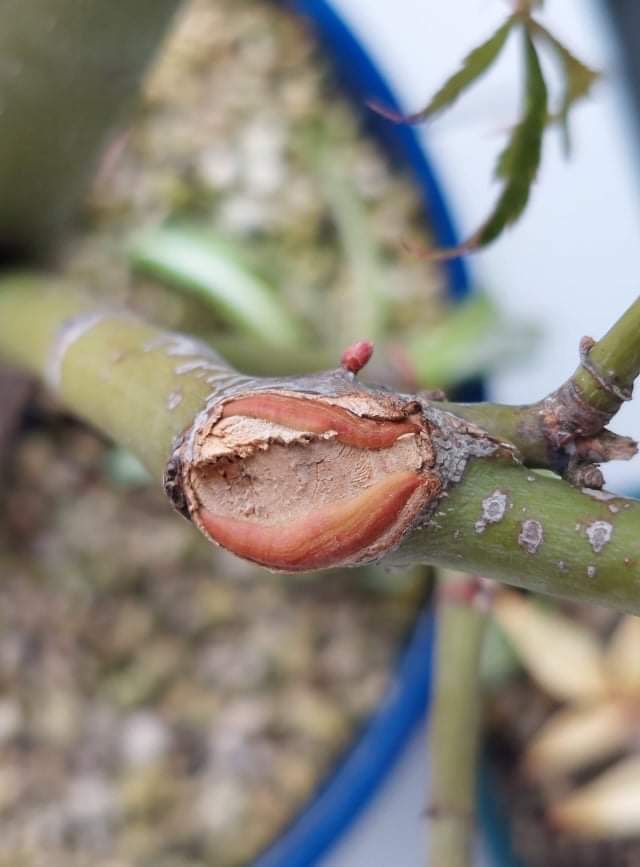
A cut from two angles showing some deadwood as well. All of that needs to be removed. This is also the opportunity to slant the cut so that it is less visible.
Both cuts on roots and cuts on branches and the trunk can be treated in the same way. What you need is:
A sharp cutter. I use a craft knife with replaceable blades. It needs to be very sharp and sterile.
Knob cutter or concave cutter. See tissue thickness requirements in the next paragraph.
Cut paste, either the putty type or the more liquid one.
If the tree has relatively thicker living tissue (cambium and outer layers), a concave cut needs to be made and if the tissue is very thin i.e. Azalea, then a convex cut can be made. Anything in between needs a flatter cut.
Start by using the cutters to either flatten or hollow the area of the cut wound. Use this opportunity to reduce the area by cutting at an angle or to the back of a branch.
Use a very sharp, sterile blade after most of the unnecessary material is removed.Rough cuts and most material removed.Smoothed out and ready for cut paste.
It is important that the cut area is as smooth as possible. What is meant by this is that a ridge in the middle of a cut will cause the new tissue to bulge over that or even stop the formation of new tissue. The living tissue (cambium outer layer) must be intact and the best way to do this is to run a very sharp blade across it. This will allow intact cells to multiply better and faster to grow over the open wound. Also referred to as the cambium rolling over the wound. Once the wound is clean, relatively smooth and the cambium prepared, use cut paste to cover the wound, especially the cambium. Proper cut paste will keep the cambium moist and it also contains chemicals that will enhance the growth of new cells.
Cut paste applied and you can also see the more acutely angled cut compared to before.
Allowing branches to elongate freely in the vicinity of the wound will help to bring nutrients and hormones to that area for faster healing.
Healing cuts with cambium rolling over. The edges of this cambium can be cut again to stimulate further growth until the cut is completely covered. The wound will eventually be fully covered and will continue to recover if the early steps were done right.
The area could be cleaned again after a few months of healing. Remove the cut paste and study the progress. If it looks as if the cambium roll over came to a standstill, gently open the edge of the cambium up again, apply cut paste and repeat the wait and check again process.
An almost healed large wound. This was about 3cm across as a wound.
Carving is usually done to create or enhance jin, uro (holes), shari (stripped bark) or getting rid of areas where large branches were removed. In this case a large branch, about one inch thickness, had to be removed and it was decided to leave a 15cm piece of it and sculpt a jin (deadwood) out of it.
The tools.
I use a die grinder with a carving bit to remove material fast and to roughly shape the dead straight branch by making grooves in curves and alternating the depth of the grooves. Once this is done I burn the jin to get rid of wood fibres and then repeat the process with the trusted Dremel and a smaller carving bit.
The rough carving results.
Burn, baby burn.
As mentioned, burning the jin with a butane torch gets rid of the loose fibres, but it also helps to get rid of sharp edges and tool marks. After a heavy torching, the jin is brushed with a copper brush and then with a nylon brush. Sand paper can be used to smooth areas that needs it, but I find that the brushing works well on its own.
End result.
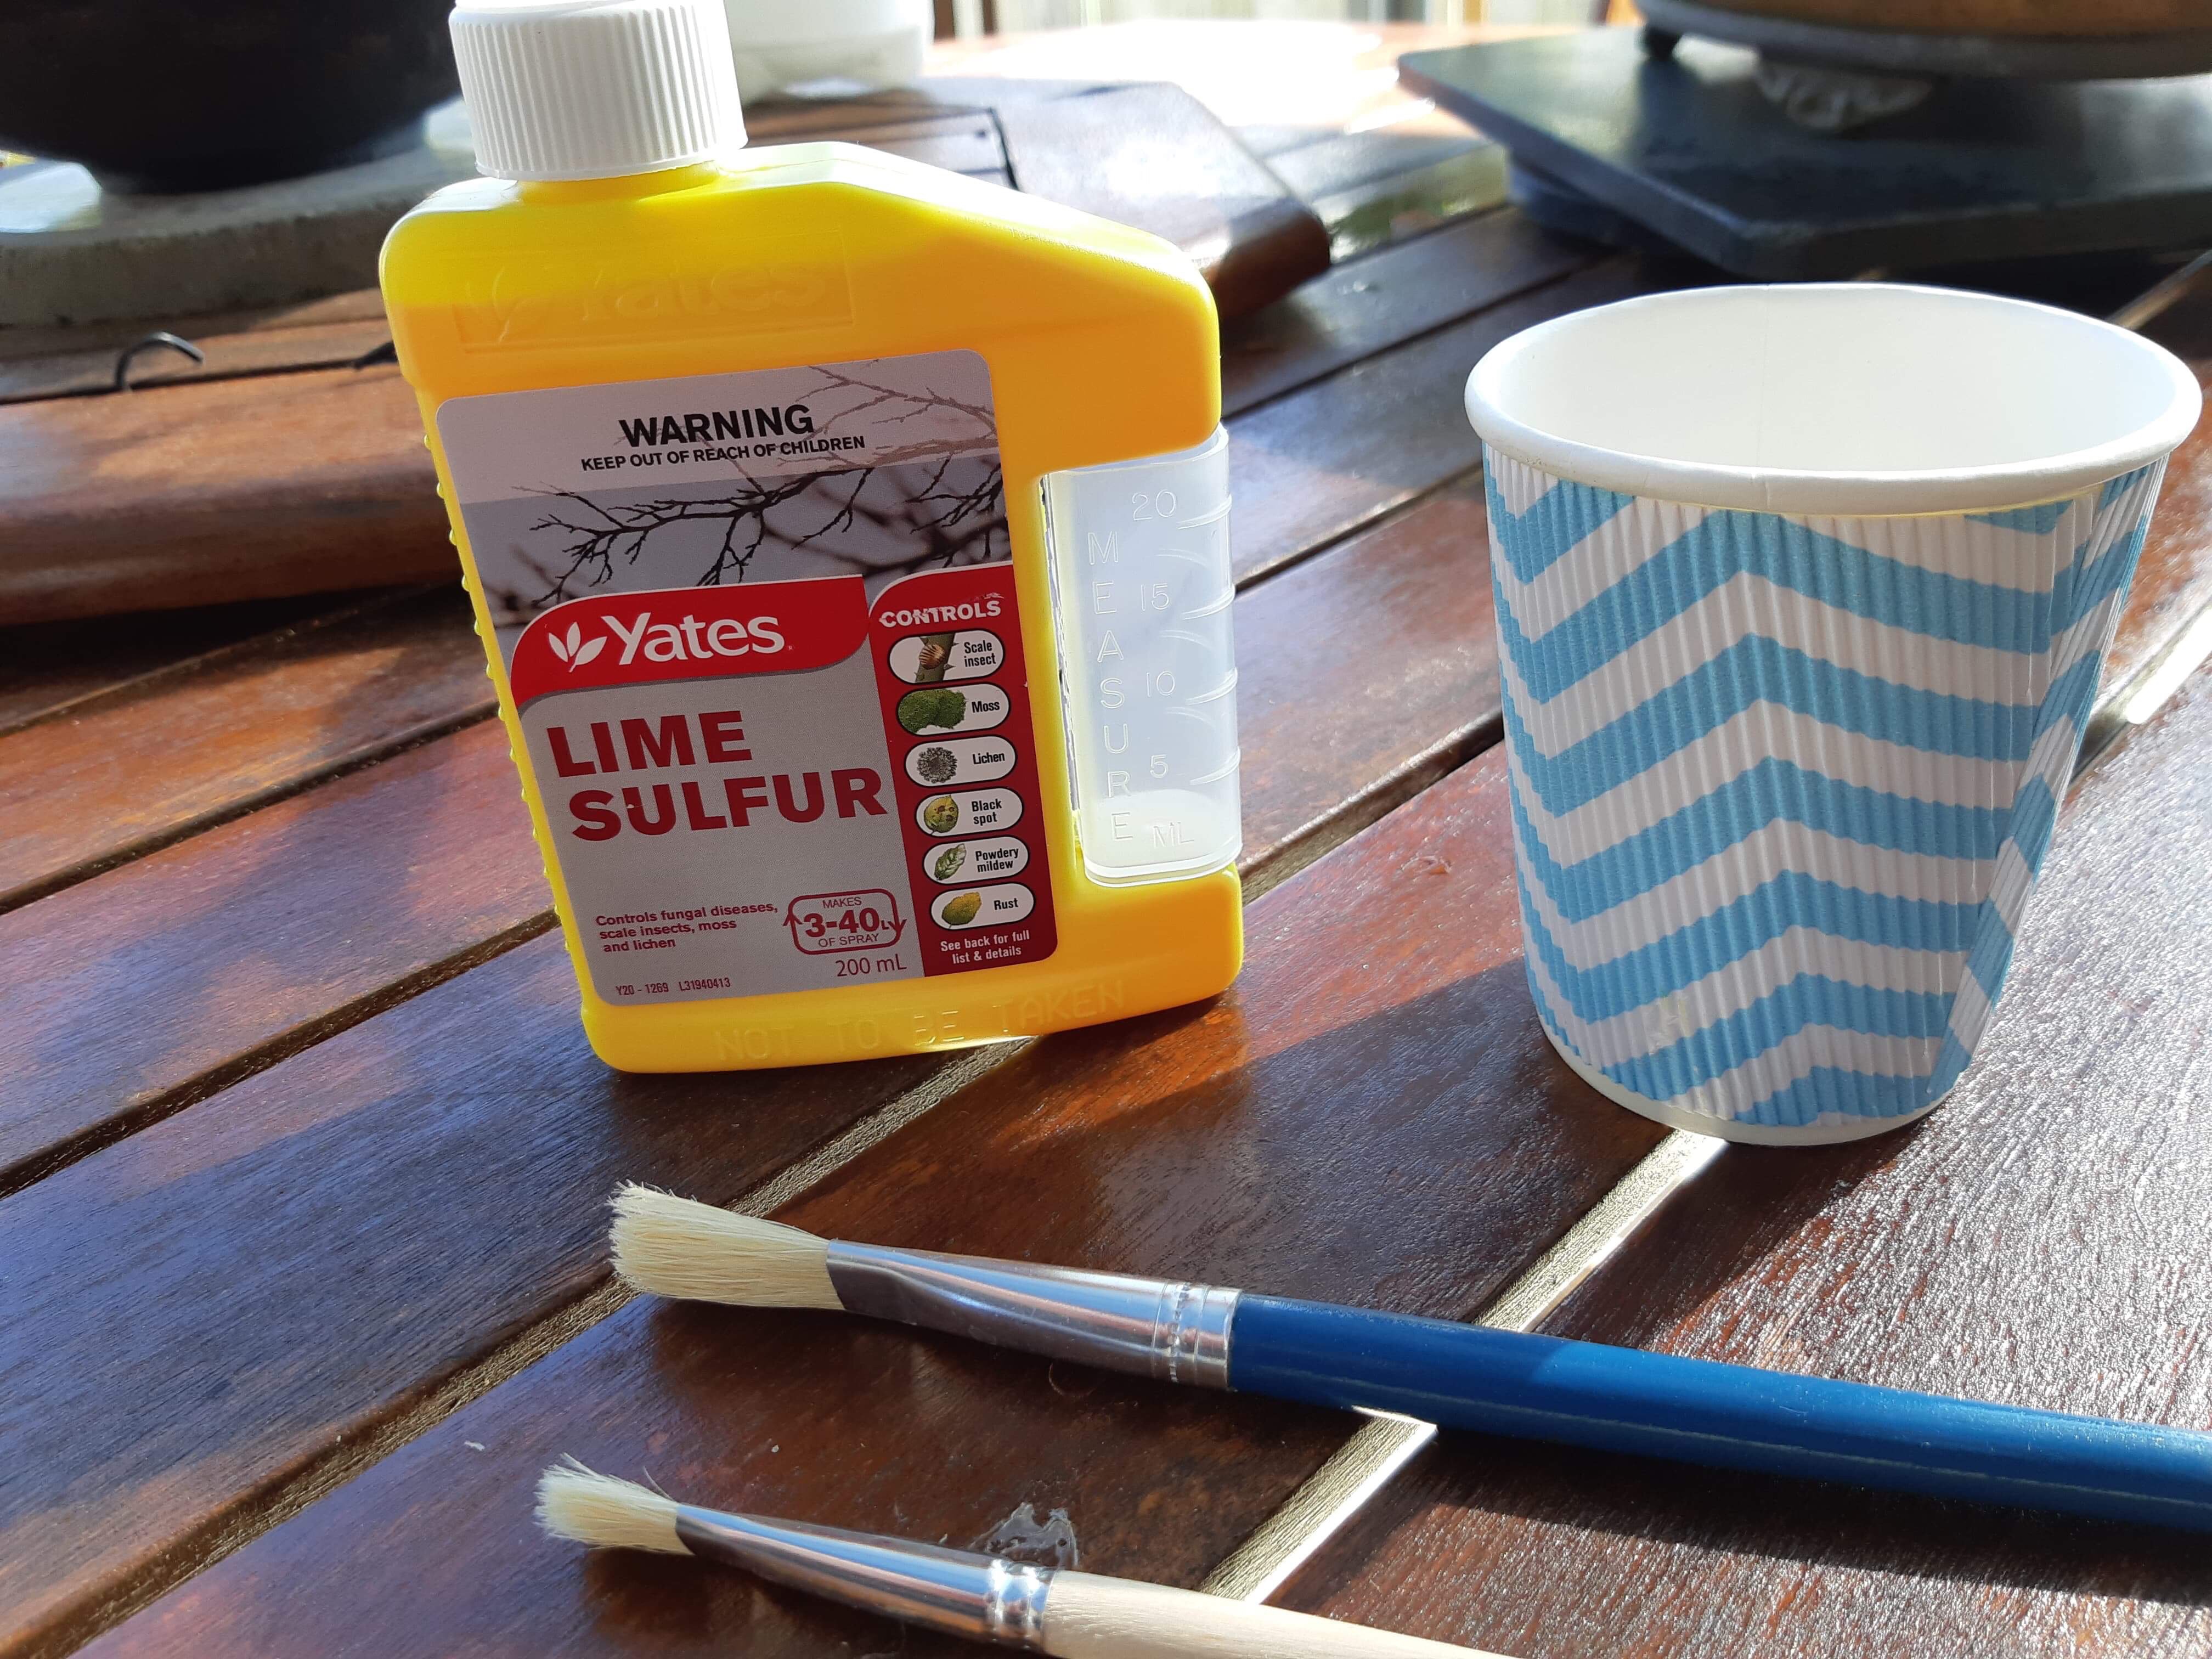
To preserve the newly carved jin, I wash the whole tree off and then let it dry and rest for a few days. Lime sulphur or a wood hardener can then be applied. For a darker finish, mix some ash (burnt paper) in water and paint on. Some of the grooves can also be painted by making use of black ink. All fluids should be diluted. Lime sulphur is usually diluted with water 50/50%.
Safety aspects:
Wear safety glasses during the carving phase.
Use gloves when using the power tools.
When using the torch, protect the rest of the tree from the flame by using aluminium foil or a wet cloth around foliage and nearby parts.
Please like and subscribe to this blog to be notified when new posts are done. Thank you for the support and feel free to shore this post as well as the blog site.
In November 2015, the very early days of this blog site, I wrote about Metrosideros excelsa or Pohutukawa as Bonsai and included a few photos of these magnificent trees in nature. This tree is also known as the New Zealand Christmas tree. The link to that blog post is here.
For this blog post I will style a Pohutukawa as a Bonsai. As can be seen from the photos in the linked post, these trees very naturally present as multi trunks with great root structures and the very prominent aerial roots. it is this root structure and especially the aerial roots that make these trees ideal for root over rock designs. This tree will not be a full root over rock, but a rock will be placed next to it with roots growing over the rock.
Metrosideros excelsa / Pohutukawa
This plant was grown from a cutting for a few years and these photos clearly show that these trees are basal dominant. It basically means that it will keep on growing new shoots from the base compared to tree which are apical dominant where the new growth is at the top of the tree.
Close up of the multiple shoots growing from the base as well as visible aerial roots.
As can be seen from the photos above, the first step is to search for roots and in this case roots in the soil and not the aerial roots. I find it better to remove the top edge of the plastic bag and sometimes remove the bag or pot completely. The presence and position of roots, especially radial roots will help to determine the orientation of the tree. In other words, the front of the tree and the first ideas of what the design could look like. In this case quite prominent roots were found and spread around the tree which means we can now look at the above ground structure as the placement of the roots allow us to look at multiple design options.
The next step is to remove all unwanted growth. To stay more or less true to the natural growth pattern Pohutukawa, the decision was made to design a multi trunk tree with three trunks. Really only two, but the thickest trunk has a fork which visually looks like two trunks. All three trunks have different diameters which makes it visibly more pleasing. All inward growing branches are removed and decisions are made about the three trunks. This includes things like direction, placement and length. As the three main trunks did not grow naturally in the directions needed and the centre trunk needed to be compacted, wire was applied.
A lot of branches and foliage were removed. some of these will be propagated as cuttings.Wire was applied to bend the branches and also change the direction of the branches.The pot is prepared.
The final product with a rock added to add visual weight on the right hand side and also allow a backdrop or prop for some of the aerial roots to grow over.
It is important that Bonsai trees are three dimensional. The best way to check that is to view the tree from above. Visual depth adds to the aesthetics and overall view of the tree.
As for all trees, the aftercare is now of the utmost importance. As the pot is not that shallow, not many roots were removed, but the tree will still be kept in a protected spot, out of the wind and cold temperatures. Watering is now also important as well as sun exposure. Just damp, not wet and limited afternoon sun is what is now needed for the further development of this tree.