

Semi-cascade Juniper Bonsai


One of the fastest way to get a Bonsai collection going is to find material at your local nursery to develop over time into a stunning Bonsai. Yes, it takes time, but still beats starting from seeds or cuttings. Although My private collection mainly consist of mature trees, I regularly still work on anything from cuttings to nursery material. The main reason for this is to generate stock for my wife’s fledgling Bonsai shop.


Yesterday I bought this Juniper from our local Bunnings (hardware store for those outside of Australia and New Zealand). As luck would have it, I just recently saw a mature Juniper on Instagram with a slanting main branch and a smaller branch following the contour of the main branch. Another coincidence is that I recently went on a Dolphin watching trip on Guardian, the boat used by Dolphin Seafaris in Tauranga, New Zealand. Where does this fit, you may ask. Well, there were a lot of baby Dolphins with their mothers, swimming in close proximity of the mother and mimicking what they do. It might also have to do with the fact that they suckle on mommy dolphin twenty times per hour! Need to be close for that.

The first task is to clean the tree up as selecting the front was a given with the shape I wanted it to have. The clean up consists of removing unnecessary branches, just one in this case, and then all the growth pointing to the bottom and on top of the branches. It also includes cleaning the crotches between the main branches and the lateral ones. It just makes it a lot easier to apply wire.

Then the wiring starts. The same gauge wire was used on both branches as the smaller one also needed to be twisted and bend around to follow the main branch line. You cannot just bend it over as the leaves will have their undersides on top then. It needs a twist as well.
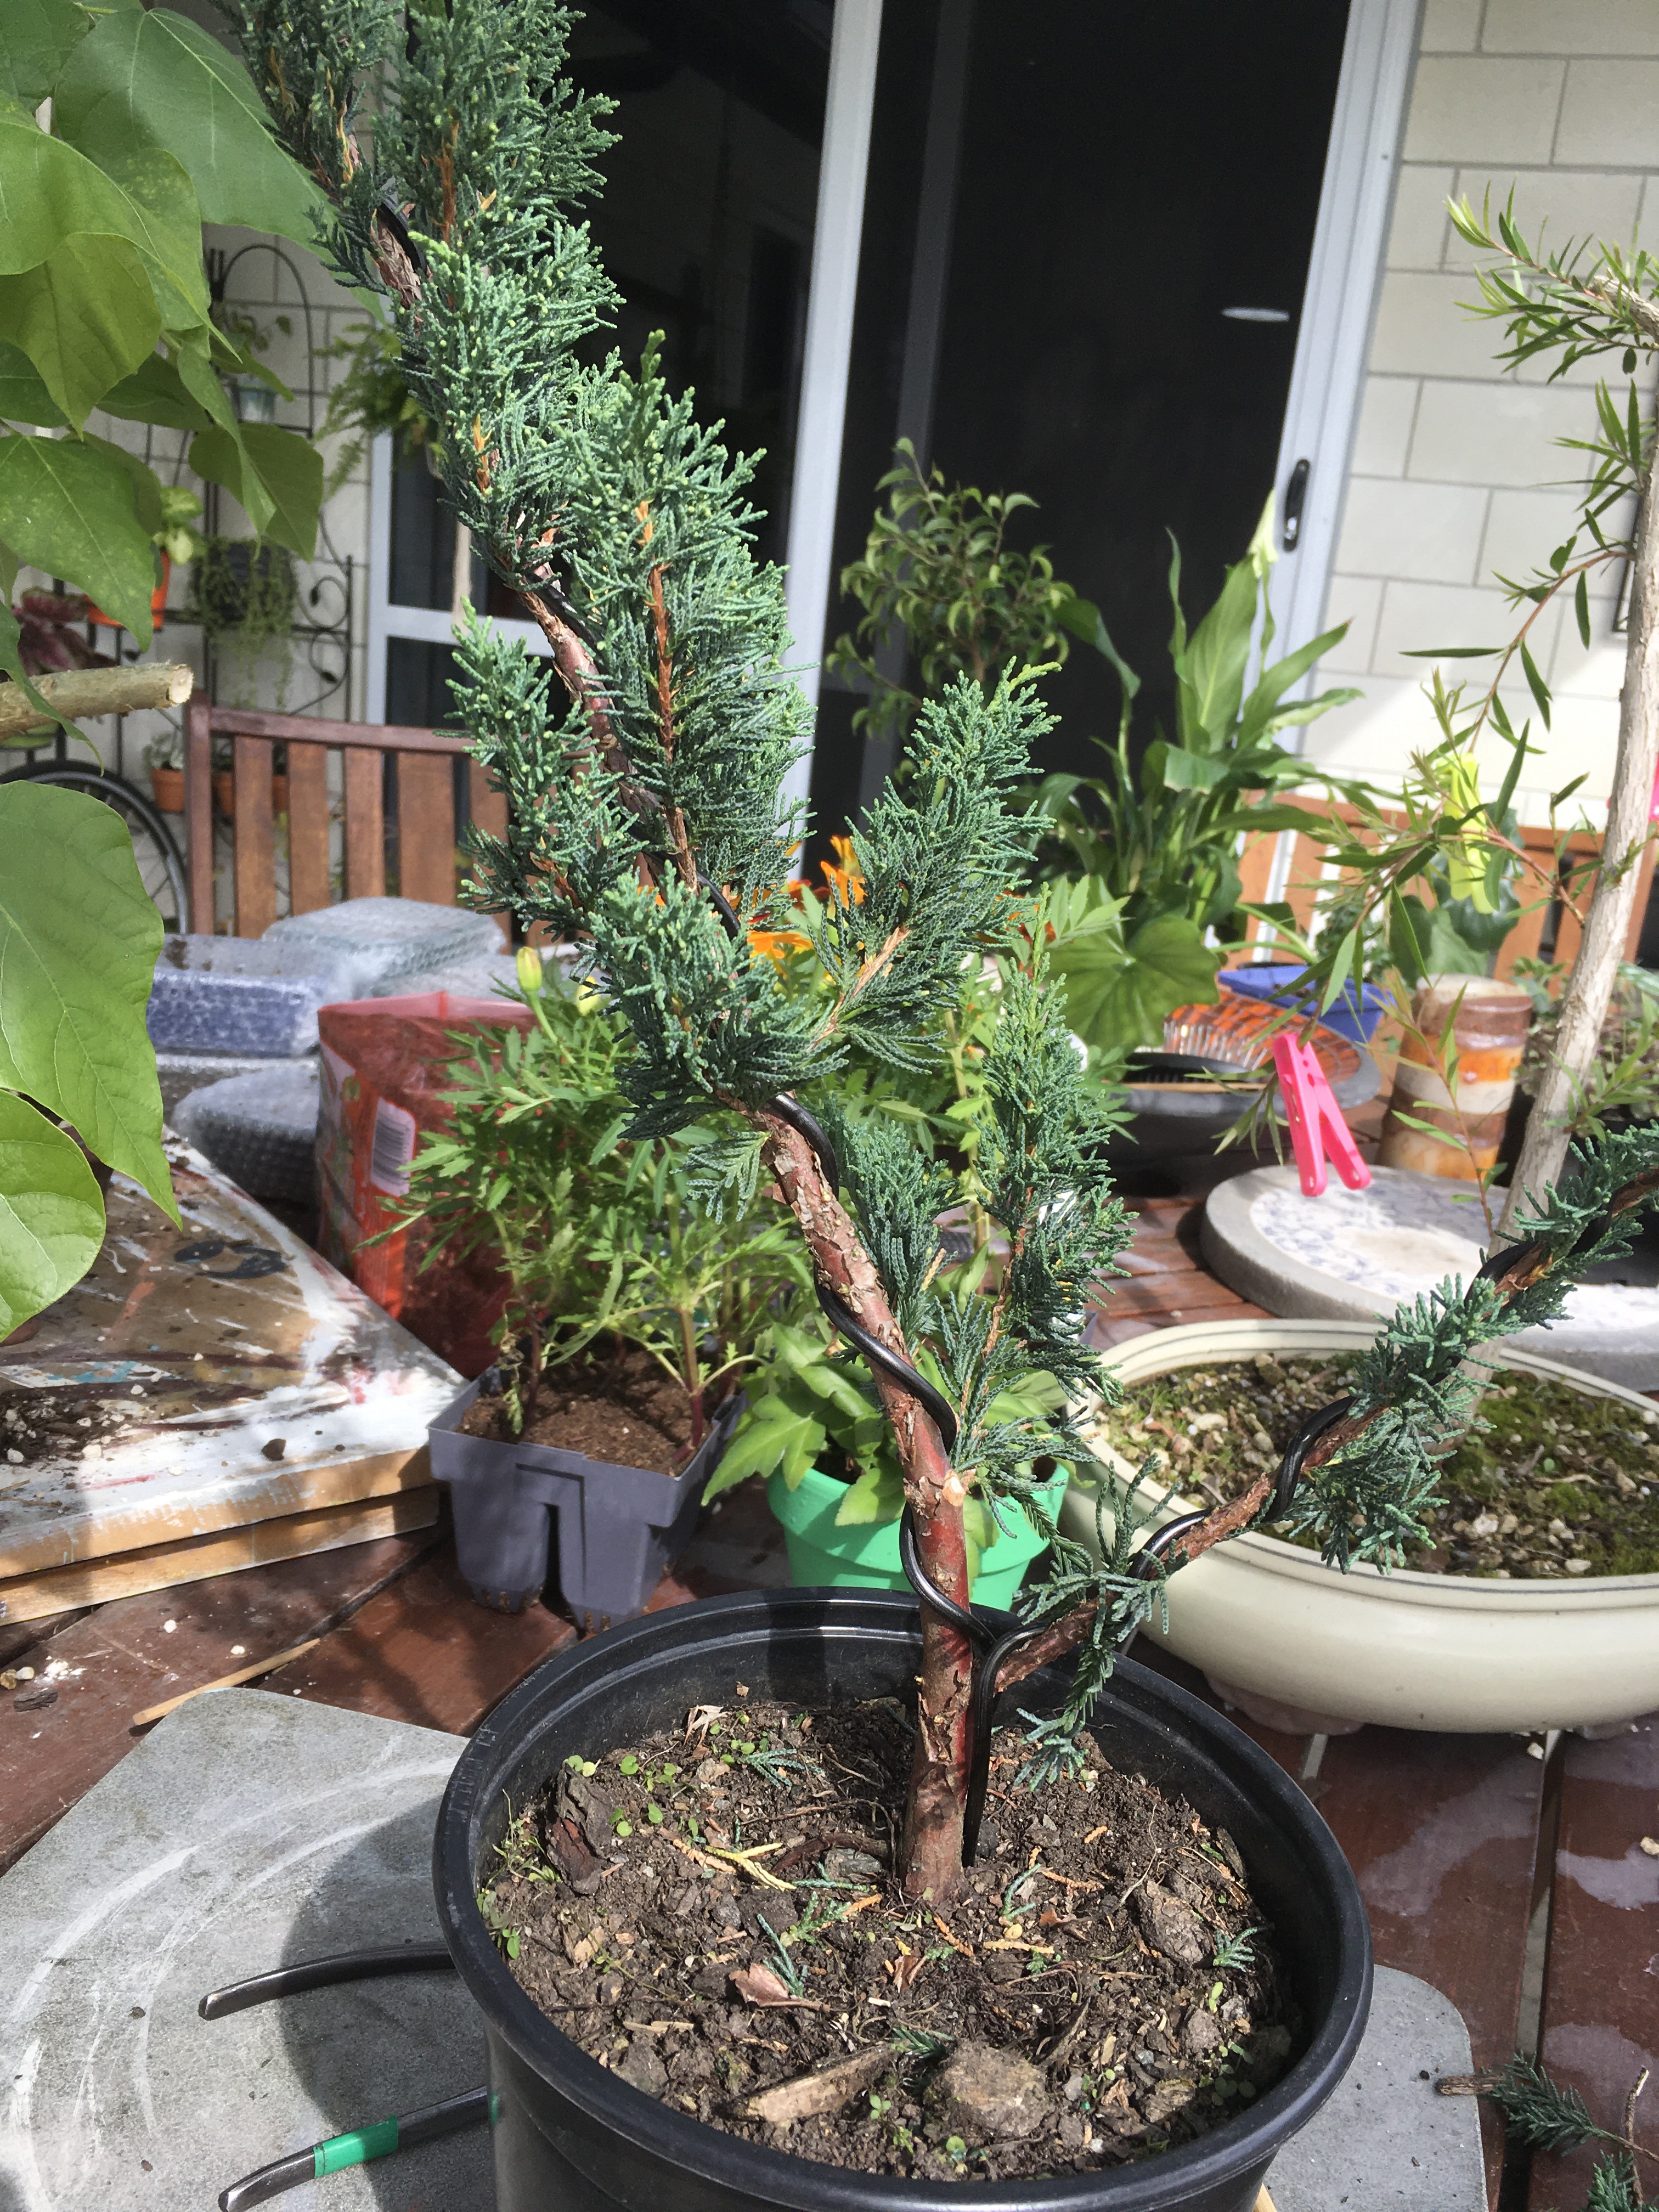


The final product. The main slanting branch represents the mother Dolphin and the smaller one the baby Dolphin. There is my memory of the Dolphin watching trip now captured in a starter Bonsai. Now for it to rest, watered, fertilized and kept out of harsh climate conditions.

Watch this space to see the updates, further development and potting) and also follow us on Bonsaiplace on Facebook as well as Instagram.
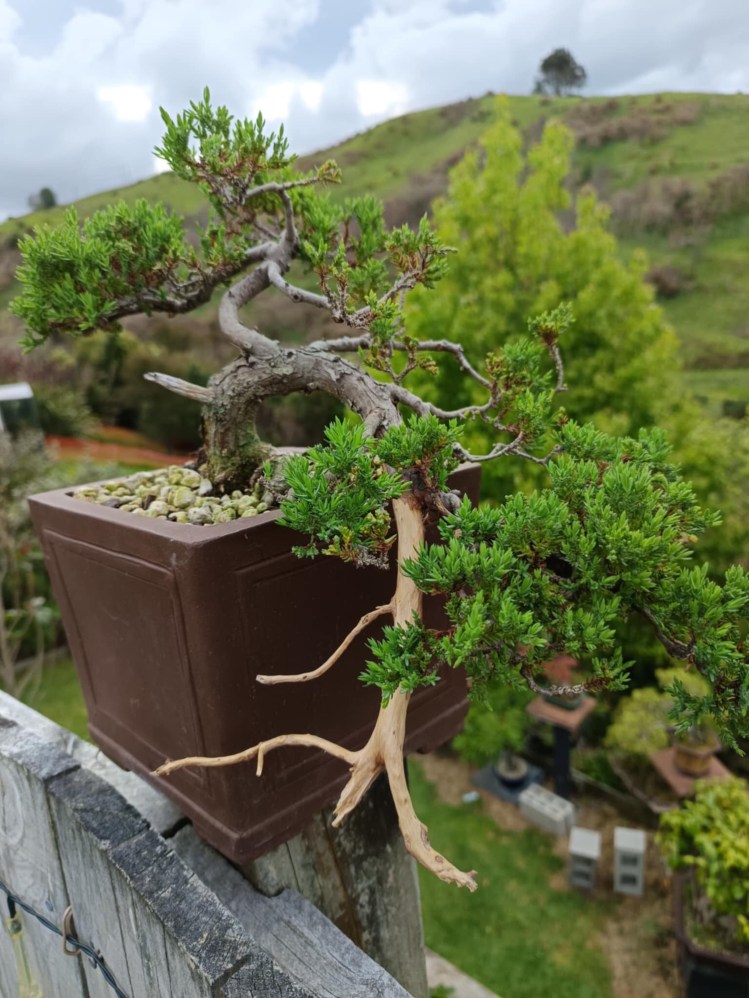
This Juniper was lifted in June 2015 and planted in a plastic container. It came from a garden and was planted in a very sandy soil which came away during the lifting process. It was basically bare-rooted at the time which in my mind was not ideal at the time. I did bring some of the soil with me to add to the new mix with the hope that it contained some michoriza. At this stage I also removed some of the long, whippy branches with very little foliage on it to try and balance the foliage to root ratio.

From this point on it was watered and fertilised and received plenty of sun. A few branches died over the next twelve months, but plenty of new growth showed as well. All of this was of the needle type and then reverted to adult growth. The tree was also planted into a Bonsai pot at which time the roots were reduced a bit.


I had to move my trees three in the last six months. First from a colder, wetter part of New Zealand to an almost subtropical climate. The first place was a temporary place while we were shifting our household, then to a rental until we shifted into our own house three months later. Eighteen months after the lifting (January 2018) it was time for its first styling. Deadwood was created on the cut branches and then the wiring started. This took about six hours with not more than two hours done per day. I find it is best to start at the bottom of the tree and then work towards the apex of the tree. I have just used aluminium wire and varies from 1mm thickness to 4mm thickness. Quite a few guy wires were used to pull larger branches down. I use plastic tubing to protect the branches. Due to a few harsh bends, light cracks appeared and these were sealed with cut paste.

Now it is time to let it rest. Water and fertilise, keep an eye on the wire to prevent it from cutting in give it plenty of sun. It could be show ready in about three years. The foliage pads must mature and I have left a bit of new growth on the main branch from where another branch or two can be formed to fill some gaps.


