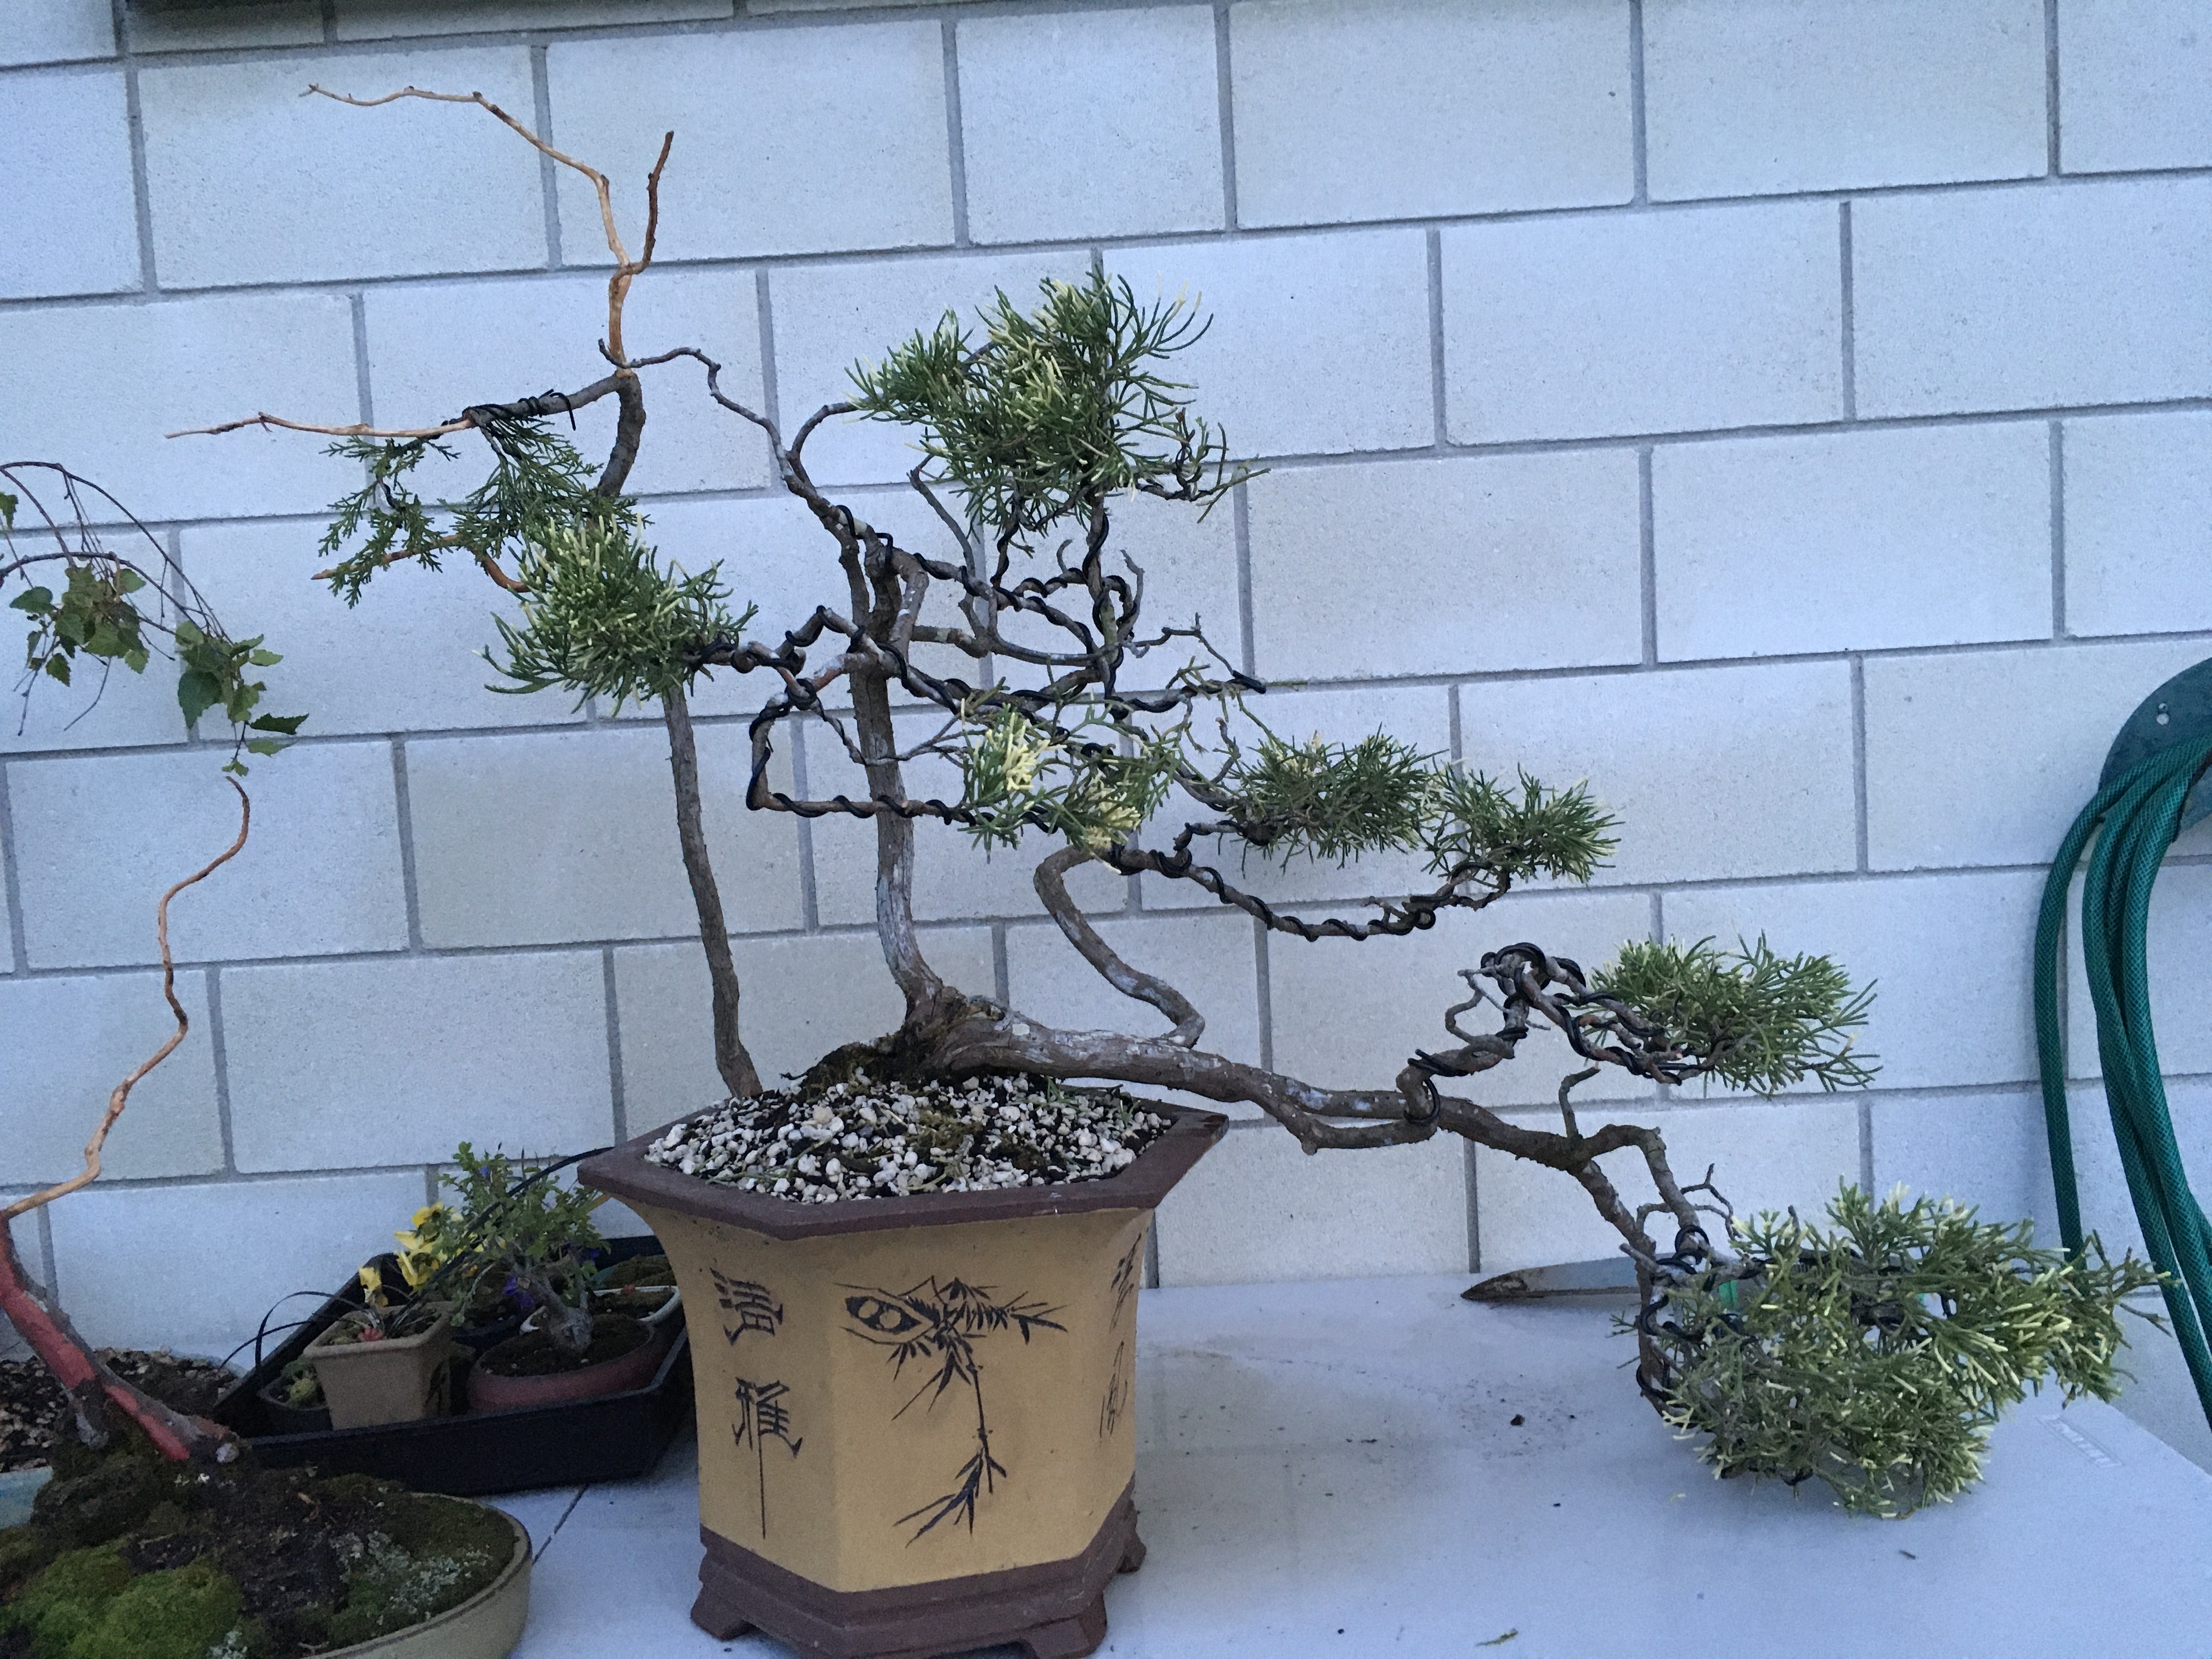
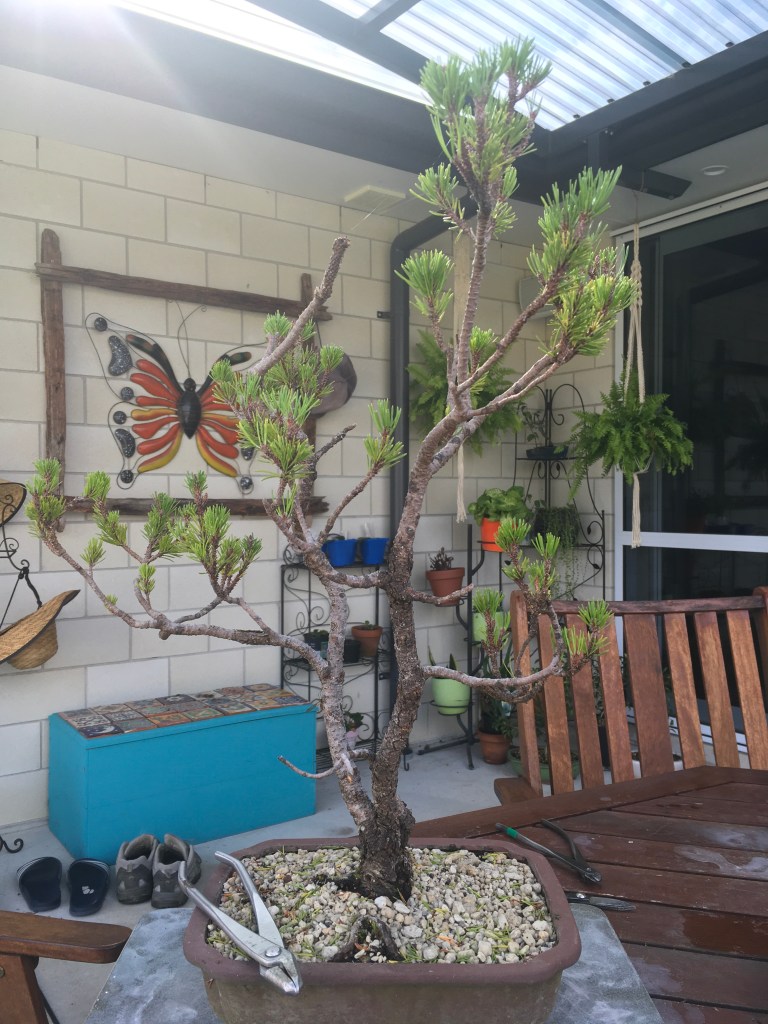
I was confronted with this Mugo Pine and had no idea what to do with it. The two bar branches at the bottom is ugly and the two arms going up from there does not lean itself to any of the Bonsai styles that I know of.
After many days, weeks and months of staring at it from different angles, I one day was working on a small Japanese White Pine that is planted in a crescent shaped pot and a new idea came to me. To do this, many Bonsai “rules” must be broken and the tree put at risk due to a lot of material being removed. This is a calculated risk. More about that later. Here is the culprit in all its former glory.
What to do with it?
The decision was made to remove the one thick branch on the one side and create a two inch long Jin out of it.
The Jin on the right.
Then the other branch was stripped and Jinned as well.
One short Jin and one long Jin.
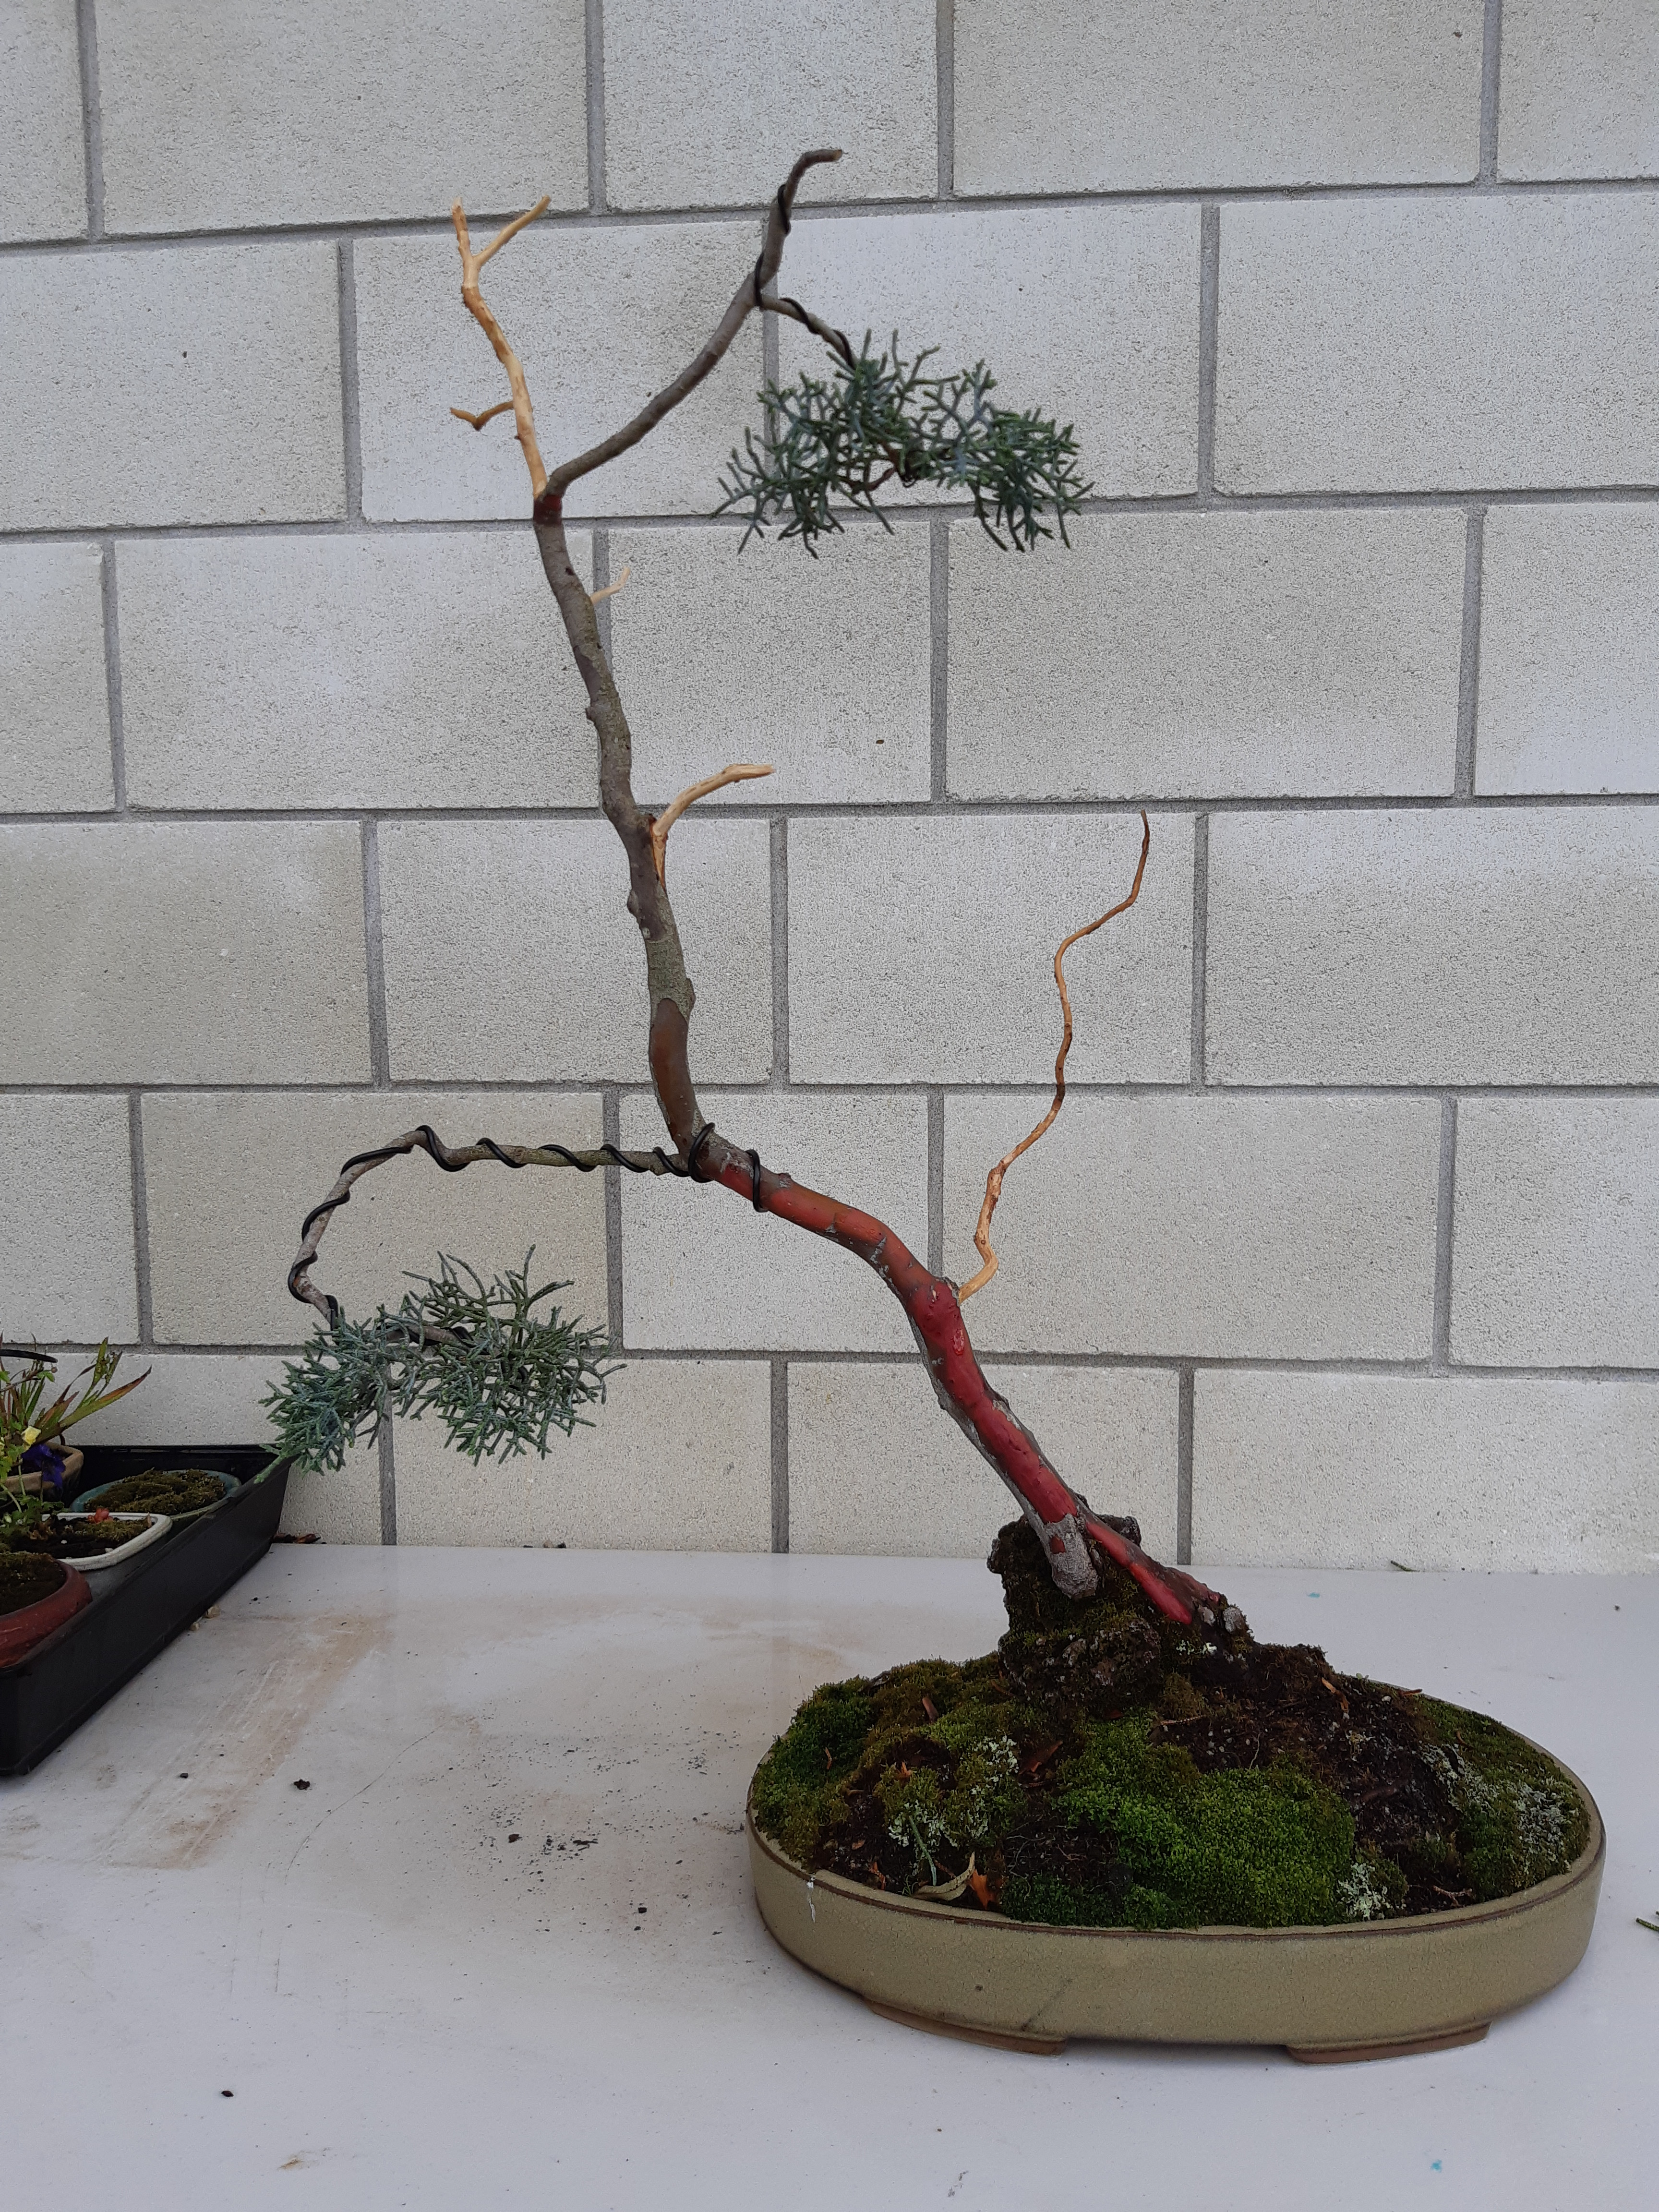
This longer Jin is now wired up and bent in the shape of a crescent, the same as what a crescent shaped pot would look like.
The crescent pot.The branch is bent.
Now the only branch that is left is shaped to represent an informal upright style Bonsai tree with a loop in what is now the trunk to get the height correct.
The end product for now.
Aftercare and the future: the tree will now be placed in a sheltered spot and remain there for at least a year. Fertilisation, watering, checking on the wire and weeding is the most excitement this tree will see for a long time. When the time is right, the wire will be removed and the Jin will be further developed. That will just be some detail work, inclusive of using fine carving tools, torching it and lime sulphur treatment. The tree will also go into a Bonsai pot once the growth is strong.
I mentioned taking calculated risks earlier. It really comes down to mitigating the risks by thinking through each risk and finding a way to minimise the risk. These include not potting anytime soon which means no root work at this time, sealing all the wounds and keeping the tree out of wind and harsh sunlight. Extensive wiring took place and this is mitigated by placing guy wires in places to support the harder wiring as to take some of the load off. Guy wires are attached to the wire on the branches / Jin and not on the branches itself. Now, let’s pray.
The shorter Jin that will undergo further development.
It is always exciting for me to apply wire to a tree and I feel the same excitement unwiring a tree. Applying wire is part of the creative process. You wire and you place the branches in place and when done, you can stand back and admire the design. Removing the wire for me brings the same excitement in that once the wire is off, two emotions are detected. One is happiness that you managed to remove the wire in time with no nasty wire bite marks on the branches. The second emotion is about the same as seeing an infant take the first steps on his or her own or seeing your puppy successfully toilet trained. Your tree is now on its own, with no help from wires to keep its shape. It is resembling something more advanced from the time that you applied the wire. It is another step towards maturity as a Bonsai tree.
Wire off.
How do you do this job? Some people cut the wire in short bits and others uncoil it from the branches. I do both. Usually thicker wire gets cut and thinner wire gets uncoiled from the branches. It also depends on the size of the tree for me in that I prefer to use my fingers on smaller trees as my wire cutter is quite bulky, but perfect to use on the thicker wire where the chances of damaging bark is greater. Using the cutter is just easier, especially on Copper wire. Aluminium is softer and much more pliable which makes for safer removal of the wire. And that brings us to a very important point. Safety and the health of the tree always comes first. If you cannot remove the wire safely by hand and the uncoiling method, the appropriate tool should be used. Never compromise on the health of a tree.
I also usually start with all the thinner wire first. In other words, the reverse order of which the wire was applied in. My technique is to set the thicker branches first, therefor using thicker wire and from there use thinner wire as the branches taper out to the thinnest ones. Starting with the thinner ones also means working from the outside in and avoiding the odd wire that naughtily crossed a thicker wire in its pursuit to support the tree. Yes, it does include some planning on order of work and technique to be used. I also usually start at the bottom of the tree and work my way up, one branch at a time. That will minimise the chance of missing a wire somewhere and then discovering it a few weeks later, by then causing damage to the branch where it was missed.
Do you re-use uncoiled wire? I do, especially for students to practice their wiring technique. To do this, it is best to get all the bends out of the wire first. I use a smooth steel pipe that is fixed on both ends and then all you have to do is take the ends of the wire around the pipe in each hand and pull it across the pipe a couple of times and it is as straight as new wire again.
Unwiring is part of the process. Do it mindfully and your tree will reward you not just with its aesthetic appeal, but also with good health and a feel good emotion of accomplishing something worthwhile.
Feel free to comment on how you approach this task and any tips that will make the job easier.
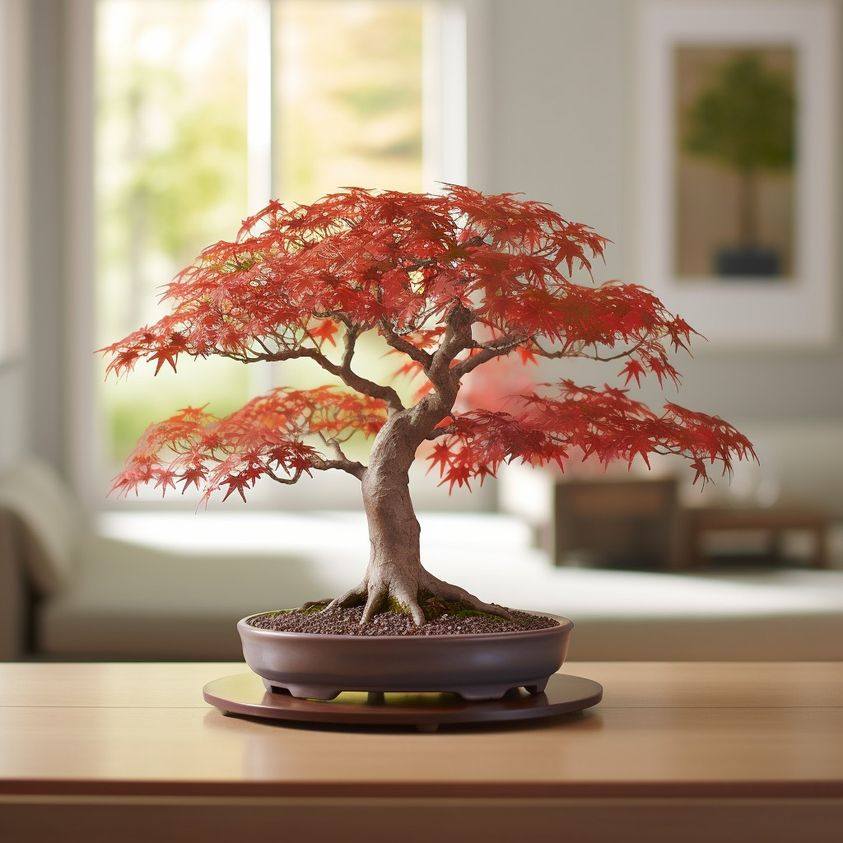
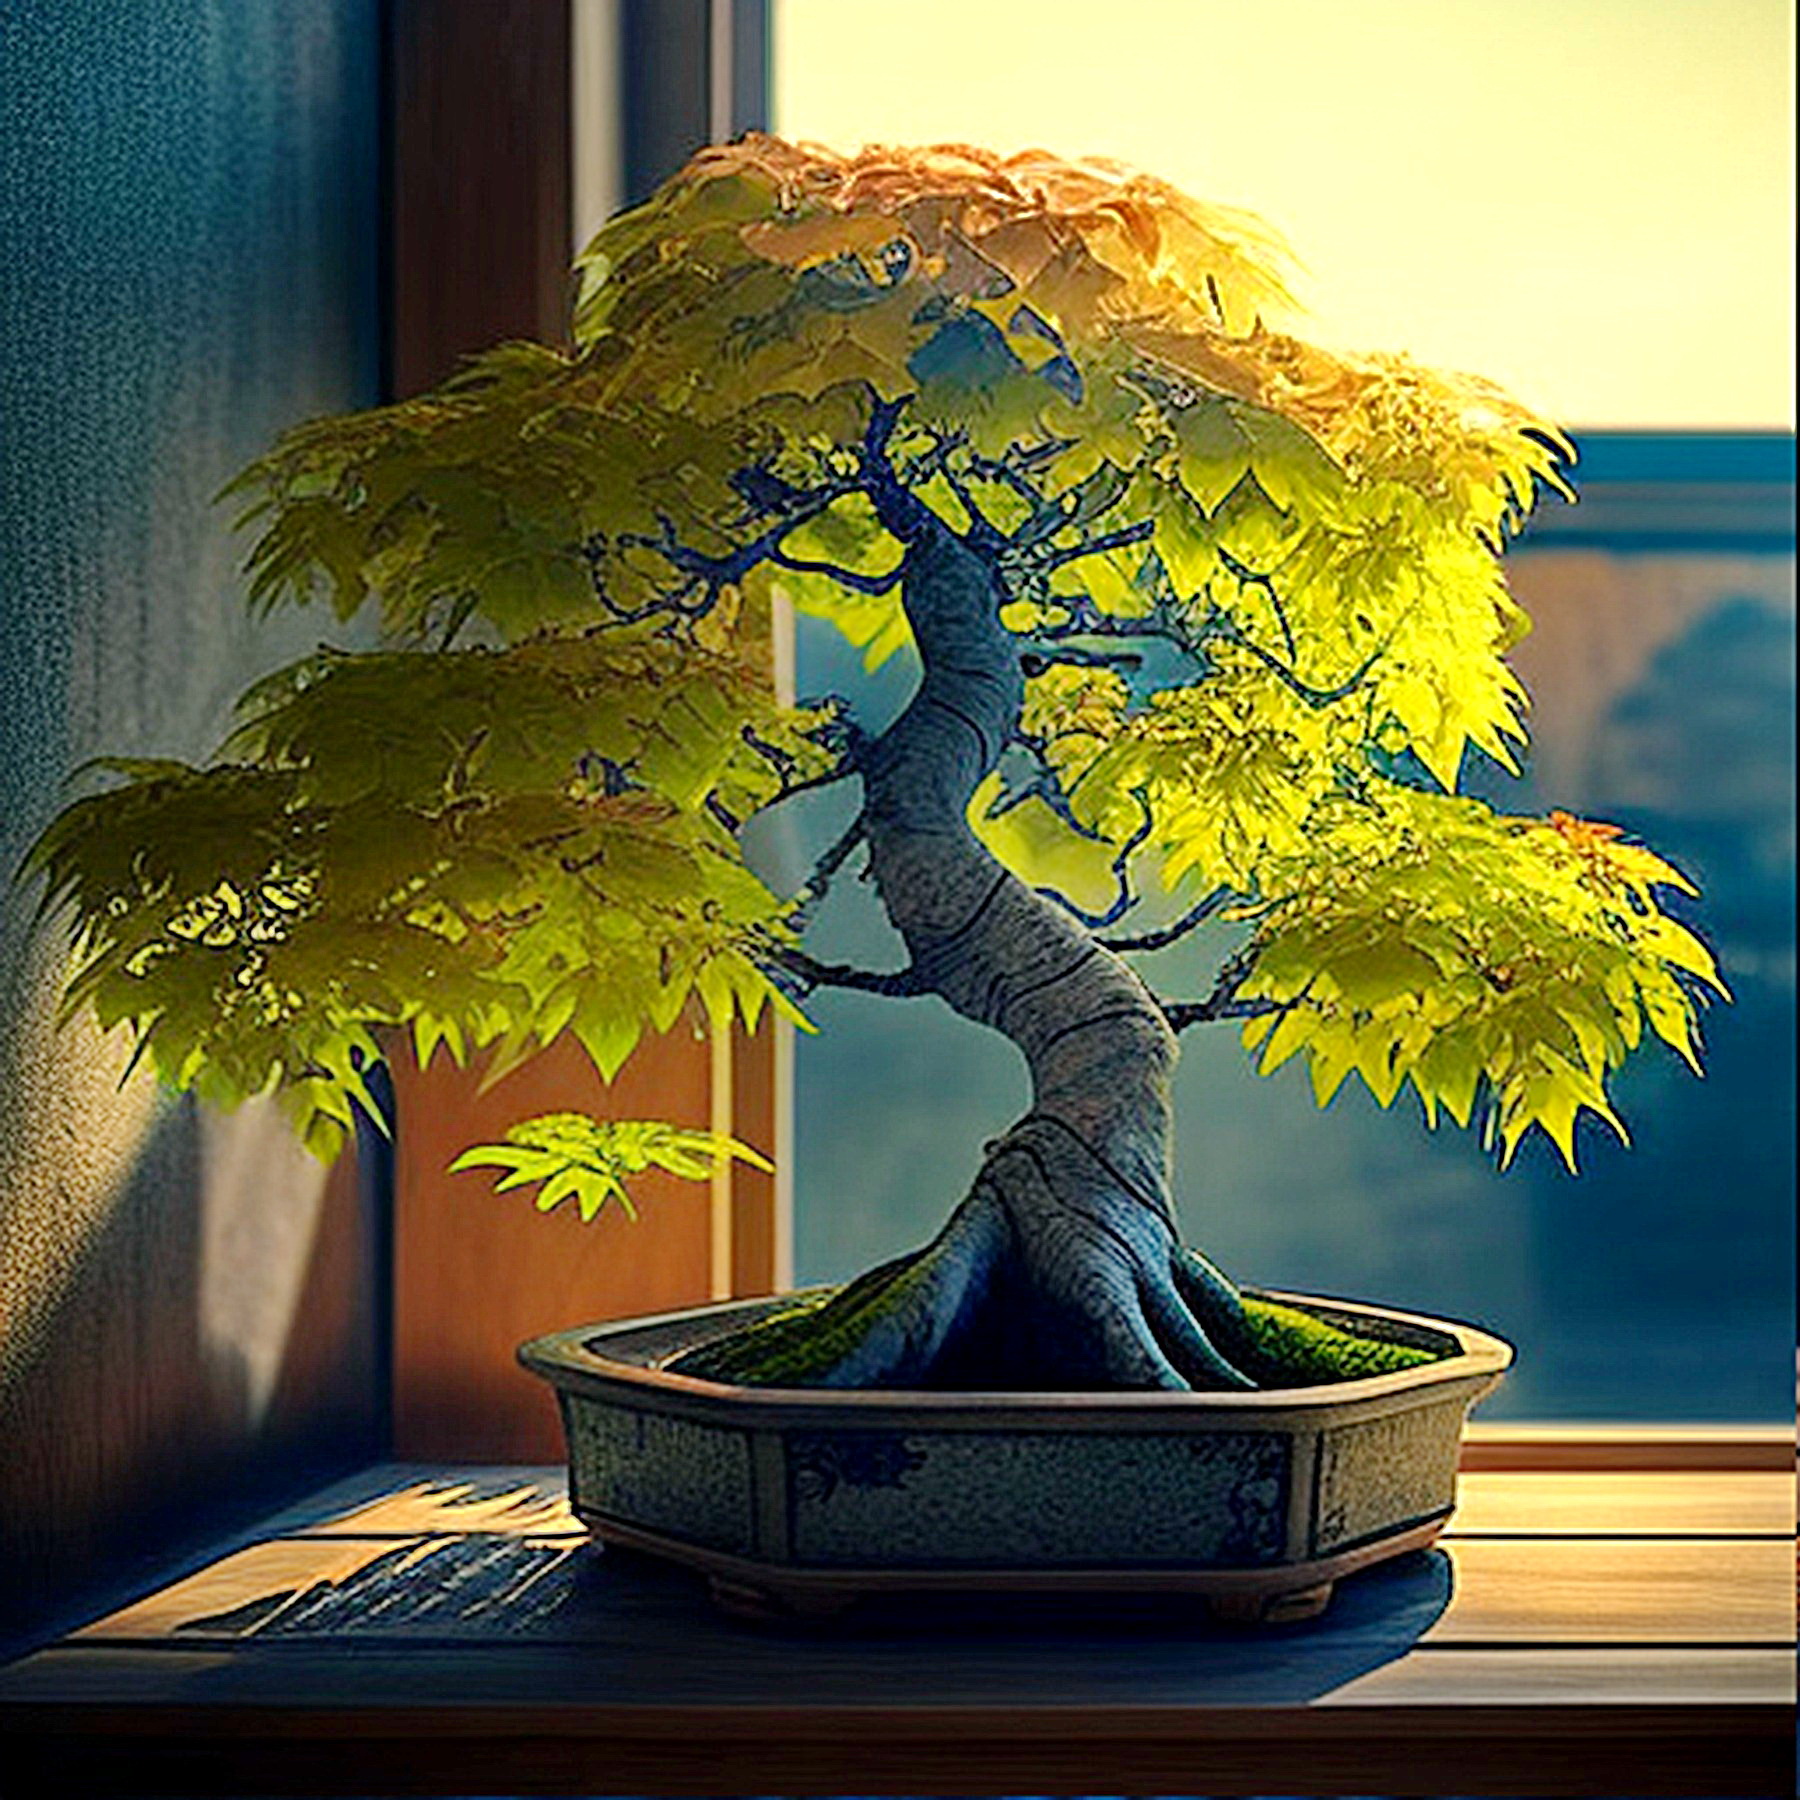
A Bonsai friend recently commented on a social media post showing an AI-generated image of a Bonsai tree that it was too perfect and that it does not display the characteristics of true Bonsai identified through the concept of Wabi-sabi. This is not the first time that I am writing about Wabi-sabi, but in this blog I would like to dig a little bit deeper into the concept and then apply it to Bonsai. I would specifically like to explore the concept of Perfection in Imperfection, one of the meanings of Wabi-sabi.
AI-generated ImageAI-generated Image
Let’s recap quickly on what Wabi-sabi means. According to Wikipedia (Wikipedia link), the term refers to a world-view focused on the acceptance of transience and imperfection. It is at times described as appreciating beauty that is imperfect, impermanent and incomplete in nature. Further on it is quoted stating that “from an engineering or design point of view, wabi may be interpreted as the imperfect quality of any object, due to inevitable limitations in design and construction/manufacture especially with respect to unpredictable or changing usage conditions; in this instance, sabi could be interpreted as the aspect of imperfect reliability, or the limited mortality of any object, hence the phonological and etymological connection with the Japanese word sabi“.
This takes us to Bonsai as a living art form, one that is never finished, one that is constantly changing due to nature and the hand of humans impacting on its growth, design and health. It is not just the tree itself, but it can also incorporate the elements making up a traditional display, the pot, the soil cover, the stand, the accompanying plantings and then also the scroll or art work in the background. The paragraph above mentions the limitations in design as one example of impact. When it comes to Bonsai there are many others.
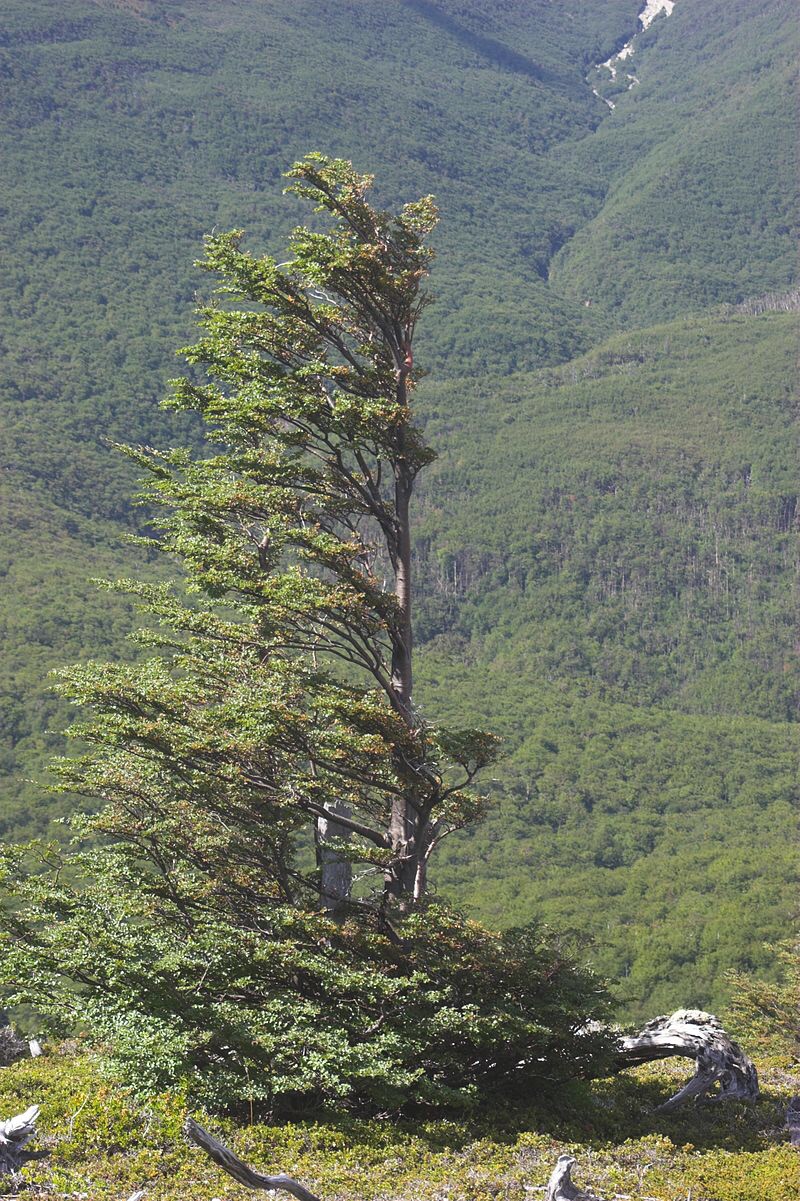
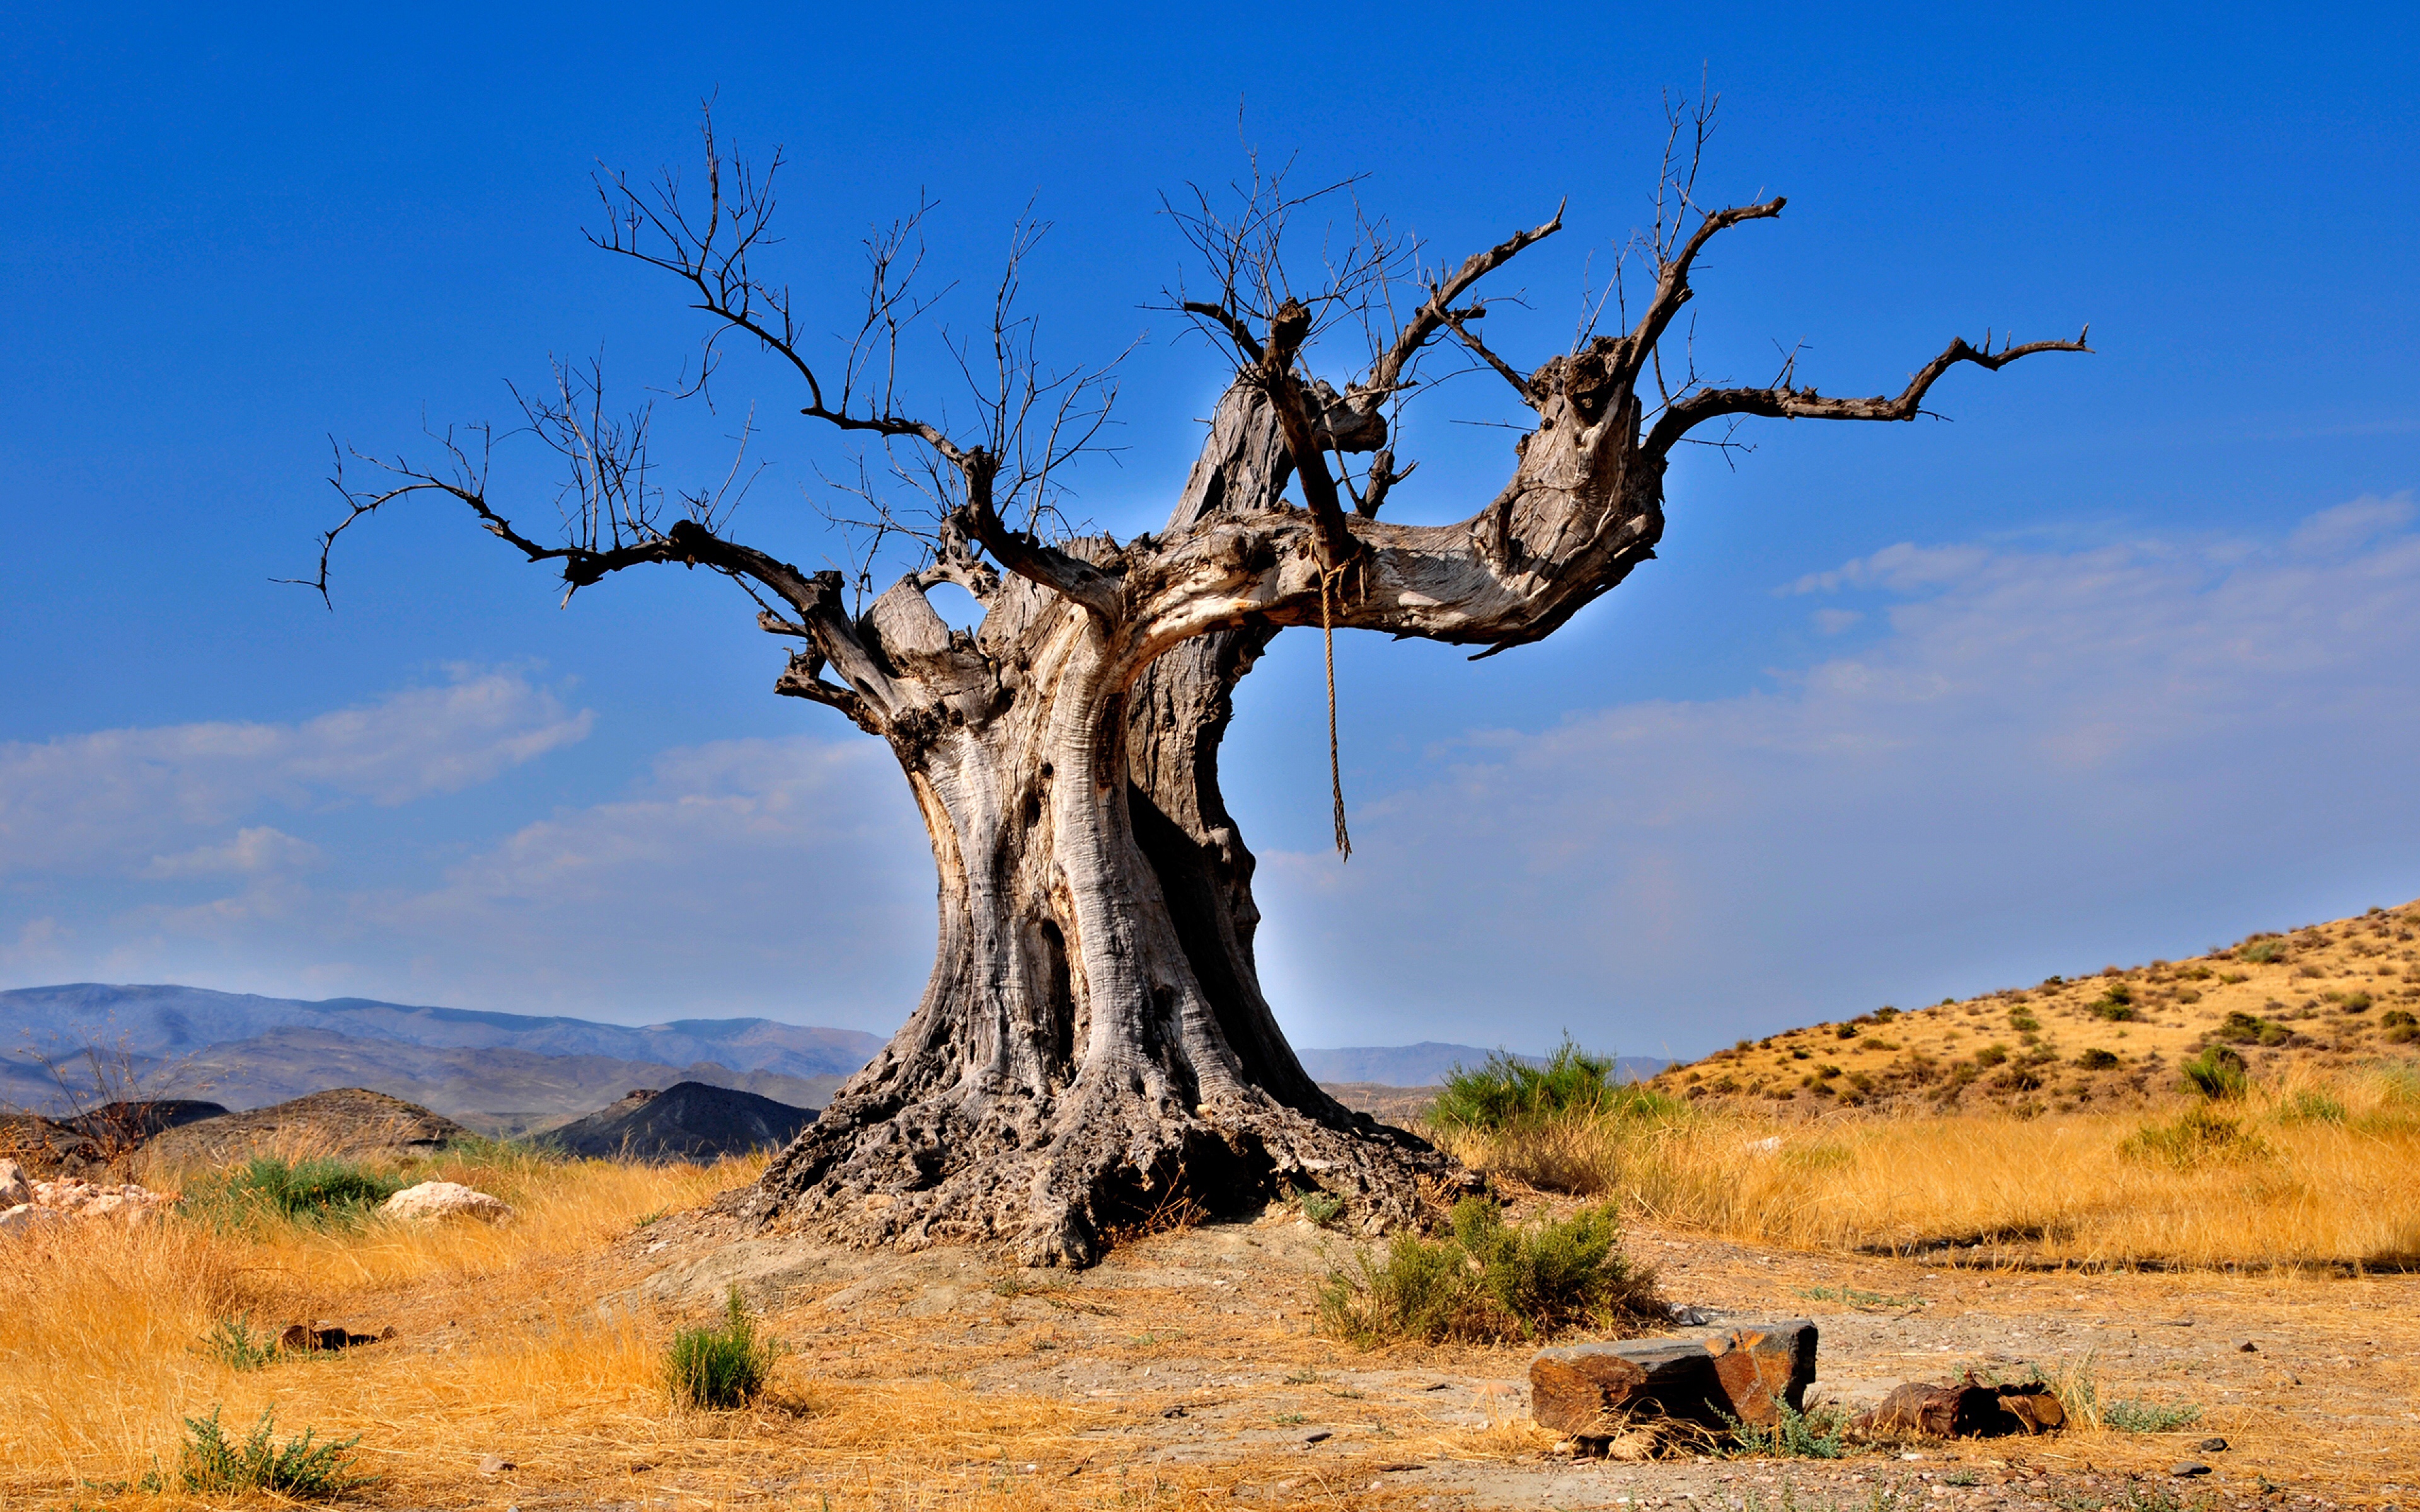
Not everything can be controlled when it comes to Bonsai cultivation. When a tree is harvested from nature, there will no doubt be imperfections caused by insect or mechanical damage, the direction of growth and the effect of wind, snow, animals, substrate and sun. This needs to be incorporated into the design and these features, if managed correctly, will become part of the tree’s aesthetic, its character and be part of the tree’s story. These imperfections add to its history, its aura and a kind of spiritual presence that cannot come from a “perfect” tree.
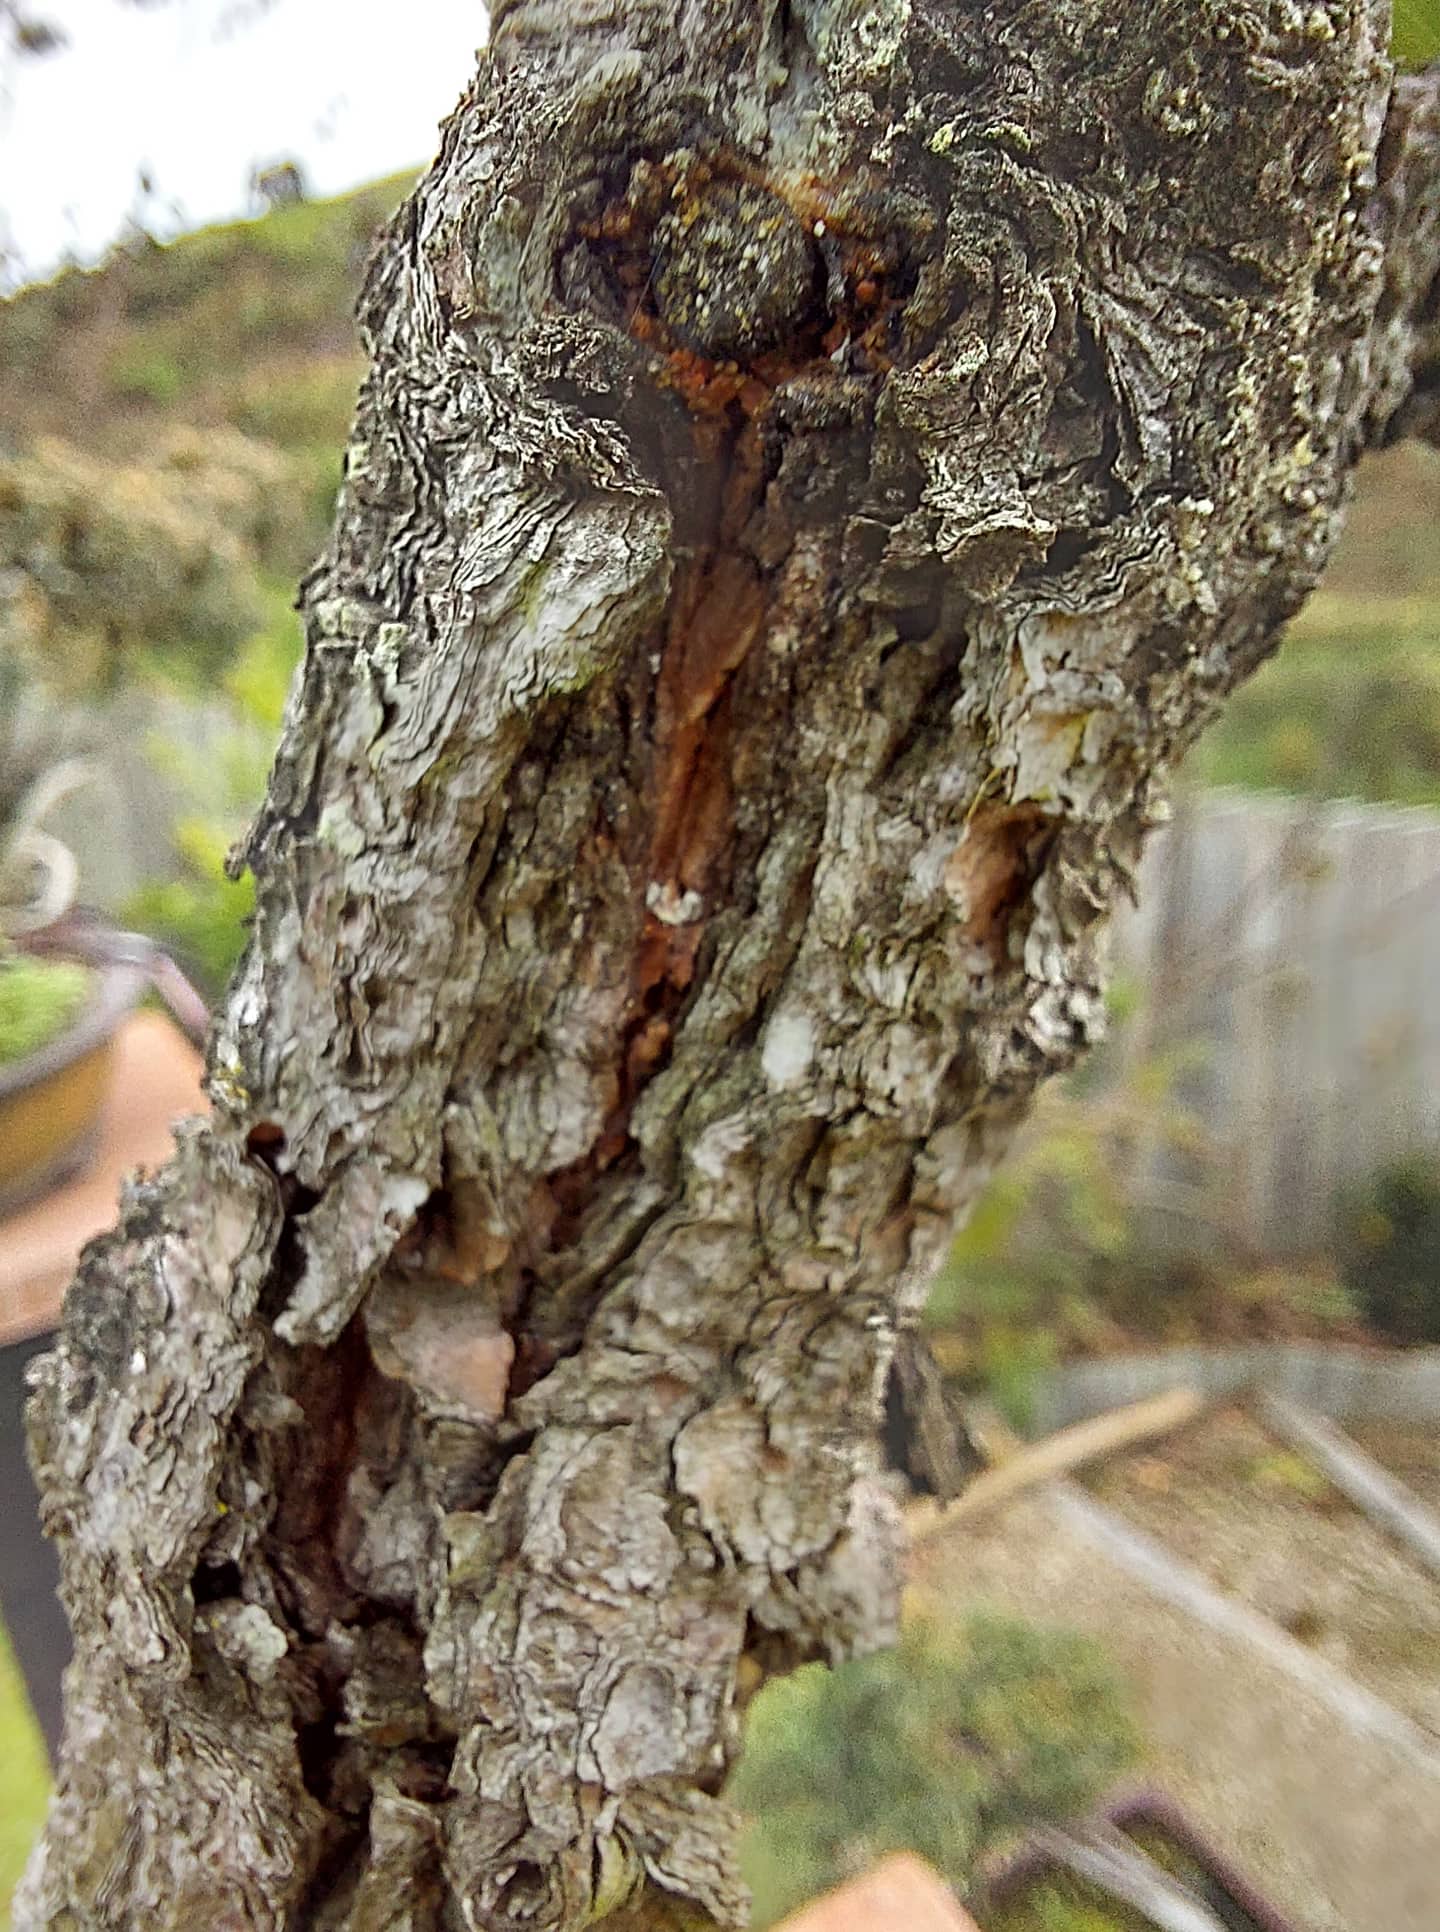
Another natural example illustrating this concept, is the changing nature of the art work. The colour changes due to seasonal changes, the appearance of flowers and fruit, and then these disappearing again. It is seen in deciduous trees through being cloaked in leaves during the warmer months and then being bare during the colder months. Development of bark (craggy, flaky), fissures, Jin, Shari and Uro are all examples of natural imperfections that adds to the aesthetic of the tree, showing the beauty through these imperfections, making it perfect.
The paragraph above mentioned things that can occur naturally and some of those and others can be done by human hand. The artist can purposefully create some imperfections in line with the characteristic of the tree to add beauty through these imperfections. Here we are thinking about jin, shari and uro, but then there is also the way in which the tree is displayed. Is the position in the pot off-set or in the middle, the style of the tree plays a leading part in this. Yes, we try to match the style of the tree with the pot, size, shape and colour, but is is very rare to get all of these elements to align perfectly. On top of that you will always have different opinions on shapes, size, colour of pots as well as the general flow of the tree in relation to the pot. We try to provide one picture, one whole, but on closer inspection, the “flaws” will be there. Are they flaws, no, they are imperfections, all adding up to the complete picture being perfect. And then the tree grows ……!
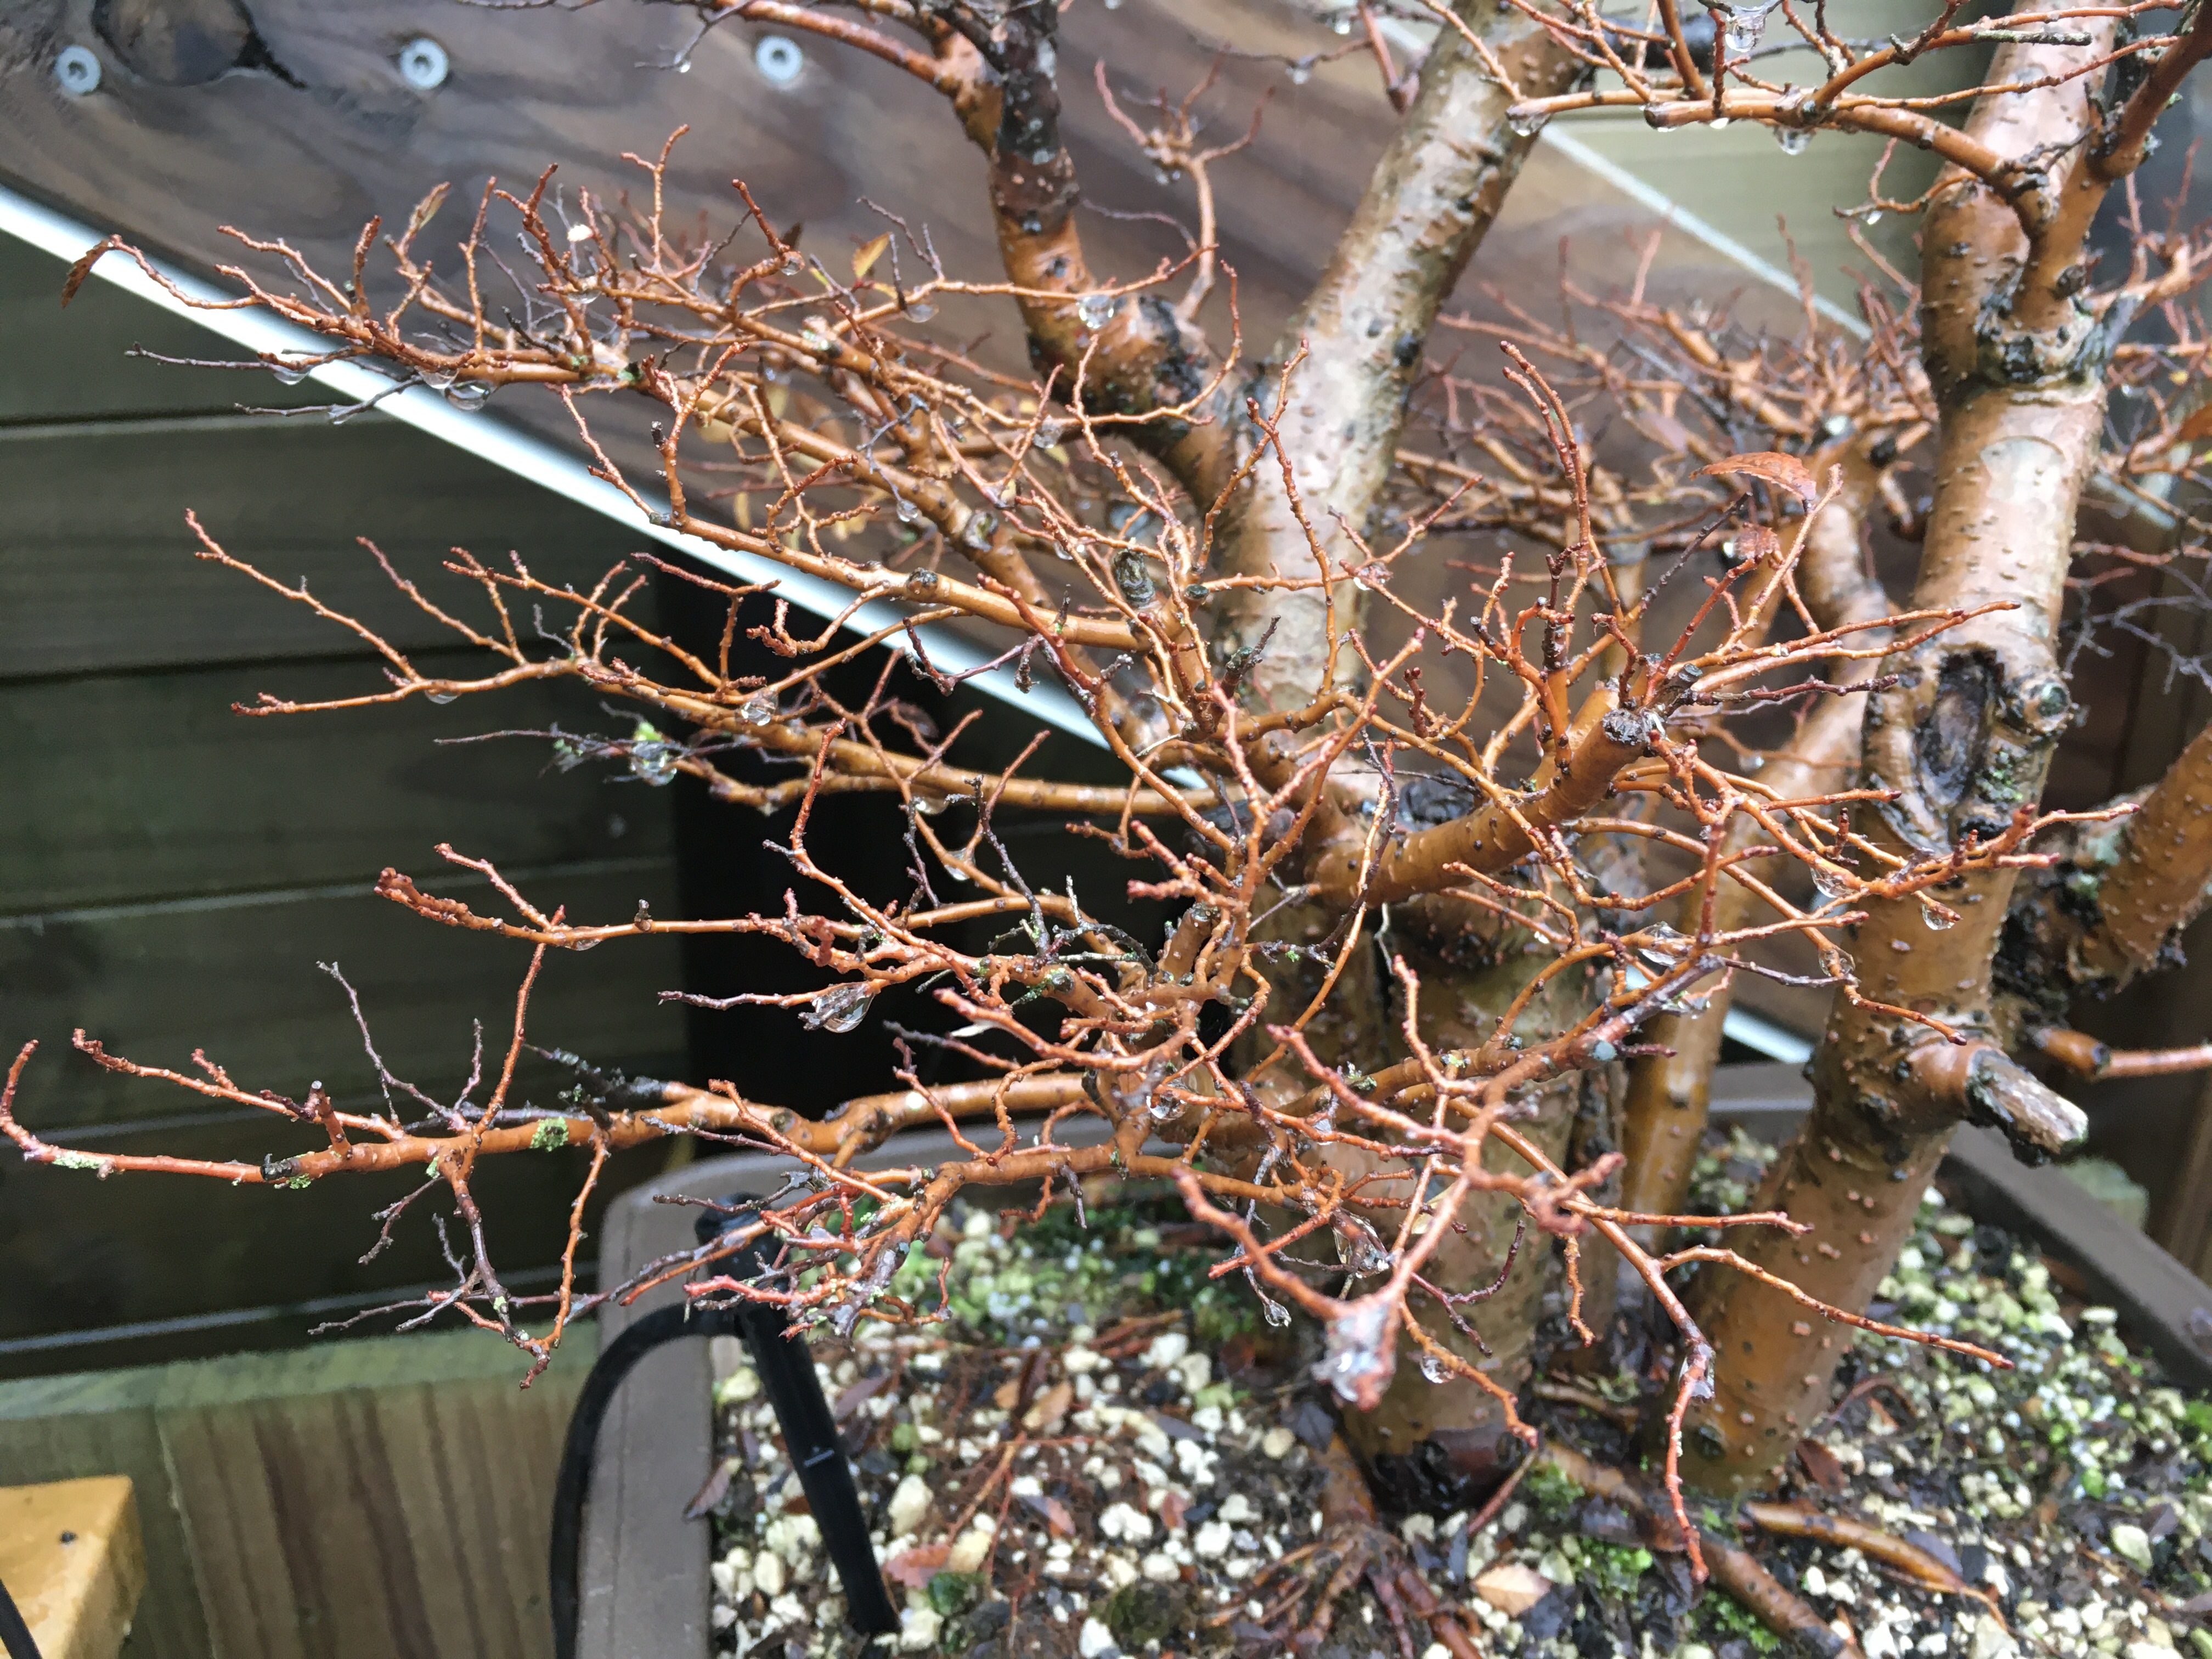
Winter provides good opportunities to do structural work on deciduous Bonsai trees. Sap flow is low, no leaves means you can see what you are doing and wiring can set branches before Spring growth starts.
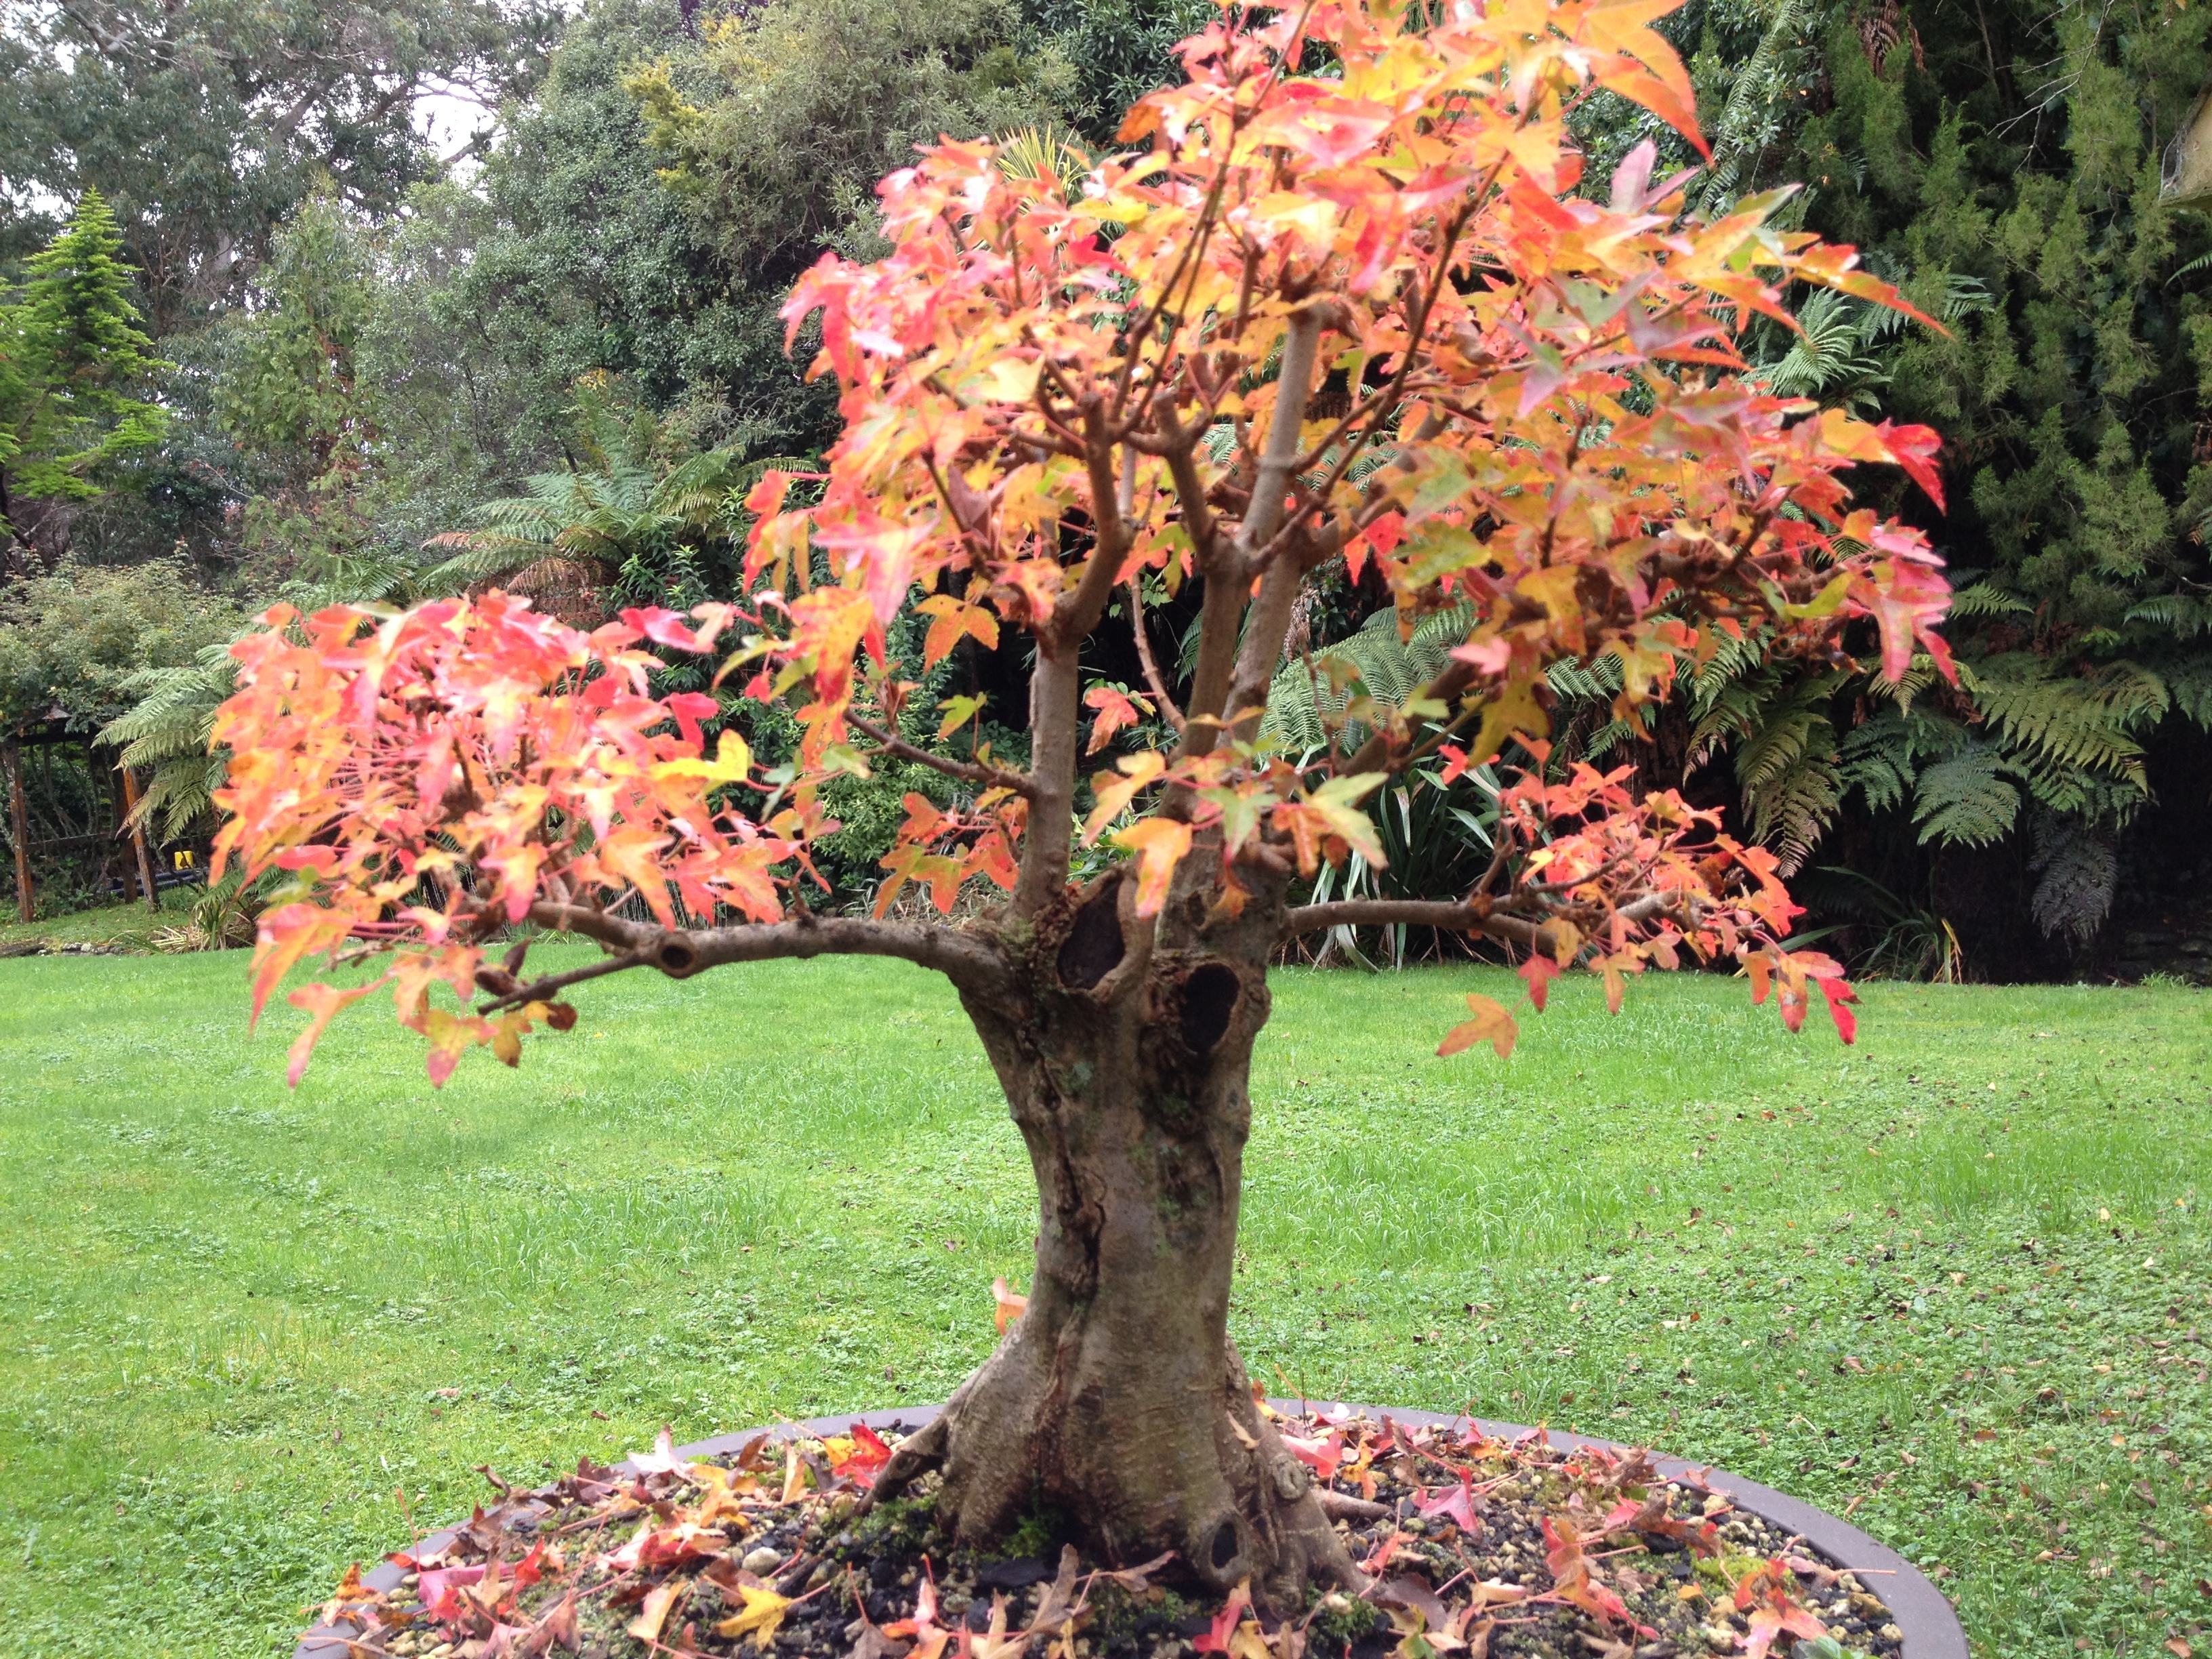
The tree in all its Winter glory.
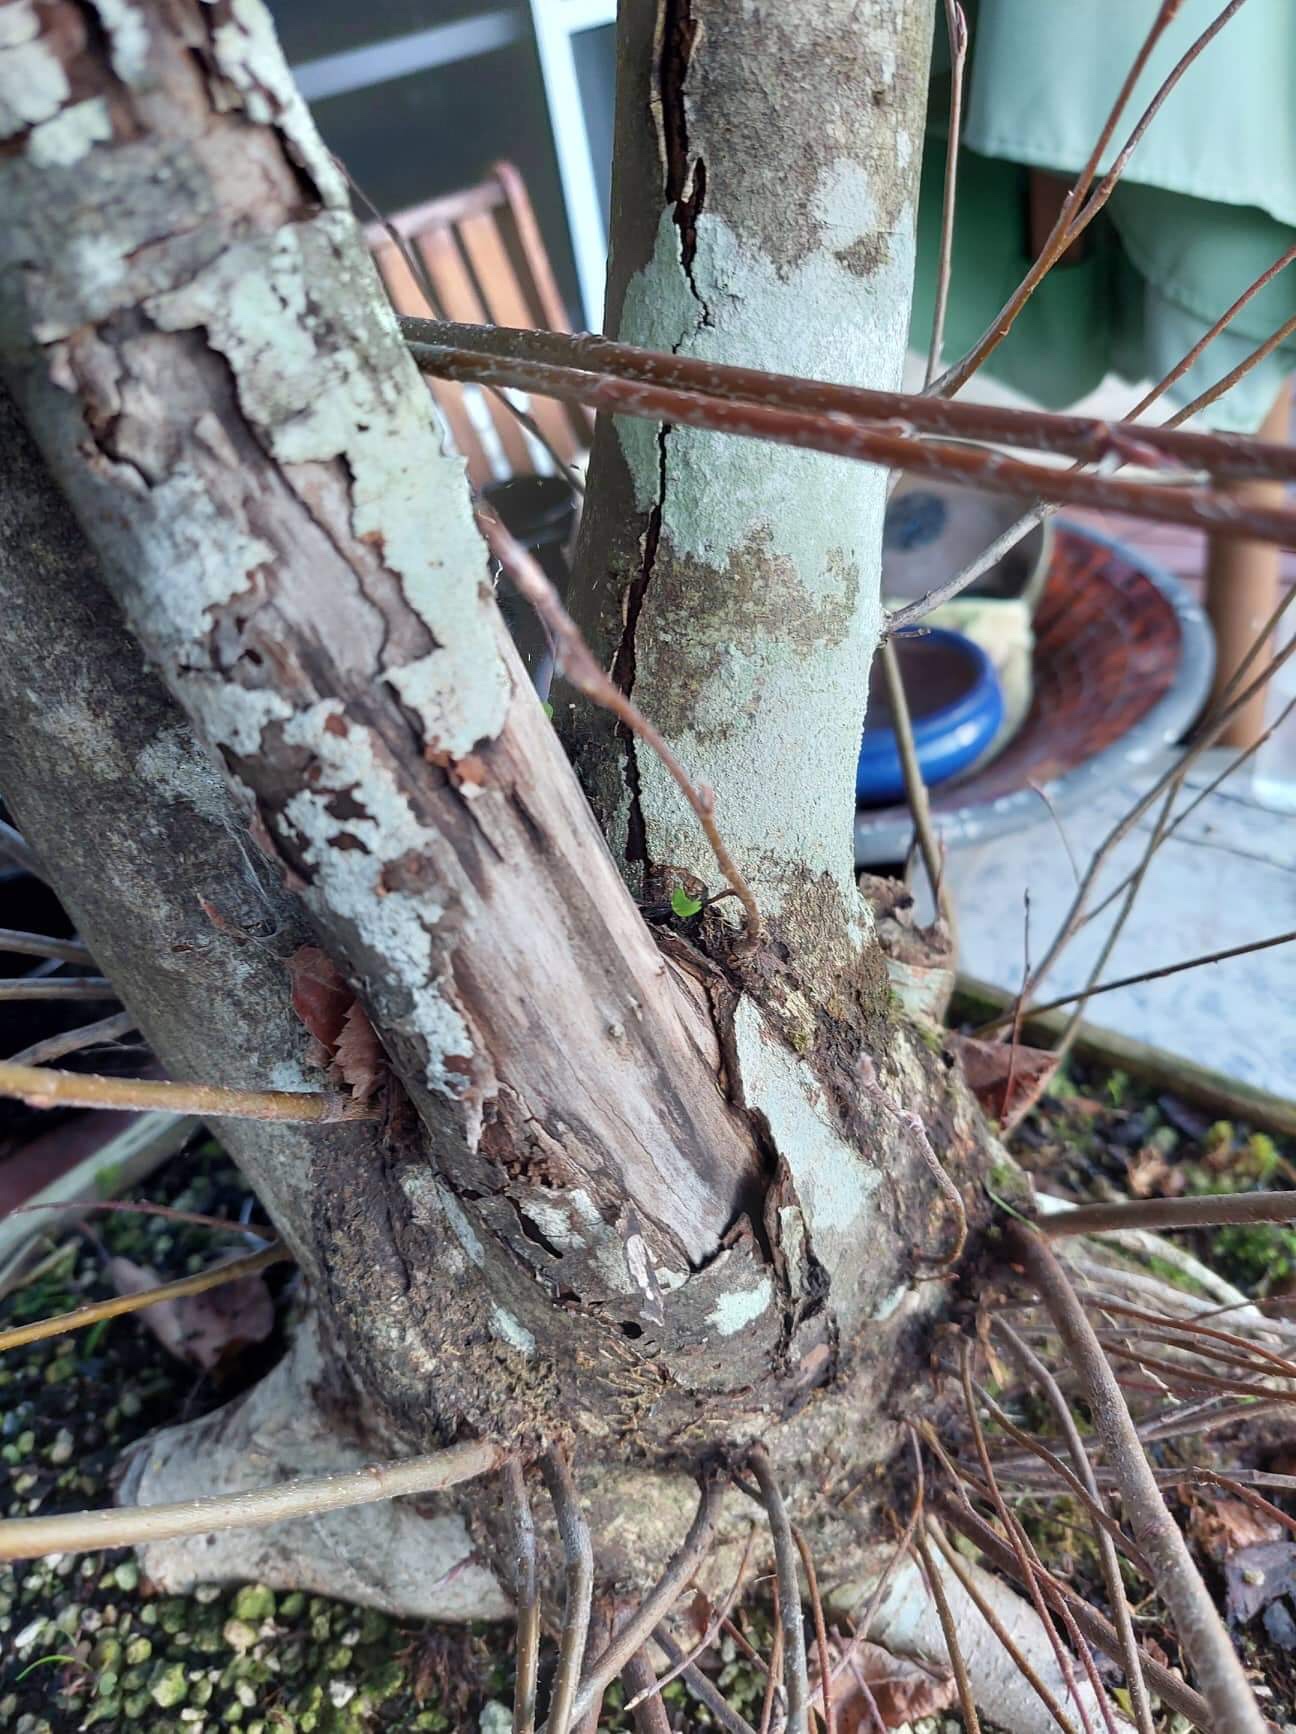
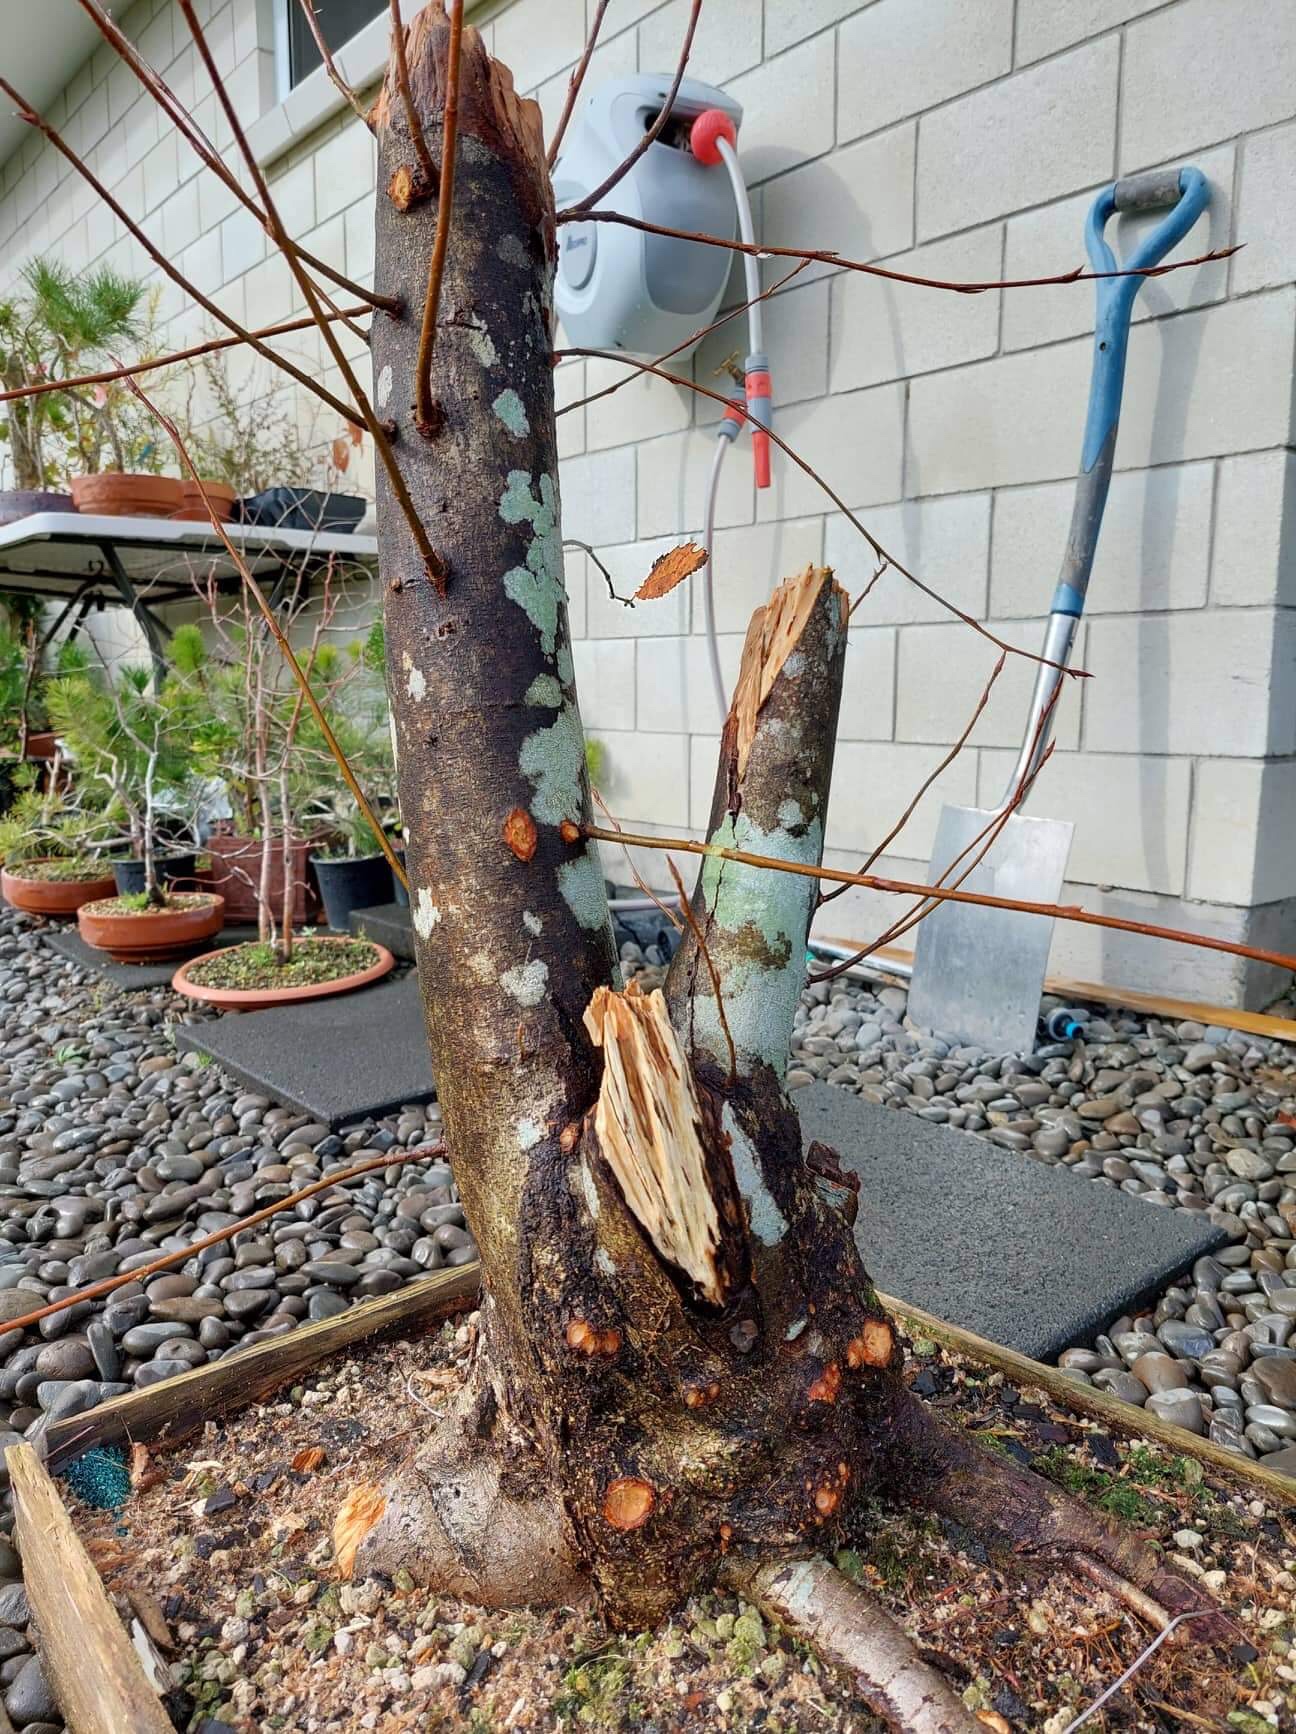
This Cherry tree was collected about a year ago and was just a trunk, in this case a triple trunk at collection. The original tree was about four metres high and in a forrest which means it was quite lanky with no branches towards the bottom. One year later and it has put on a lot of new growth and the fine root development is spectacular.
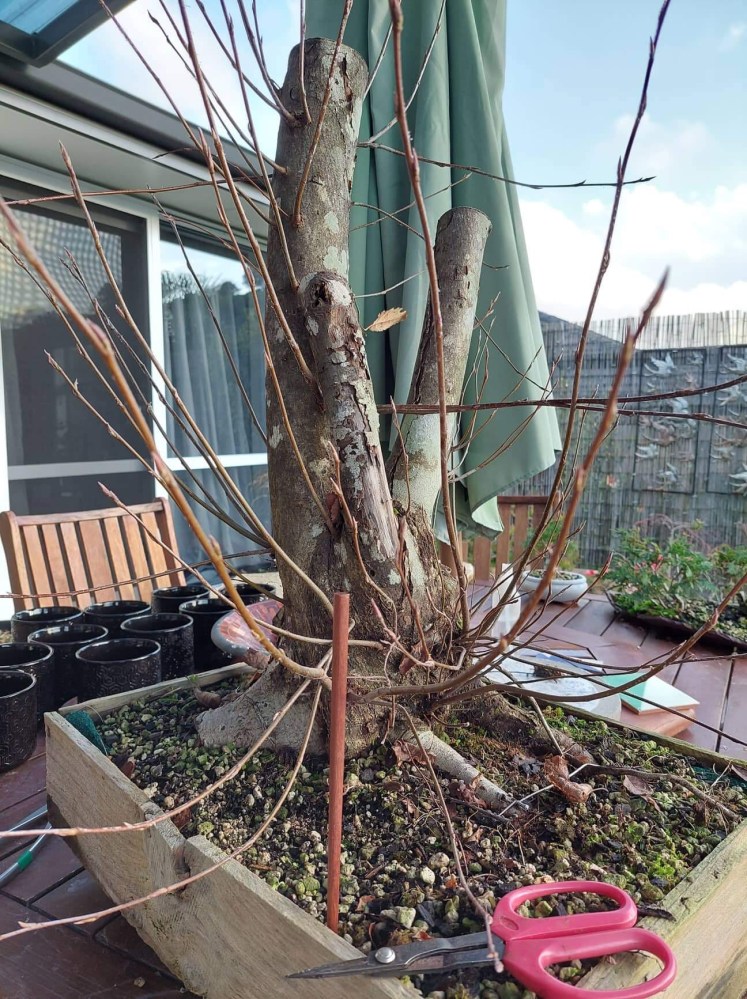
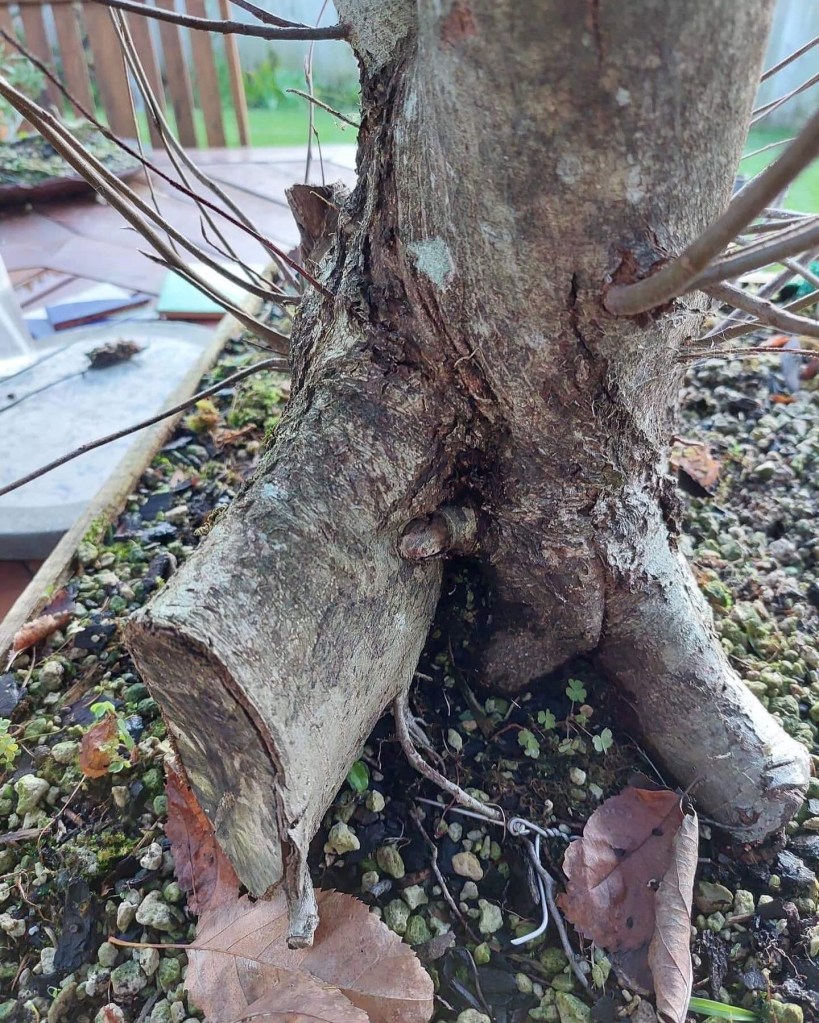
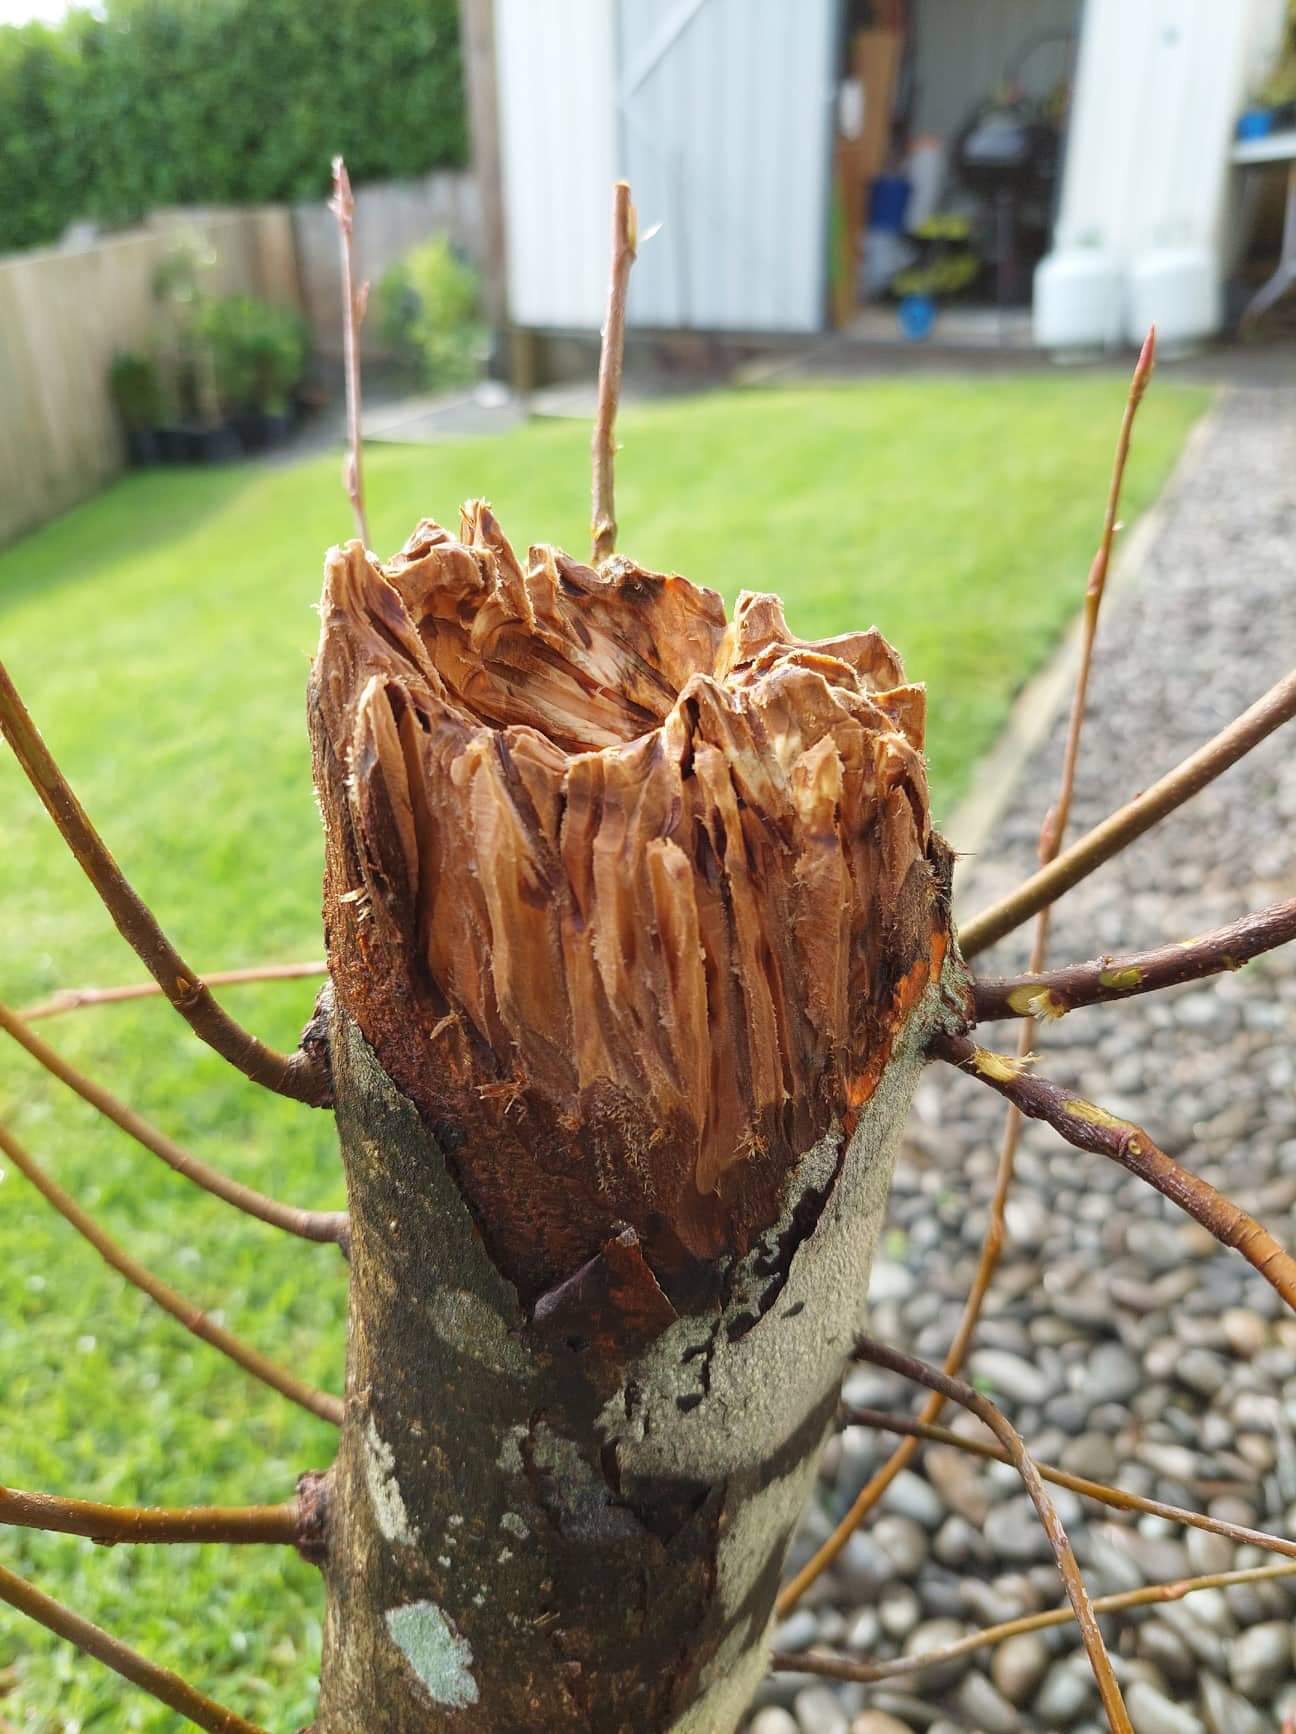
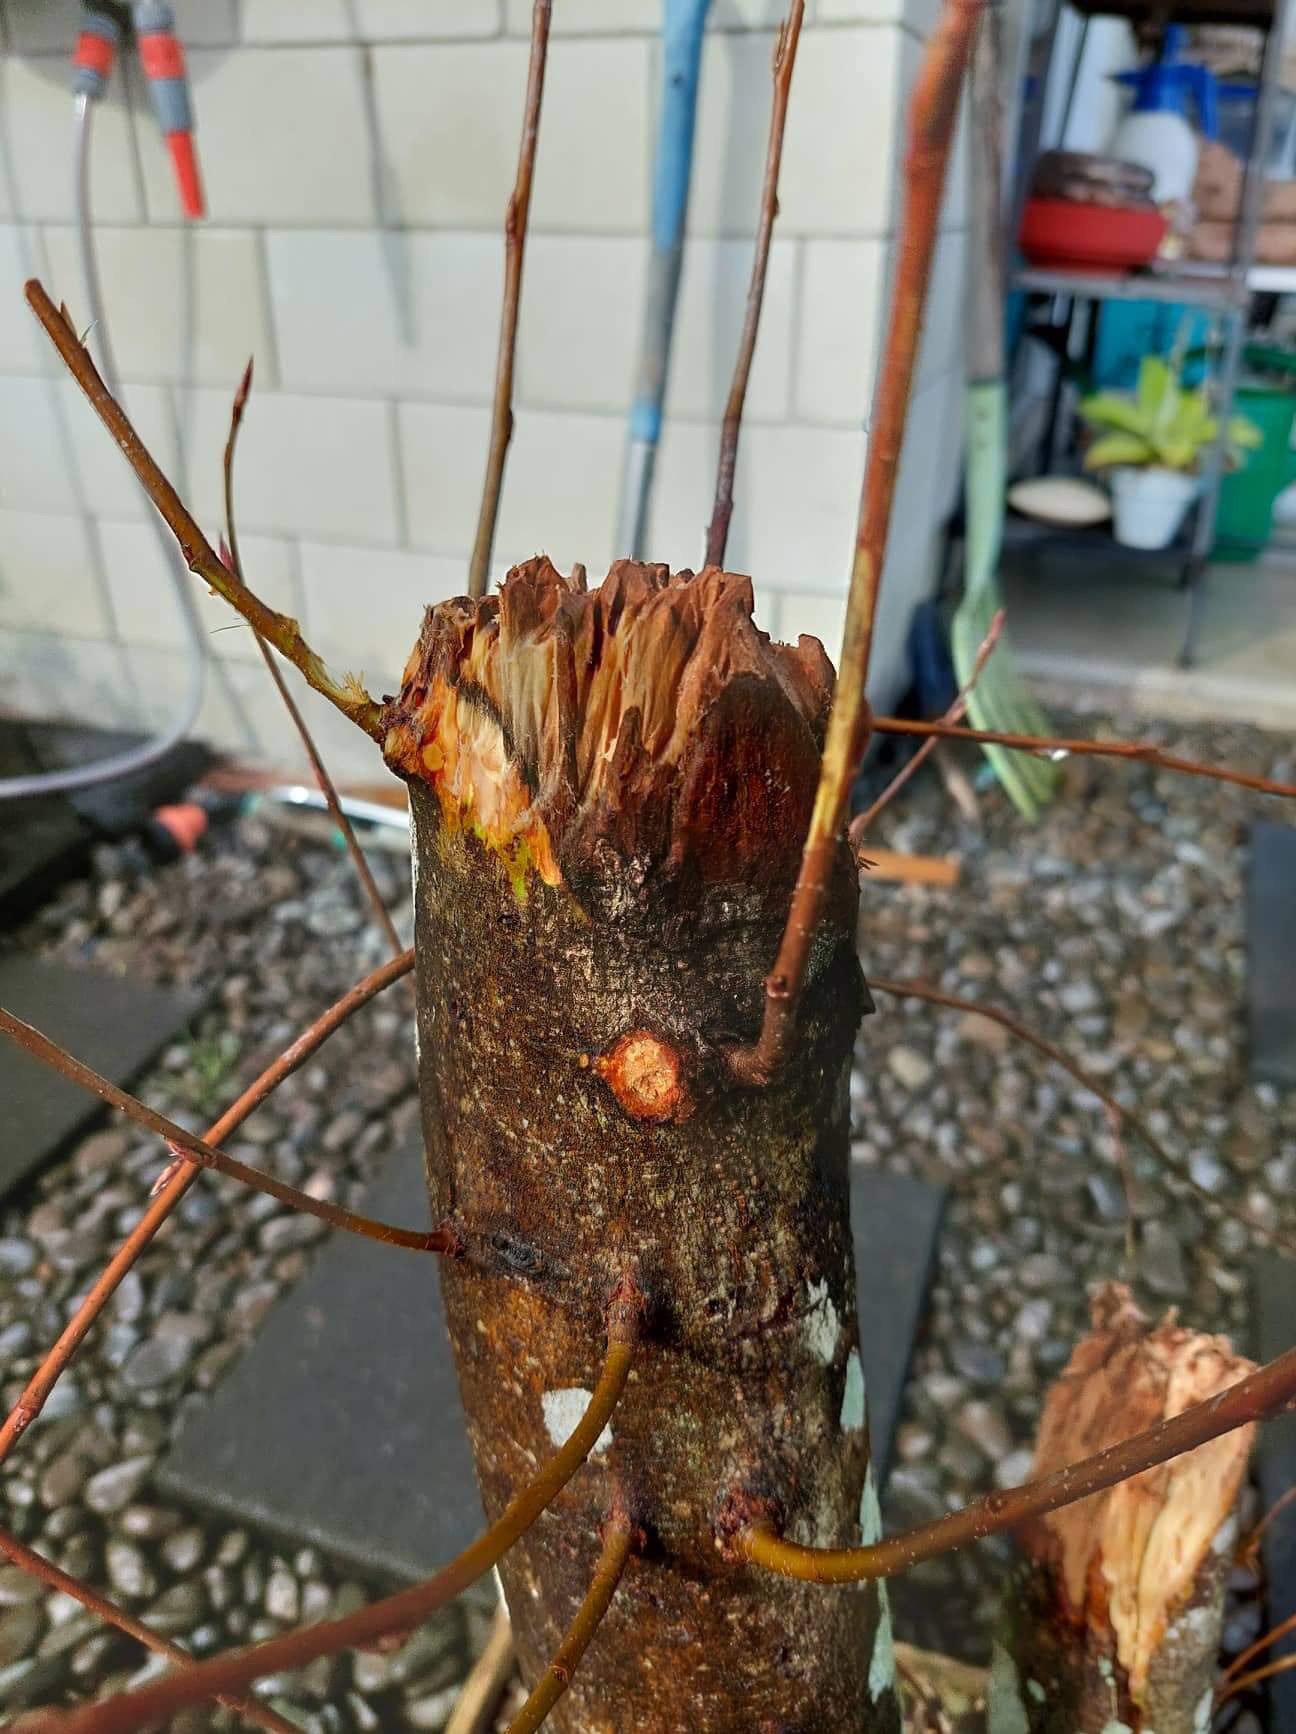
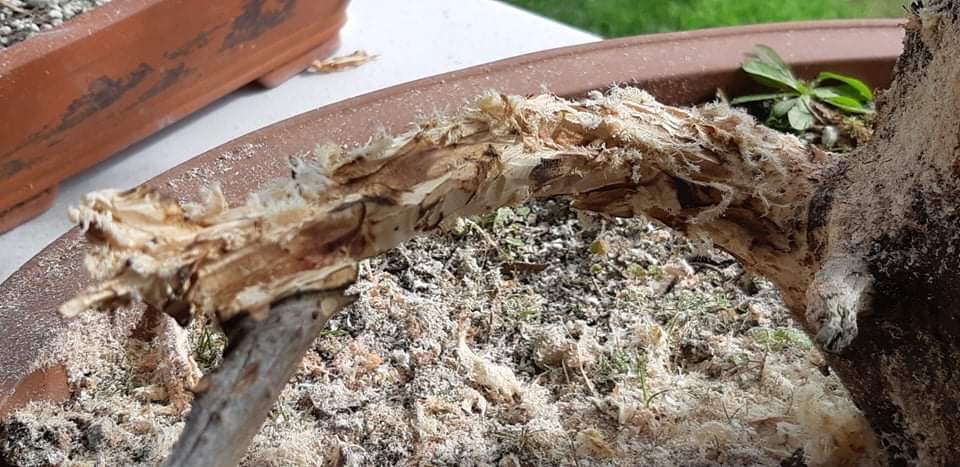
It has three quite large scars on the end of each trunk and then also a very big one on a chopped root. The middle trunk is dead and has been at collection already. This trunk was rotten and easy to just break to shorten it. As the root scar was going to be large, it was decided to have that at the back.
The large root had to be removed.
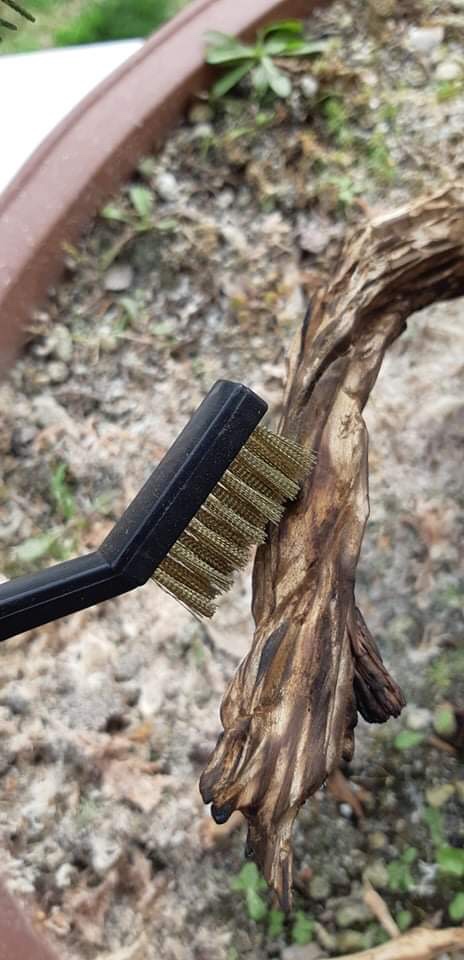
Once the front was established, extra branches were removed and a few at the top were shortened. All branches crossing the main trunks or too low down on the trunks were removed. The same happened where two new branches grew from the same place or they were just too close to each other. A few branches were in a 50/50 situation and these were left for now to be decided on later. Always start by removing large parts first. In this case it was mainly the root which was removed with a reciprocal saw and then the larger bit on the die grinder was used to set the first grooves by also creating some taper. This was then followed up by ever decreasing sizes of bits and once everything was carved, a wire brush and then a nylon brush was used to clean and polish the carvings. By polish I mean brushing vigorously to remove fine threads and fibres left over from the carving. I usually use a blow torch to help with this action, but in this case it was decided to not use the torch.
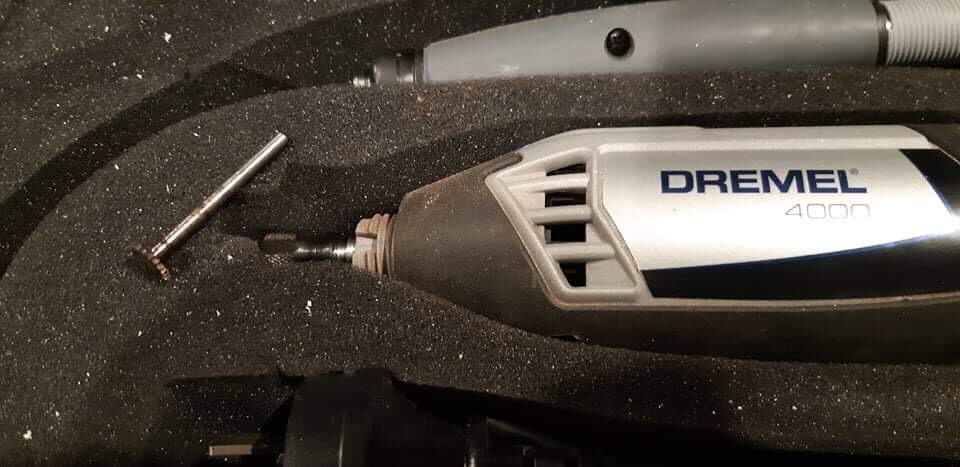
Once this phase was completed, the carving started. This was a three hour operation using different sized carving bits with both a Dremel 4000 as well as a trusty old die grinder.
The root carving.The main branch carving.The short branch carving.The dead branch carving.
The last step was now to apply wire and set the branches. A few more branches were removed and it was also decided to plant the tree on an angle leaning forward a bit more once Spring sets in. This will be a naturalistic looking tree with a large and rounded top with the shorter trunk carrying the lower branches on the left hand side. There are still a couple of branches that will probably be removed, but that will come later depending on further development. An example of this are the two branches that looks as if they are coming of the front of the main trunk about a third from the top.
Now it will rest and as soon as the buds swell a fertilisation program will start and a sharp eye be kept on the wire as it will cut in quickly as the tree grows. Watch this space for updates.
Branches wired and set.Video of tree after after carving.
Subscribing to this blog will ensure you see the progress of this tree over the years to come.
The Merriam-Webster dictionary defines Texture as the visual or tactile surface characteristics and appearance of something. Bonsai is a very visual art form and therefore texture does play a vital part, not just in the individual parts of the Bonsai picture, but the whole picture as a whole. There are already so many things that play a role in the overall aesthetic display and look of a Bonsai tree, that to bring out one specific aspect, might be one step too far for some. However, we will break it down in the different parts and as you develop on your Bonsai journey, more of these features can be combined. Each individual aspect will make reference to its place as part of the larger whole.
Pots or containers
These come in various sizes, colours, shapes and also textures. There are some generalisations around like conifers do not necessarily go into glazed pots, but only unglazed pots, and then also that the pot colour should either match the flower colour or be of a contrasting colour. Let’s for the sake of this article, focus on texture. Needless to say is that a very refined tree, with a more feminine appearance and feel, will look odd in a rustic, unglazed pot. There is also a saying that the pot is like the frame of the picture and should enhance the visual appearance of the tree. It is therefore logical to say that smooth pots, usually glazed, is better off with trees which have smooth bark or a smooth leaf surface. A very rustic old Pine tree will probably look better in a more rustic container that could even have the texture of a rock or similar to the craggy old bark. The word generalisation has already been used here and it is common place to bend and break “rules” if the appearance of the whole visual picture will be enhanced in so doing. In short, as the pot or container is such an important part of the final look, it will pay to think about texture as well in selecting the best pot for the tree. It is definitely more than just size, colour, shape, depth, glaze, texture matters.
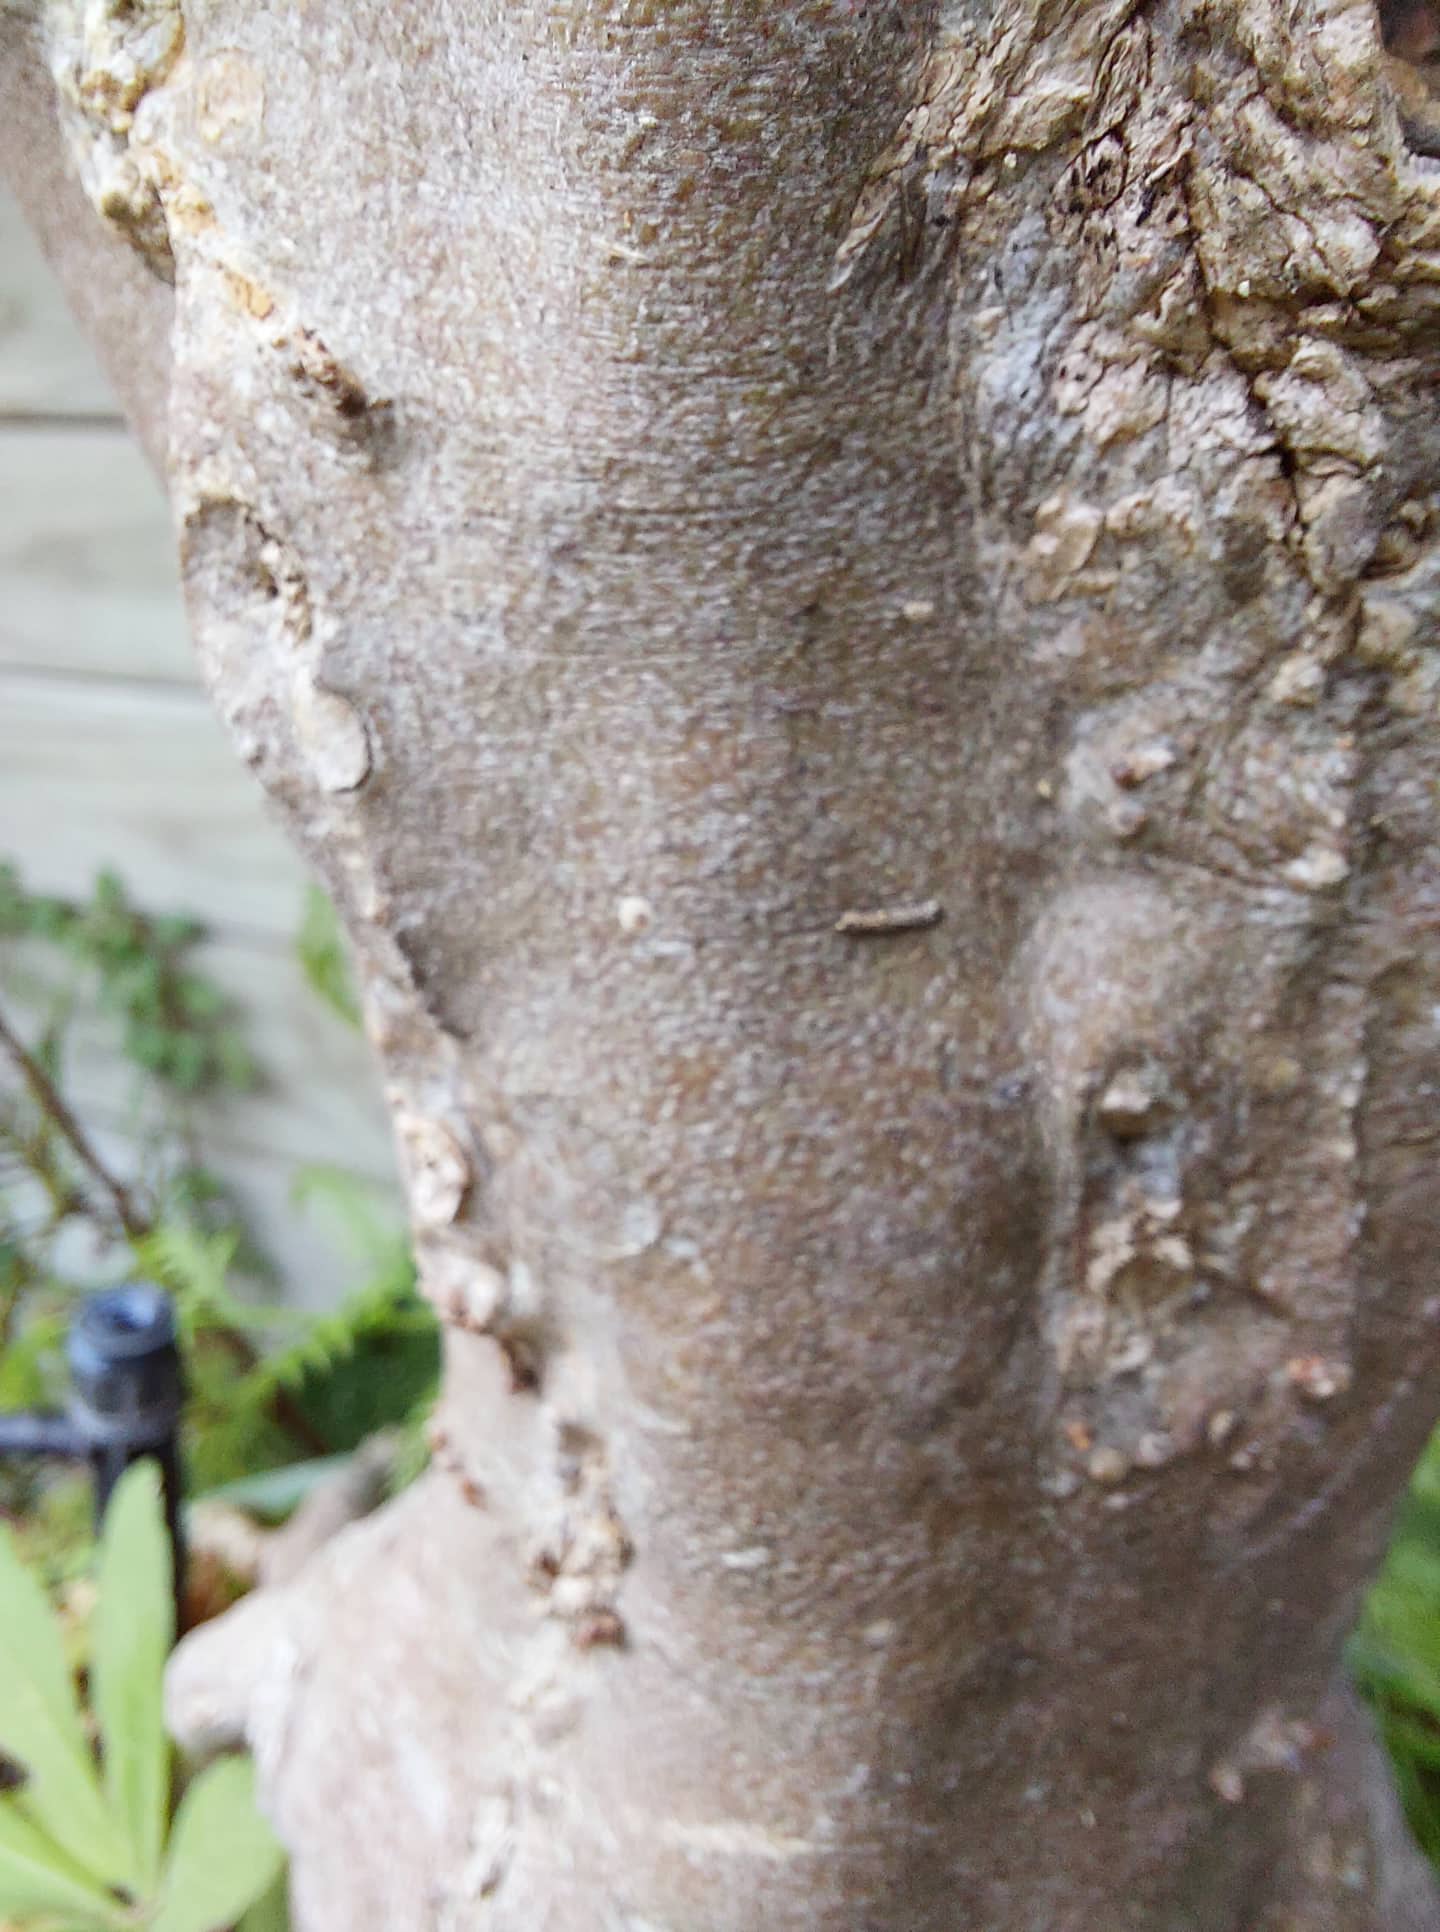
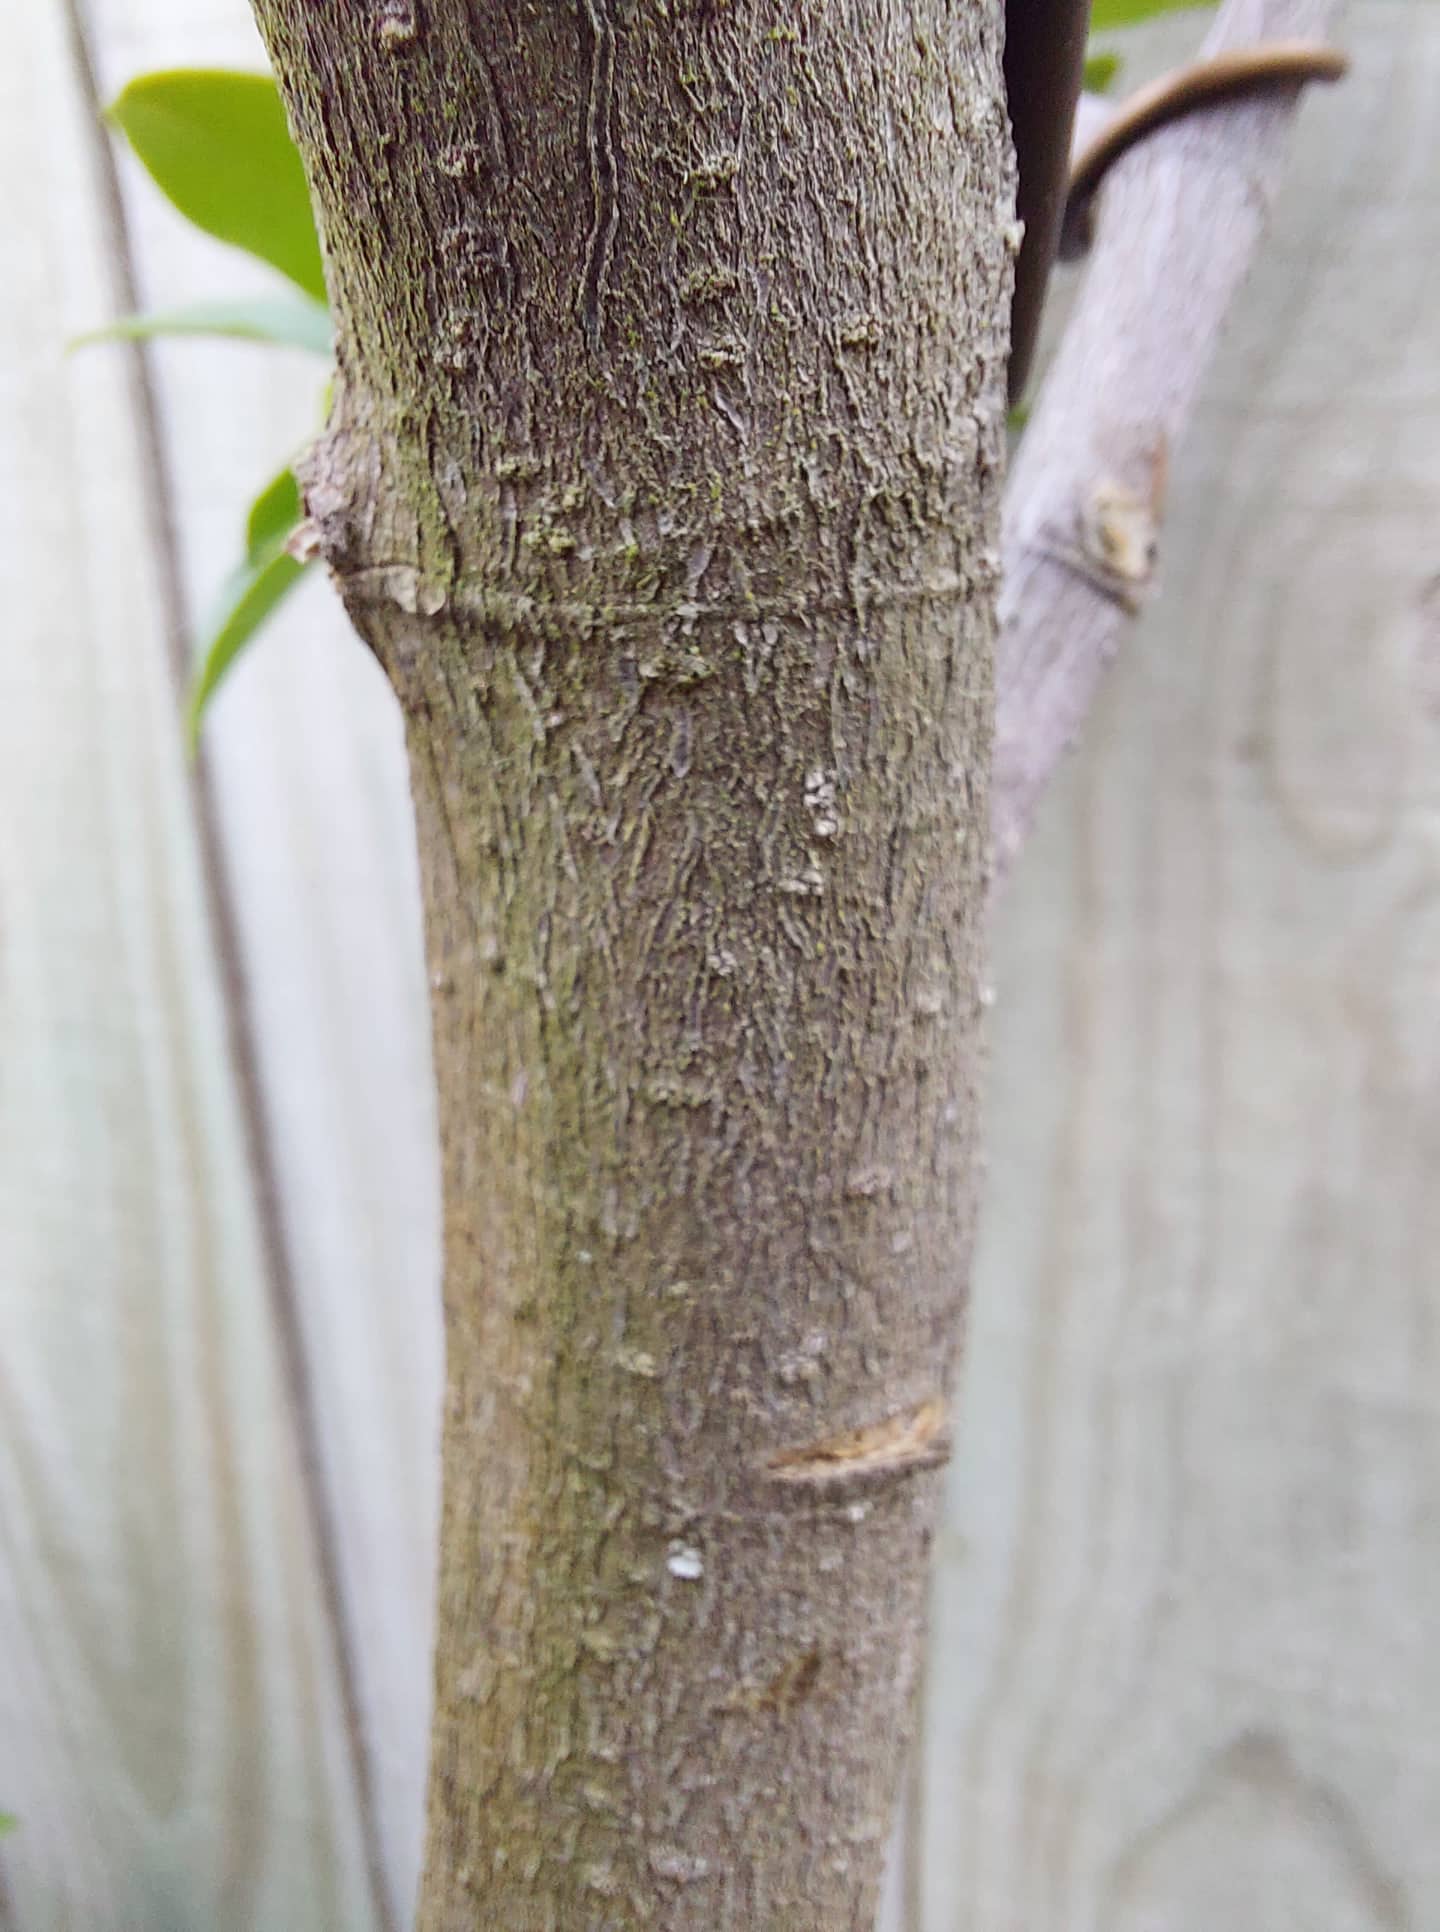
Bark
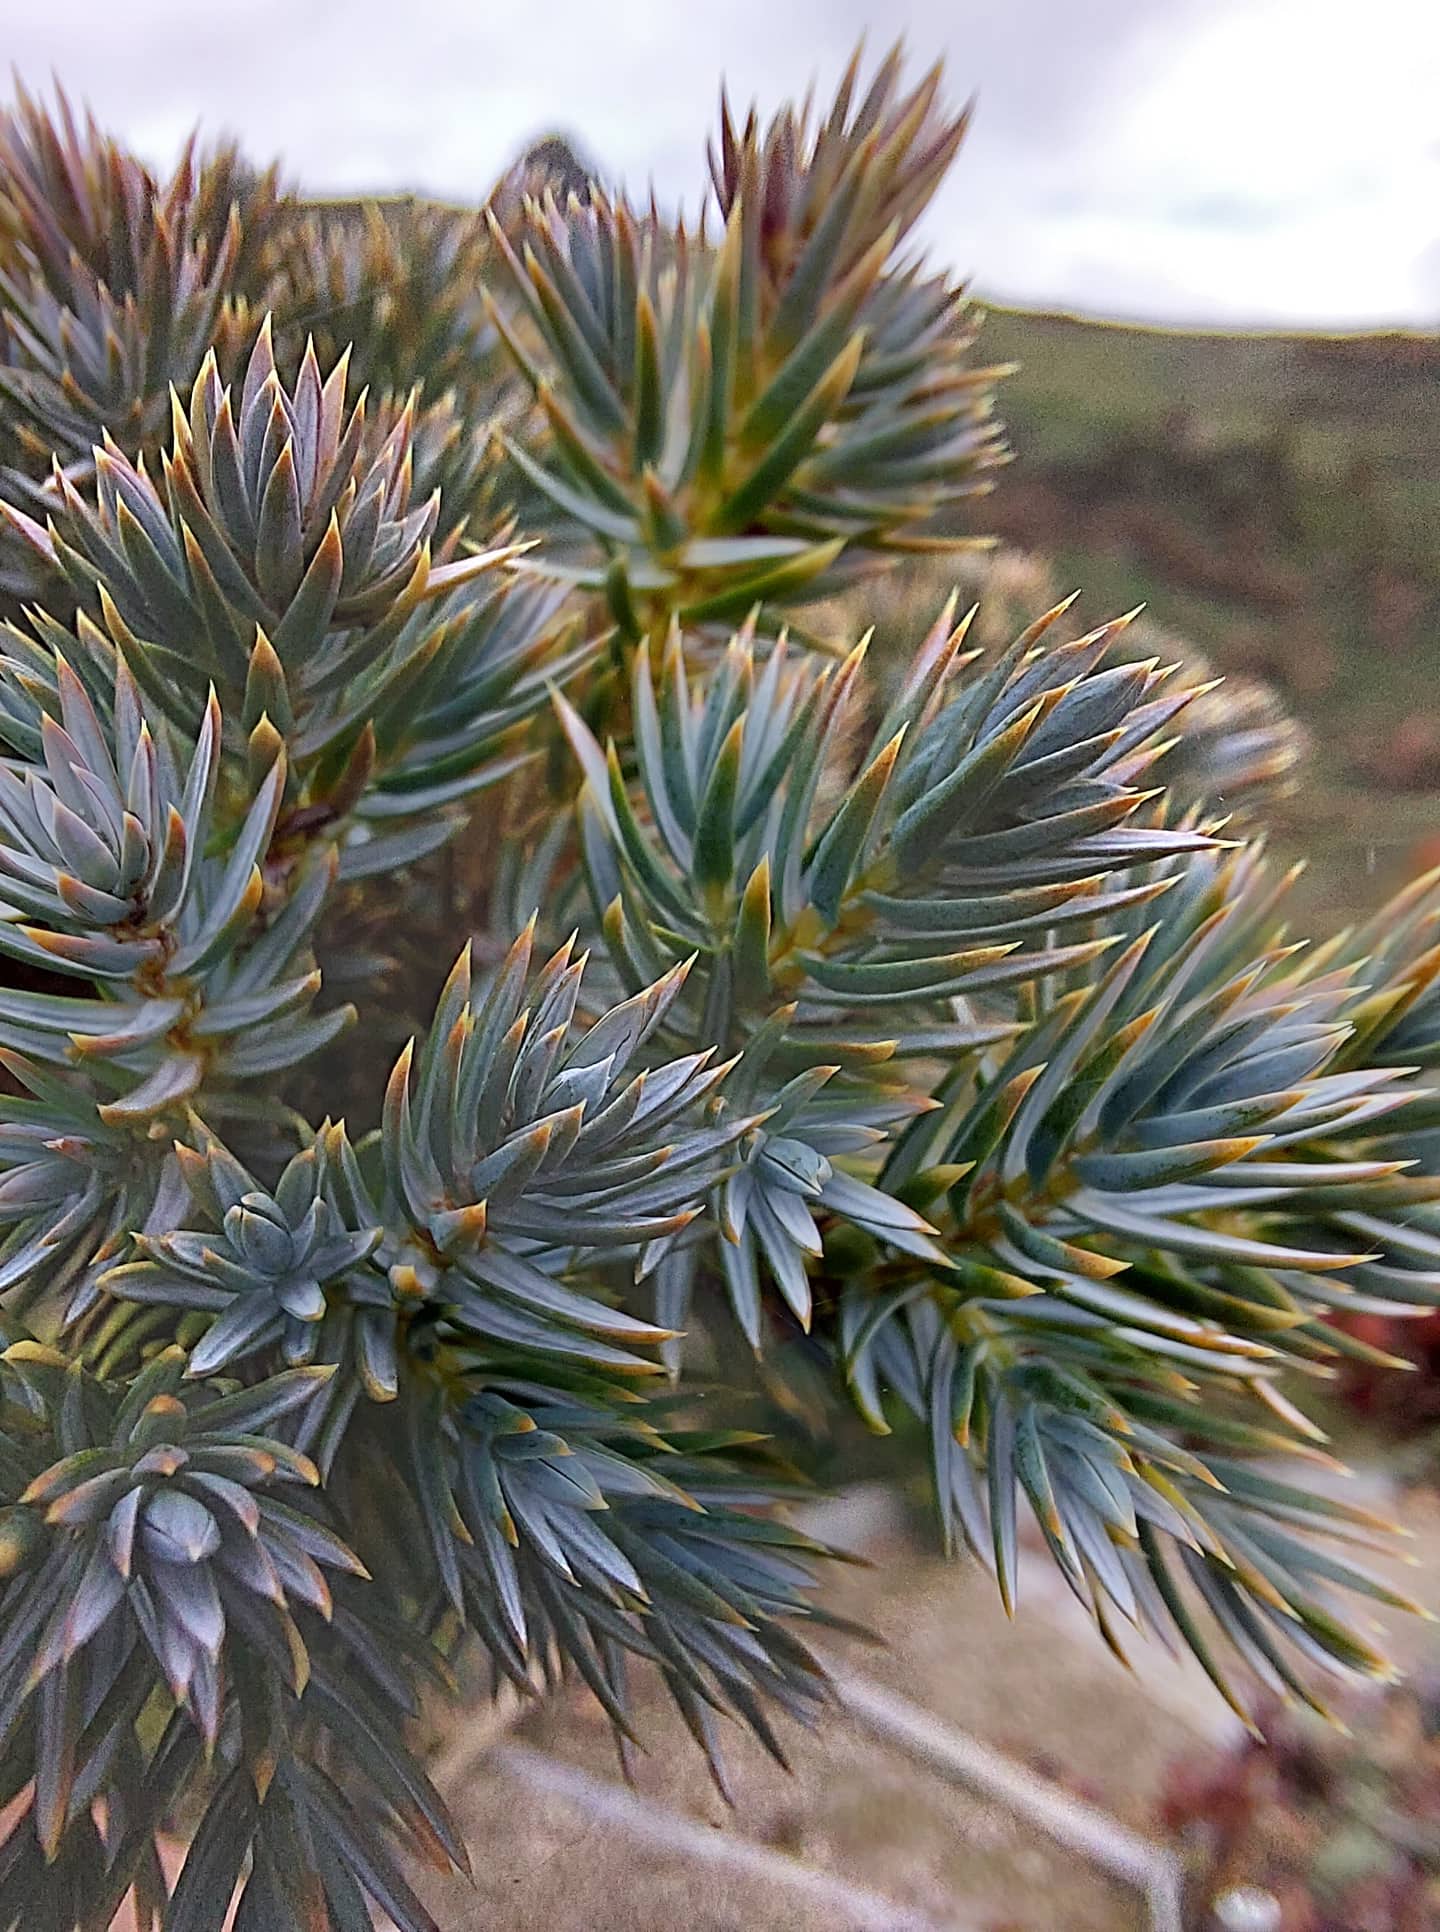
From a visual perspective, and especially when the bark is well-developed and stretches down to the soil surface, it is one of the most striking aspects of a tree from a textural perspective. Bark comes in many forms, shapes, colours, sizes and thickness. The same can be said for texture. The two main characteristics will be either smooth or rough with anything in-between. Then there is also the fact that some trees will form bark plates and others could have flaky bark. All of this is determined by the species and is a natural characteristic that is genetically determined. All the Bonsai artist can really do here is to ensure that the bark is protected or removed if it needs to be. The latter refers to some Junipers where the flaky bark is removed to show the rich contrasting reddish live veins off against the stark white of deadwood. Bark is a sign of age and therefore a very important aspect of increasing the aged look of the tree.
Jin, Shari and Uro
This goes hand in hand with Bark and influences textural aesthetics of the tree. This also can be used to enhance aging characteristics due to the textural differences between these features and the rest of the trunk, stems or bark.
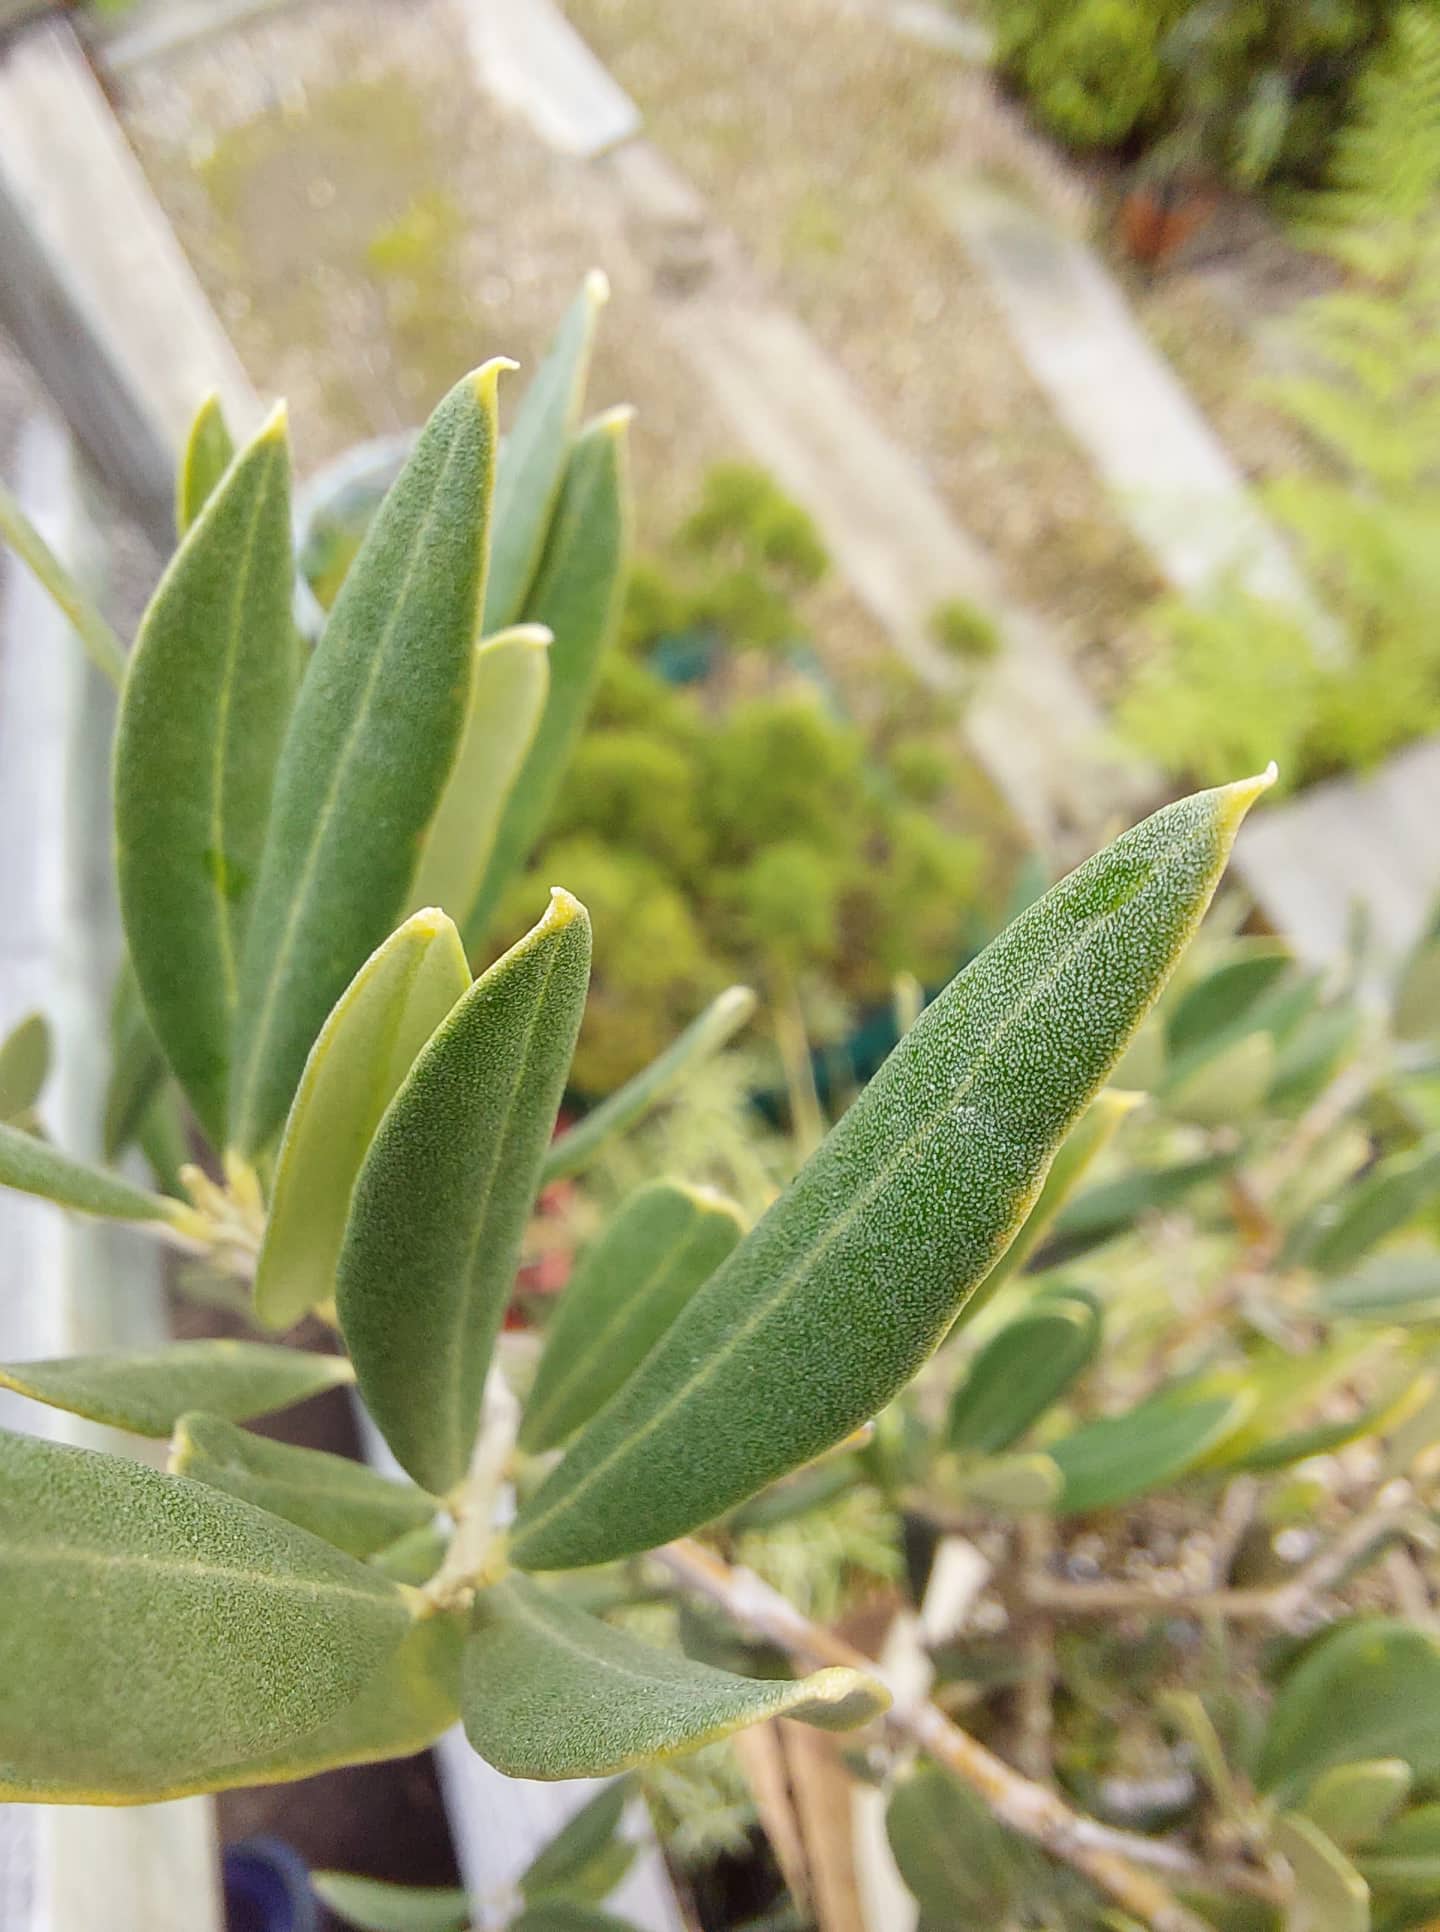
Foliage
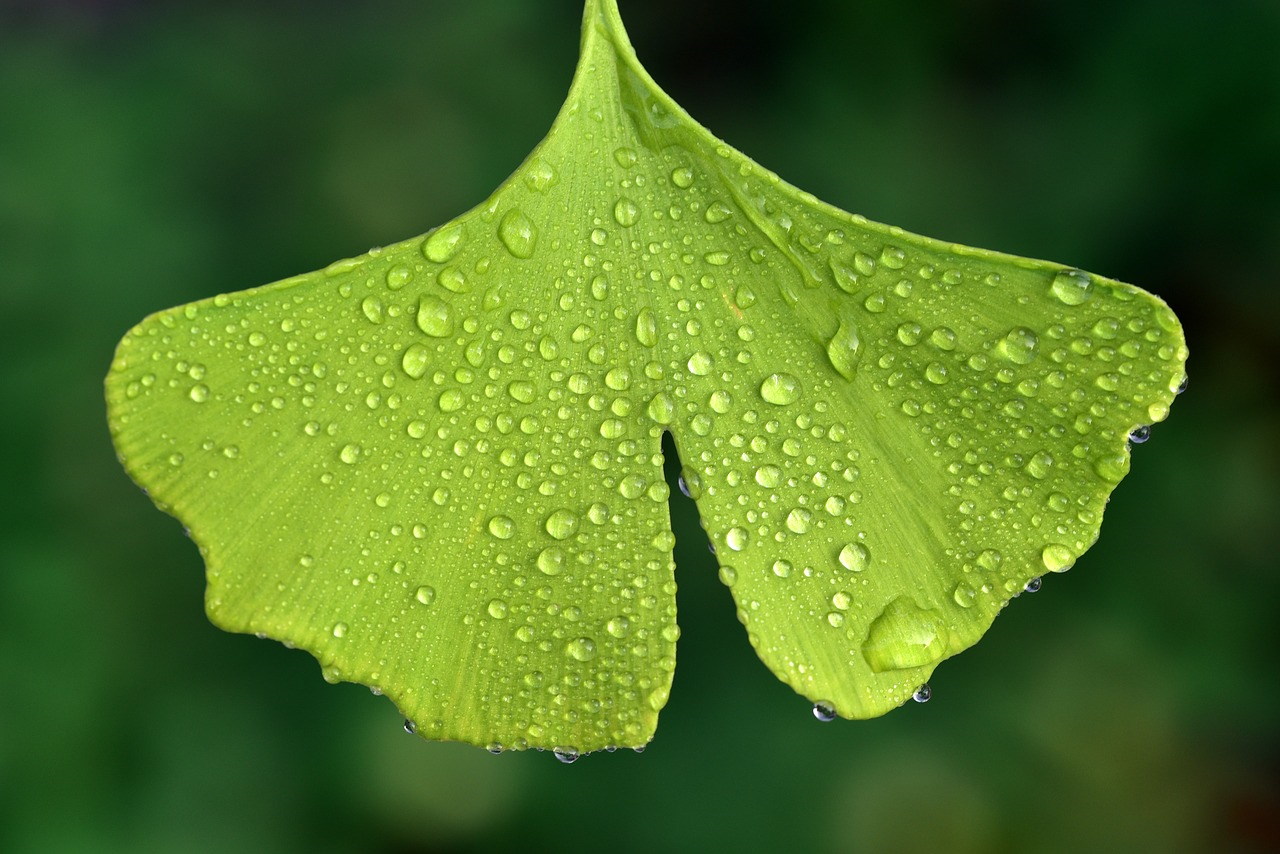
When it comes to leaves or needles, the usual visual impacts are those of shape, colour and size. There are textural aspects when it comes to foliage that are important when it comes to overall appearance of the art work. Things like, softness, hardness, smoothness and then also in a lot of broadleaves, like Rhododendron and some Magnolia, the two leaf surfaces showing completely different textures on the two leaf sides. We do find some leaves with a smooth top (adaxial side) and the underside (abaxial side), could be hairy. In Bonsai, it is rare to see the lower side of leaves, but if there is a unique difference in texture, it might pay to find ways to show it off. That is where creativity can trump practicality or “rules”. We all know about the spectacular autumn colour changes we see in some deciduous trees, but it is good to note that when the colour changes happen, there is at times also a textural change at the same time.
Other aspects
Flowers: The more striking aspects of flowers and fruit would be the colour, size and shape. It is worth noting that flowers have different textures, not just the whole flower, but also parts of the flower can be different.
Soil or surface cover: This refers to the upper layer of the soil that is visible in the pot or container. Texture here is important as well. The soil particles itself can form a visual pleasing aestehtic, but it is more common to cover this with something like moss. Just within different moss varieties a whole lot of different textures can be found.
Stands: Bonsai are usually displayed on a stand and traditionally these are made from wood. In modern displays it is not uncommon to see different materials being used. This could be steel, composites and even glass.
It all comes down to the aesthetic and the visual impact that will enhance the tree and texture is a force to be reckoned with when these decisions are made.
Let’s drop the cat in the middle of the pigeons by saying that most art forms have specific styles or movements that are easily recognisable through look, technique or application. This article is just one of many having a good go at describing different painting styles (https://indonesiadesign.com/story/major-art-painting-styles). These include styles like Realism, Impressionism, Expressionism and many others. The artist themselves can in a lot of cases be identified by just looking at their work. Bonsai does not have that and there the cat goes.
Painting Styles
How does this relate to Bonsai? Most Bonsai artists will be able to explain the difference between Bonsai and Penjing (see Zhao Qingquan’s work) and then there is also the nuggets of wisdom wanting to explain Niwaki as an art form, and we will rather stay away from saying too much about Topiary (just joking). Then there is also Kenji Kobayashi describing Keshiki Bonsai and many other attempts at identifying styles.
Penjing and Niwaki.
A book of great value is that of Charles Ceronio, Bonsai styles of the world (2015) in which he describes the structural styles of Bonsai design. What I am getting to here is to see if we can identify styles like it is done with paintings as mentioned in the first paragraph. There are attempts made by some artists to add to this knowledge and an example of this could be Walter Pall talking about the Naturalistic style. Is that even a thing? Taking a hedge trimmer to a Bonsai and giving it a name is probably not the best of attempts to give a style a name.
Pierneef style recognisable as from Africa.
It is quite clear that there are many easily recognisable trees or even collections of trees that can be attributed to specific Bonsai artists. Goshin would be a good example of this. I can also think of some of Masahiko Kimura’s trees as easily identifiable. Is that true for many of the current big or trendy names that we currently have in Bonsai? Can you pick a Bjorholm, a Noelanders, a Neil, a Pall out of a line up of trees?
Goshin and two of Kimura’s works.
Then there is also a debate going around on specific regional styles. Is their a European style or an American style? What we do see is that artists use native trees from specific areas and do a wonderful job with those trees, but at the end of the day, these trees still relate back to the basic design styles of Bonsai and not necessarily an artist or a region or a philosophical style. The one exception will be that of Literati. Is that the only design style that can be linked to a time period or a movement?
Literati.
Where to with this argument? Probably nowhere and does it really matter. We have the basic design styles in Bonsai and many derivatives from that, we have individual expression in each tree and if that is recognisable as the work from a specific artist, great. Do we need to link it to the “isms” that we find in other art forms? So far it has been restricted for Bonsai or maybe it is just case of it not being necessary for the Bonsai world. Or is it? Is this the missing bit for Bonsai to be recognised as a true art form? Maybe we can just enjoy Bonsai for what it is and not overcomplicate matters by trying to find its place in mainstream art forms. It could be that it is so far removed from other art forms that the vocabulary needed to describe it is very different. Maybe the vocabulary must still be worked out?
Whatever it is, it is art, a living art. It is an art form that humans use to express themselves within what nature provides to do so. It could be that it is too free to put in a box and put “ism” at the end of the name of the box.
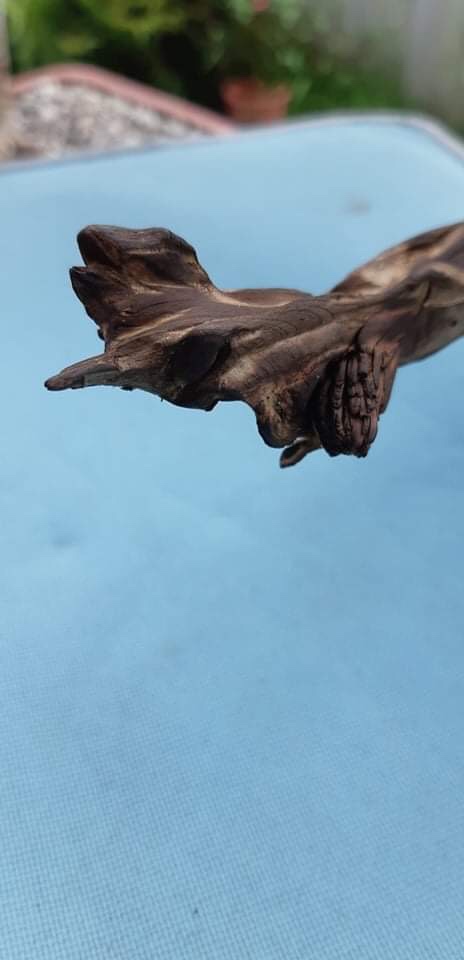
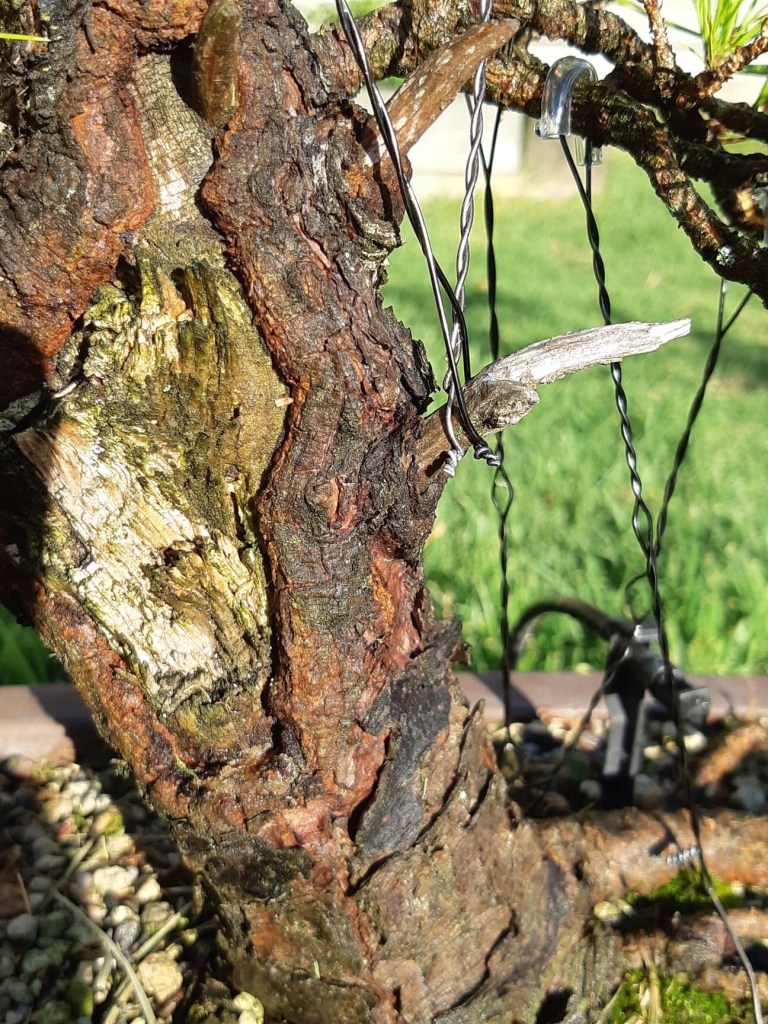
Carving is usually done to create or enhance jin, uro (holes), shari (stripped bark) or getting rid of areas where large branches were removed. In this case a large branch, about one inch thickness, had to be removed and it was decided to leave a 15cm piece of it and sculpt a jin (deadwood) out of it.
The tools.
I use a die grinder with a carving bit to remove material fast and to roughly shape the dead straight branch by making grooves in curves and alternating the depth of the grooves. Once this is done I burn the jin to get rid of wood fibres and then repeat the process with the trusted Dremel and a smaller carving bit.
The rough carving results.
Burn, baby burn.
As mentioned, burning the jin with a butane torch gets rid of the loose fibres, but it also helps to get rid of sharp edges and tool marks. After a heavy torching, the jin is brushed with a copper brush and then with a nylon brush. Sand paper can be used to smooth areas that needs it, but I find that the brushing works well on its own.
End result.
To preserve the newly carved jin, I wash the whole tree off and then let it dry and rest for a few days. Lime sulphur or a wood hardener can then be applied. For a darker finish, mix some ash (burnt paper) in water and paint on. Some of the grooves can also be painted by making use of black ink. All fluids should be diluted. Lime sulphur is usually diluted with water 50/50%.
Safety aspects:
Wear safety glasses during the carving phase.
Use gloves when using the power tools.
When using the torch, protect the rest of the tree from the flame by using aluminium foil or a wet cloth around foliage and nearby parts.
Please like and subscribe to this blog to be notified when new posts are done. Thank you for the support and feel free to shore this post as well as the blog site.
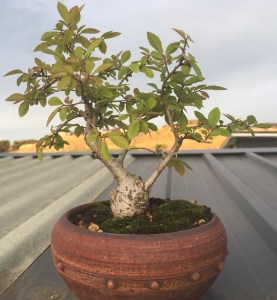
In November 2015, the very early days of this blog site, I wrote about Metrosideros excelsa or Pohutukawa as Bonsai and included a few photos of these magnificent trees in nature. This tree is also known as the New Zealand Christmas tree. The link to that blog post is here.
For this blog post I will style a Pohutukawa as a Bonsai. As can be seen from the photos in the linked post, these trees very naturally present as multi trunks with great root structures and the very prominent aerial roots. it is this root structure and especially the aerial roots that make these trees ideal for root over rock designs. This tree will not be a full root over rock, but a rock will be placed next to it with roots growing over the rock.
Metrosideros excelsa / Pohutukawa
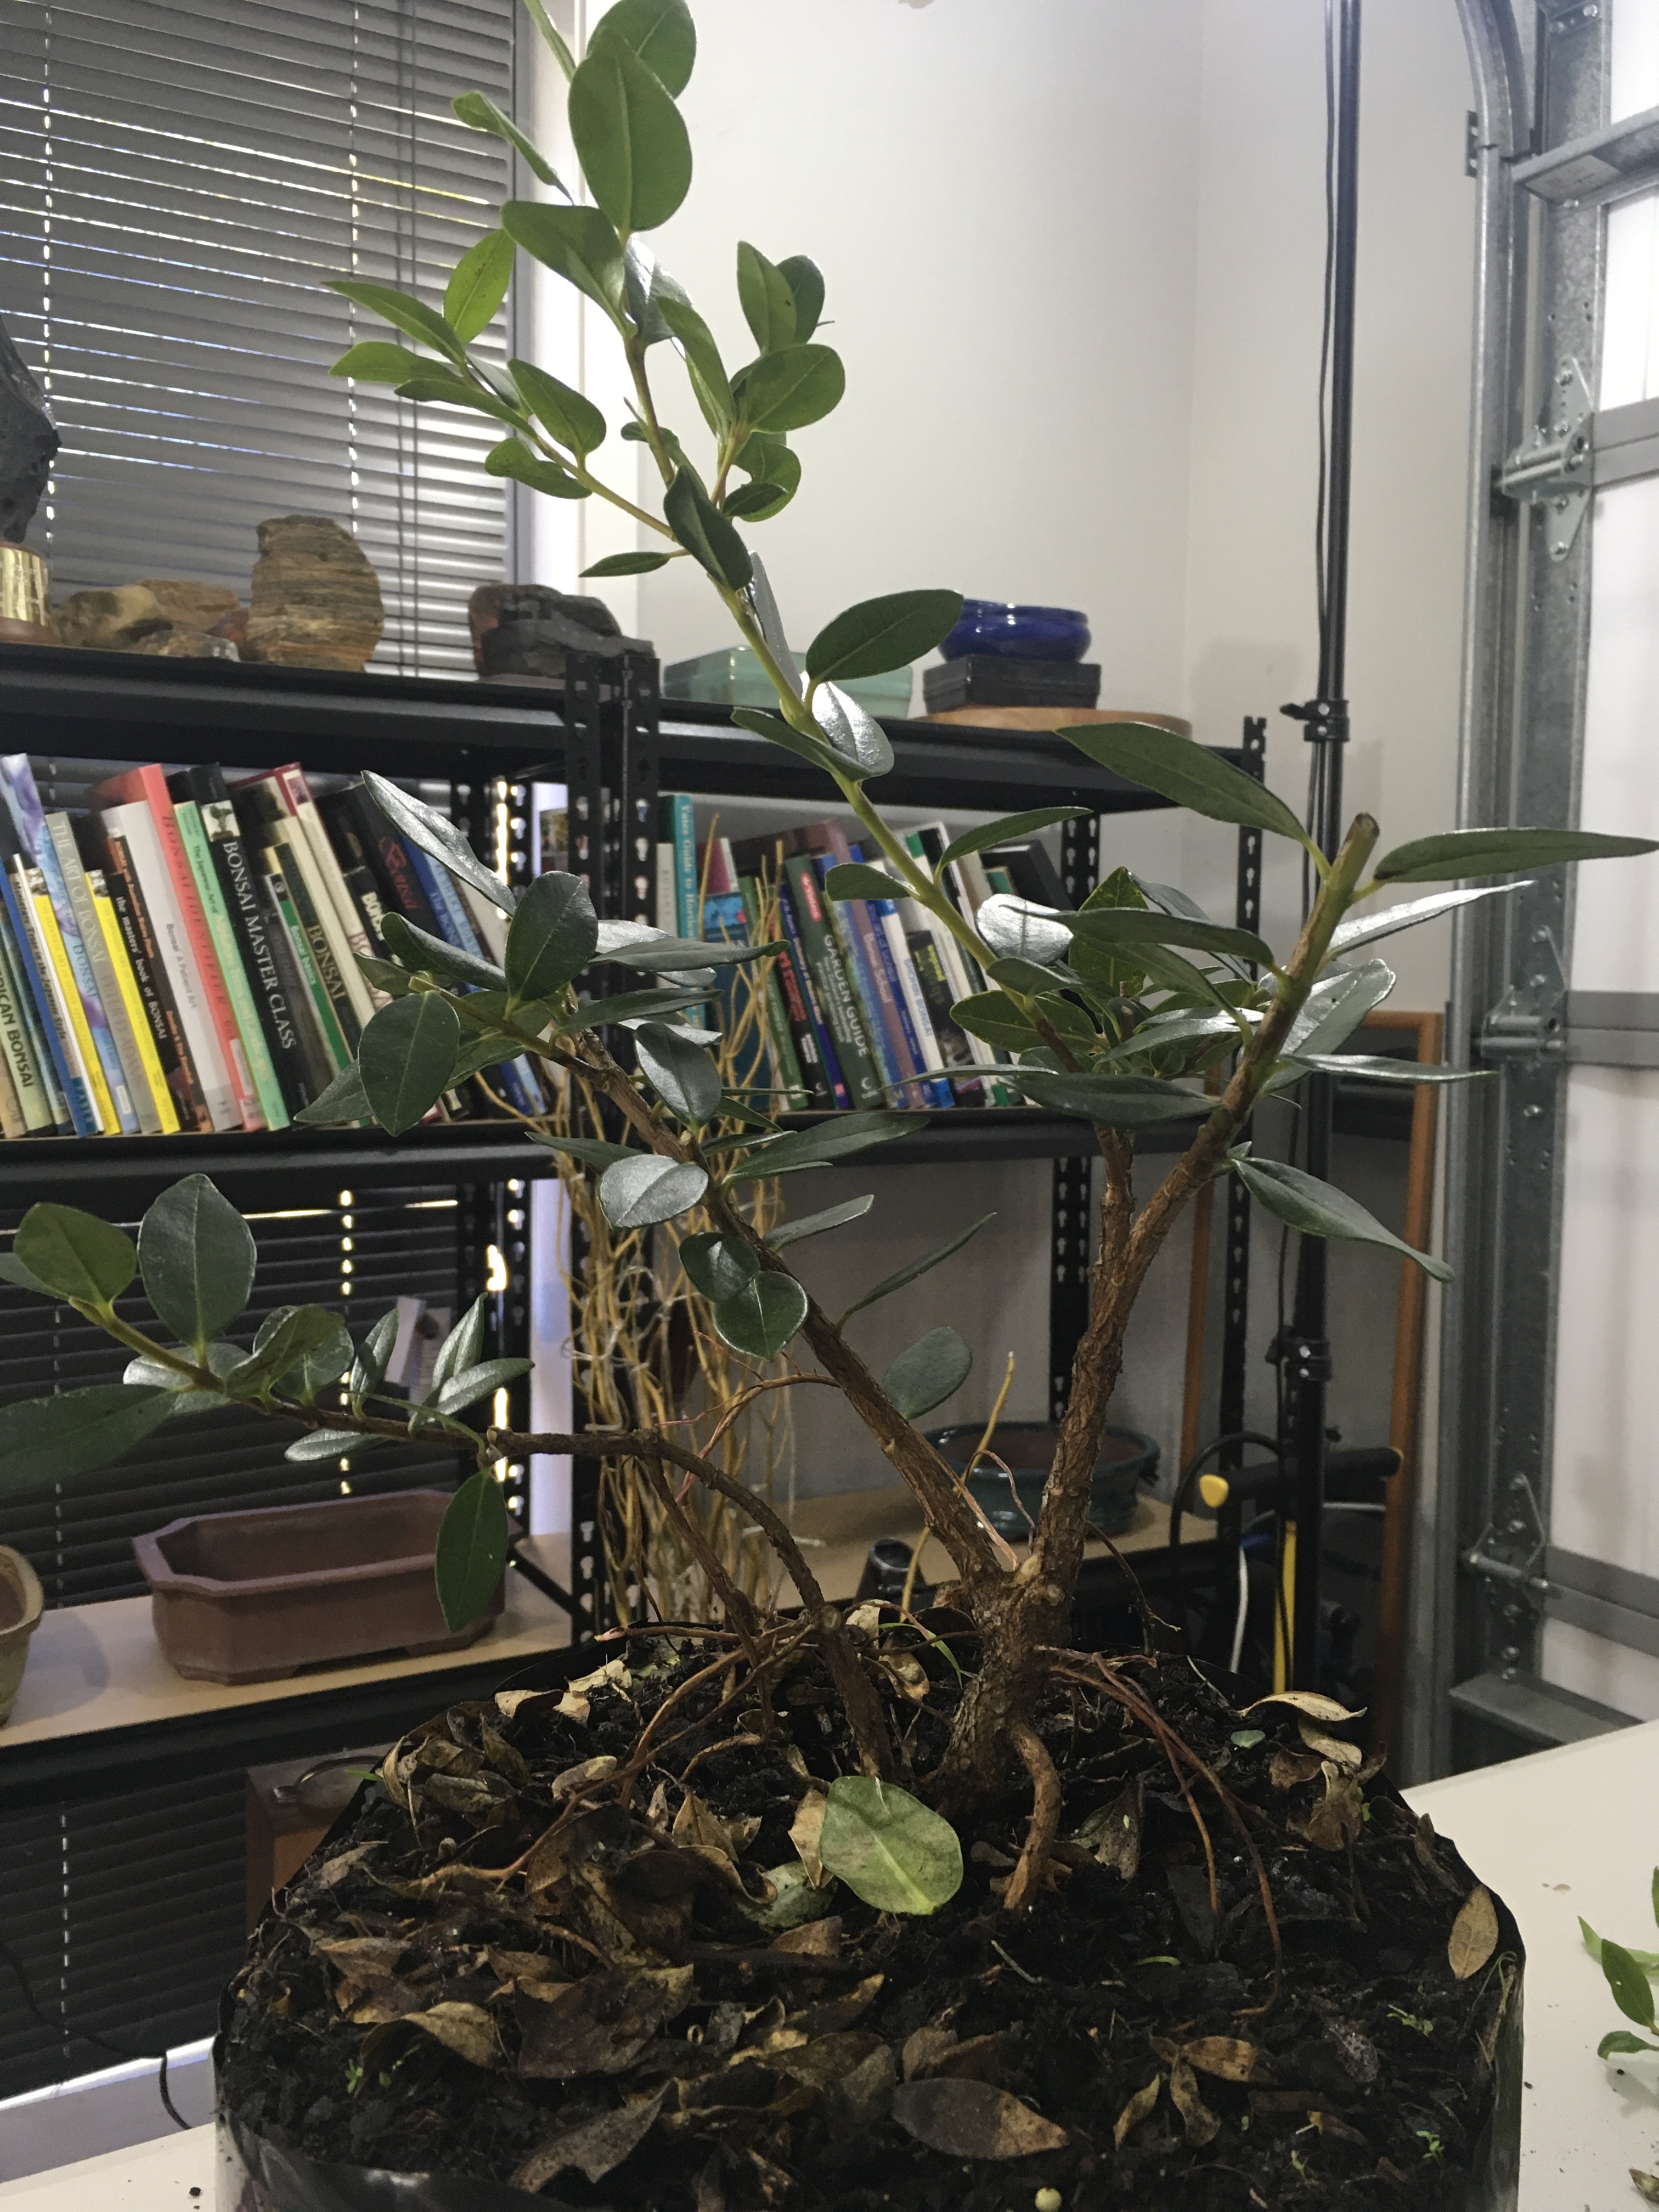
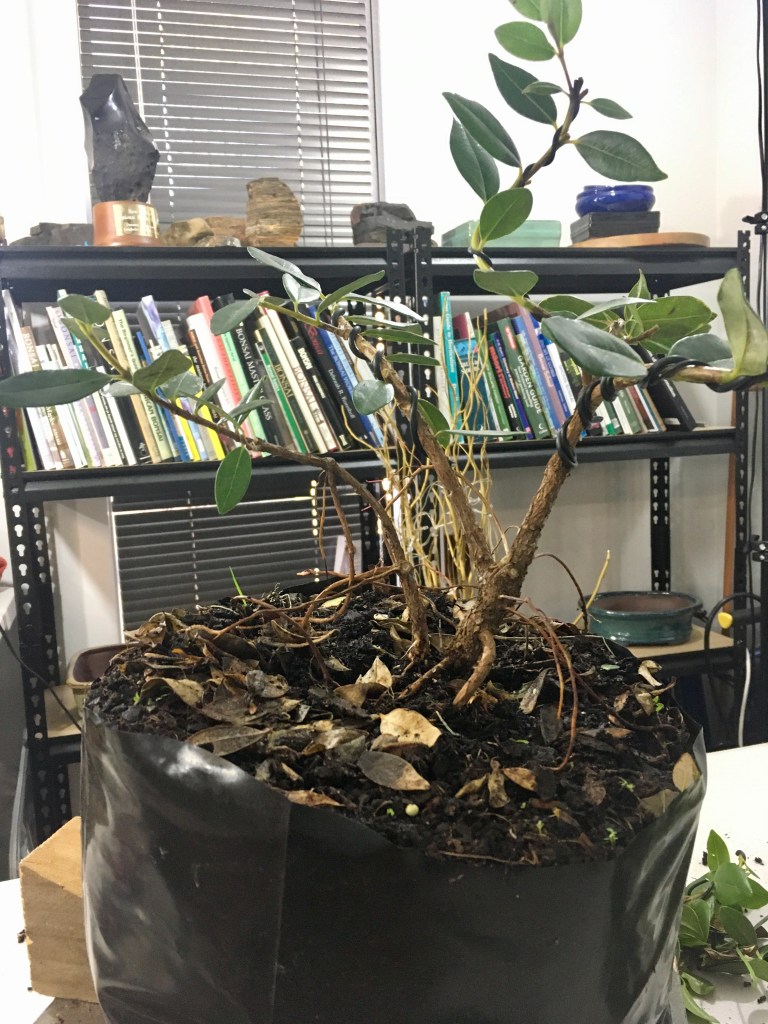
This plant was grown from a cutting for a few years and these photos clearly show that these trees are basal dominant. It basically means that it will keep on growing new shoots from the base compared to tree which are apical dominant where the new growth is at the top of the tree.
Close up of the multiple shoots growing from the base as well as visible aerial roots.
As can be seen from the photos above, the first step is to search for roots and in this case roots in the soil and not the aerial roots. I find it better to remove the top edge of the plastic bag and sometimes remove the bag or pot completely. The presence and position of roots, especially radial roots will help to determine the orientation of the tree. In other words, the front of the tree and the first ideas of what the design could look like. In this case quite prominent roots were found and spread around the tree which means we can now look at the above ground structure as the placement of the roots allow us to look at multiple design options.
The next step is to remove all unwanted growth. To stay more or less true to the natural growth pattern Pohutukawa, the decision was made to design a multi trunk tree with three trunks. Really only two, but the thickest trunk has a fork which visually looks like two trunks. All three trunks have different diameters which makes it visibly more pleasing. All inward growing branches are removed and decisions are made about the three trunks. This includes things like direction, placement and length. As the three main trunks did not grow naturally in the directions needed and the centre trunk needed to be compacted, wire was applied.
A lot of branches and foliage were removed. some of these will be propagated as cuttings.Wire was applied to bend the branches and also change the direction of the branches.The pot is prepared.
The final product with a rock added to add visual weight on the right hand side and also allow a backdrop or prop for some of the aerial roots to grow over.
It is important that Bonsai trees are three dimensional. The best way to check that is to view the tree from above. Visual depth adds to the aesthetics and overall view of the tree.
As for all trees, the aftercare is now of the utmost importance. As the pot is not that shallow, not many roots were removed, but the tree will still be kept in a protected spot, out of the wind and cold temperatures. Watering is now also important as well as sun exposure. Just damp, not wet and limited afternoon sun is what is now needed for the further development of this tree.
We were supposed to have aBonsai Society meeting today, which would have been the first one in a long time. Last night at 9pm, a change in alert levels was announced which means that where we live, social distancing is in place and as the venue is quite small, not the best for safety in the current Covid climate. That was called off.
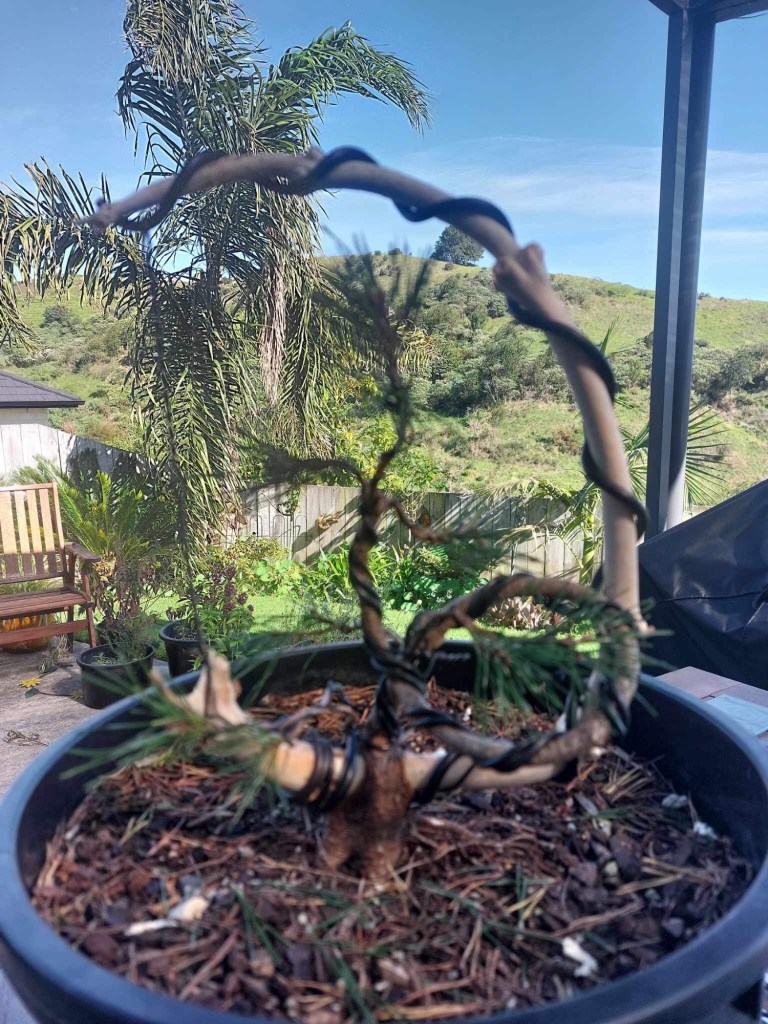
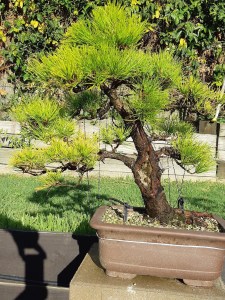
I had this tree that I wanted to work on at the meeting. Basically just a clean up job and then lots of wiring to set the foliage pads. It is a Pine tree and in the twin-trunk style. Here is the before photo.
Before the wiring commenced.
And here is the tree after the pads were set.
Cleaning, Jin work, wiring and branches set. Pity some of the three-dimensionality disappears in these photos. Maybe I just need to get my photography sorted.
Please like and subscribe to this blog as I will post updates on this tree.
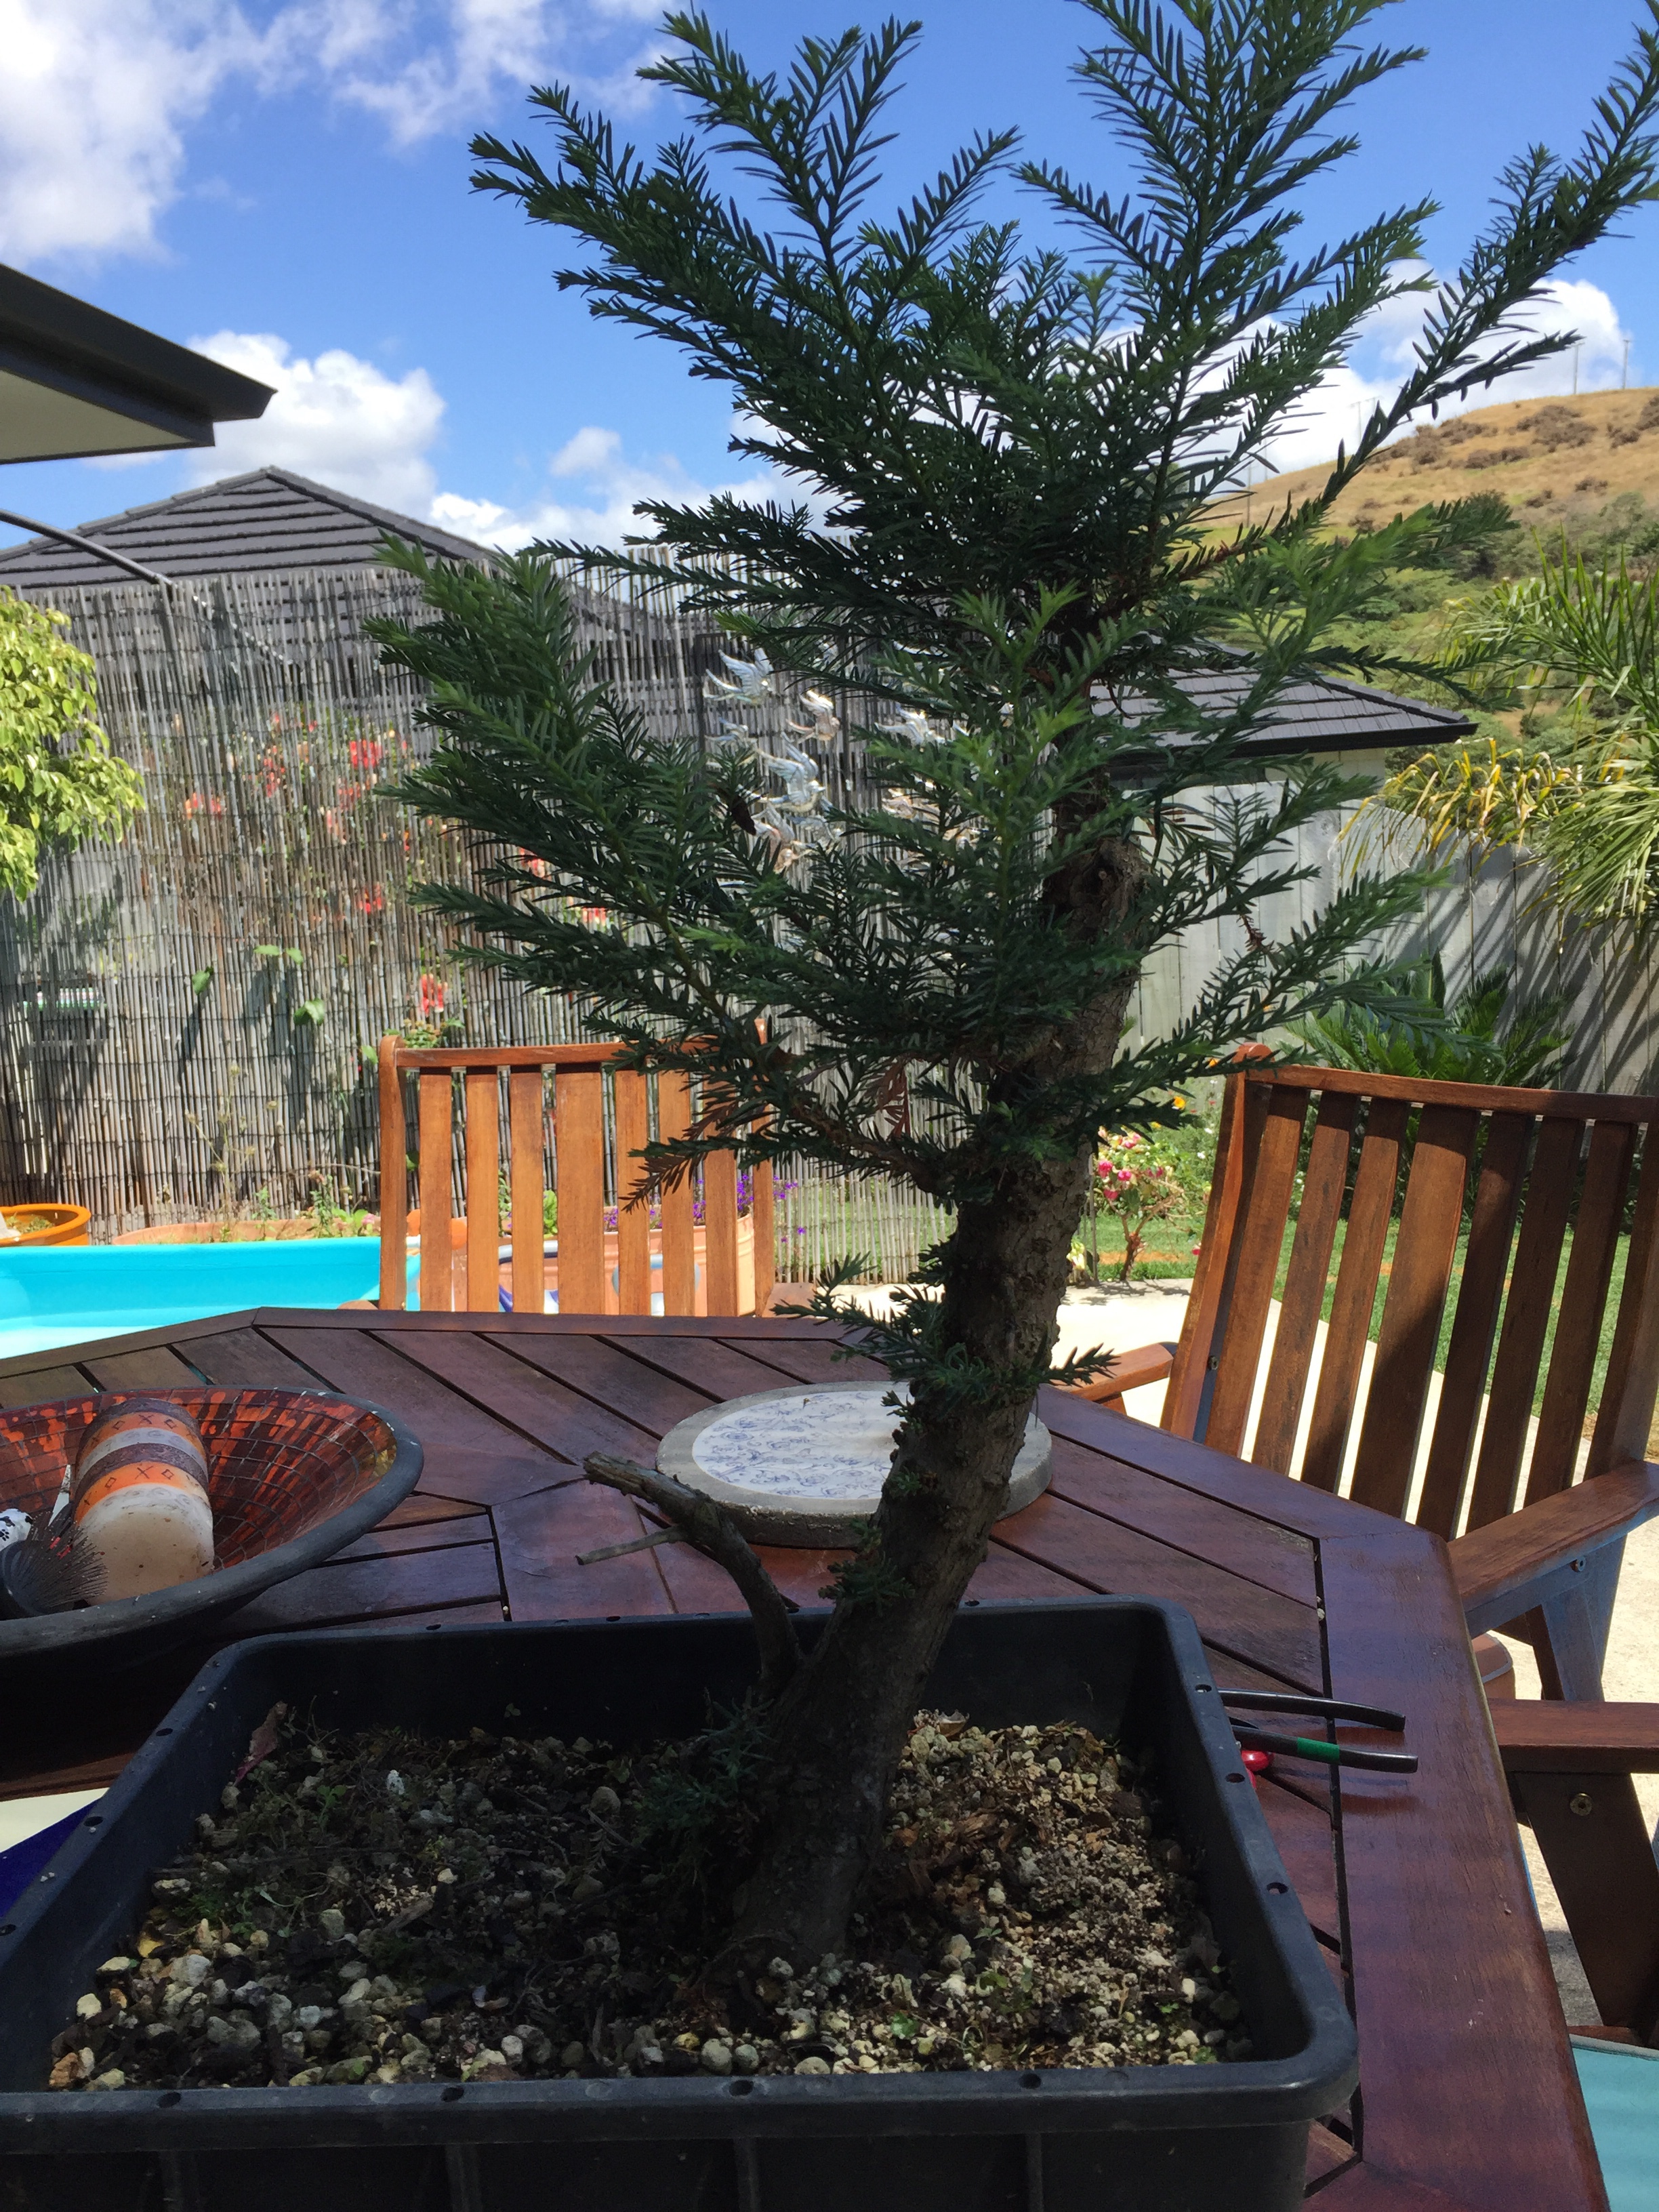
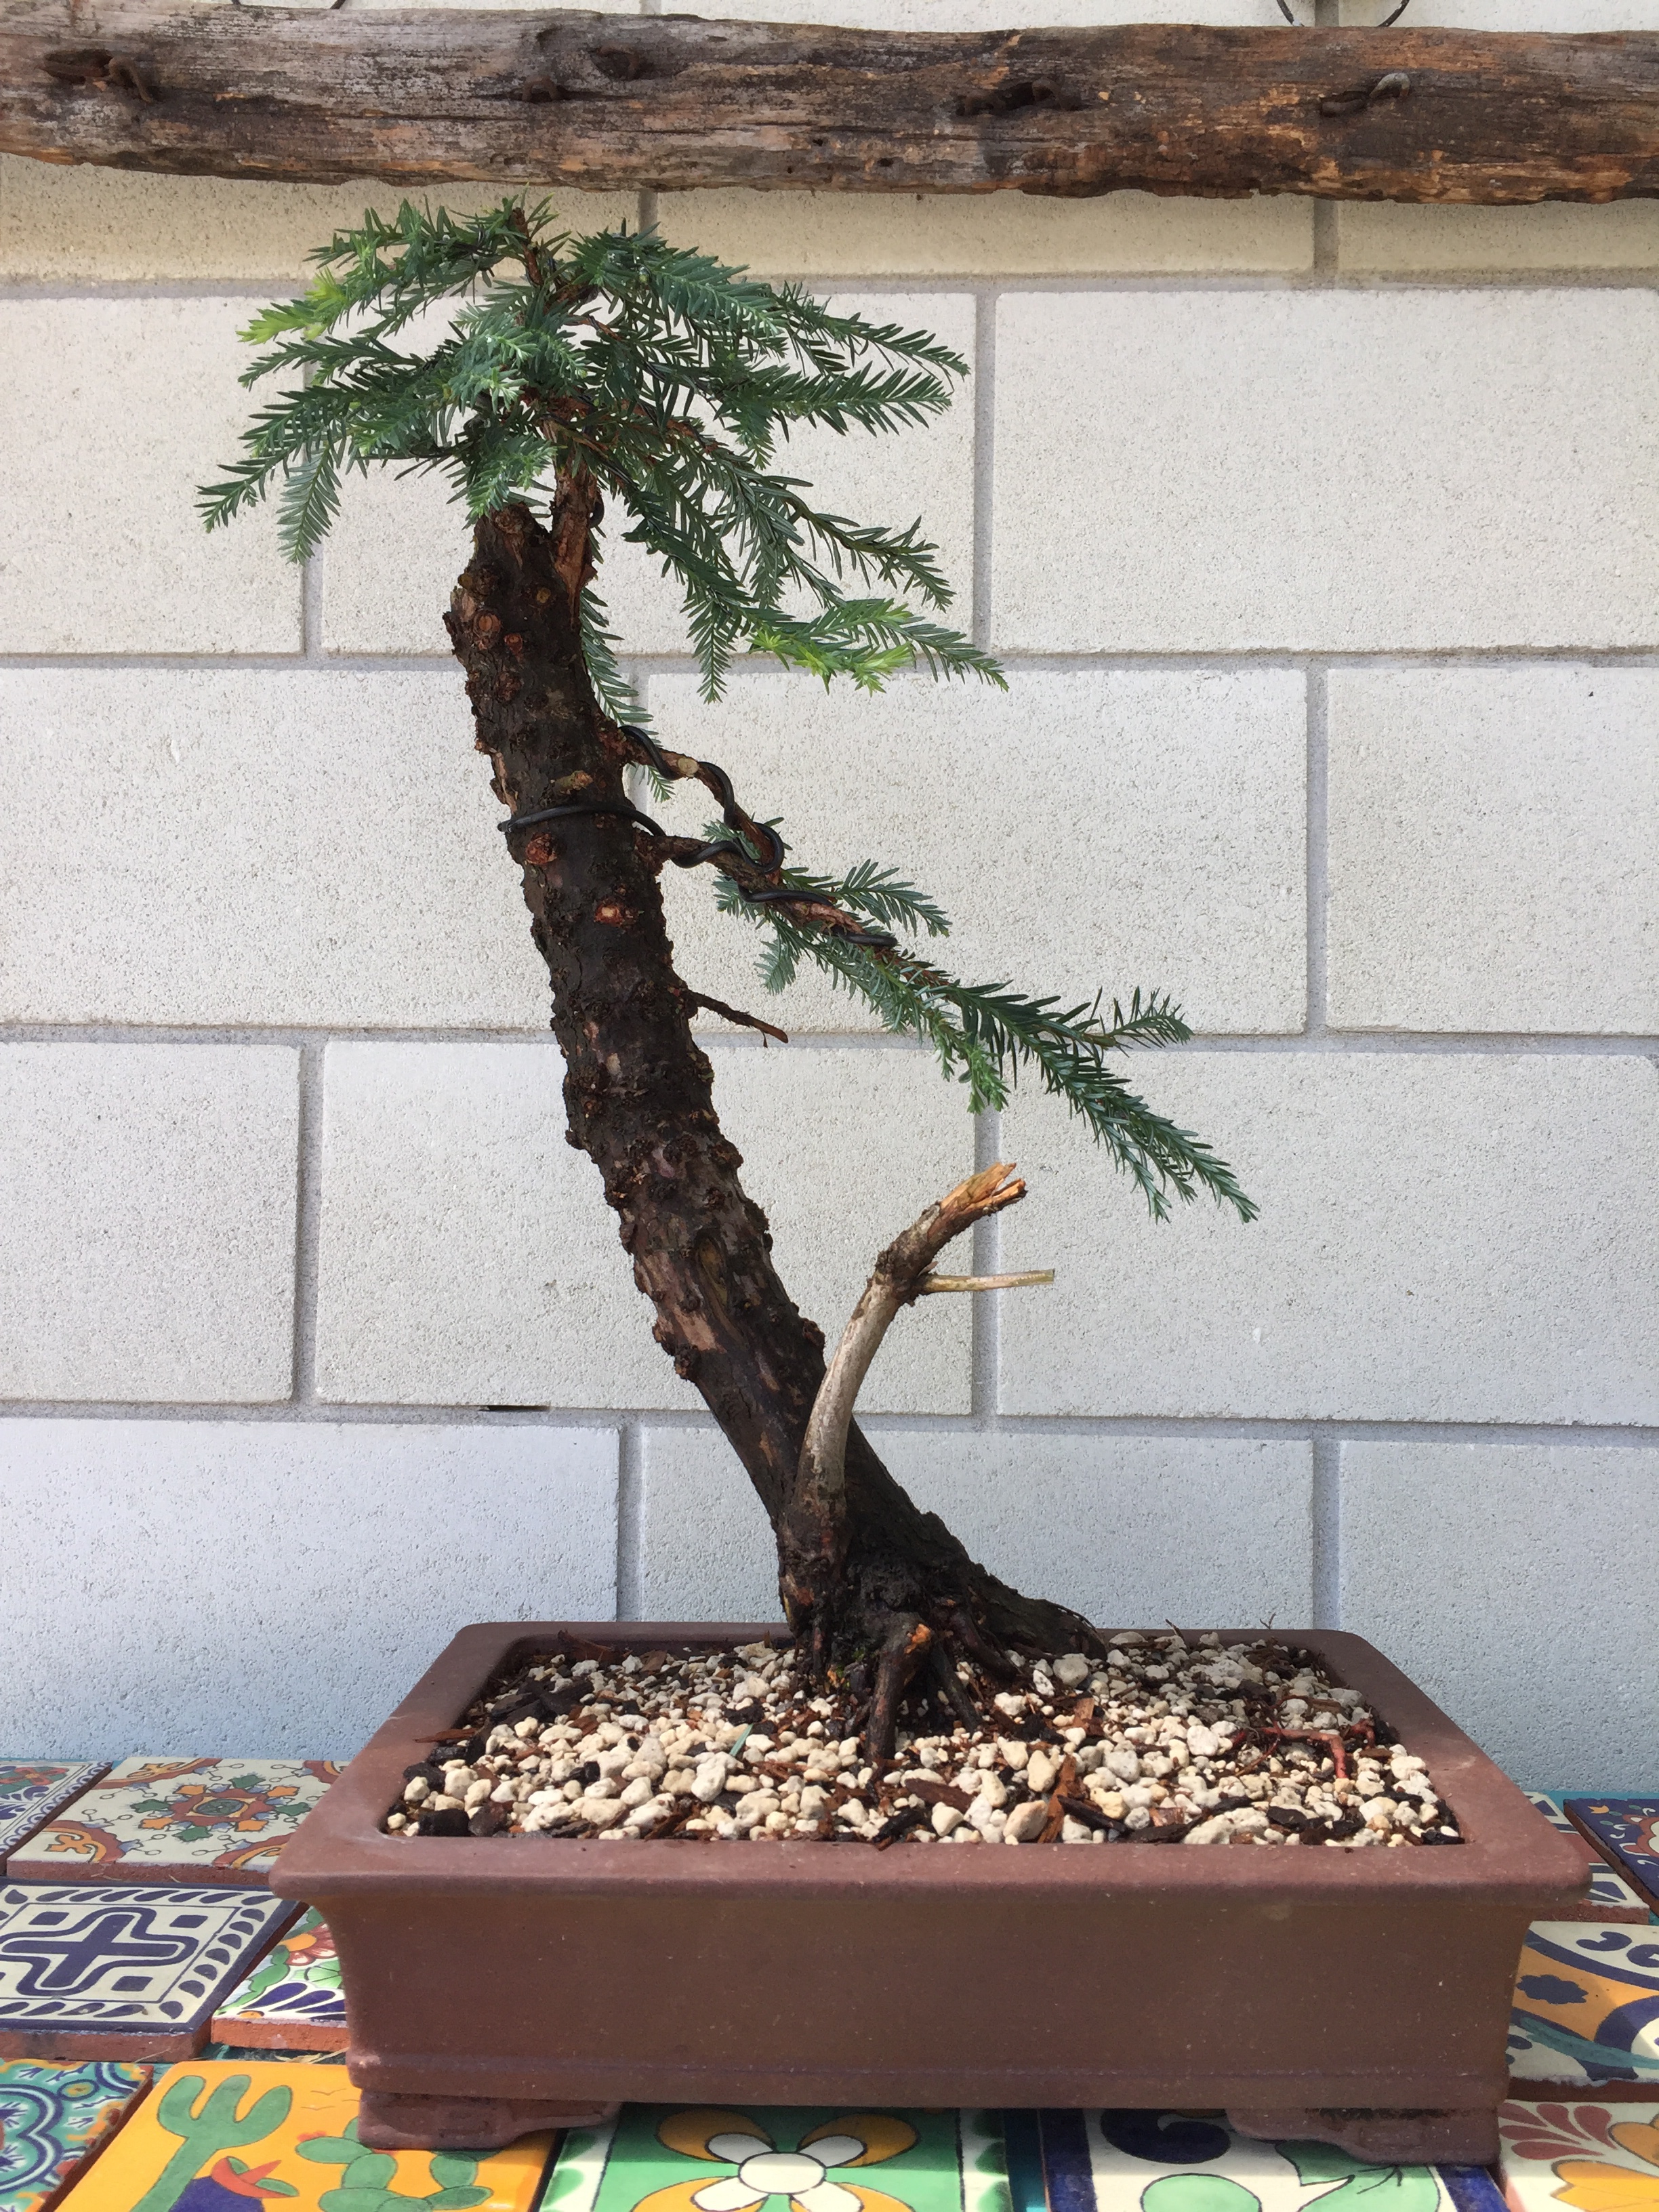
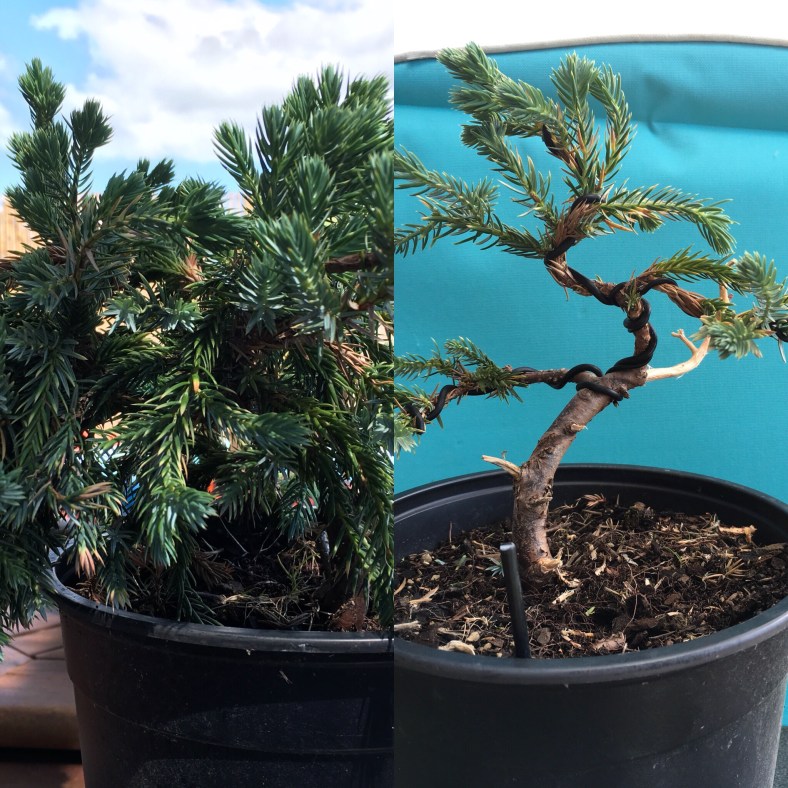
This Redwood came to me just over a year ago and ended up on the bottom shelf as it was not a high priority to work on and a little bit ugly. Today was the day for this one to get attention and even if I have to say so myself, the ugly duckling is now well on its way to become a beautiful swan.
Different angles.
It has a very straight trunk and was chopped before it came to me. The taper is minimal, but can be enhanced with a bit of carving at the top. More interest can also be had by creating an interesting Jin out of the dead branch at the bottom. Most of the growth is at the top which normally lends itself to a Literati style tree, but in this case the trunk is nowhere near what one would like to see in a Literati style tree.
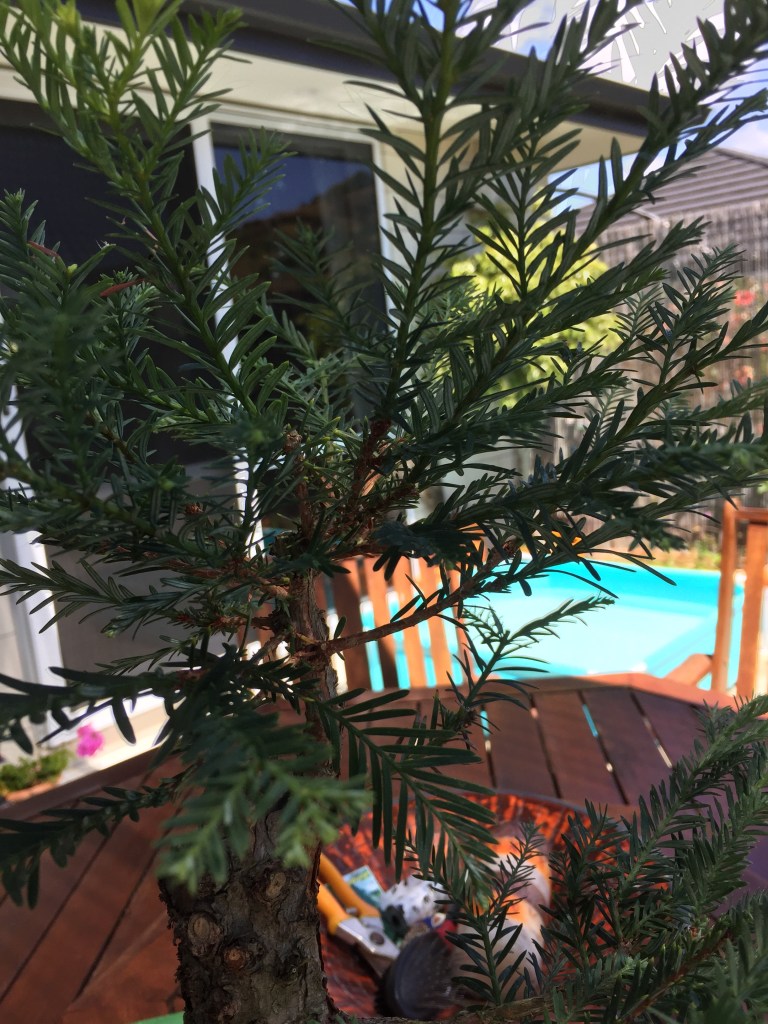
Lots of growth right at the top and spread radially around the trunk at this point.
Decision time and it is to slant the trunk and then for the branches to droop downwards at an angle following the trunk line. Normally with this style the branches on the open side, in this case to the right, are longer than those on the closed side, or left side in this case.
Slanting style Redwood.
The growth is still relatively young with no real solid branches at the top, but it is important to spread the branches / leaves radially out to enable all green parts to receive maximum light.
All leaves should get light.
This Redwood will now rest until Spring, be fed profusely in a sheltered spot.
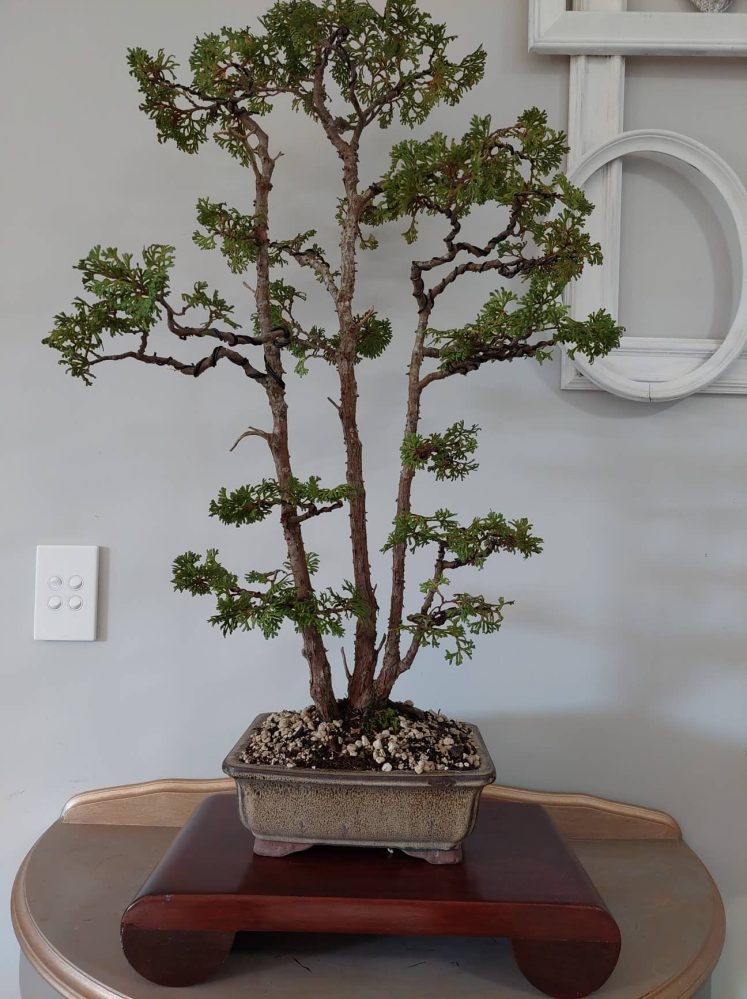
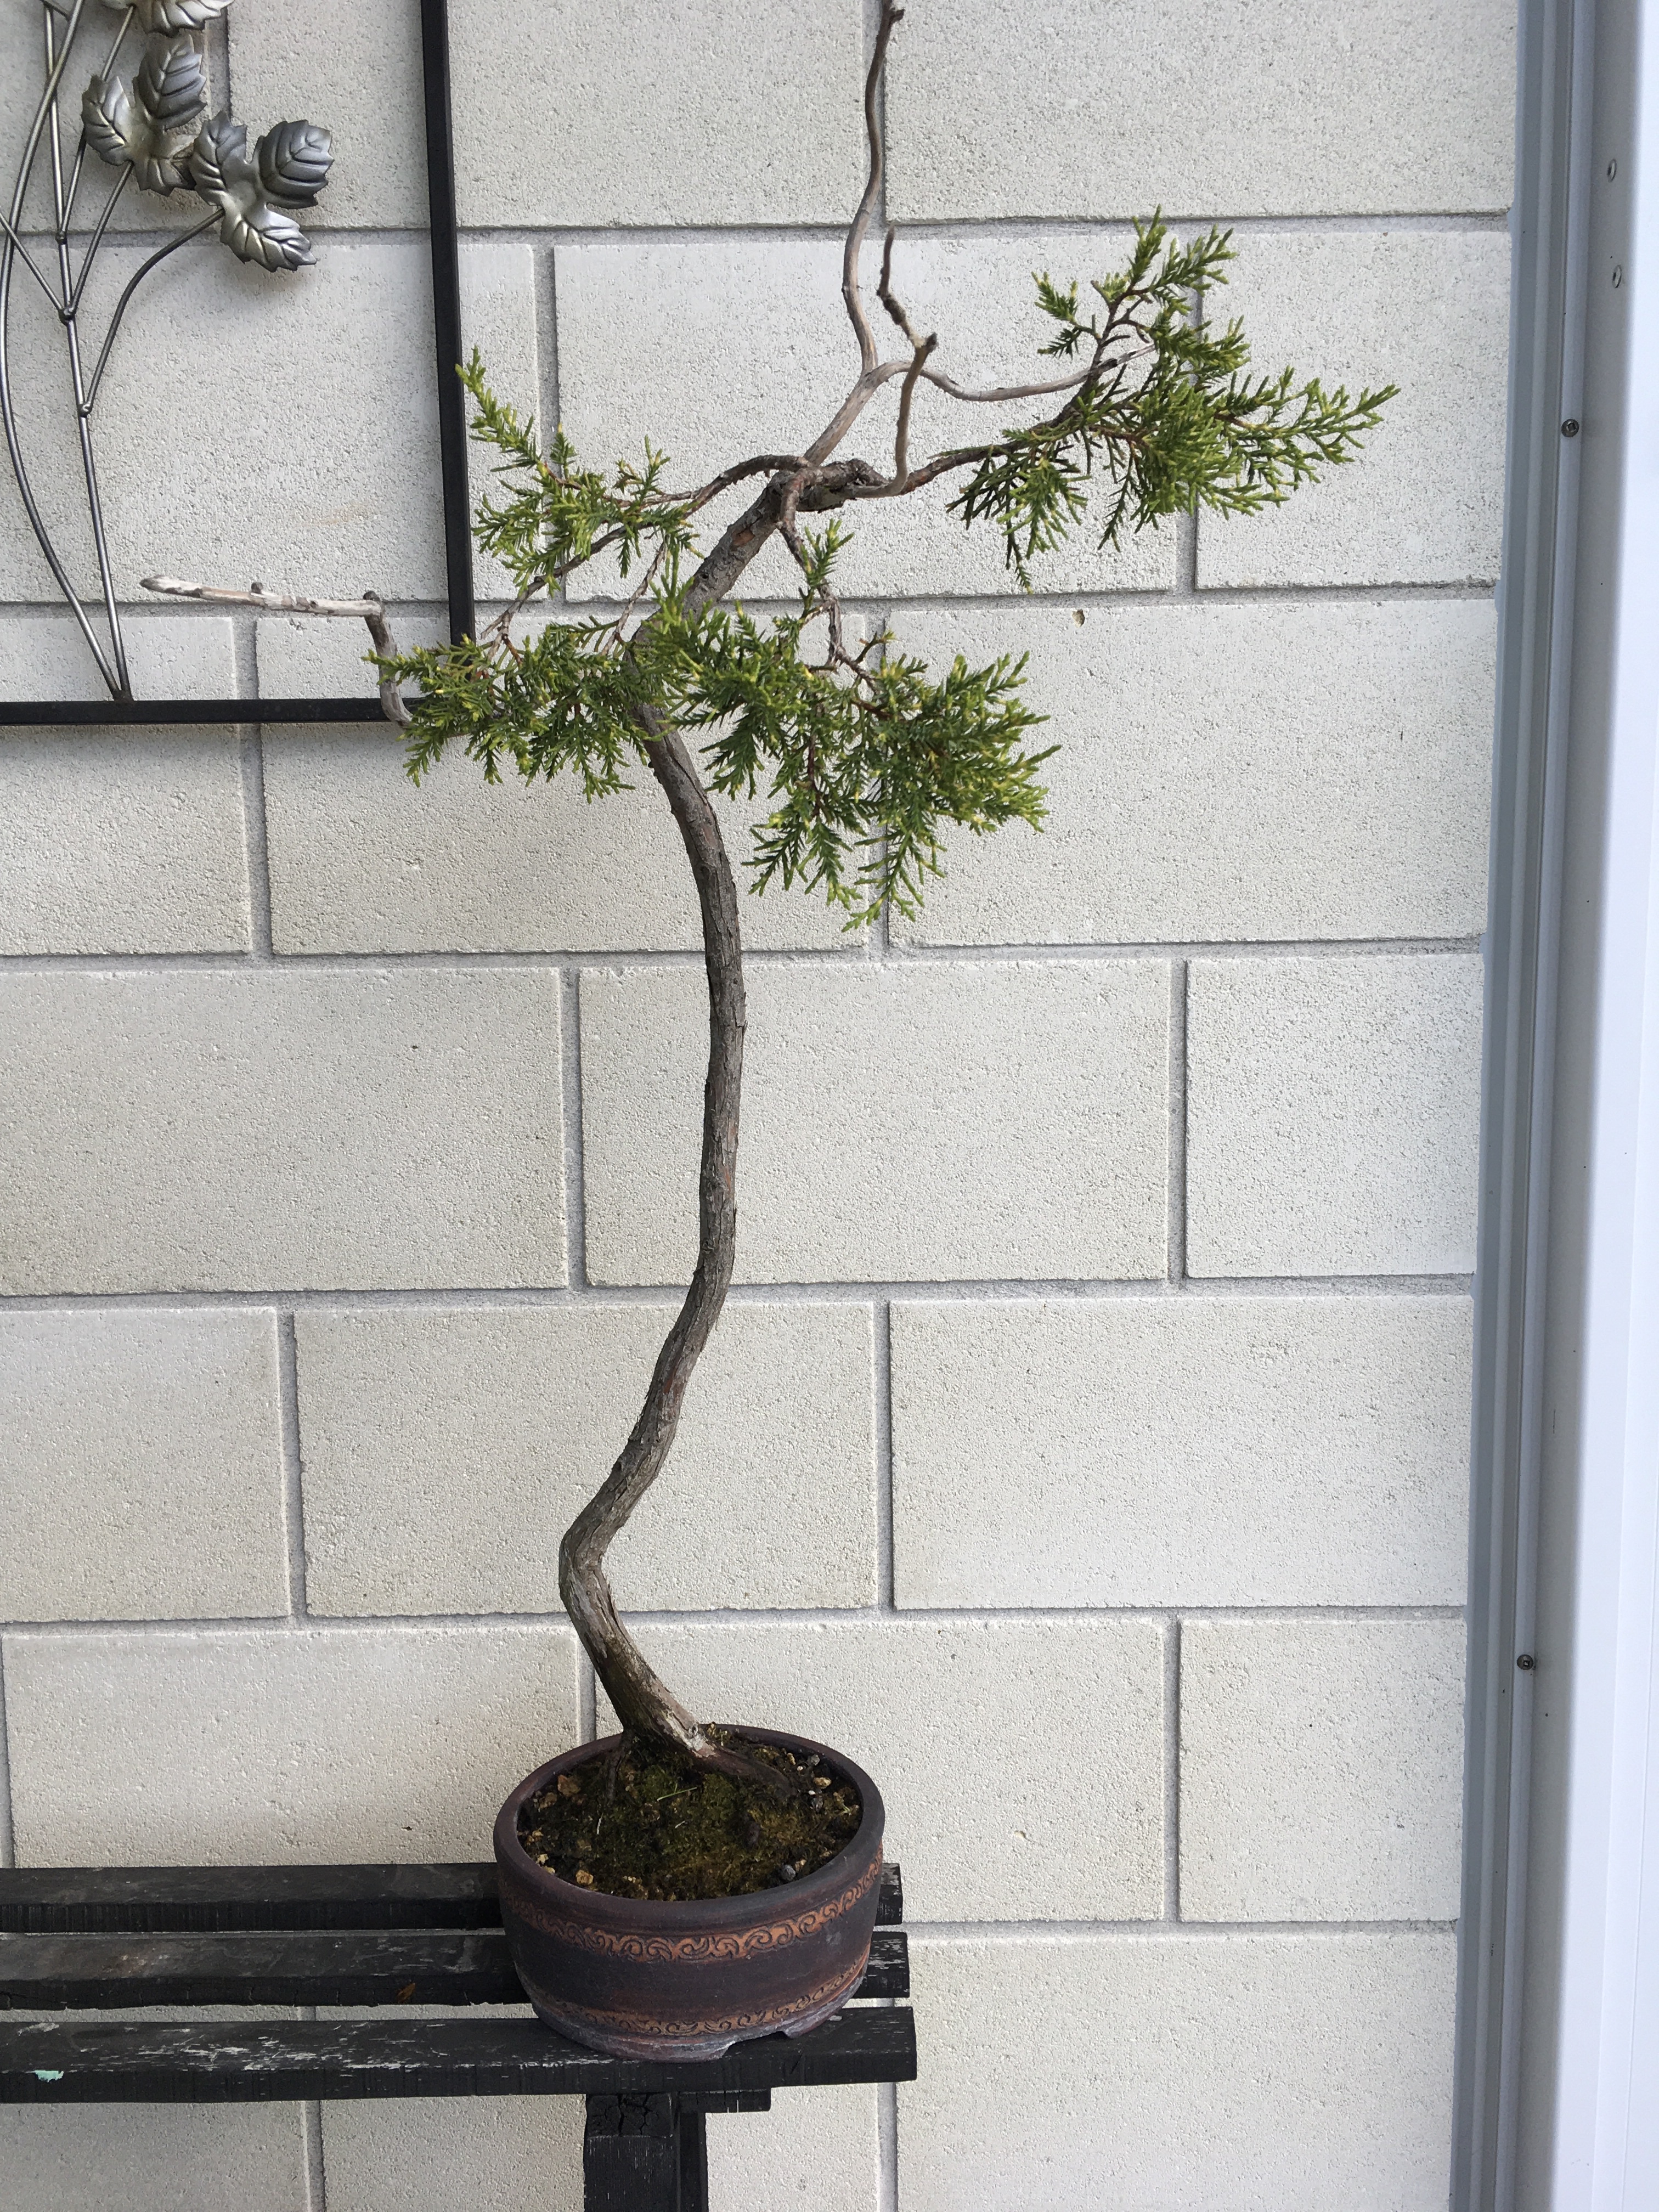
This Literati style Juniper came into my collection as a very neglected, half of the branches dead and under nourished tree.
Today it was time to get some wiring done through to the growth points. The previous and first wiring from me was just on the main branches to set them. As can be seen, the branches that were dead or with no hope of recovery were all jinned and these branches will be refined with sanding paper and lime sulphur later on.
The living branches, only three of them have responded nicely with new growth and these are kept in tact at this stage to get as much energy as possible to the green and new growth. This tree only received liquid fertiliser in the form of a marine plant / kelp conditioner with one dose of a granular feed, balanced NPK.
Here are some of the before photos
Before photos
This type of work is quite light and I only used two thicknesses of aluminium wire and a wire cutter for this job. The coffee is not really optional, but I did have the mandatory glass of wine just before this job with a meal.
The tools used.
These are the after photos:
After photos. The job took about 30 minutes. It is light work.
This tree will now rest and carry on with its fortnightly application of liquid food. This is applied over the leaves as well as the soil.
It is a given. You will have a few trees die on your watch. Nobody wants it, but it happens and it is part of the life-death cycle that underpins all living things. We do not kill our trees deliberately and it therefore is important to take note of the things that do increase the chances of this unfortunate event.
Basic Horticulture
This relates to keeping the tree healthy through everyday practices, inclusive of hygiene, watering, light and nutrition requirements.
In my experience watering requirements is the most important of these aspects. Get that wrong and your tree will deteriorate and then just die. This relates to both overwatering as well as too dry conditions. Every tree will have different requirements based on species, soil medium, size and exposure to sun. Study this for each specie, make notes, learn and apply. Overwatering is the dangerous one as it generally leads to root rot and by the time you become aware of this it is too late. Be aware of irrigation systems. A power outage, a flat battery or a broken pipe, all lead to disaster. The best way to water is by hand and by studying each tree and adjust the amount of water to the daily requirements. It is labour intensive, but a safe way to keep your trees alive.
When repotting, pay special attention to the roots. Some species do not handle complete removal of soil well. Check for tangled roots, check for bugs, caterpillars and ants nests in the soil at this time.
Seasonal and Climate requirements
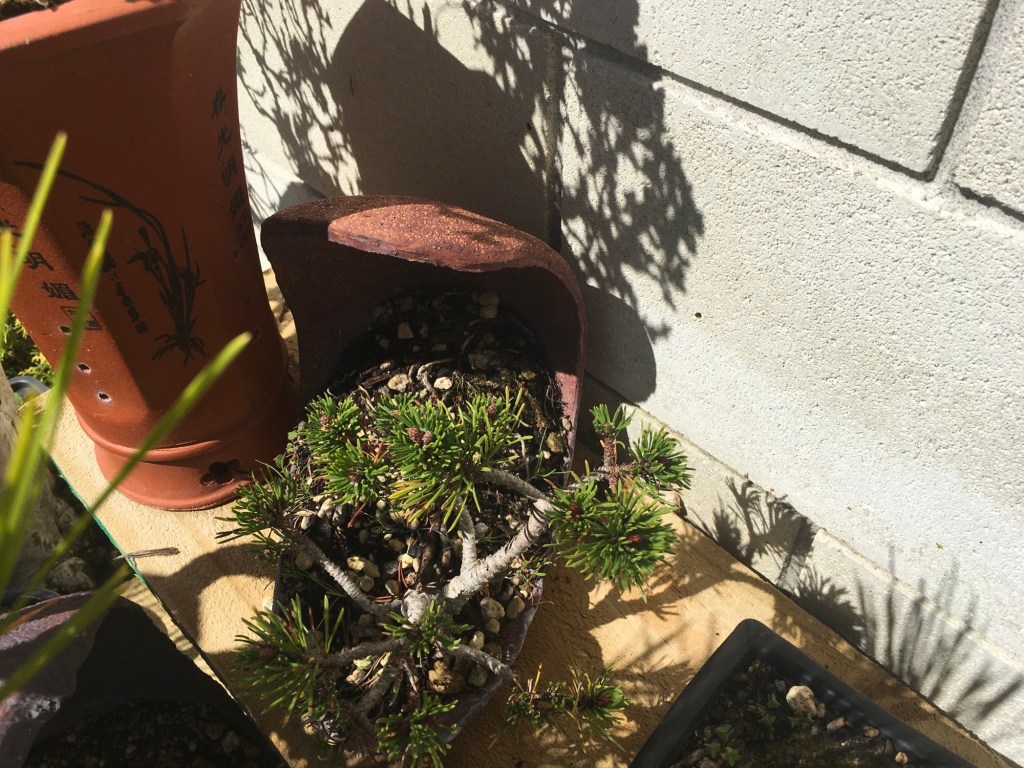
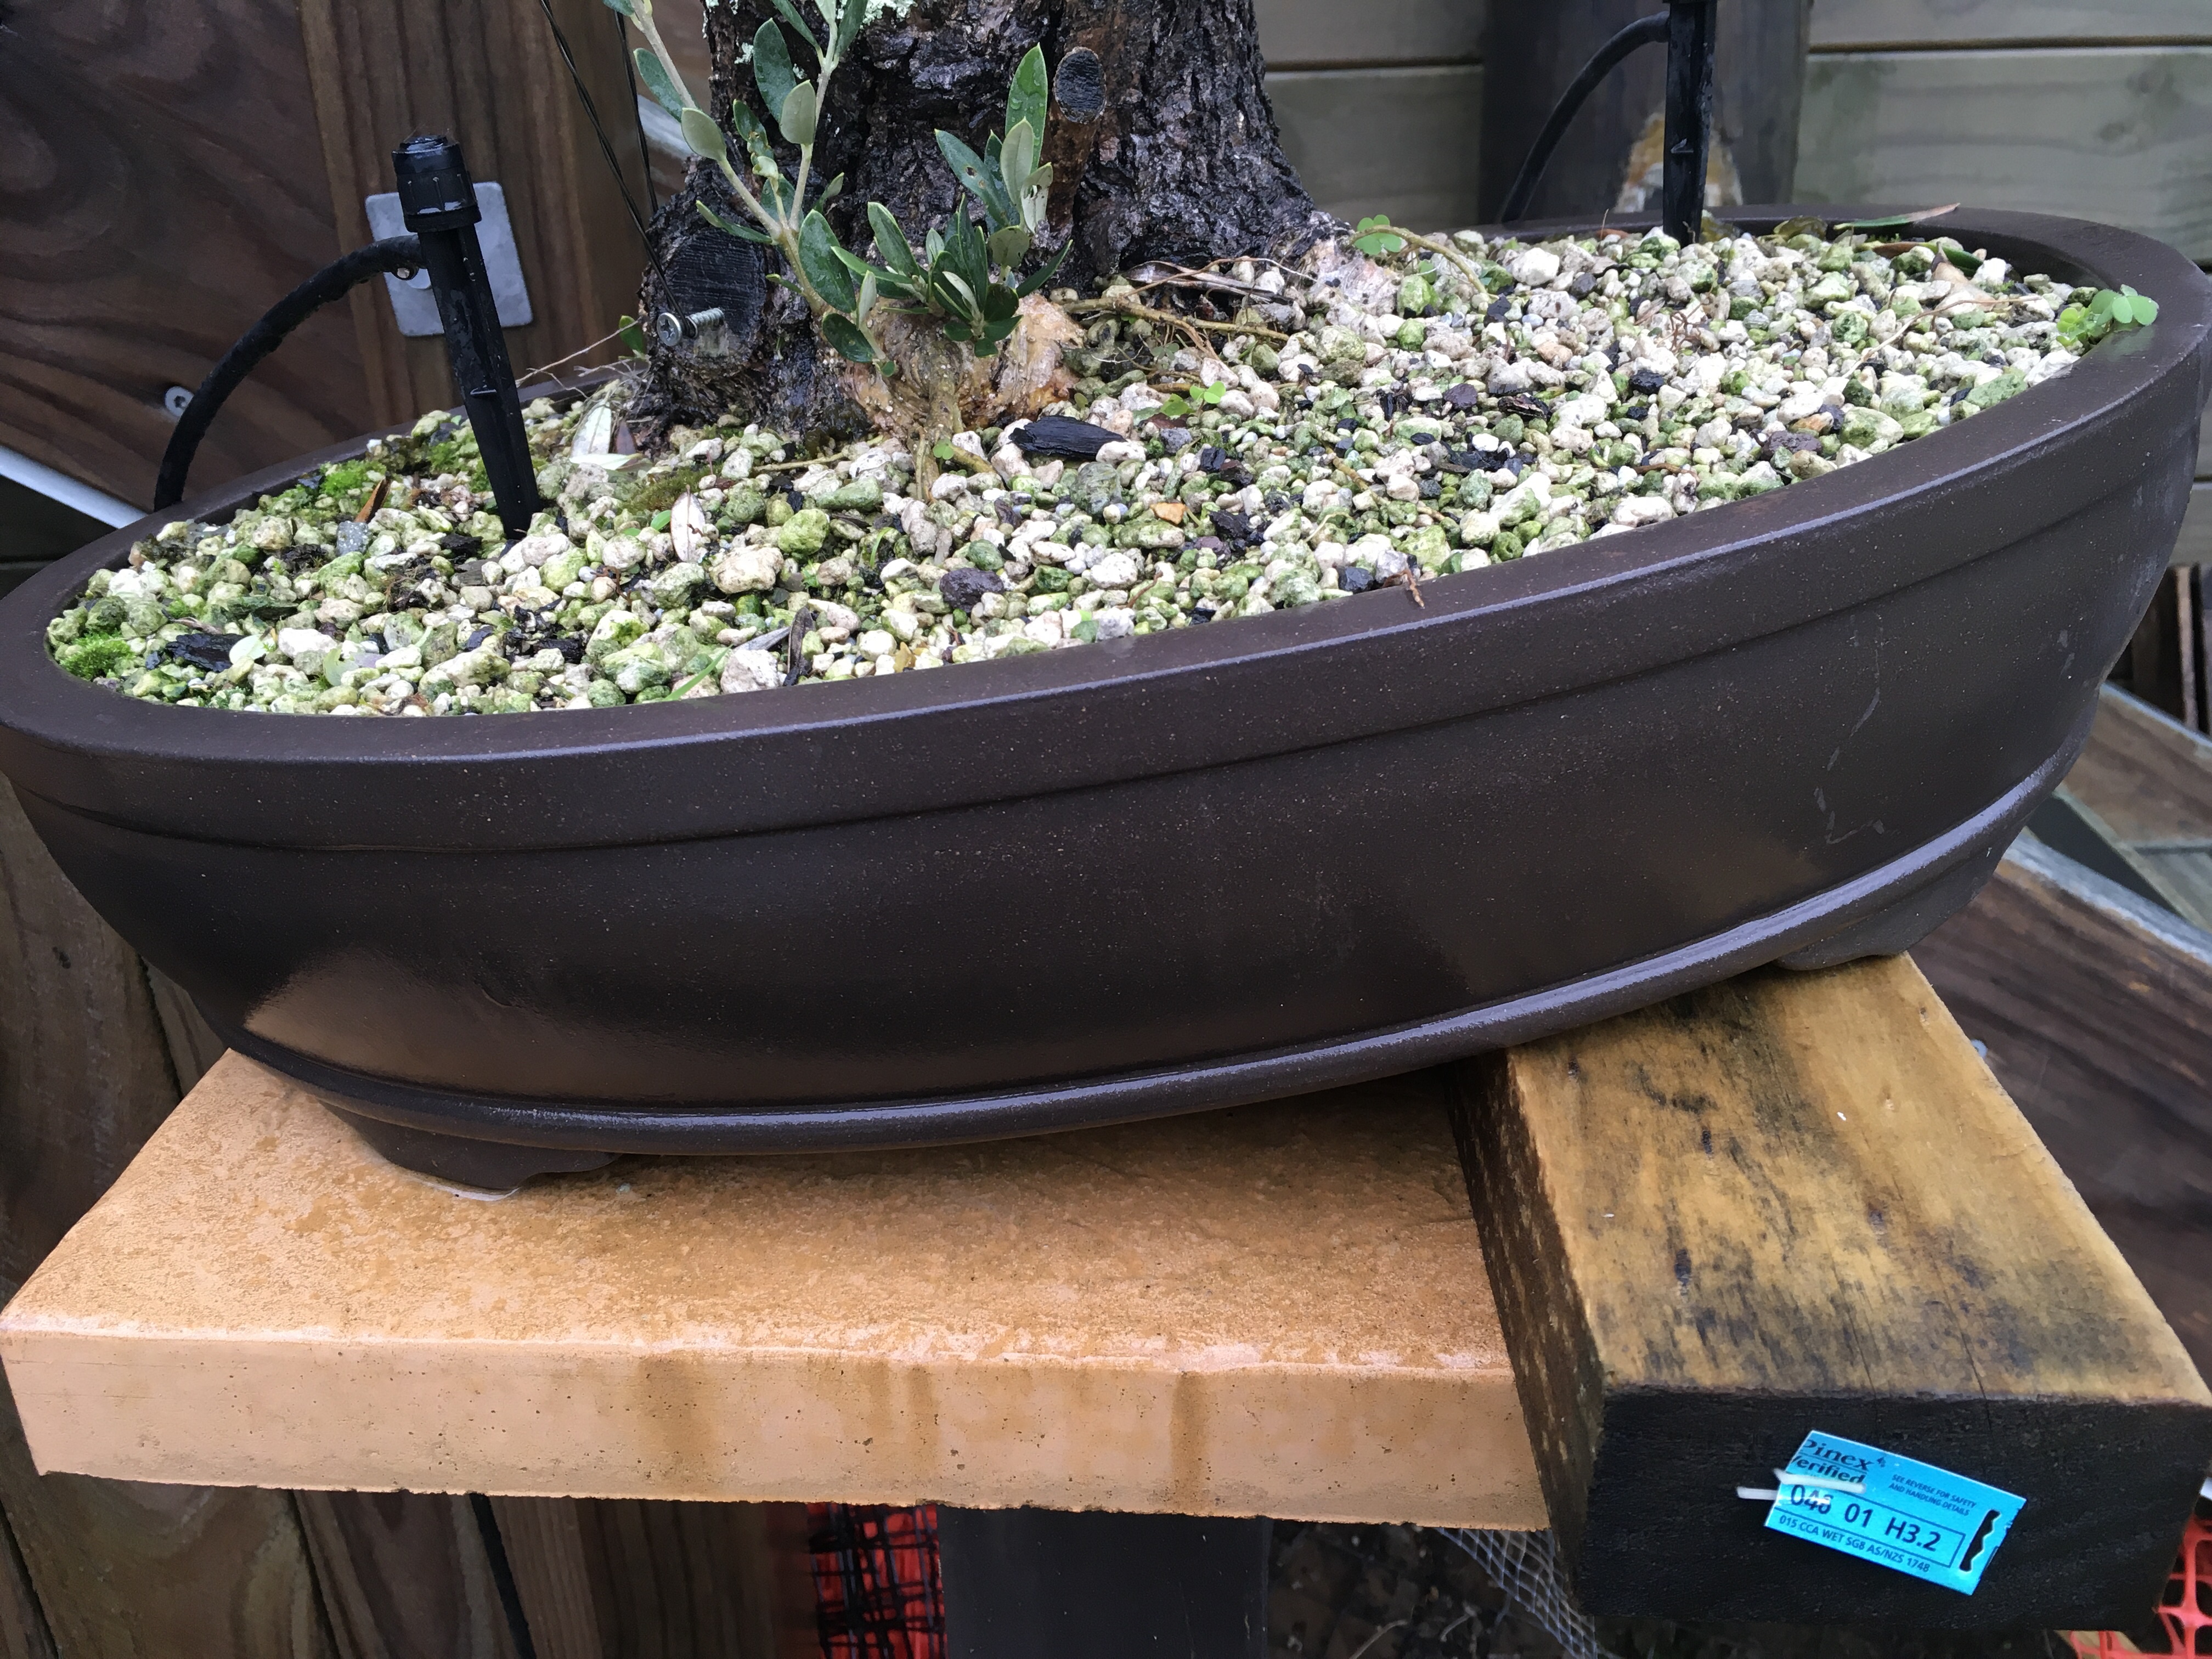
At the time of writing this, it is winter in New Zealand and after quite a dry period, it has now been raining for three days solidly and the temperature has dropped into single digits in places. Irrigation systems are now turned off and the focus now shifts from preventing trees from drying out to ensure they do not drown. Half of my trees now have pots at an angle to allow water to run off, rather than sit in the pot. Back to basic horticulture as your soil medium and its drainage ability now plays a big role in keeping trees healthy and alive.
Pot at an angle and removing excess moss for better drainage.
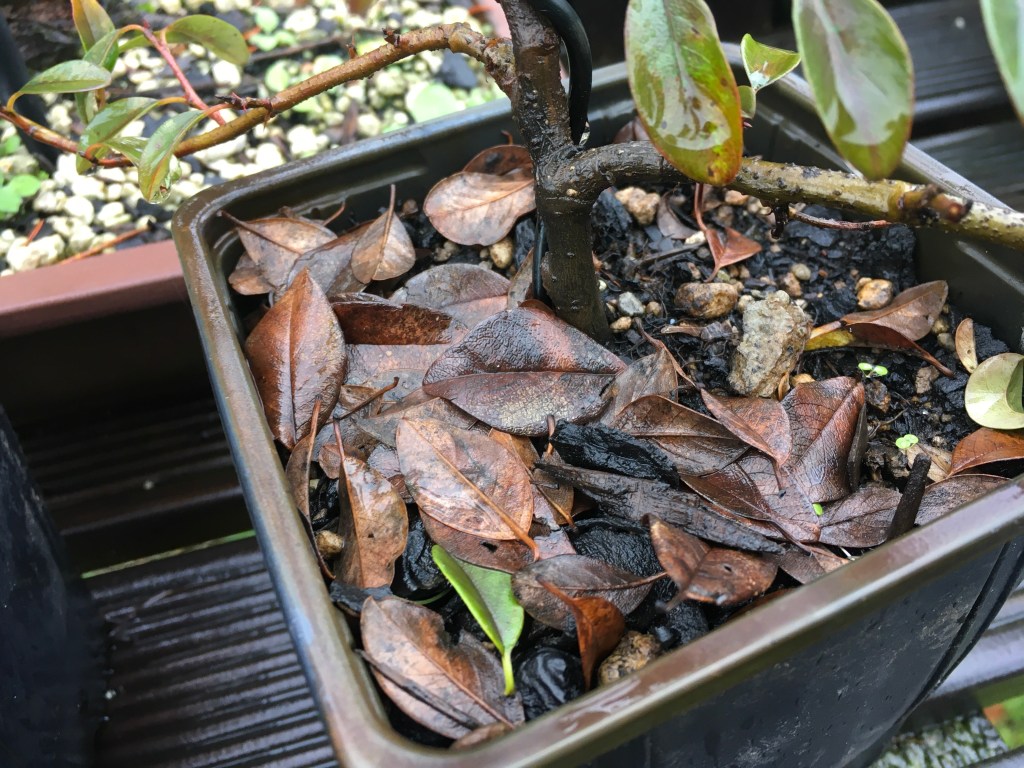
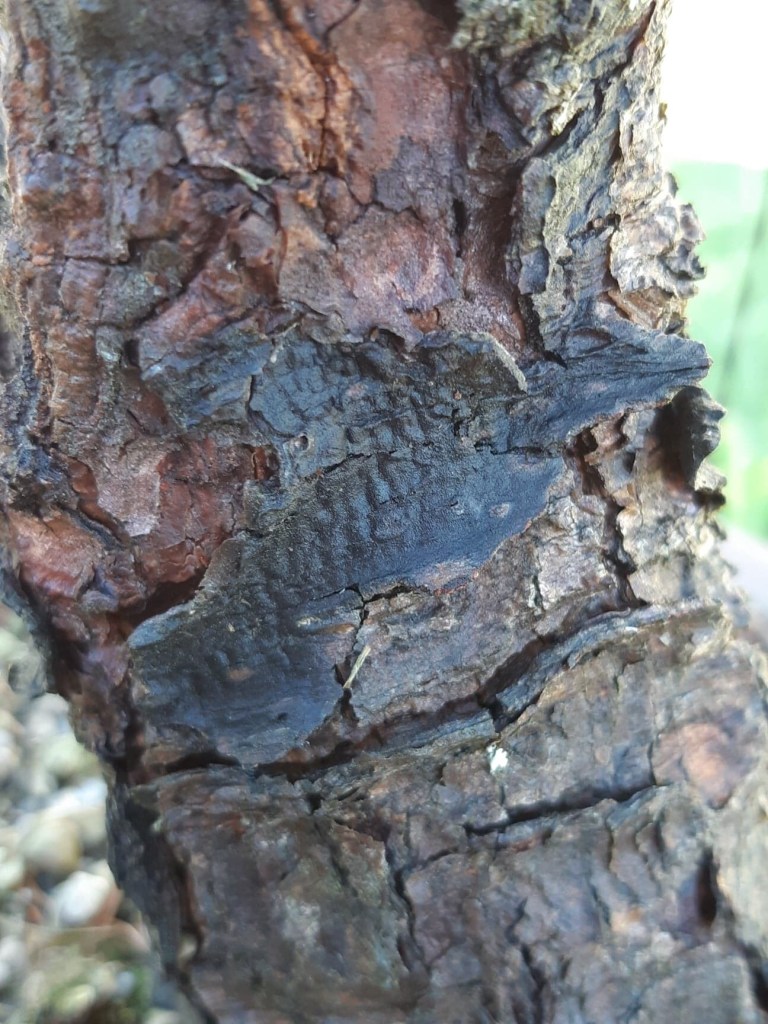
I have mentioned temperature and the accompanying conditions now come into play as well. Snow can actually insulate trees, but frost is just nasty. Your local climate and specific species will dictate if a tree needs to be under cover or not. Frost has killed many a tree. Very harsh high temperatures, accompanied with little to now sun protection and not enough water will kill trees. Take note of your pot and soil temperatures. The pot construction, size and colour can have an effect on the temperature inside the pot. Two pots next to each other can have very different temperatures.
Frost and cold damage.
Be careful when bringing plants inside, especially non-dormant trees. I have seen and heard of many trees that just did not like artificial heating systems, wood fire burners and even being cooked on a window sill, resulting in the tree ending up on the compost heap.
Light requirement of a tree is a big one. Suitable species for sunny areas are Celtis, Junipers, Chinese Elms, Cotoneaster, most Pine species, Holly, pyracantha and others. For a more shady aspect look at Azalea, Maples, Beech, Zelkova and others. Acclimatisation plays a big role here. You can gently and over time get some species to tolerate a wider range of light and temperatures if your care is spot on. Generally, if you get this wrong, a tree will deteriorate over time and if not corrected will say goodbye.
Seasonal differences and evergreen vs deciduous trees have different needs.
Overworking
This is not just a beginners issue. Many a tree has succumbed to being overworked. The safe mantra here is do little bits of work more often, rather than massive root work at the same time as huge pruning and styling jobs. This goes with seasonal changes as well. Certain things, like defoliation, should take place at a specific time of year. Same for root work and repotting. It could be different for different species. Study, learn and apply.
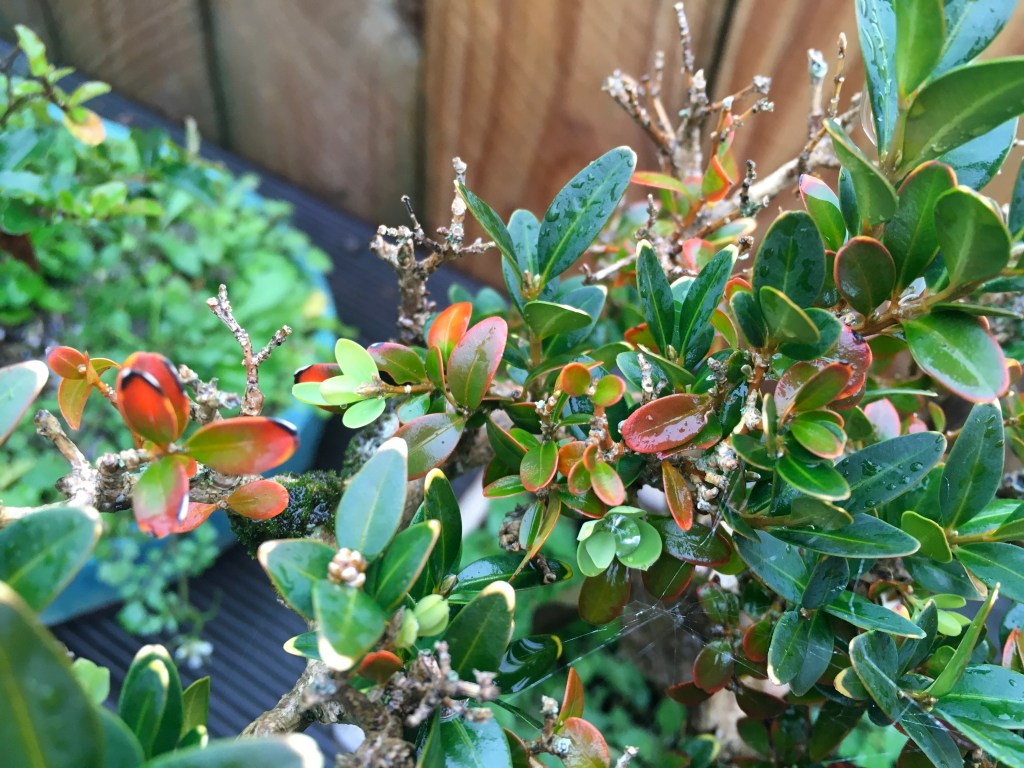
Diseases and Pests
That is self-explanatory. The best is to use preventative methods to stop disease and pests from getting to your trees. This could include preventative sprays, either organic or not. That depends on your philosophy, but either way, keep an eye out for tell tale signs. Things like ants can point to aphids, sooty mould and other issues. Yellowing and spots on leaves, droppings of bugs and caterpillars, chew marks on leaves, sudden leave drop, are all signs of things going wrong. Keep an eye out and this can easily be combined with your daily watering routine. A big part of prevention is basic hygiene around your trees. Get rid of fallen leaves, clean underneath your benches and check the undersides of pots. Many an issue can be prevented by just cleaning often.
Many places for creepy crawlies to hide.
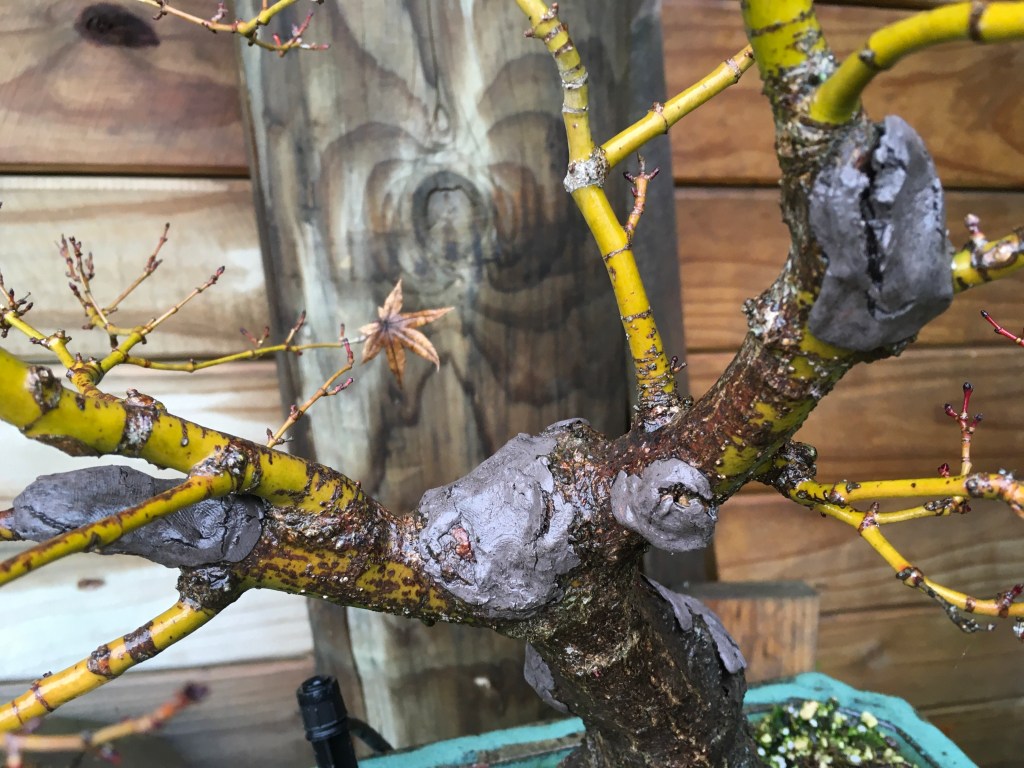
Seal wounds, tie trees down in pots when repotting, check old wounds, look for new holes in the trunk, marks like ring barking and especially underneath the leaves.
Seal wounds.
Summary
This is just a snapshot of things that can go wrong and is not intended to scare or put Bonsai enthusiasts off, just a reminder that a Bonsai tree is like having a pet. The tree has basic requirements and if these are not taken care of, it will deteriorate and can then die as a result of neglect or just not being bale to pick up on adverse things early enough. The solution is to arm yourself with knowledge, practice the skills involved in keeping a tree alive and constantly take great care of your trees.
You are now bitten by the bug and you are well on your way to addiction and now you want to design, bend, shape, cut, wire and do all the other things to expand your growing collection. Yes, there is a lot of art to it, but you can get far by following a few basic steps. I call it my Bonsai Beginner’s Curriculum and have done many workshops based on these basic seven steps. It works well on nursery material as well as field lifted trees which have been planted and allowed to rest for at least a year. Here we go with the seven steps.
Nursery stock
Step 1: Find the front of the tree. This includes looking at the trunk flare / root zone (nebari). You want the widest and most interesting part to face the front. The second part to this step is to find the best front showing the flow or movement of the main trunk line. Hopefully the best nebari view and trunk line is the same side, if not, make a decision based on the best of the two elements.
Step 2: Clean the main trunk. This includes getting rid of all unwanted growth. It could be removing one or more branches reducing the bar branch effect. Also remove branches pointing to the front in especially the bottom third of the trunk and branches crossing the trunk. At this stage remove all growth in the crotches of the main trunk and primary branches.
Step 3: Set the main trunk. If you are lucky, the movement of the trunk will be great and you have nothing to do. This is rarely the case. Use wire to set the shape. There are other more advanced strategies and methods that can be used. If you are using guy wires, it is best to wire the branches first as the wires sometimes get in the way of further work.
Thick wire can be used to bend this trunk.
Step 4: Select the main branches. You have already looked at this during step 2. What you now need to do is to look at the positioning of branches. The historical pattern is to have one to the one side, then to the other side and then one growing backwards. Repeat as you move up the trunk line. Nature and practicality does not always give this to you on a platter and this is where the artistic side of Bonsai kicks in. Also make sure that you do not have branches growing from the inside curve of a bend.
Step 5: Clean the rest of the tree by removing all growth from the axils / crotches of all branches. Remove the rest of the unwanted growth and especially spindly growth. At this point it is important to note that once you remove all leaves / needles from coniferous plants, it is highly likely that the bare branch will die. Perfect for Jin (more advanced technique).
Step 6: Set the main branches. Use wire on the branch or guy wires. Wiring technique is also slightly more advanced and will follow in a future blog or video. Ensure that there is movement in the branches (left, right, up and down). This is an easy way to bring leaves / growth closer to the main trunk on spindly growth.
Step 7: Create the apex. The apex is the top of the tree and plays a major role in determining the flow of a tree. Older trees show a more rounded apex form and this is what you want to recreate by either pruning or wiring the branches into that position.
Crotches are clean and branches set by using guy wires.
By now you should have a design roughly resembling a pre-Bonsai tree. After-care is the next important step. My advice is to not pot the tree into a Bonsai pot at this stage. If you have removed a lot of growth, the tree will be stressed and the last thing it needs now is to have its roots interfered with. Rather just place it in a sheltered position with no harsh afternoon sun. Water regularly and fertilise the tree to encourage health and good growth. Potting can be done in Spring or for certain species, Autumn could be suitable as well.
Keep an eye out for further articles in the Beginner’s series. If you subscribe to this blog, you will not miss any of those.
If you need one on one tuition, have a look at the subscriptions page on this website.
I am not sure where the word Guy wire comes from, but a wild guess is that it is from the word Guide. It is defined as a wire or cable used to stabilise something, like a mast and seeing that dictionaries and Wikipedia will not relate this to Bonsai, here is my version of it: A Guy wire is used to pull branches down and is used instead of normal Bonsai wiring due to various reasons.
Not a good idea to place wire directly on old bark.
My common use for it is on plants with very soft bark and more often, on older trees when I want to preserve the bark and also in cases when I do not want to cover the bark with raffia or cloth. I usually only use it to pull branches down, but it can also be used to get some shape in a branch by using more than one guy wire, pulling in different directions.
As I use aluminium wire for this task and usually a thin wire, it is important to protect the branch and the bark at the pressure point on the branch. Aquarium tubing is perfect for this task. Short lengths are used and the wire is pulled through it and then it is placed in position. The other end is then securely fastened at an anchor point.
Using aquarium tubing to protect the bark.
An anchor point can be many things. If the tree is in a plastic pot, a hole through the rim of the pot is an easy way to do it. In a timber box, a screw can be used to anchor the wire. As in the example that I show here, the tree is in a ceramic Bonsai pot and a thicker wire is used around the pot through which the guy wire is then threaded and fastened securely.
Anchor points.
Once the wire is fastened, I use a short length of wire through the two wires around a branch to wind the two wires together. This does not only has a neater appearance, it can be used to fine tune the positioning of a branch as the branch can be further pulled down by winding the wires up more.
Winding wires up.
This method definitely exerts less pressure and therefore less stress on the tree. As you use a thinner wire, it is less expensive. It is also easier to remove and once removed, the wire can still be used for other purposes, especially if it was not wound tightly.
This tree has fourteen guy wires to pull branches in place.
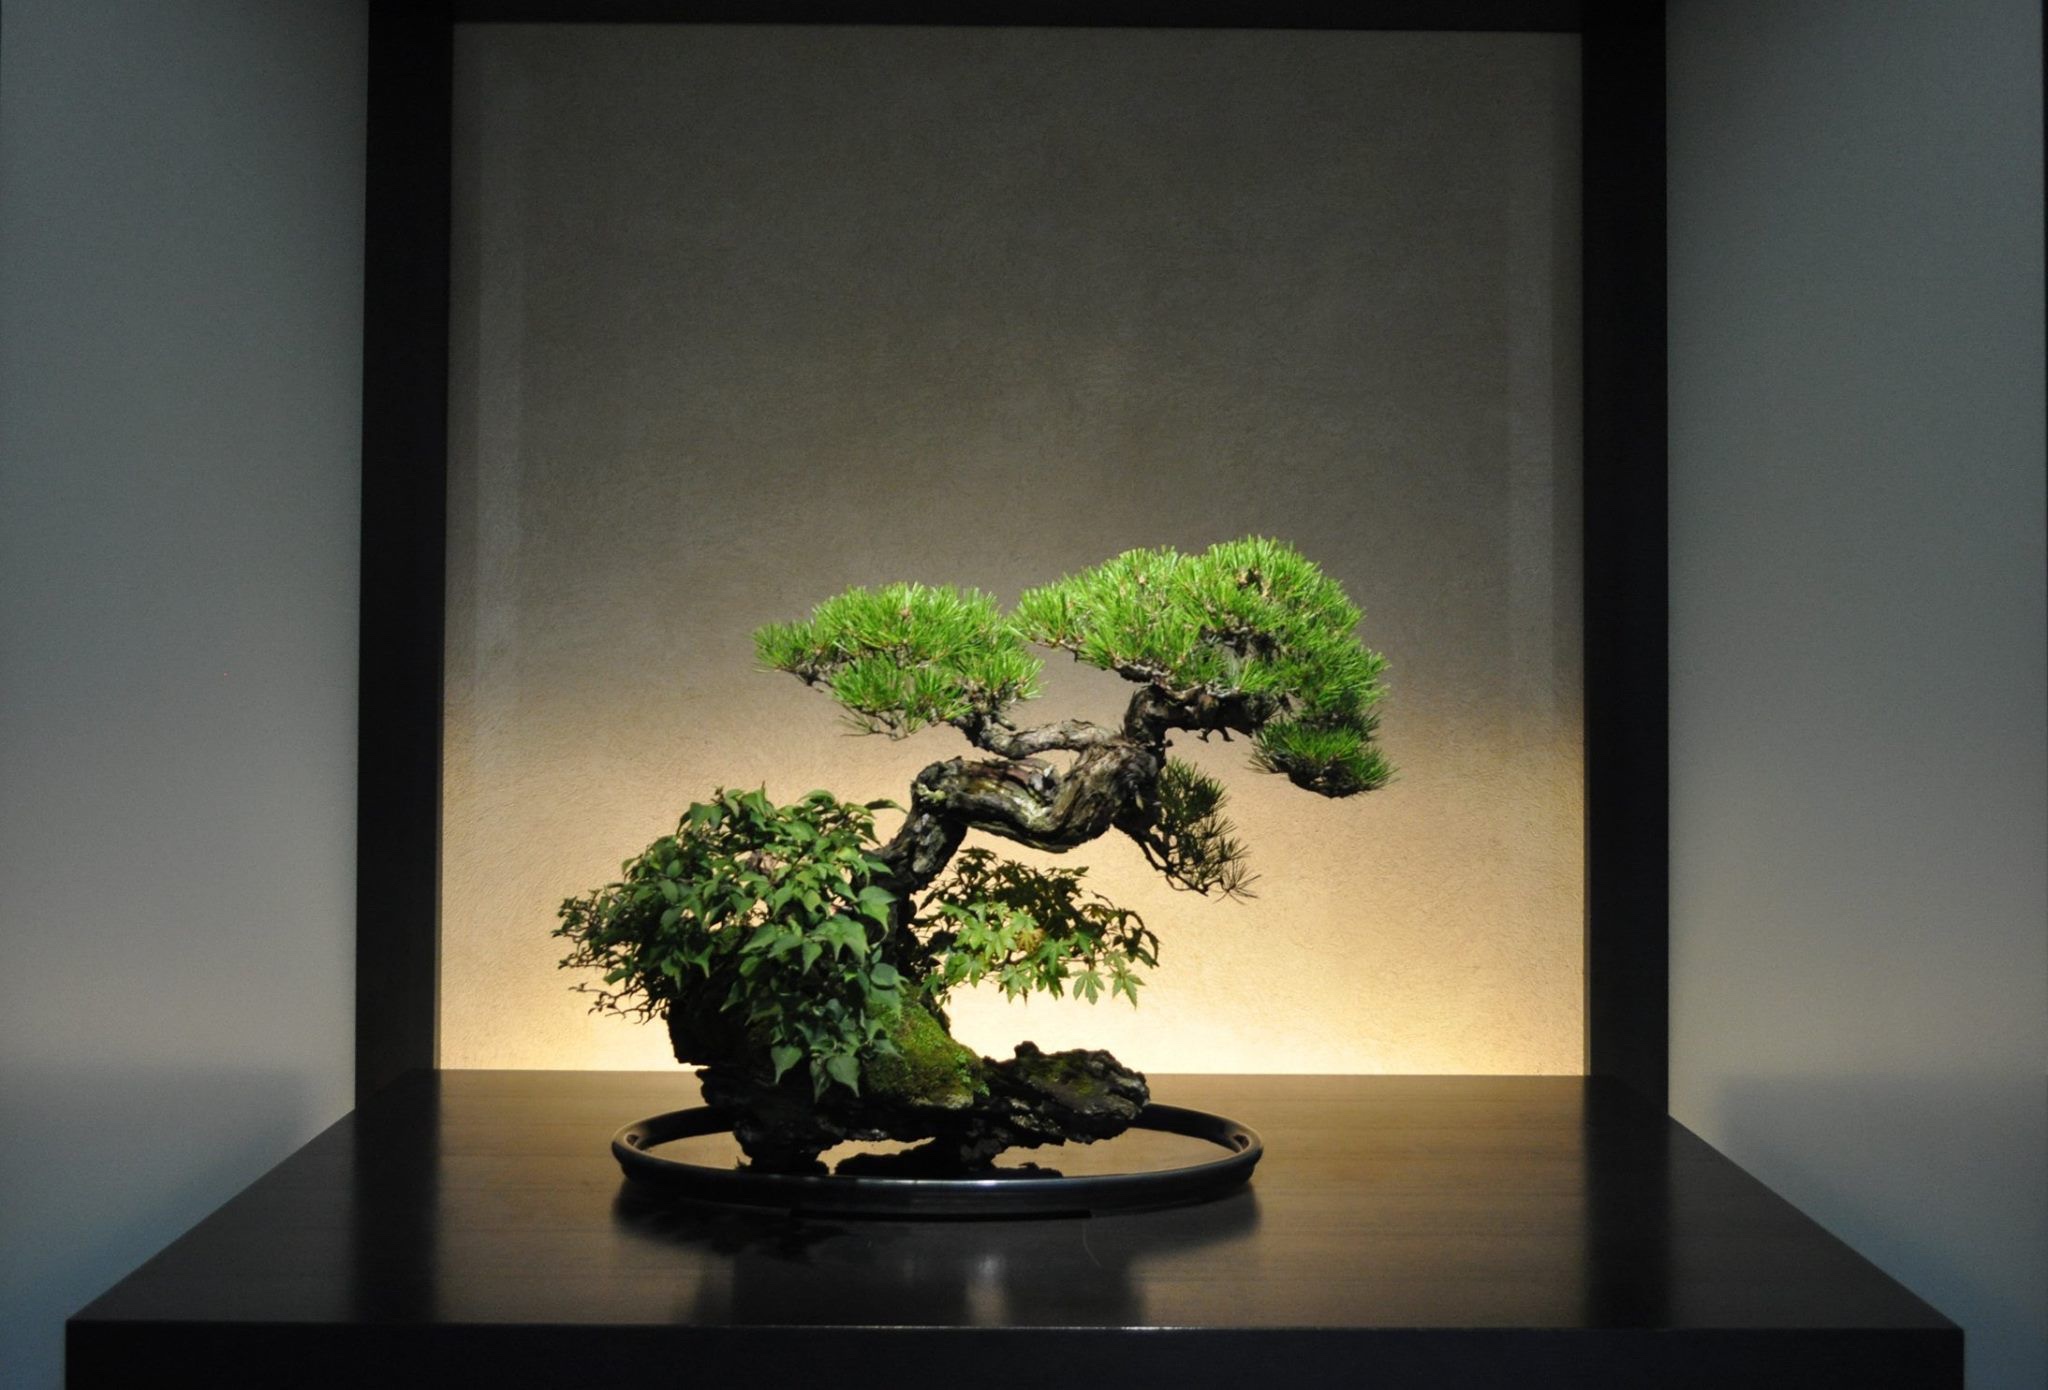
I am seeing more Bonsai being exhibited as part of other art forms in what is generally referred to as an art gallery or a general art exhibition. This, in my mind is great, but we need to do more of it. One of the things we probably need to do as Bonsai artists is to promote it better as an art form. Where we see this happening, the results are normally outstanding. Without this general exposure to the general art public, the acceptance of Bonsai art in mainstream art circles, just will not happen.
From Pinterest
In my search for links between art and Bonsai to help with this infiltration into the general art world, I started by looking at definitions of what art is. See below.
Art is the expression or application of human creative skill and imagination, typically in a visual form such as painting or sculpture, producing works to be appreciated primarily for their beauty or emotional power.
It will be so easy to slip the word Bonsai in there along with painting or sculpture. It is the second part of this definition that really speaks to me. For me Bonsai is appreciated primarily for their beauty or emotional power. That speaks for itself. Bonsai does exactly that. The debate is over and all we now need to do is to get our Bonsai into mainstream art galleries. As mentioned, this happens, but I would like to see it happen more often and in a way where there is no debate and just a general acceptance of Bonsai as a legitimate art form that can hold its own in any art exhibition and not just for horticultural shows or Bonsai on their own.
Some useless, but interesting statistics:
An internet search for Bonsai art presented 3.5 million results.
Another search for Bonsai horticulture yielded 493 thousand results.
My deduction from that is that Bonsai is seen as an art form, but when that vast amount of results are further analysed, very few of those relate to Bonsai as a mainstream art form. We are getting there, but there is still a lot of work to do.
Please share your thoughts on this in the comment section on this page.
I love watching Bonsai demonstrations, whether it be live or on You Tube. The quick transformations, the inspiration, the magnificent material that these artists work with, it is pure drama, pure theatre.
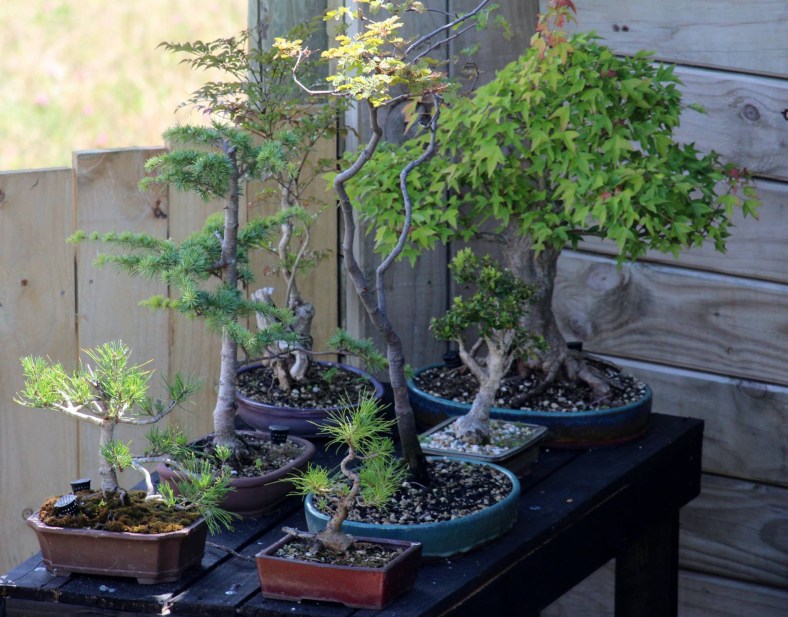
I do that as well. Pluck the odd tree out of a field or hunt for suitable nursery material to test my skills and knowledge and then compare my design outcomes with the artists who I follow or are exposed to. This is very satisfying and keeps on inspiring me and as said, tests my abilities.
This however is not my real test, my real challenge. My real Everest is the daily grind. The seasonal grind. Yes, those tasks that must be performed to keep your trees healthy and thriving. The weeding, the feeding, the watering, the wire on and the wire off. Especially the latter. Maintaining pots, tools, irrigation system and weather protection. Being able to do all of this is the real challenge, the real test.
It is therefor important to see it all as one. The not so nice work as well as the inspirational stuff. Hey, is that not life. The good days and the bad days. Look at the big picture, that is the reality.
I have recently been privileged to get hold of a few older trees that has not had a lot of care and maintenance done on them. They came from an older person whose health is not that great and he cannot look after the trees that well anymore.
Just a plant in a pot. Some of the character is there, but growth is leggy and not well maintained.
Restyled as a semi-cascade to show more of the character. Jin and Shari still to be added. The stick on the left with the Jin protruding at the top is a different tree.
While studying the trees I had this overwhelming feeling of responsibility that came to sit on me and I realised that I now have to look after these trees better than the trees that I have cultivated from scratch. Why this feeling? I have been part of many discussions and even said it to many people in audiences wherever I go, that Bonsai is something that we get to enjoy now, but that we also start something for the next generation. I now realise that when it lands on the next generation, it comes with a burden, but it is a positive one. We are just caretakers of the Bonsai trees coming through our hands right now. It is part of our journey just as we are part of the tree’s journey.
You are privileged to receive a tree from the previous generation and you inherit with it, a responsibility to support that tree for the next generation. And on the cycle goes. All privilege comes with responsibility and this is no different when it comes to Bonsai. Is it more than just looking after your own trees? Yes, I do think so. The tree comes with a history, a story, and you might not be aware of this as I certainly have no idea what this looks like for my new (old) trees. That does not matter as we are lucky in that some of this history is told by the tree itself.
The roots will tell you how it has been struggling to hold on to the ground and how it searched for water and food. The bark, the angle of the branches, the presence of jin and shari and what it looks like, are all parts of this story being told. It is now my job to ensure that this tree’s story can still be told and then when it goes off to the next generation that my contribution to the life story of the tree is visible and seamlessly integrates with the tree’s existing story. This is privilege and this is responsibility.
There were only two living branches and the rest of its story will be told as a Literati.
Accept this responsibility, carry it and enjoy it!


 I love watching Bonsai demonstrations, whether it be live or on You Tube. The quick transformations, the inspiration, the magnificent material that these artists work with, it is pure drama, pure theatre.